

Visual supports in special education turn spoken words, which disappear the moment they are said, into something a student can look at again and again. Think of a student who hears “clean up, wash hands, then line up for lunch,” completes the first step, and then stands still, unsure what comes next. A simple picture strip could have answered that question without another reminder.
By the end of this guide, you will be able to choose the right type of visual, build a visual schedule, teach students to use it, apply visuals to communication and behavior, and check whether they are working. Each step includes a worked example you can adapt.
Examples are fictional. Adapt to the student’s goals and agreed supports. This is guidance, not a diagnosis.
At a glance
- Start with one clear need, such as transitions or following directions.
- Match the visual to the student: objects, photos, symbols, or words.
- Teach the visual directly, then fade adult prompts over time.
- Use visuals for communication and behavior, not only schedules.
- Track one simple measure to see whether the support is helping.
1. Identify the need before choosing a visual
Visuals work best when they solve a specific problem. Therefore, start by naming the moment that is hard for the student. Common examples include transitions, multi-step tasks, waiting, and asking for help.
First, observe the student during the day for a few days. Note when they seem confused, wait for repeated reminders, or become upset. Then pick the one moment that happens most often or causes the most stress.
Next, write a short goal for the visual. For instance, “Theo will move to the next activity using his schedule with no more than one adult prompt.” A clear goal makes it easier to choose the visual and measure progress later.
Consider Theo, a fictional grade 2 student. He follows the class well in the morning, yet he often stands still after recess and needs three or four verbal reminders to start the next activity. His team decides that transitions after recess are the priority.
| Hard moment | How often | Possible visual |
|---|---|---|
| Starting work after recess | Daily | Visual schedule |
| Washing hands | Twice a day | Task strip |
| Waiting for a turn | Several times a day | Wait card |
Also, ask the student when possible. Even young students can show what helps by pointing to a picture or choosing between two options. Their input makes the visual feel like their own tool rather than something adults put on them.
Finally, share the choice with everyone who works with the student. A visual used by only one adult loses much of its power.
2. Choose the right type of visual support
Visual supports come in many forms. The right one depends on what the student understands right now, not on their age or grade. Some students need real objects, while others read words easily.
To begin, think of a simple ladder. Real objects are the most concrete, followed by photos, then picture symbols, and finally written words. Start at the level the student understands reliably, and move up only when they are ready.
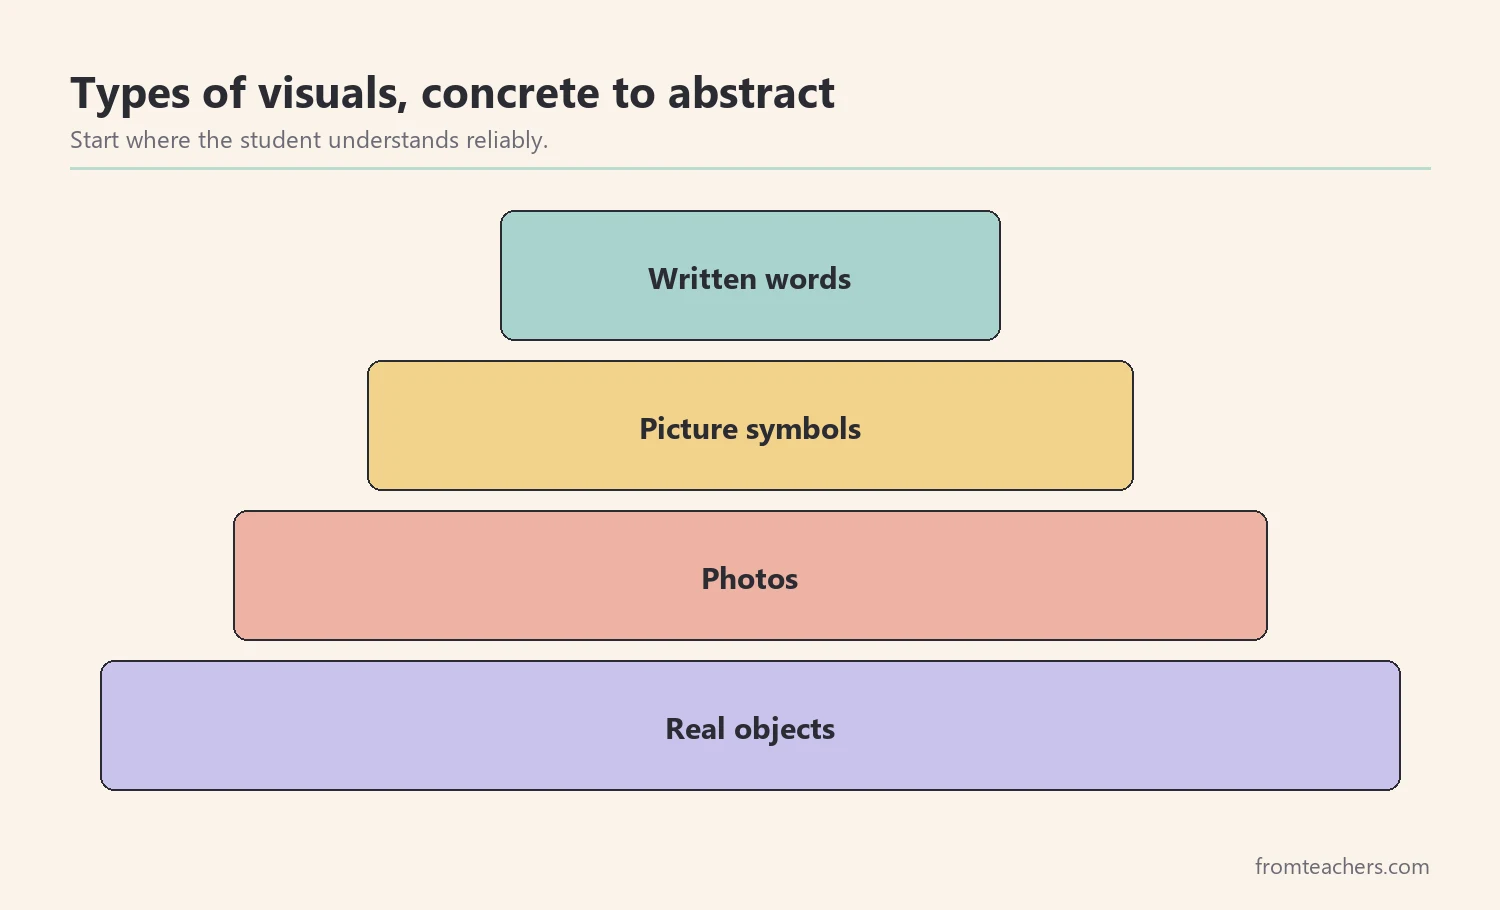
Then choose the format. Common options include visual schedules, first-then boards, task strips, choice boards, timers, and cue cards. Each one answers a different question for the student, such as “what comes next” or “how long do I wait.”
Size and clarity matter as well. Keep each picture large enough to see from where the student will use it, with plenty of space around it. Avoid busy backgrounds, and use the same symbol for the same activity every time.
For Theo, the team tests photos and picture symbols. He matches picture symbols to activities quickly, so they choose symbols. They also add a first-then board for the post-recess transition: “first math, then blocks.”
3. Build a visual schedule for visual supports in special education
A visual schedule shows the order of activities, so the student can predict the day. Predictability often lowers worry and helps students move between tasks with less adult help. It is one of the most common and useful visual supports in special education.
First, decide the length. Some students do well with a full-day schedule. Others need only the next two or three activities, because a long strip feels like too much.
Next, choose the layout: top to bottom or left to right. Add a clear way to mark finished activities, such as a “done” pocket or flipping the card over. Then place the schedule where the student can reach it easily.
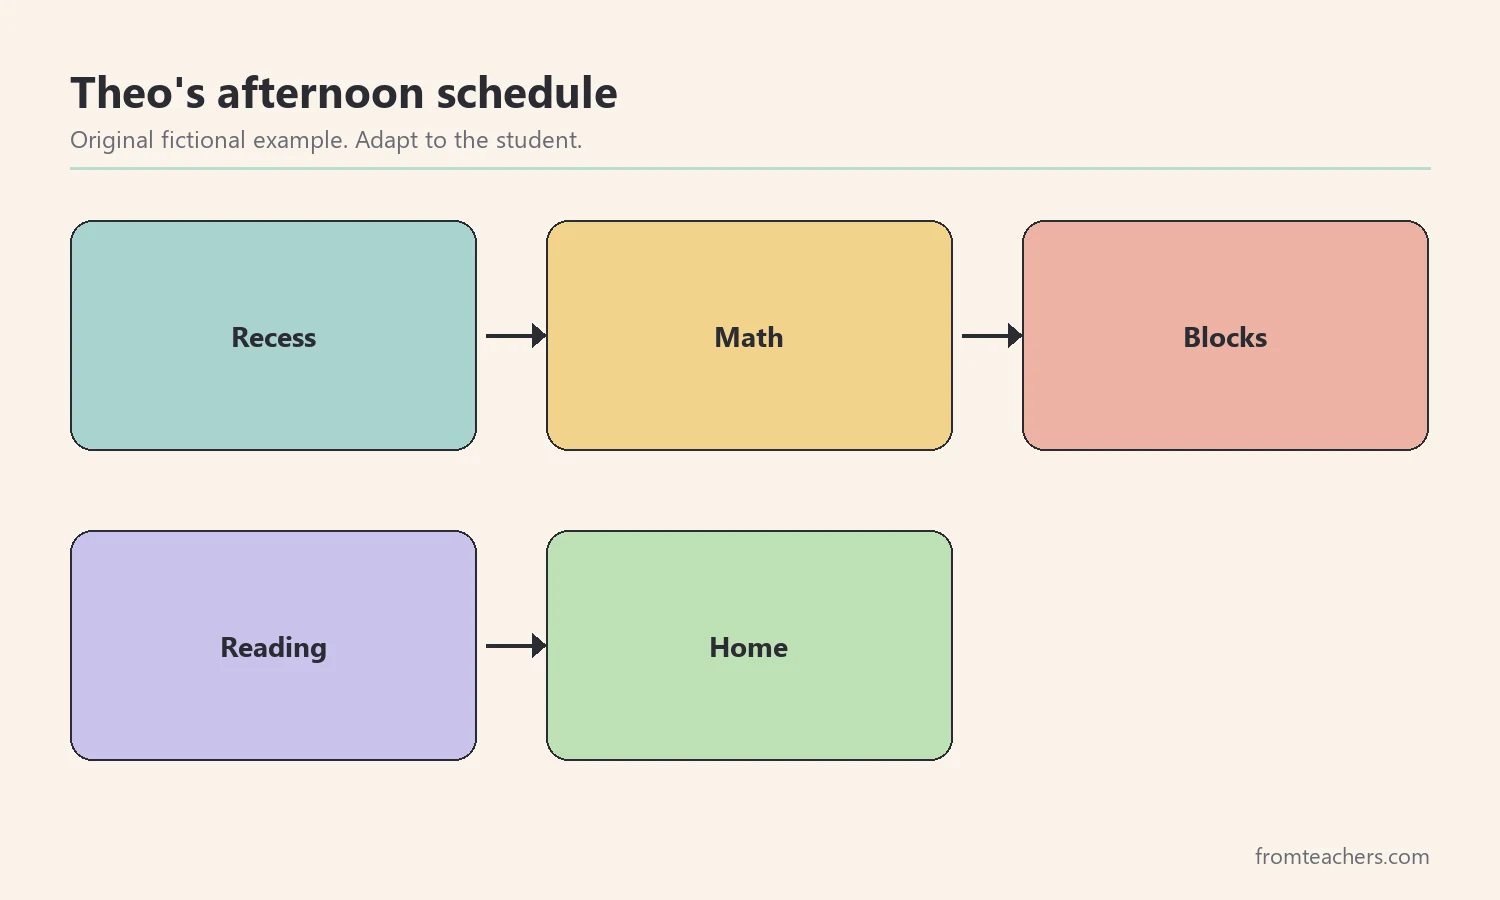
For Theo, the team builds a short afternoon strip with five symbols: recess, math, blocks, reading, and home. When he returns from recess, he moves the recess card to the done pocket, looks at the next symbol, and walks to the math table.
For ready-made ideas, the comic-style guide to visual supports and schedules covers visual schedules and routines, along with how to put visuals in place across the classroom.
Durability is worth planning too. Laminated cards with hook-and-loop backing last longer and are easy to move. If the student uses a tablet or a printed booklet instead, then make sure it travels with them to specials, therapy, and lunch.
In addition, keep the schedule honest. If the plan changes, update the schedule and show the student. A simple “change” card helps students accept surprises.
4. Teach students to use the visual
Putting a visual on the wall is only the start. Students need to be taught how to use it, just like any other skill. Without teaching, many visuals become decoration.
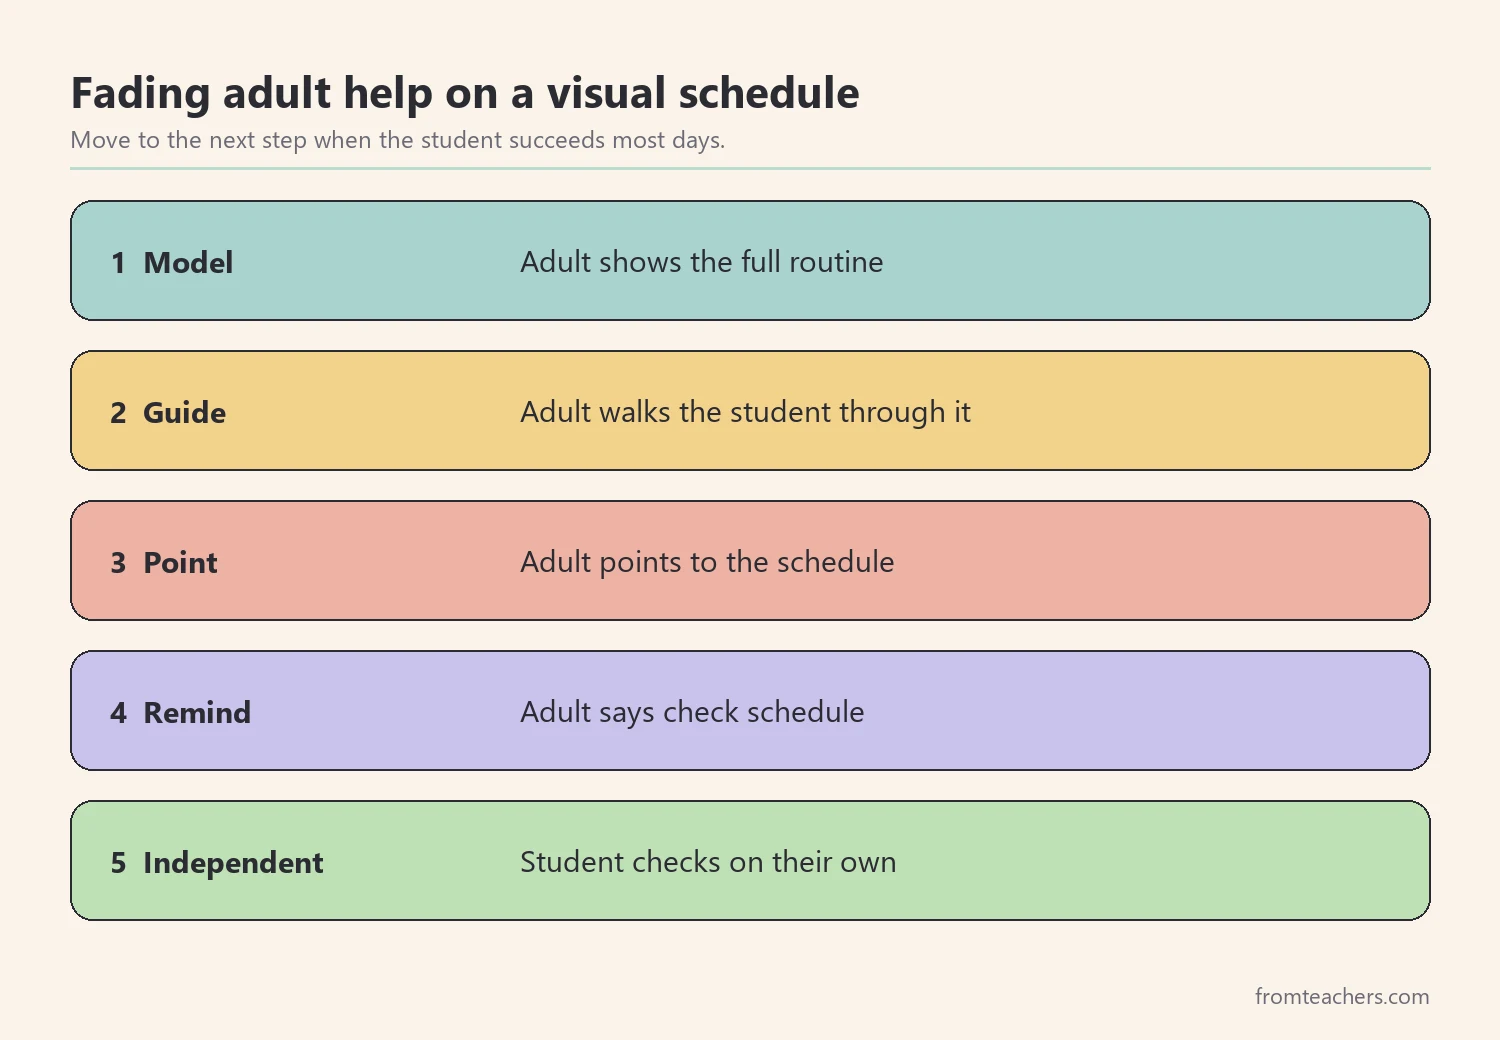
To start, model the routine. Walk the student to the schedule, point to the next card, and say a short phrase like “check schedule.” Then guide them through the action, such as moving the card and walking to the activity.
Next, practice at real transitions every day. Use the same words each time, and praise the student for checking the schedule. Over time, reduce your help: from guiding, to pointing, to a short reminder, to no reminder at all.
Mistakes during teaching are normal. If the student walks past the schedule, then calmly guide them back and try again, without a long explanation. Consistent, low-key practice builds the habit faster than reminders delivered from across the room.
For Theo, the teacher guides him for the first week. In the second week, she only points. By the third week, she says “check schedule” from across the room, and Theo walks over on his own most days.
Also, teach the meaning of new symbols before adding them. Show the symbol, then do the activity right away. This simple pairing helps the student connect the picture with what it means.
5. Use visuals for communication and behavior
Visuals help with much more than schedules. They can give students a way to ask for things, make choices, and understand expectations. As a result, they often reduce frustration on both sides.
For communication, try a choice board with two to four options at snack, free time, or work time. For requests, a “help” card or a “break” card gives the student a clear way to ask. Importantly, respond quickly when the student uses the card, so they learn it works.
For behavior, use visual rules with one picture per expectation, such as “quiet voice” or “hands to self.” A first-then board can show what comes after a less-preferred task. Keep the language positive: show what to do, not only what to stop.
Visual scripts can also support social moments. A small card with “Can I play?” or “My turn, please” gives a student words to use with classmates. Practice the script in a calm moment before expecting the student to use it at recess.
Theo’s team adds a “break” card to his desk. When work feels long, he hands it to an adult and takes a short, timed break in the reading corner. Because he now has a clear way to ask, the team sees fewer moments where he leaves his seat without a plan.
Timers are another helpful visual for behavior. A visual timer shows how much time is left in a break or a task, which makes waiting and stopping easier for many students. For Theo, a five-minute visual timer marks the end of each break, so he knows when to return without a verbal reminder.
Likewise, share the same visuals with the family. A home copy of the break card or the first-then board helps the student use the same tools in both places.
6. Check whether visual supports in special education are working
A visual should make the student more independent over time. To know whether it does, choose one simple measure and record it for a few weeks. Keep it quick enough to collect during a busy day.
For Theo, the team counts the number of verbal reminders he needs after recess. They record it each day and look at the weekly average. The numbers below are fictional and only show the format.
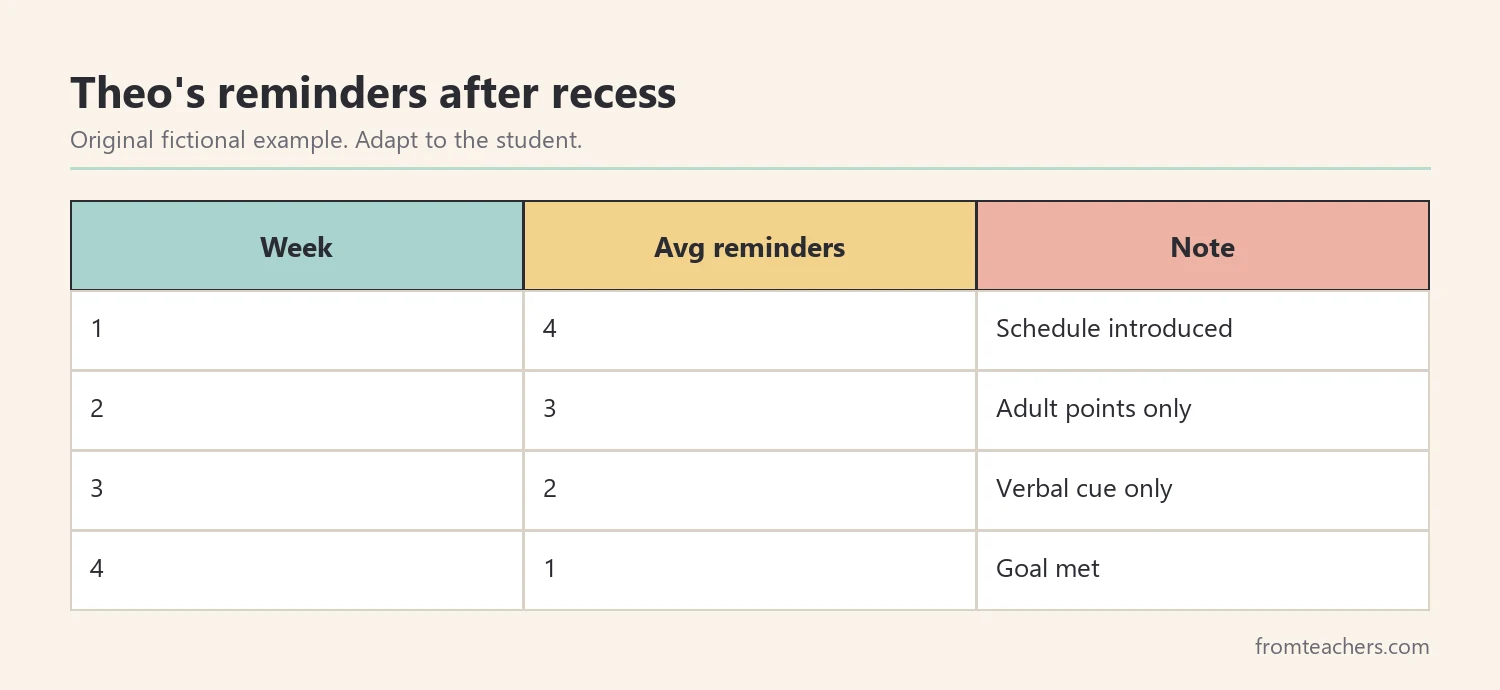
In this example, Theo needs an average of 4 reminders in week 1 and 1 reminder by week 4. That change meets the team’s goal of no more than one prompt. Next, they might try the same schedule for the morning transition.
Besides numbers, notice quality. Does the student look calmer during transitions? Do they check the visual without being asked? Short notes about these moments help the team describe progress to the family.
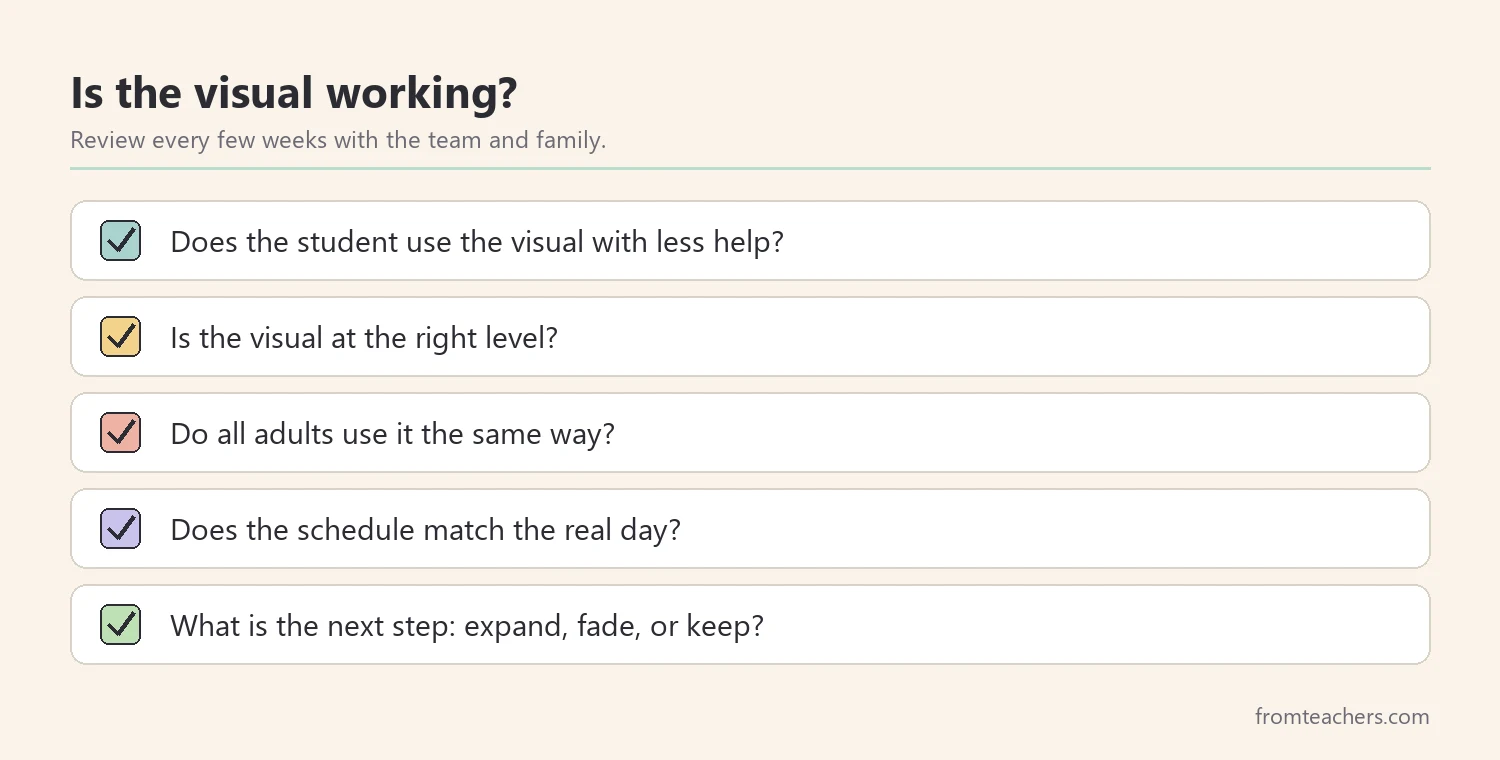
If the numbers do not change, then look at the visual again. Is it at the right level? Is every adult using it the same way? Small adjustments often make a big difference.
Once a visual works well, consider whether to fade it or keep it. Some students move from a full strip to a smaller card, then to a written list. Others keep the schedule because it helps them stay calm, and that is a perfectly good outcome.
Common mistakes and how to avoid them
- Too many visuals at once. Fix: start with one need and one visual, then add more slowly.
- Visuals above the student’s level. Fix: test what the student understands and start there.
- No teaching. Fix: model, practice, and fade prompts on purpose.
- Schedules that do not match the day. Fix: update the visual when plans change and show the student.
- Only one adult uses it. Fix: share the visual and the routine with all staff and the family.
Questions teachers and parents ask about visual supports in special education
Are visual supports only for autistic students?
No. Many students benefit from visuals, including students with language differences, attention challenges, or anxiety. General education classrooms use them too.
Should I use photos or picture symbols?
Use whatever the student understands reliably. Some students start with photos or real objects and move to symbols later.
Will the student always need the visual?
Some students fade visuals over time, while others keep using them, just as adults use calendars and lists. The goal is independence, not removing support at any cost.
How many items should a schedule show?
It depends on the student. Some handle a full day, while others do better with two or three items at a time.
Can visuals help at home?
Yes. Morning routines, bedtime steps, and choice boards work well at home, especially when they match the visuals used at school.
Related reading: Autism Spectrum Disorder: A Guide to Early Signs, Support, and Effective Strategies, Moving Beyond Shame and Behavior Charts, and Accommodations vs Modifications in Special Education.
A companion resource for visual supports in special education:
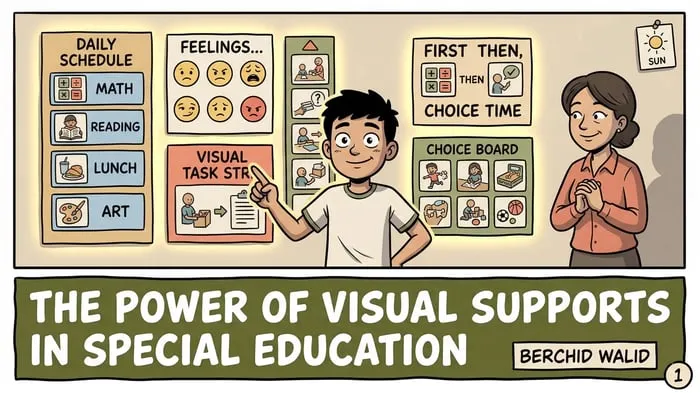
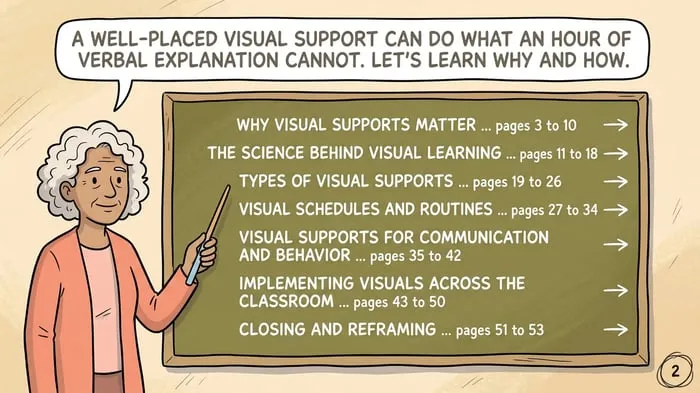
Visual Supports & Schedules for Special Education: a 53-page comic-style guide covering why visual supports matter, types of visuals, visual schedules and routines, visuals for communication and behavior, and how to implement them across the classroom.
Sources and scope
- IRIS Center, Vanderbilt University: free modules on evidence-based practices, including supports for autistic students.
- AFIRM, UNC Frank Porter Graham Child Development Institute: free learning modules on evidence-based practices for autistic learners, including visual supports.
- CAST: the organization behind Universal Design for Learning, which encourages multiple ways to present information.
- IDEA, U.S. Department of Education: the law behind special education services and IEPs.
This guide covers choosing, building, teaching, and reviewing classroom visual supports. It does not cover formal communication assessment or AAC device selection, which belong to qualified specialists and the student’s team.
Key takeaways
- Start with one clear need and one visual.
- Match the type of visual to what the student understands now.
- Teach the visual directly and fade adult help over time.
- Use visuals for communication and behavior, not only schedules.
- Track one simple measure to check that the support is working.









Leave a Comment