

Sensory tools for autism work best when each tool is matched to a specific sensory need, not pulled from a basket at random. Picture a first grader who covers his ears and slides under the table every time the class sings, yet seems calm and focused during quiet reading. A fidget toy will not help much with that moment. A pair of headphones and a planned quiet spot might.
This guide gives you a five-step process for choosing and using sensory supports in class or at home. By the end, you will be able to observe sensory moments, match tools to each sensory system, teach a tool before it is needed, build a simple daily routine, and track what actually helps.
Examples are fictional. Adapt to the student’s goals and agreed supports. This is guidance, not a diagnosis.
At a glance
- Observe when and where sensory difficulty happens before choosing any tool.
- Match each tool to a sensory system: hearing, sight, touch, smell and taste, or movement.
- Teach the tool during calm times so the student can use it in hard moments.
- Build tools into the daily routine instead of waiting for a crisis.
- Track what helps and review it with the family and the occupational therapist.
1. Observe sensory moments before choosing sensory tools for autism
First, watch before you buy or borrow anything. Sensory tools for autism are only useful when they fit a real need. A short observation shows you which sense is involved and when the difficulty tends to happen.
Next, keep simple notes for a few days. For each hard moment, write the time, the setting, what was happening around the student, and what the student did. For example, “10:15, music class, singing, covered ears and left the circle.” You do not need a formal form for this step.
Then, look for patterns. Good choices about sensory tools for autism grow out of these patterns, not out of a catalog. Does the difficulty happen in loud places, in bright rooms, during messy art, at lunch, or after long periods of sitting? Some students avoid certain input, such as noise. Others seek more input, such as movement or deep pressure. Many students do both, depending on the sense and the day.
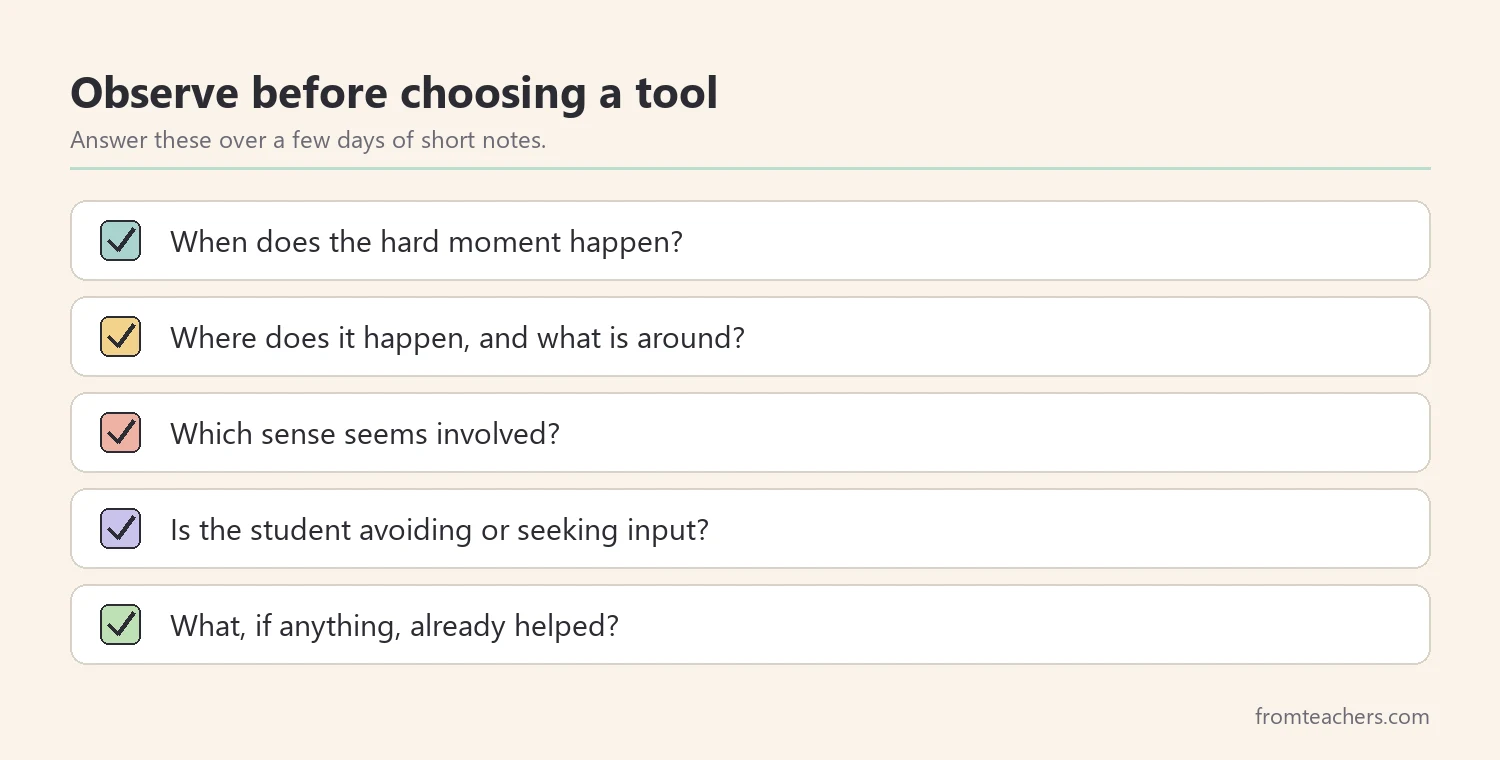
For example, meet Theo, a fictional first grader. His teacher, Ms. Grant, notes four hard moments a day during the first week. Three of them happen in loud settings: singing, the lunchroom, and the end of recess. The fourth happens after long seat work, when Theo starts rocking and leaving his chair. So she sees two needs: less noise and more movement.
Finally, include the people who know the student best. Families often know which sounds, textures, or foods are hard at home. Also, an occupational therapist can help interpret what you see and suggest supports that fit the student.
2. Match sensory tools for autism to each sense
Now, organize tools by sensory system. Grouping sensory tools for autism by sense keeps the choice purposeful and easy to explain to the team. Instead of asking “Which tool should we try?”, you ask “Which sense needs support right now, and what tool fits that sense?”
Start with the senses most often involved at school. Hearing supports include noise-canceling headphones or a quiet corner. Sight supports include a visual schedule, softer lighting, and a less cluttered workspace. Touch supports include fidget tools, a weighted lap pad, or a textured cushion. Smell and taste supports might include a chewy tool or familiar utensils at lunch. Movement supports include planned movement breaks, a wobble cushion, or, with therapist guidance, equipment such as a swing.
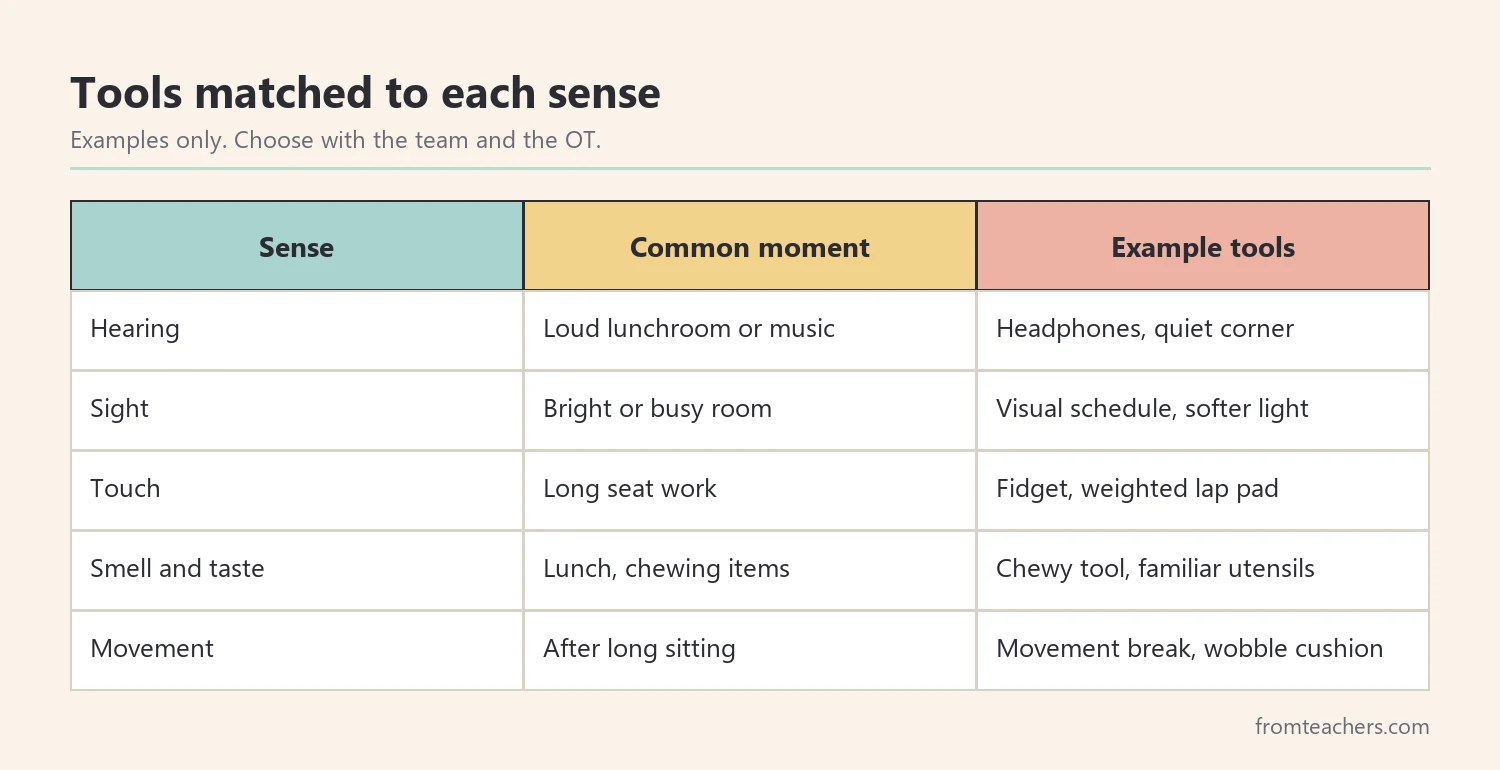
Next, choose one or two tools for the strongest pattern, not ten at once. Too many new tools can be overwhelming in itself. Moreover, one tool at a time lets you see what actually helps.
For Theo, Ms. Grant chooses two sensory tools for autism support: noise-canceling headphones for loud moments and a wobble cushion plus a short movement break for long seat work. She does not add fidgets yet, because nothing she observed pointed to a touch need.
When you want a ready reference for this matching step, a guide to sensory support tools organized by sensory need can help, since it groups tools by auditory, visual, tactile, olfactory and taste, and vestibular supports, with the reason each one may help.
| Observed pattern | Sense involved | Tool to try first |
|---|---|---|
| Covers ears in loud rooms | Hearing | Headphones |
| Squints in bright light | Sight | Softer lighting |
| Rocks after long sitting | Movement | Wobble cushion |
| Chews sleeves or pencils | Taste and touch | Chewy tool |
3. Teach the tool before it is needed
A tool that appears for the first time during a meltdown rarely helps. Students learn to use sensory tools for autism the same way they learn any routine: through calm, repeated practice.
First, introduce the tool when the student is calm. Show it, name it, and explain its job in a few words: “Headphones make loud sounds quieter.” Then let the student try it in a low-pressure moment, such as during free play.
Next, teach how to ask for it. Requesting a tool is a skill in itself, and it is one of the most important goals when using sensory tools for autism. Some students can say “I need my headphones.” Others may point to a picture card or hand over a break card. Choose the method that fits the student’s communication, and practice it several times.
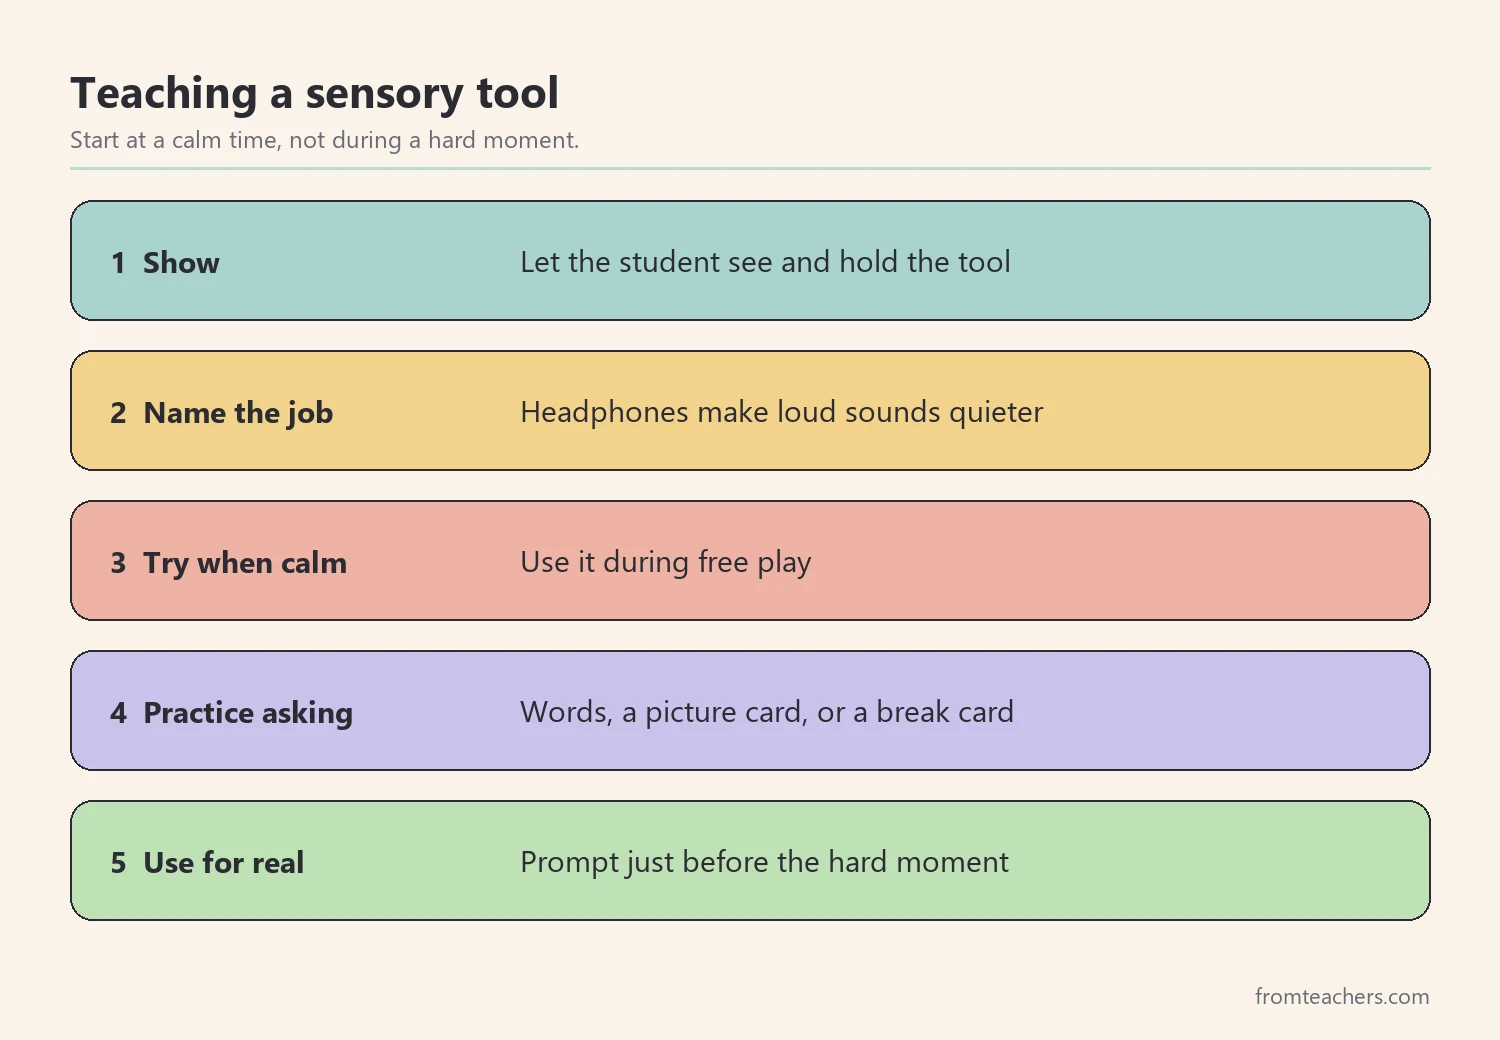
Then, rehearse the real moment. Before singing time, Ms. Grant reminds Theo: “If it gets loud, show me your headphones card.” During the first week, she prompts him to use the card just before the song starts. Later, she waits a few seconds to see whether he uses it on his own.
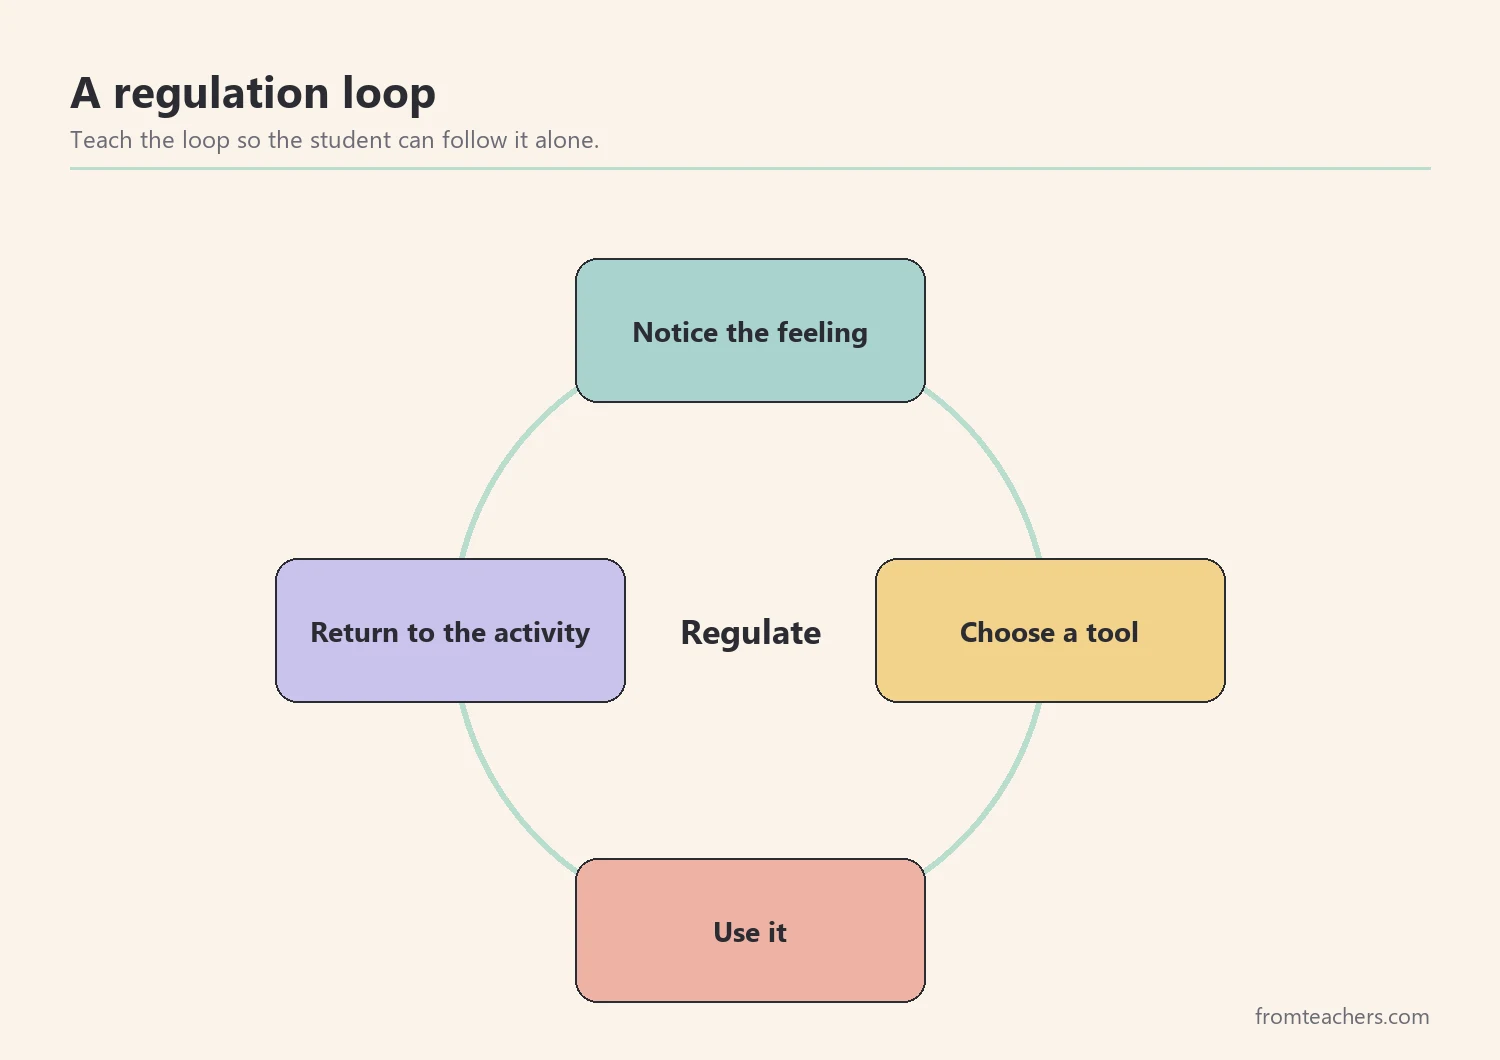
Also, teach the end of the tool use. Students need to know when and how to return to the activity. A visual timer or a simple “headphones off, back to circle” card makes the return clear. As a result, the tool supports participation rather than replacing it.
Finally, respect the student’s response. If a tool seems uncomfortable or makes things harder, stop and try something else. Sensory preferences are personal, and the student’s reaction is important information.
4. Build sensory tools for autism into the daily routine
Next, move from reacting to planning. Sensory tools for autism are most useful when they are part of the day, not only an emergency response. A planned routine can reduce how often hard moments happen.
First, look at your schedule and mark the predictable sensory hot spots, such as music, lunch, assemblies, and long seat work. Then plan a support before each one. For instance, headphones go on before the assembly starts, not after the student is already upset.
Next, add regular movement and calming breaks. Many students benefit from short, planned breaks between demanding tasks. Ask the occupational therapist which activities fit the student, such as carrying books, wall pushes, or a short walk.
For Theo, Ms. Grant adds two planned supports. Before singing and lunch, he puts on his headphones. After every 15 minutes of seat work, he takes a two-minute movement break carrying books to the shelf. Meanwhile, his wobble cushion stays on his chair all day.
Then, make the routine visible. When sensory tools for autism appear on the schedule, the student learns that support is normal and expected. A picture schedule with small icons for headphones and movement breaks shows the student when supports are coming. This predictability can lower anxiety, because the student knows help is part of the plan.
Finally, share the routine with everyone who works with the student. Specialists, paraprofessionals, and substitutes should know where the tools are and when to offer them. In addition, families can use similar supports at home, such as headphones in a busy store or a movement break before homework.
5. Track what helps and review sensory tools for autism
Finally, check whether the plan is working. Reviewing sensory tools for autism every few weeks helps the team keep what works and drop what does not. Simple data keeps the conversation focused on facts rather than impressions. Two numbers are often enough.
First, count hard moments per day, using the same definition you used in Step 1. Second, count how many times the student asks for a tool on their own. Together, these numbers show whether the tools are reducing difficulty and building independence.
Next, look at weekly averages, not single days. Sensory needs can change with sleep, illness, or schedule changes. A weekly view shows the trend.
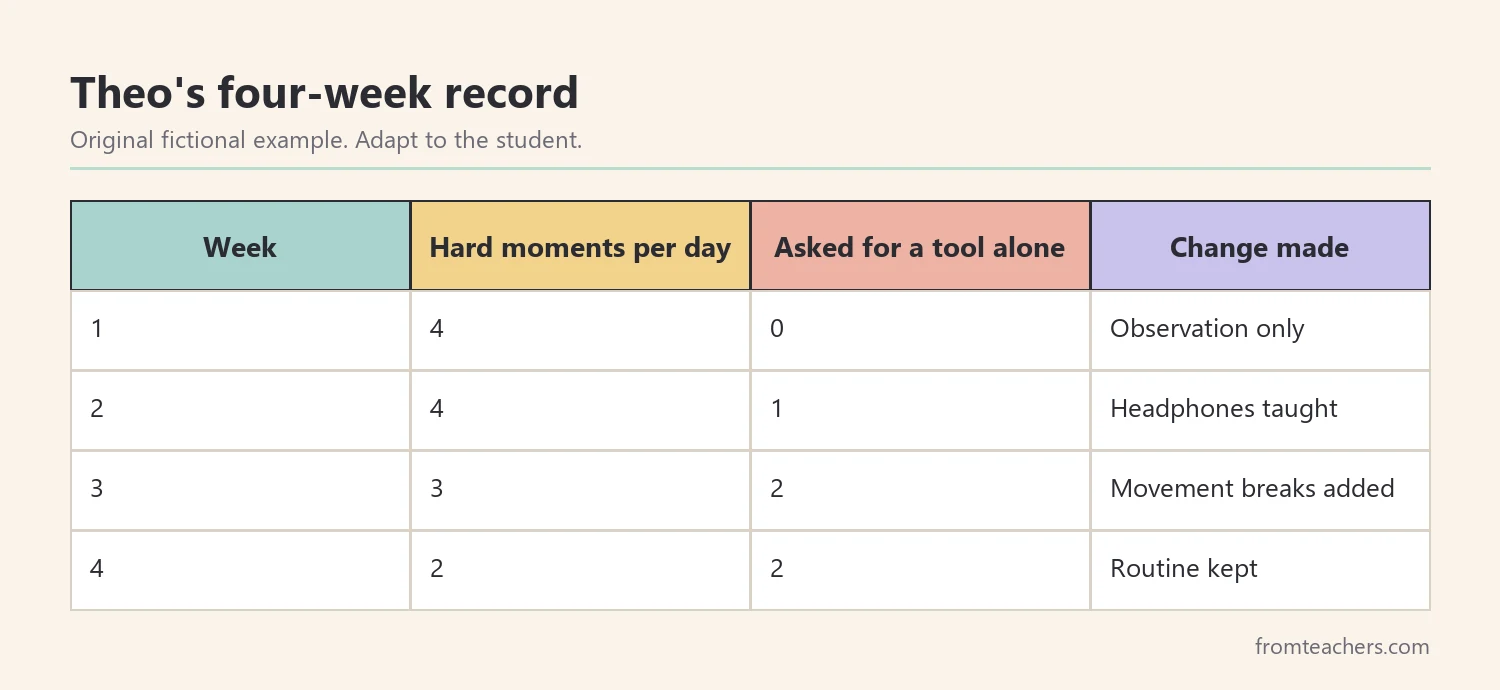
Look at Theo’s record. In week 1, he had about 4 hard moments a day and asked for a tool 0 times on his own. In week 2, after the headphones were taught, he still had 4 hard moments but asked once a day. By week 3, with planned movement breaks, hard moments dropped to 3 and he asked twice a day. In week 4, he had 2 hard moments a day and still asked for a tool twice on his own.
Then, review the data with the team and the family. Ask what helped most, what can be faded, and what new need has appeared. For Theo, the team keeps the headphones, continues movement breaks, and plans to try a visual timer during lunch.
Above all, involve the student. Students who help choose their own sensory tools for autism are often more willing to use them. Ask, “Which tool helps you most?” Even a pointing response gives useful information and builds self-awareness.
Common mistakes and how to avoid them
- Offering a basket of random tools. Fix: observe first and match each tool to a specific sense.
- Introducing a tool during a meltdown. Fix: teach the tool during calm times and practice asking for it.
- Adding many tools at once. Fix: start with one or two for the strongest pattern.
- Using tools only in emergencies. Fix: plan supports before predictable hot spots.
- Forgetting the return to the activity. Fix: teach a clear end, such as a timer or a return card.
- Using movement equipment without guidance. Fix: ask the occupational therapist before using swings or similar equipment.
Questions teachers and parents ask about sensory tools for autism
Which sensory tools for autism should I try first?
Start with the sense linked to the strongest pattern you observed. For noise, headphones are a common first step. For a need to move, planned movement breaks or a wobble cushion are simple options to discuss with the team.
Do all autistic students need sensory tools?
No. Sensory experiences vary widely among autistic people. Some students need several supports, some need few, and needs can change over time.
Can sensory tools become a distraction?
Sometimes, especially when a tool is new. Teaching how and when to use it, along with a clear return to the task, usually helps. If a tool keeps distracting, try a different one.
Should an occupational therapist be involved?
An occupational therapist can be very helpful in understanding sensory needs and choosing supports. Ask the school team about access to an OT consultation, especially before using movement equipment.
How can families use these tools at home?
Families can use the same tools and words as school, such as headphones for noisy places and movement breaks before homework. Sharing what works in both settings keeps support consistent.
Related reading: Managing Sensory Overload: Practical Strategies for Autism and ADHD, Understanding Autism ADHD Meltdowns: Signs and Support Strategies, and Autism Spectrum Disorder: A Guide to Early Signs, Support, and Effective Strategies.
A companion resource for sensory tools for autism:
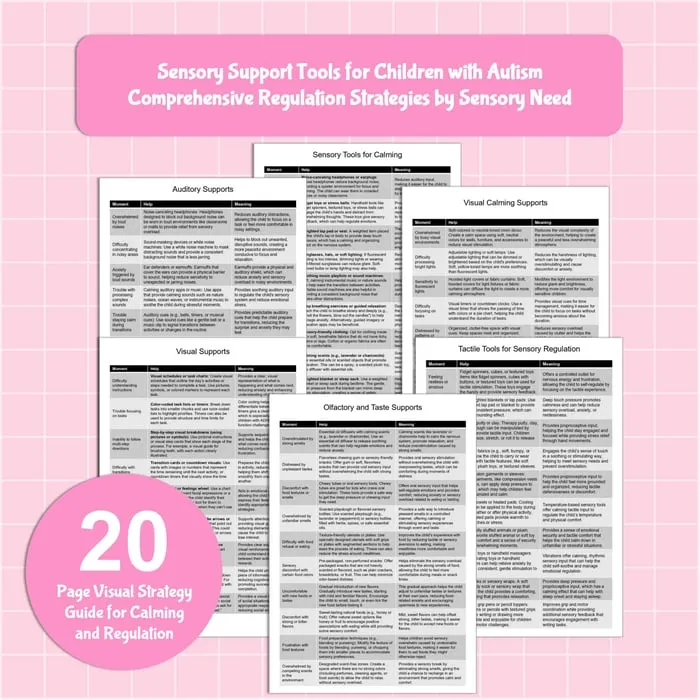
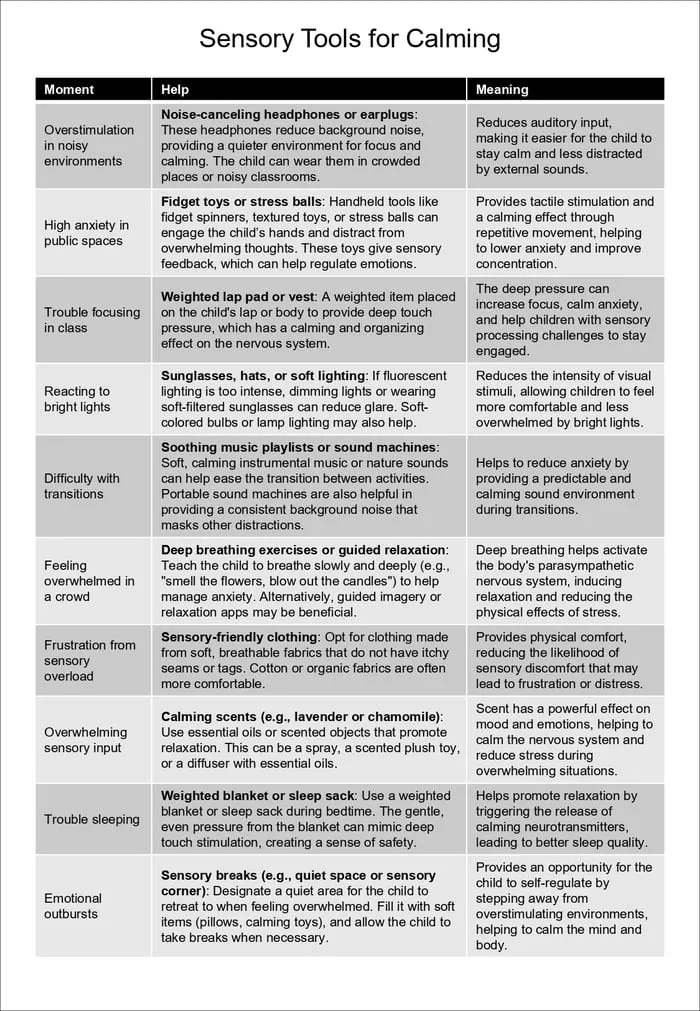
Sensory Support Tools for Children with Autism: a 20-page Moment, Help, Meaning visual guide that organizes sensory supports by sensory system, including auditory, visual, tactile, olfactory and taste, and vestibular tools.
Sources and scope
- IRIS Center, Vanderbilt University: free modules on autism, classroom supports, and evidence-based practices.
- CDC autism information: general background on autism spectrum disorder for families and educators.
- American Occupational Therapy Association (AOTA): information on occupational therapy, including sensory and daily living supports.
- IDEA, U.S. Department of Education: the law behind special education services and IEPs.
This guide covers practical ways to choose, teach, and review sensory supports at school and at home. It does not replace an occupational therapy evaluation or individualized guidance from the student’s team.
Key takeaways
- Observe sensory moments before choosing sensory tools for autism.
- Match sensory tools for autism to the sense that needs support.
- Teach tools during calm times and practice asking for them.
- Plan supports before predictable hot spots in the day.
- Track hard moments and independent requests, and review with the family and OT.










Leave a Comment