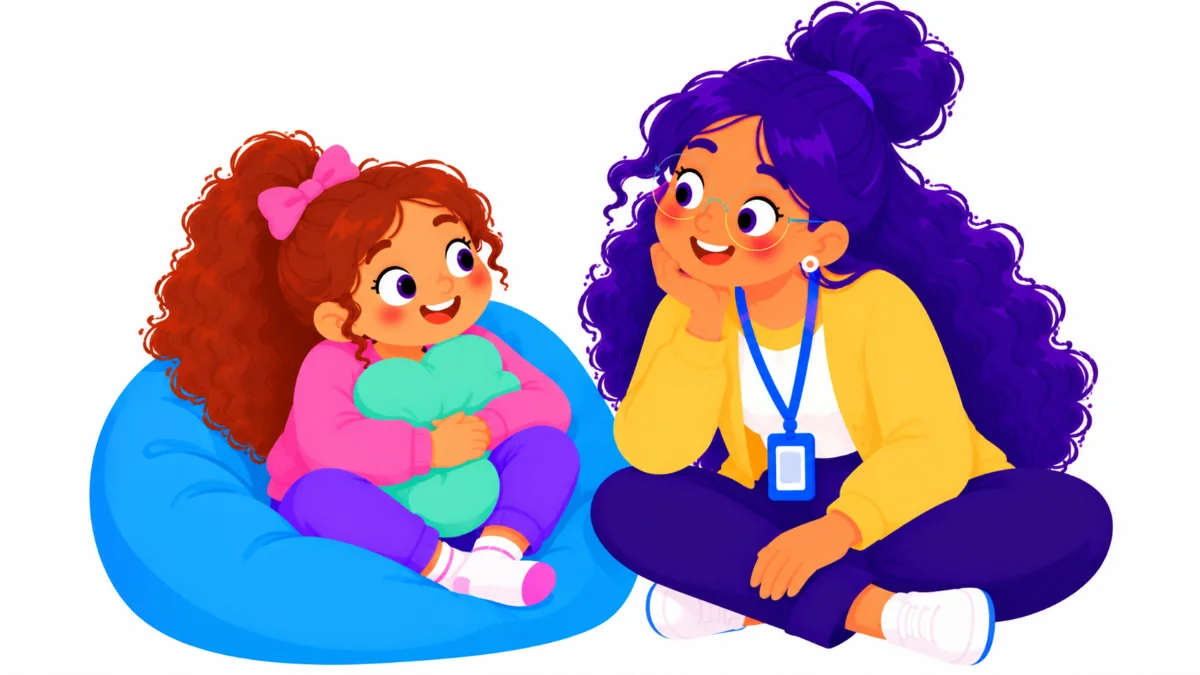

Emotional regulation tools give students a way back to calm when feelings get big. Picture a third grader who crumples her worksheet, pushes her chair back, and freezes. She wants to calm down, but in that moment she does not know how. Nobody taught her what to reach for, so she reaches for nothing.
This guide gives you five steps to build emotional regulation tools into everyday school life: know the five tool types, teach tools when students are calm, create a personal toolkit, prompt tools early, and review what works. By the end, you will have a practical plan that helps students stay calm, focused, and ready to learn.
Examples are fictional. Adapt to the student’s goals and agreed supports. This is guidance, not a diagnosis.
At a glance
- Regulation is a skill students learn and practice, not something they just know.
- Body, mind, sensory, social, and environmental tools each help in different ways.
- Teach and practice tools during calm moments, not in the middle of a crisis.
- A personal toolkit card makes choices visible and simple.
- Small tools used early often prevent bigger moments later.
1. Learn the five types of emotional regulation tools
First, look at regulation as a set of options rather than one strategy. Many classrooms rely on a single tool, such as “take a deep breath.” That helps some students. However, others need to move, change the space around them, or ask someone for support. A wider set of choices means more students find something that works.
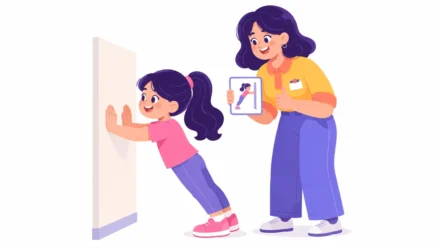
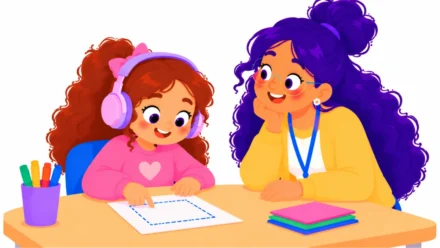
A helpful way to organize emotional regulation tools is by type. Body tools use movement and breathing, such as belly breaths, stretching, wall push-ups, or a squeeze ball. Mind tools use thinking, such as counting slowly, positive self-talk, or picturing a calm place. Sensory tools change what the student sees, hears, or touches, such as noise-reducing headphones, a soft mat, or softer lighting.
In addition, social tools involve other people. A student might say, “May I have a break, please?” or ask a teacher for help. Working quietly beside a partner is also a social tool. Environmental tools change the space: moving to a quieter area, sitting in a preferred seat, clearing a messy desk, or checking a visual schedule.
Also, think about where each tool can happen. Some emotional regulation tools work at the desk, such as counting or a squeeze ball. Others need a different spot, such as a calm corner or a hallway stretch. Knowing where a tool fits helps you plan which ones a student can use without leaving the lesson.
Then, remember that no tool type is better than another. A student who needs to move is not less mature than a student who counts quietly. The goal is a match between the student, the feeling, and the setting.
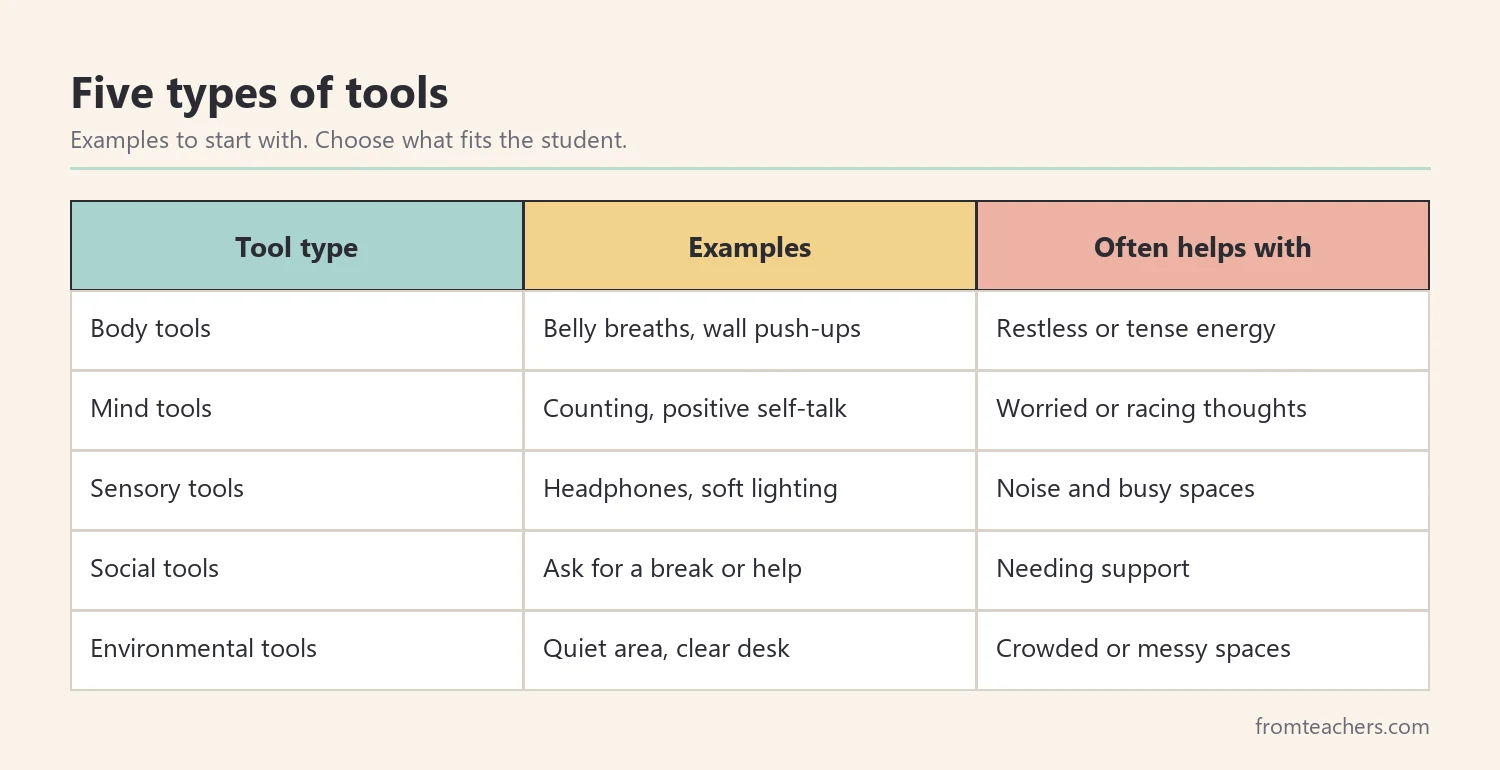
Worked example. Maya is a fictional third grader. Her teacher, Mr. Okafor, notices that she gets upset most often during noisy group work and long writing tasks. He wonders whether breathing alone is enough for her. So, he plans to try at least one tool from each of the five types.
2. Teach emotional regulation tools when students are calm
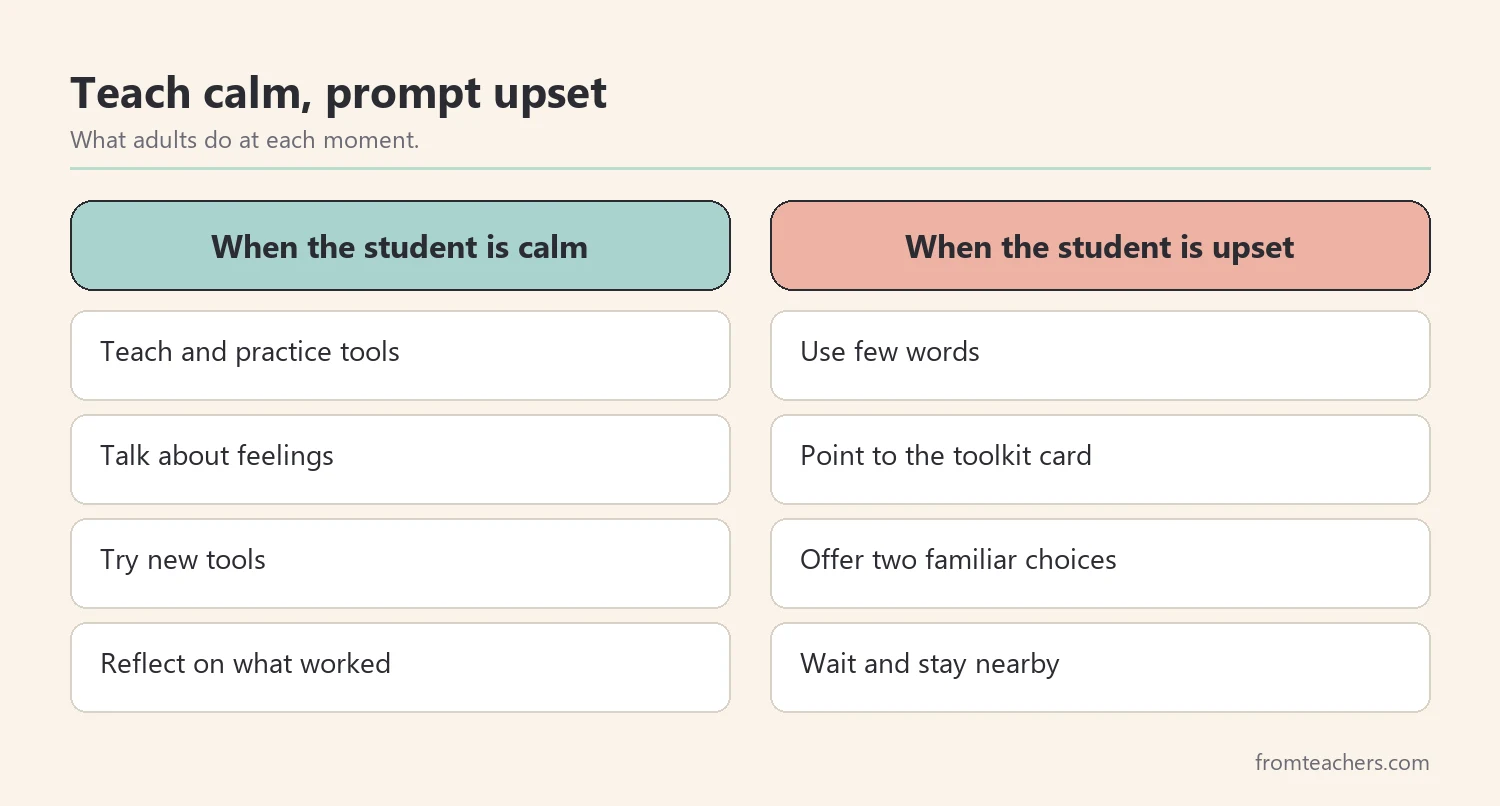
Next, teach tools during calm moments. When a student is very upset, the thinking brain is harder to reach, and new learning rarely sticks. Calm moments are the time to explain, model, and practice. Upset moments are the time to use what is already familiar.
Start with short lessons. Introduce one tool at a time. Name it, show it, and practice it together. For example, teach belly breathing by placing a hand on the stomach and watching it rise and fall. Then practice it again at different times of the day, such as after recess or before a test.
Also, connect tools to feelings. Ask, “When might this tool help?” A wall push-up might help with restless energy. Headphones might help when the room is loud. Counting might help with worried thoughts. These connections help students choose emotional regulation tools on their own later.
Moreover, practice as a whole class. Whole-class practice removes stigma, because everyone learns the same tools. It also gives every student a shared language. When you say, “Let’s try a body tool,” everyone knows what you mean.
Finally, model the tools yourself. Say out loud, “I feel a little frustrated, so I am going to take three slow breaths.” Students learn a lot from watching adults handle feelings calmly. Your example shows that regulation is something everyone practices.
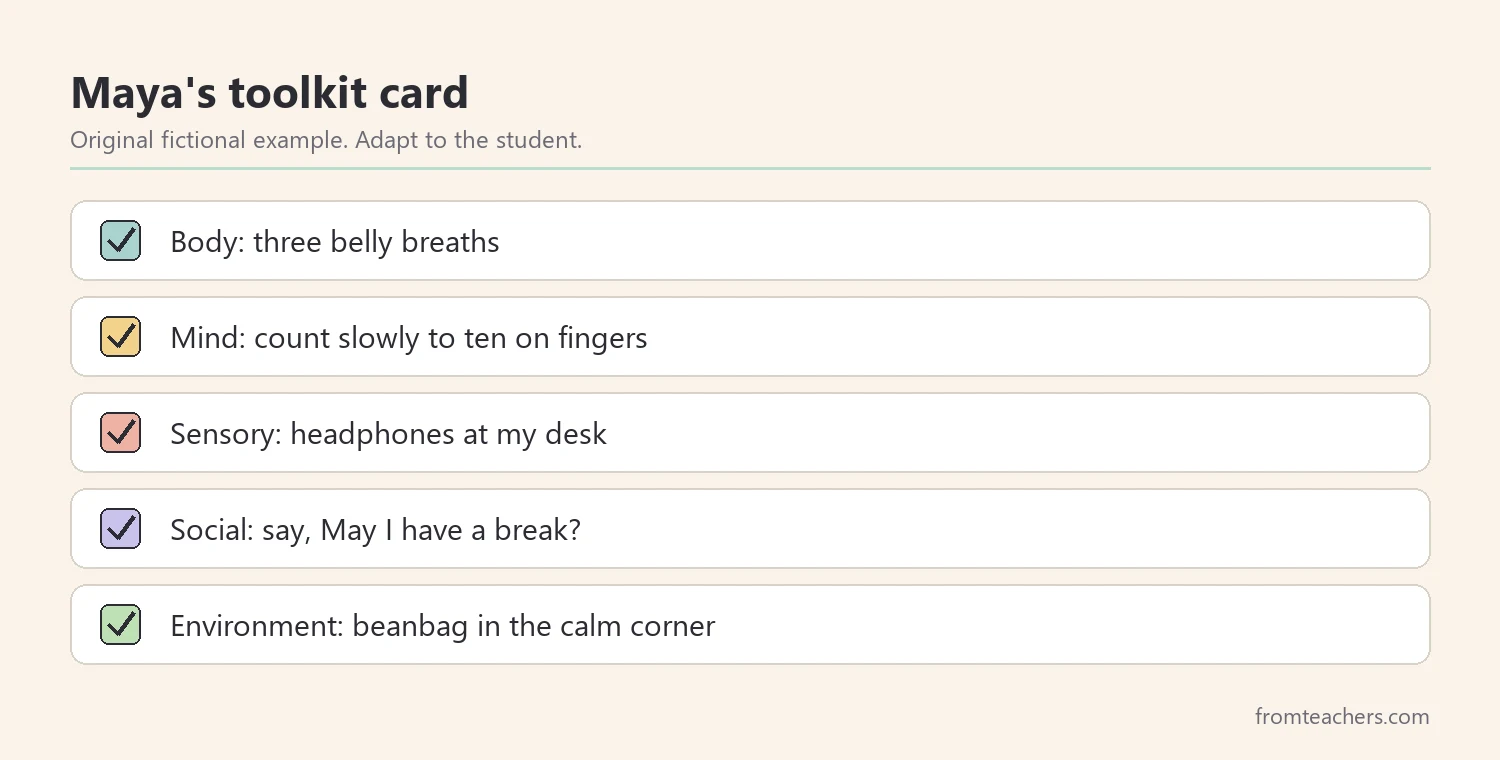
Worked example. Mr. Okafor teaches one tool each morning for a week. On Monday, the class practices belly breaths. On Tuesday, they try counting slowly on their fingers. By Friday, Maya can name and show four tools, and she says the beanbag in the calm corner is her favorite.
3. Build a personal toolkit for each student
Now, help each student choose their own emotional regulation tools. A personal toolkit is a short list of tools the student likes and can use in class. It works best when the student helps choose the tools, because ownership builds motivation.
First, try tools together and ask how they felt. Did the tool help? Was it easy to use in class? Would the student use it again? Keep the questions short and use a simple rating, such as thumbs up, thumbs sideways, or thumbs down.
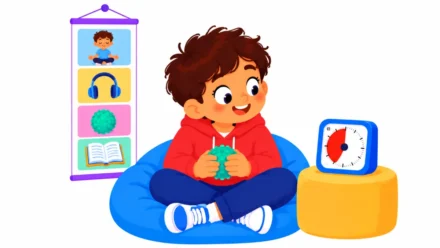
Next, pick one tool from each type, or as many types as fit. Write them on a small card with pictures. Keep the card on the student’s desk, in a folder, or on a lanyard. A visible card reduces the need for adult words in hard moments.
For a classroom reference, the Emotional Regulation Tools poster shows body, mind, sensory, social, and environmental tools in one illustrated display. It works well in a calm corner or near the front of the room, so students can see their options and choose a tool when they need one.
Also, share the toolkit with other adults. Specialists, paraprofessionals, and substitute teachers should know which tools the student uses. A consistent response across adults helps the student trust the plan.
Moreover, keep the toolkit small and honest. If a student never uses a tool, remove it. A card with three emotional regulation tools the student actually likes is more useful than a long list. Short lists are easier to read when feelings run high.
Then, plan for space and materials. If a student chooses headphones, where will they be kept? If a student likes the calm corner, how long can they stay, and how will they return? Clear routines make tools easier to use and easier to manage.
4. Prompt emotional regulation tools early
Next, focus on timing. Small tools used early often work better than big interventions used late. When you notice early signs, such as fidgeting, a frown, a raised voice, or a pushed-away paper, that is the moment to prompt a tool.
In addition, keep prompts short. During rising stress, long explanations can add pressure. Instead, point to the toolkit card or say, “Body tool or mind tool?” Offering two familiar choices gives the student control without overload.
Also, avoid making tools feel like a punishment. A break is not a time-out. The calm corner is not a consequence. Use a neutral, warm tone and present tools as help, not as correction. This keeps students willing to use them.
Then, give the tool time to work. Many tools need a few minutes. Stay nearby, keep your body calm, and wait. After the student settles, help them return with a simple next step, such as “Let’s do the first two questions together.”
Moreover, build in planned tool use. Some students benefit from using emotional regulation tools before known hard moments, such as transitions, tests, or noisy activities. A short movement break before writing, for example, may prevent frustration rather than respond to it.
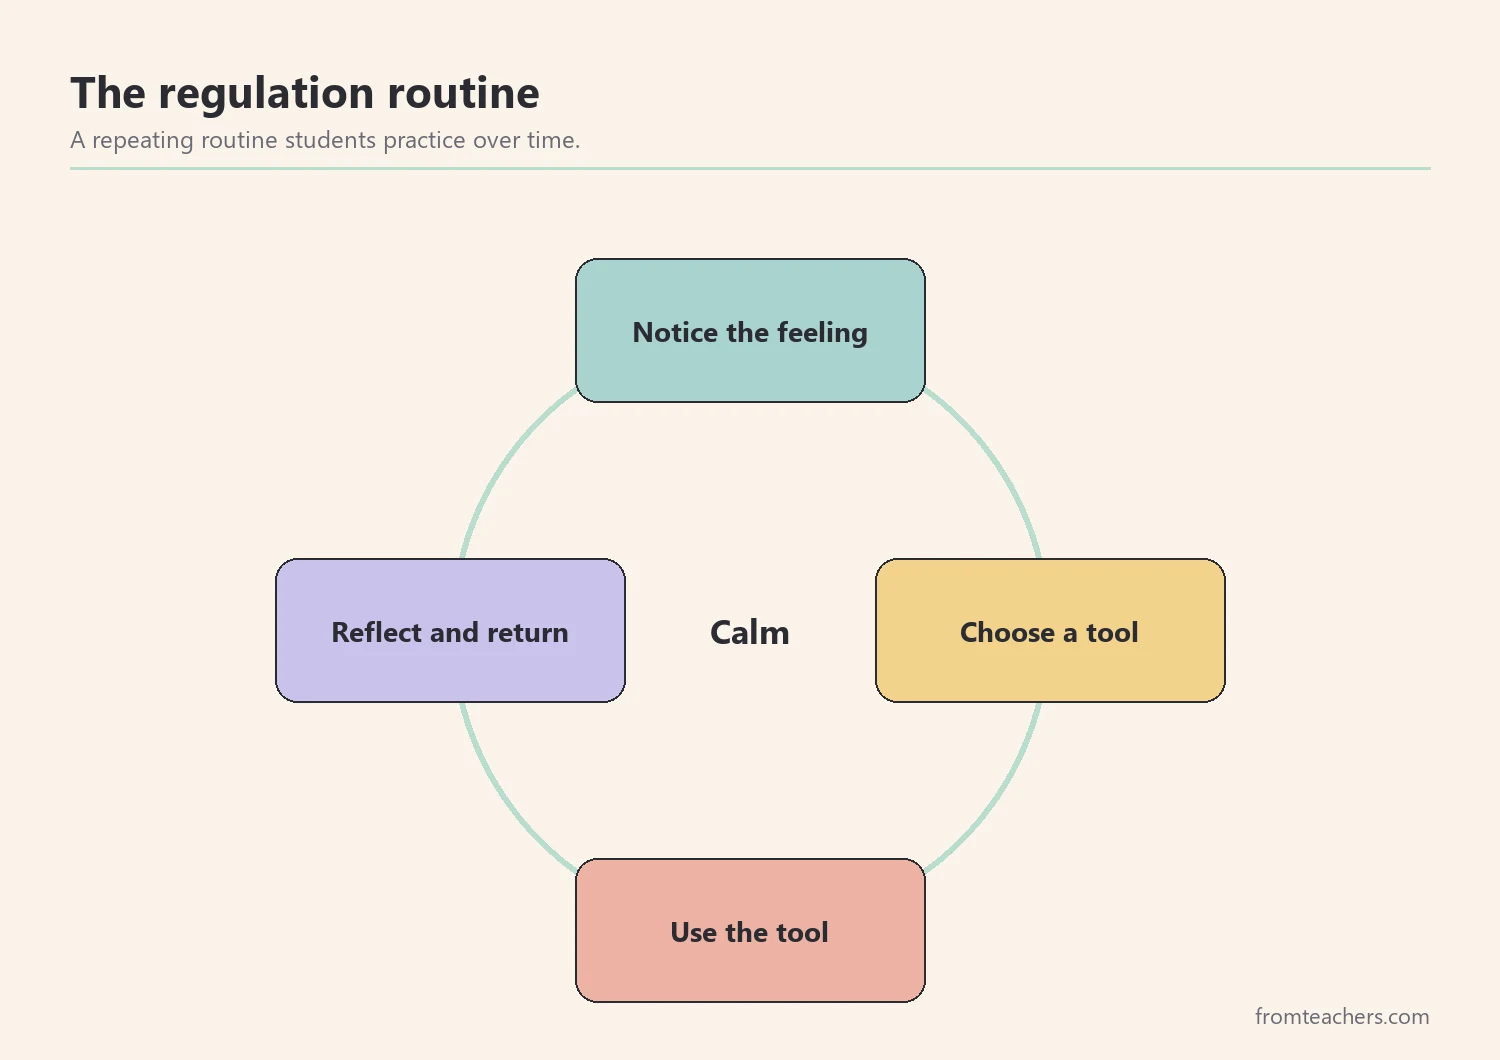
Worked example. During group work, Maya starts covering her ears. Mr. Okafor walks over, taps the sensory row on her card, and quietly hands her the headphones. After a few minutes, she takes them off and rejoins her group. Later, they talk about how the tool helped.
5. Review emotional regulation tools and adjust
Finally, review what works. A toolkit is not fixed. Students grow, situations change, and some tools stop helping. A short weekly check keeps the toolkit useful.
First, keep a light record. Note when the student used a tool, which tool, and whether it was prompted or independent. Independent use is a strong sign of progress. Over time, prompts should fade as the student learns to notice feelings and choose tools alone.
In addition, look for patterns. Do upsets happen at the same time of day, during the same subject, or after the same transition? Patterns show where planned emotional regulation tools could prevent problems before they start.
Next, reflect with the student. Ask, “Which tool helped most this week? Which one didn’t help?” Students often have useful insights. Their answers guide what to keep, change, or add.
Also, involve families. Share the toolkit card and ask which tools the child uses at home. A shared approach between school and home strengthens skills in both places. Similarly, ask families what calms the child, since they often know helpful tools you have not tried.
Then, connect with the support team when needed. If a student has frequent or intense difficulties, talk with the school counselor, psychologist, or other specialists. Emotional regulation tools are a classroom support. They do not replace professional evaluation or individualized plans when those are needed.
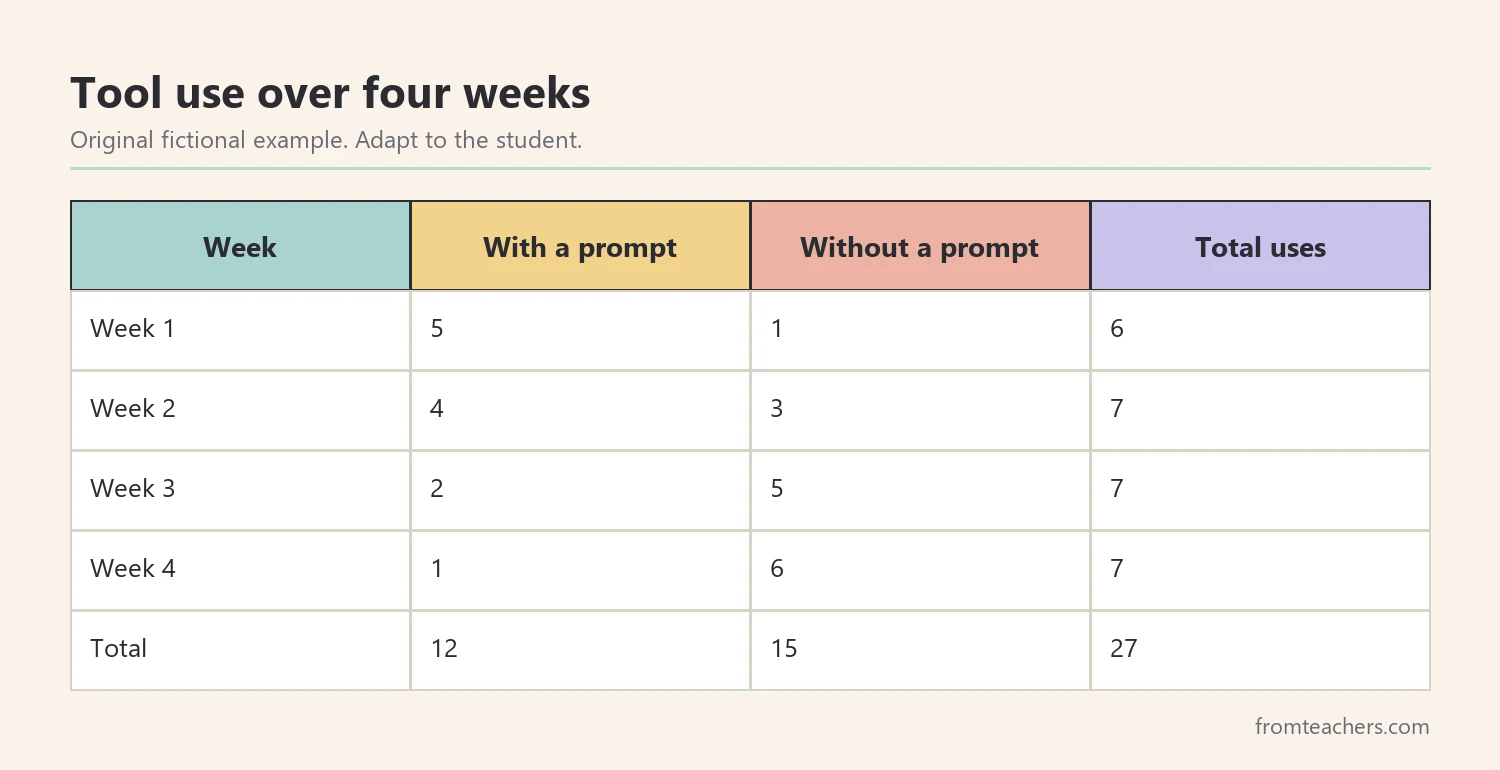
Worked example. Over four weeks, Mr. Okafor records Maya’s tool use. In week one, she uses tools 6 times, 5 with a prompt. By week four, she uses tools 7 times, 6 without a prompt. Across the month, she uses tools 27 times, 15 of them on her own. Maya decides to keep her card but swaps counting for stretching.
Common mistakes and how to avoid them
- Teaching tools during a meltdown. New learning rarely sticks then. Fix: teach in calm moments and prompt only familiar tools when upset.
- Offering only one strategy. Breathing does not help everyone. Fix: offer tools from all five types.
- Using breaks as punishment. Students stop using tools. Fix: present tools as help, with a warm, neutral tone.
- Talking too much. Words add pressure during stress. Fix: point to the card and offer two choices.
- Never updating the toolkit. Tools stop fitting. Fix: review weekly with the student.
Questions teachers and parents ask about emotional regulation tools
What age are emotional regulation tools for?
Students of many ages can use them. The tools change with age and needs. Younger students may need more pictures and adult modeling, while older students can choose and track tools more independently.
Will students use tools to avoid work?
Some may test the system at first. Clear routines help: a set time for breaks, a timer, and a simple plan for returning to work. Over time, most students use tools for their real purpose.
How many tools should a student have?
A small set is usually enough, often three to five. Too many choices can overwhelm. One tool from each type is a good starting point.
Can these tools work at home?
Yes. Many body, mind, and sensory tools work anywhere. Share the toolkit card with families so the same words and tools are used at home and school.
When should we ask for more support?
If difficulties are frequent, intense, or getting worse, talk with the school counselor or the student’s support team. They can help decide whether more individualized support or evaluation is needed.
Related reading: Managing Sensory Overload: Practical Strategies for Autism and ADHD, Meltdowns vs Tantrums: A Guide to Understanding and Responding, and Essential Trauma-Informed Teaching Strategies for Modern Classrooms.
A companion resource for emotional regulation tools:
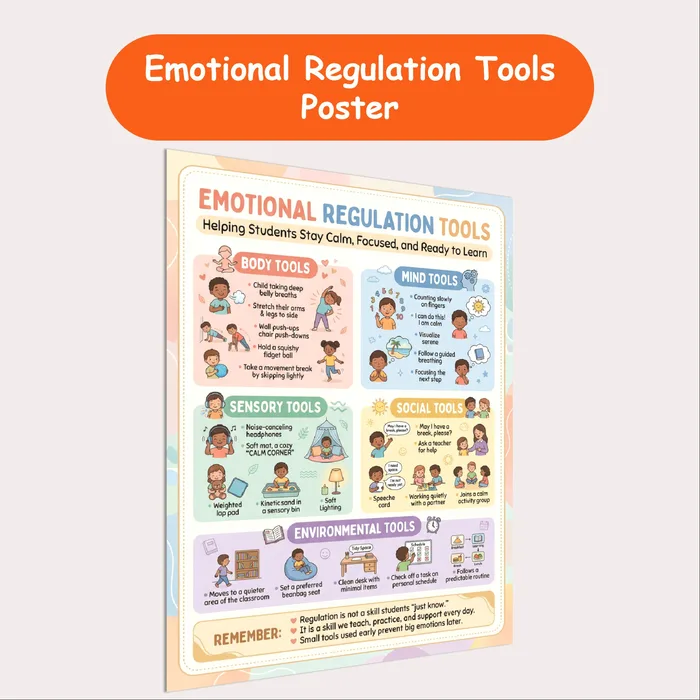
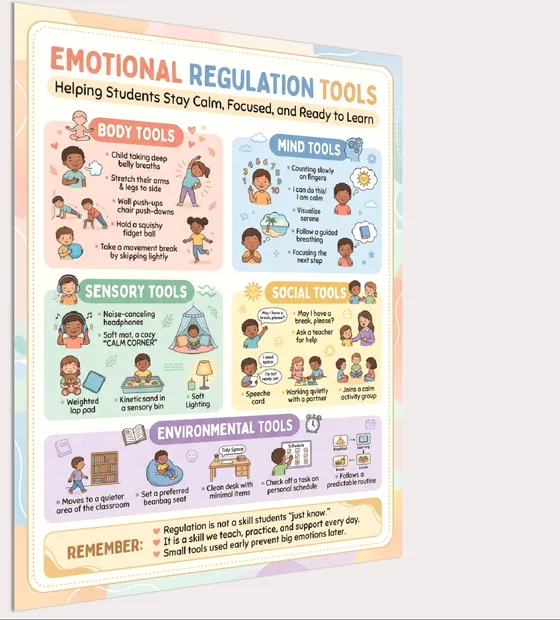
Emotional Regulation Tools Poster: an illustrated self-regulation poster that shows five types of tools, body, mind, sensory, social, and environmental, to help students stay calm, focused, and ready to learn.
Sources and scope
- CASEL: a widely used framework for social and emotional learning, including self-management.
- IRIS Center, Vanderbilt University: free modules on classroom behavior and supports for students with disabilities.
- Centers for Disease Control and Prevention (CDC): general information on children’s mental health and development.
- Understood.org: family-friendly information on learning and thinking differences.
This guide covers everyday classroom and home use of calming tools. It does not replace mental health care, evaluation, or individualized plans decided by the student’s support team.
Key takeaways
- Offer tools from five types: body, mind, sensory, social, and environmental.
- Teach and practice tools when students are calm.
- Build a short personal toolkit card with the student.
- Prompt tools early with few words and two choices.
- Review weekly and fade prompts as independence grows.




Leave a Comment