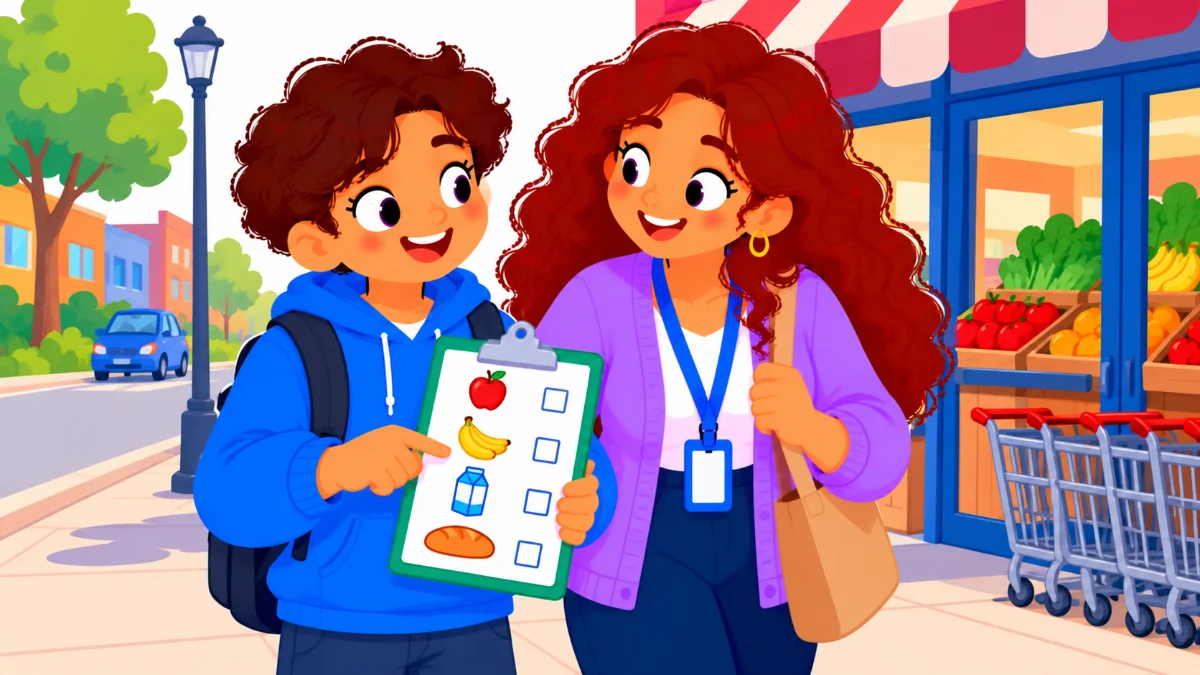

A community outing planner turns a trip to the store or the library into a lesson the learner owns. Picture a sixteen-year-old standing at the entrance of a busy grocery store while an adult holds the list, the money, and the plan. He follows along politely, but he has not made a single decision. When the outing ends, nobody can say what he learned or what he would like to do next time.
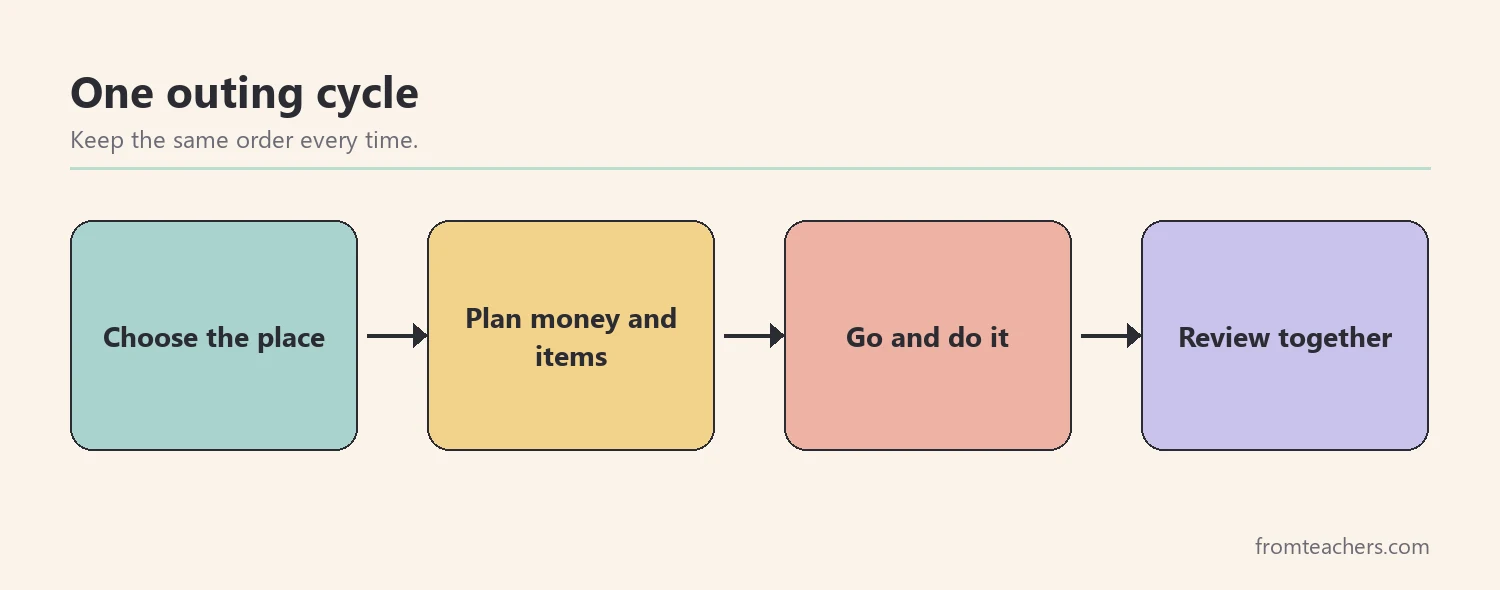
This guide shows you how to plan community outings in five practical steps. By the end, you will be able to start from the learner’s own choice, prepare the place, money, and items, agree on how the learner can say yes, no, or stop, run the outing with the right level of support, and review what happened so the next visit is easier.
Examples are fictional. Adapt to the student’s goals and agreed supports. This is guidance, not a diagnosis.
At a glance
- Start every outing with the learner’s interests and a real choice of place.
- Plan the money, items, and route on paper before you leave.
- Agree on a clear way to say yes, no, or stop, and practice it first.
- Choose one or two skills per visit, then record the level of support.
- Review each outing together and use it to plan the next one.
1. Start the community outing planner with the learner’s choice
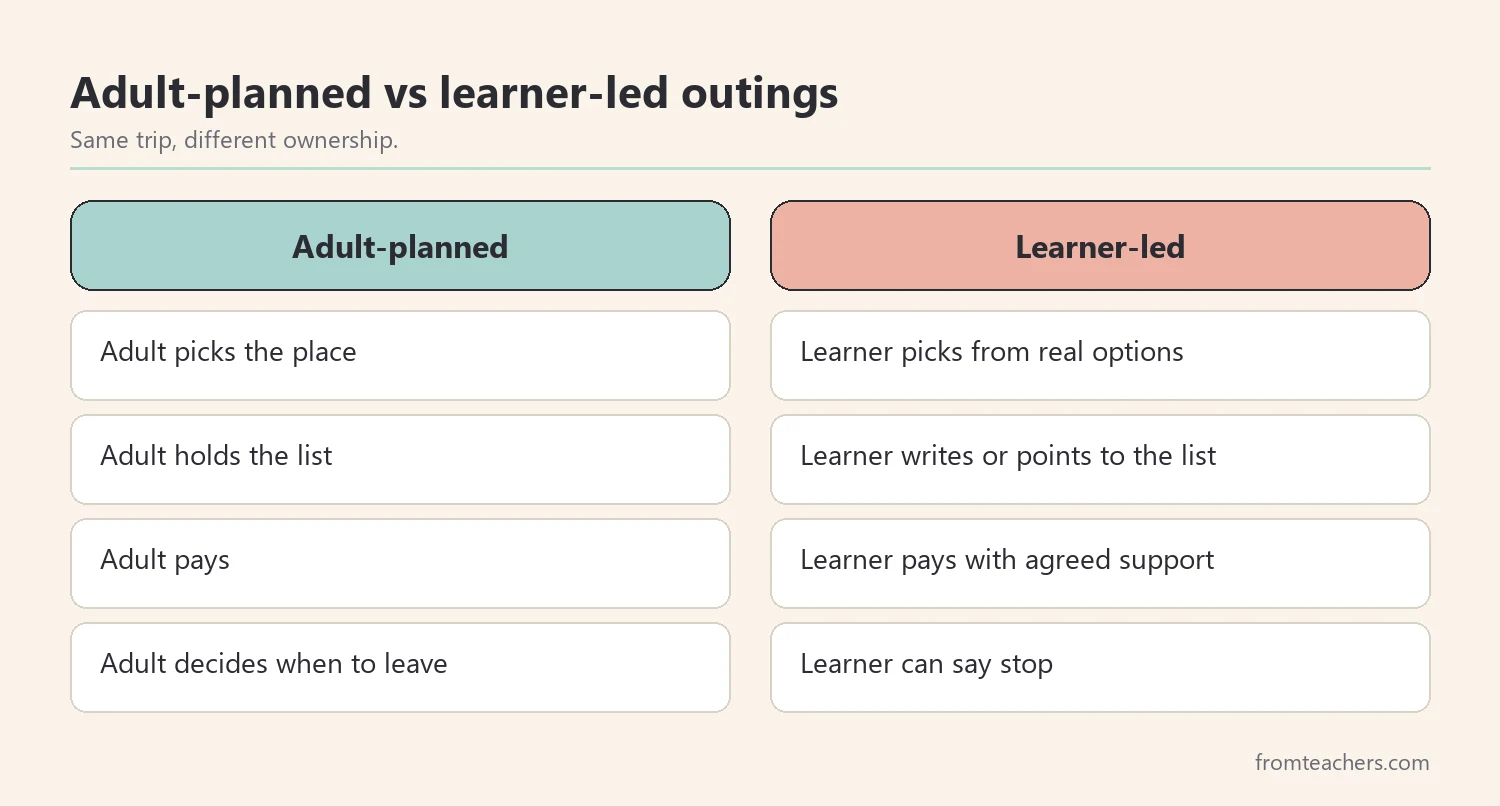
First, find out what the learner actually wants to do in the community. Many outings are planned around staff schedules or a set curriculum. As a result, the learner goes along but does not invest in the trip. Starting with a choice changes that from the first minute.
Offer real options, not a single place dressed up as a choice. For some learners, that means two photos of nearby places. For others, it means an open question such as “Where would you like to go this week?” Accept the answer in any form: speech, writing, pointing, a communication device, or a picture card.
Next, ask what the learner would like to do there and why it matters to them. These questions sound small. However, they give you the motivation you need when the outing becomes hard, and they show the learner that their reasons count.
Consider Jonah, a fictional sixteen-year-old in a transition program. Jonah loves cooking shows. When his teacher, Ms. Alvarez, offered the grocery store or the library, he pointed to the store. On his outing choice page he wrote “buy pasta” under what he wants to do, and “cook with my brother” under why it matters.
| Question | Jonah’s answer | How he answered |
|---|---|---|
| Where would you like to go? | Grocery store | Pointed to a photo |
| What do you want to do there? | Buy pasta | Wrote two words |
| Why does it matter to you? | Cook with my brother | Spoke, adult wrote it |
Finally, keep the choice page. It becomes the first record of the outing, and it reminds everyone whose trip this is.
2. Plan the place, the money, and the items
Once the learner has chosen, plan the practical details together. This step is where much of the real learning happens, because the learner practices thinking ahead. In addition, a written plan lowers uncertainty for learners who find new places stressful.
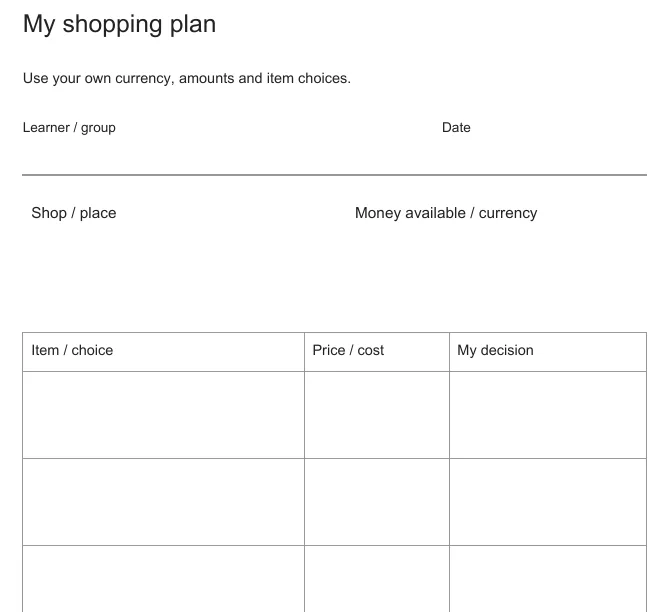
Start with the place. Write its name, the day, and the time. Then add the money available, in the learner’s own currency and amounts. Next, list the items or choices the learner wants, with a space for the price and a space for the final decision.
A simple three-column table works well: item or choice, price or cost, and my decision. The learner can fill in prices before the trip from a flyer or a website, or during the trip from the shelf. Either way, the table makes comparing and deciding visible.
For example, Jonah’s shopping plan listed pasta, sauce, and cheese. He had a set amount of money for the trip. Before leaving, he and Ms. Alvarez checked a store flyer and wrote estimated prices. Jonah realized the cheese might not fit his budget, so he wrote “maybe” in the decision column instead of “yes.”
Also plan how the learner will pay and what support they want. Some learners hand over cash with help counting. Others use a card with a prompt. Write the support the learner asks for, not only the support staff expect to give. Then add a box for what happens after paying: the receipt, the change, and the next step.
Keep the plan short. A plan with too many items can overwhelm the learner before they even reach the door. Two to four items is usually enough for an early outing.
3. Agree on how the learner can say yes, no, or stop
Before any community outing, agree on how the learner can say yes, no, or stop. This is one of the most important parts of planning, and it is often skipped. Without it, a learner who feels overwhelmed may have no safe way to end the trip except a meltdown or a refusal that adults misread.
Choose a signal that fits how the learner communicates. It might be a word, a hand sign, a card held up, or a button on a device. Write it on the plan. Then practice it at school or at home, in a calm moment, so it is familiar before it is needed.
Next, decide together what happens when the learner uses the signal. For instance, “stop” might mean moving to a quiet spot outside for two minutes, then choosing to continue or go back. Importantly, adults must honor the signal every time. If a stop request is ignored once, the learner learns that it does not work.
Also talk about the choices the learner wants to make during the outing. Some learners want to choose the route. Others want to choose which aisle to visit first. Writing these choices down makes them part of the plan rather than favors adults grant on the day.
In Jonah’s case, he chose a red card as his stop signal. He practiced it twice in class. He also wrote that he wanted to choose which pasta shape to buy and whether to use the self-checkout or the cashier.
| Agreement | Jonah’s version |
|---|---|
| Stop signal | Red card held up |
| What stop means | Two minutes outside, then choose |
| Choices he wants | Pasta shape, checkout type |
Clear agreements protect the learner’s dignity. In addition, they help staff stay calm, because everyone knows the plan for difficult moments.
4. Go out and teach one or two skills per visit
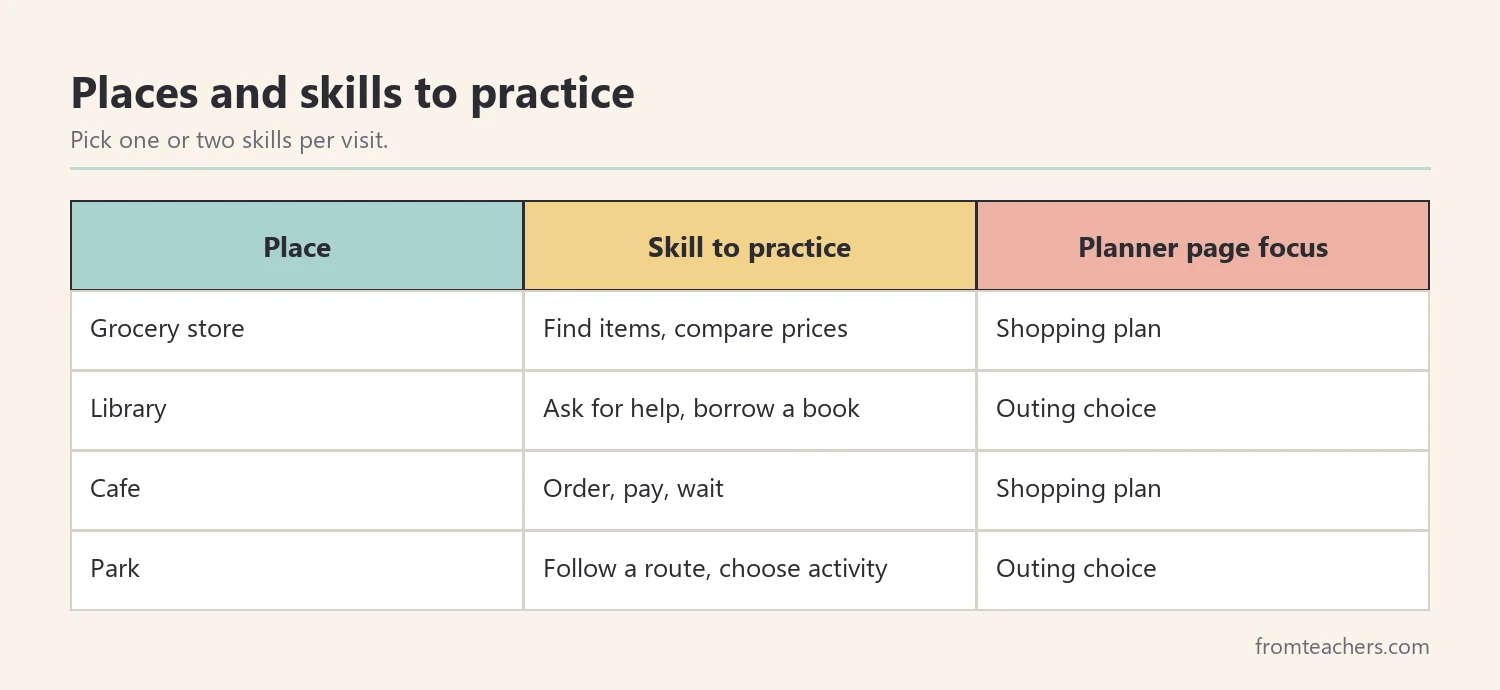
Now it is time to go. A good community outing planner keeps the trip focused. Instead of teaching everything at once, pick one or two skills for each visit and let the rest of the outing be support and enjoyment.
Match the skill to the place. A grocery store is ideal for finding items and comparing prices. A library suits asking for help and borrowing a book. A cafe works well for ordering, paying, and waiting. A park is a good place to follow a route and choose an activity.
During the outing, let the learner lead. Stand slightly behind rather than in front. Offer the least support that works: wait first, then point to the plan, then give a short verbal prompt, and only then step in with more help. Meanwhile, note what support you gave and when.
For example, on Jonah’s first visit the target skills were finding items and paying. He found the pasta with a prompt to check the aisle signs. He needed full help to count money at the register. When the cheese cost more than his estimate, he looked at his plan, saw “maybe,” and decided to leave it. That decision, made with his own plan in hand, was the most important moment of the trip.
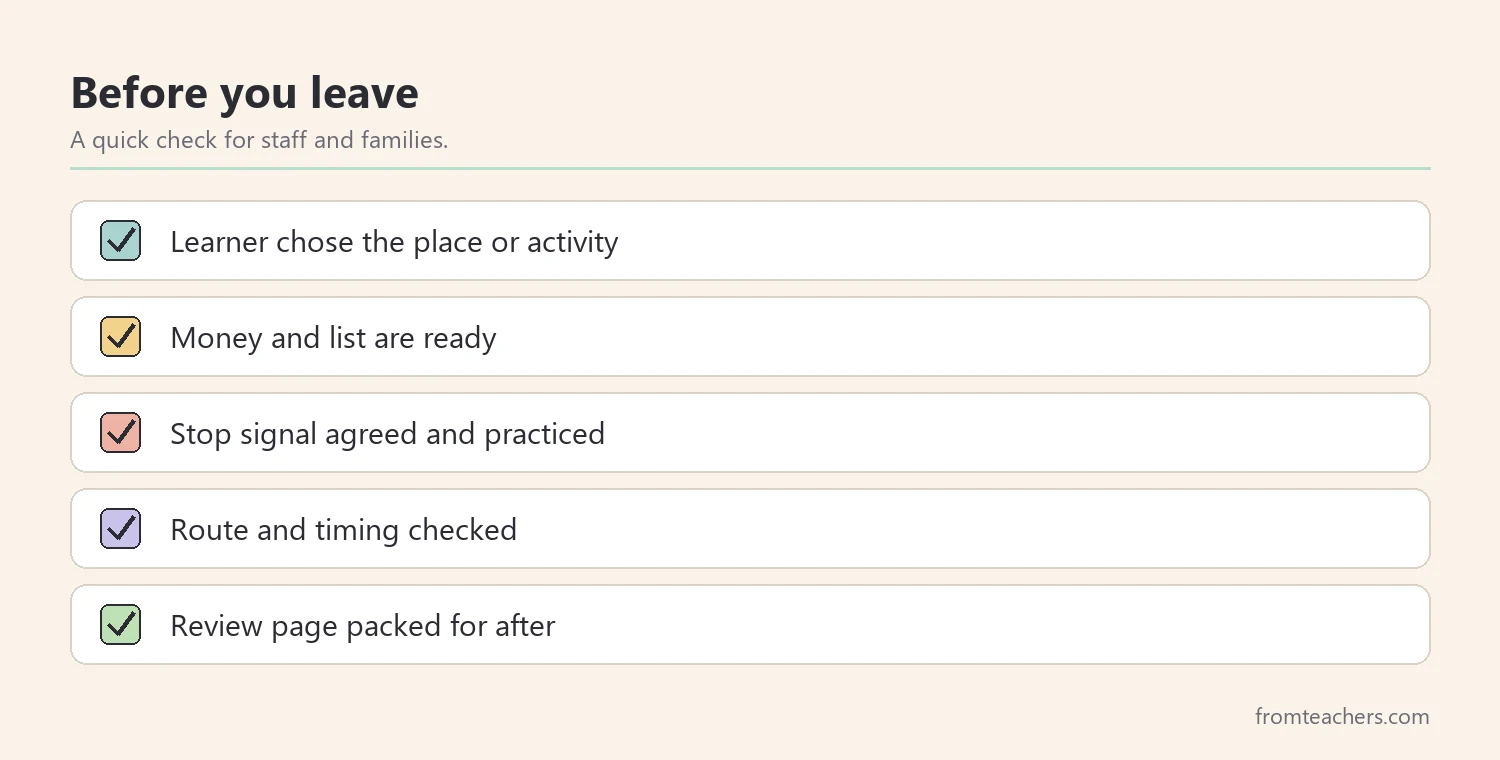
Before leaving, run through a short checklist with the learner. It takes one minute and prevents most problems on the day. If you want ready forms for this, the editable outing choice and shopping plan pages cover the learner’s choice, money, items, payment, and next steps in one place.
5. Review each outing and use the community outing planner again
Finally, review the outing together, ideally the same day. Learning in the community sticks when the learner has a chance to think about what happened. Moreover, the review gives you the information you need to plan the next trip.
Keep the review simple. Ask three questions: What went well? What was hard? What would you like to do next time? Accept answers in the learner’s preferred communication, just as you did at the start. Then add your own short notes on the skills practiced and the support given.
Look at the receipt and the change together. This is a natural moment to practice money skills without a worksheet. In addition, it closes the loop on the shopping plan: what was planned, what was bought, and what changed.
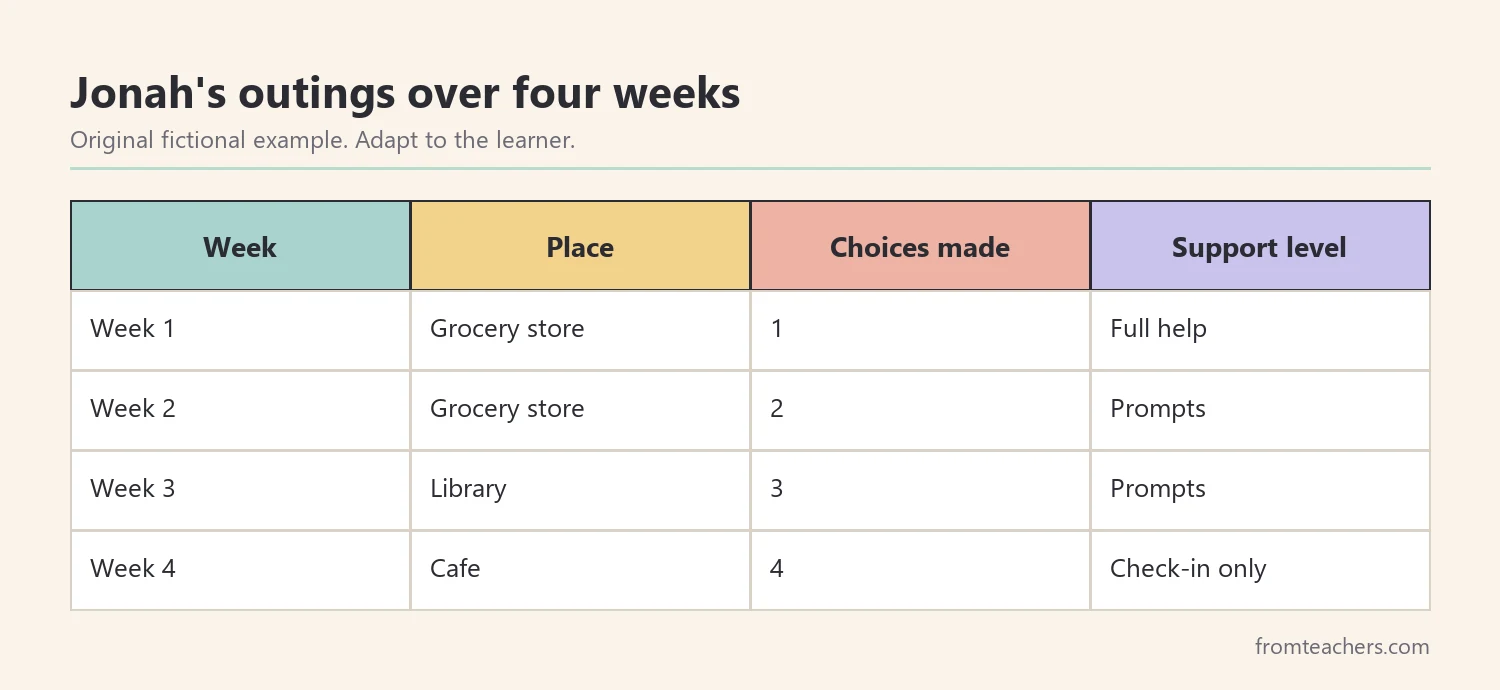
Over several weeks, a simple record shows growth. For Jonah, the number of choices he made rose each week, while the support he needed fell. By week four, he chose a cafe, ordered on his own, and only needed a quick check-in from Ms. Alvarez.
Share the review with the family if the learner agrees. A short note about what went well can lead to a similar outing at the weekend. As a result, skills practiced at school begin to appear in everyday life, which is the real goal of community learning.
Then start again. The learner’s “next time” answer becomes the first choice on the next outing page, and the cycle continues with a little more independence each time.
Common mistakes and how to avoid them
- Offering a fake choice. Asking “Do you want to go to the store?” when the trip is already booked is not a choice. Instead, offer two or more real options you are ready to follow.
- Planning too much at once. A long list and five target skills can overwhelm the learner. Instead, keep early outings to two to four items and one or two skills.
- Skipping the stop signal. Without a practiced way to say stop, distress often looks like defiance. Instead, agree on a signal, practice it, and honor it every time.
- Adults doing the hard parts. Staff often pay or speak for the learner to save time. Instead, wait, point to the plan, and give the least support that works.
- No review afterward. Without a review, every outing starts from zero. Instead, ask three short questions and keep the answers with the plan.
Questions teachers and parents ask about a community outing planner
Who should fill in the community outing planner?
The learner should fill in as much as possible, with support. They can write, dictate, draw, point, or use their usual communication method. Adults can scribe, but the words and choices should belong to the learner.
How often should we go on outings?
That depends on the learner’s goals, the program, and practical limits. Regular, predictable outings, such as one a week, often work better than occasional large trips. Consistency helps the routine of planning and reviewing become familiar.
What if the learner chooses a place we cannot visit?
Explain the limit honestly and offer the closest real alternatives. You can also write the place on a “future outings” list. That way, the choice is respected even if it cannot happen this week.
Can families use the same planner at home?
Yes. The same pages work for a weekend trip to the shop or the library. Using the same forms at school and at home helps the learner carry skills across settings.
How do we track progress without heavy data collection?
Note the number of choices the learner made and the level of support for each target skill. A short table, filled in after each outing, is usually enough to show a pattern over a month.
Related reading: Navigating the Path to Adulthood: Building Essential Life Skills, Building Workplace Readiness: Essential Skills for Career Success, and The Power of Data Tracking in Special Education.
A companion resource for a community outing planner:
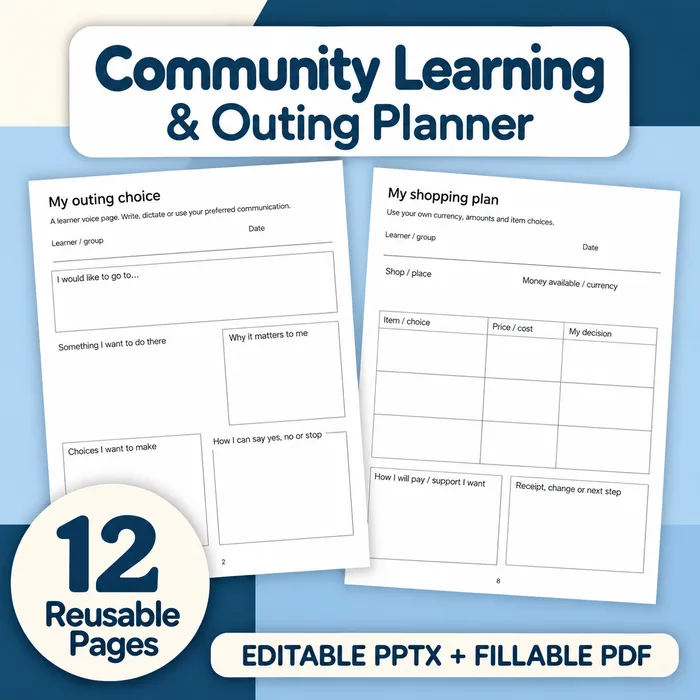
Community Learning and Outing Planner: 12 reusable pages with 131 blank response fields for planning visits to shops, libraries, and other community places around the learner’s interests and choices, as an editable PowerPoint and a fillable PDF.
Sources and scope
- Individuals with Disabilities Education Act (IDEA): official information on transition services and planning for life after school.
- IRIS Center, Vanderbilt University: free modules on transition, prompting, and progress monitoring.
- Understood.org: family-friendly information on building independence and life skills.
- CAST: information on Universal Design for Learning and flexible ways for learners to express choices.
This guide covers everyday planning and review of community outings at school and at home. It does not replace individual risk assessments, school trip policies, or the decisions of the learner’s support team.
Key takeaways
- A community outing planner starts with the learner’s own choice of place.
- Plan money, items, payment, and support on paper before leaving.
- Practice a clear stop signal and honor it every time.
- Teach one or two skills per visit and offer the least support that works.
- Review each outing and let “next time” shape the next plan.



Leave a Comment