
Calm corner setup can decide whether a space helps students reset or simply becomes a beanbag nobody uses. Picture a third grader who balls up his worksheet, pushes his chair back, and heads for the classroom corner. Ten minutes later he is still there, flipping through a stack of toys, and the lesson has moved on without him. The corner was meant to help. However, nobody taught him how to use it or when to come back.
This guide gives you a five-step plan: choose the right location, stock a small set of sensory tools, add clear visual supports, manage noise and sound, and then teach the routine and track how the space is used. By the end, you will have a calm corner that helps students regulate and return to learning.
Examples are fictional. Adapt to the student’s goals and agreed supports. This is guidance, not a diagnosis.
At a glance
- Place the corner where it is quiet, safe, and still visible to adults.
- Stock a few calming tools, not a toy shelf.
- Use simple visuals that show how to use the space and how to return.
- Plan for noise with headphones and calm sound options.
- Teach the routine while students are calm, then track visits and returns.
1. Choose the right location for your calm corner setup
First, look at your room with one question in mind: where can a student feel a little apart without being out of sight? Location is the most important choice in any calm corner setup. A great corner in the wrong spot will either be too noisy to help or too hidden to be safe.
Next, avoid high-traffic areas. Doors, the pencil sharpener, the sink, and the line-up spot bring constant movement. In addition, keep the corner away from the main group area so students do not feel watched by the whole class. A low shelf or a small divider can create a sense of privacy while keeping sight lines open.
Then, check safety and access. Remove anything heavy or breakable from nearby shelves. Make sure students who use wheelchairs or walkers can enter and sit comfortably. Also, think about how the student will get there. A short, clear path makes it easier to use the space before a small problem grows.
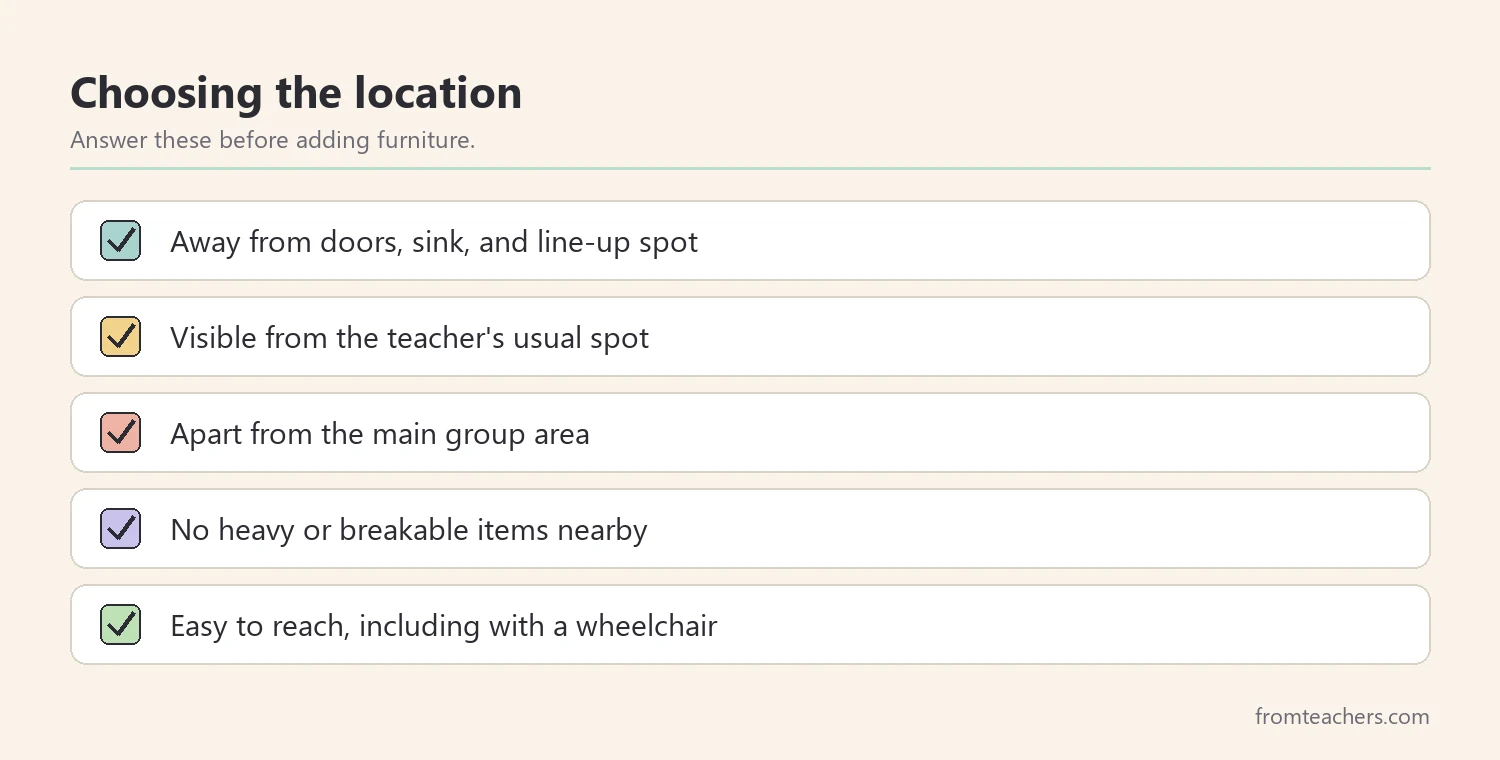
Worked example. Theo is a fictional student in grade 3. His teacher first places the calm corner beside the classroom door, but students walking in and out distract Theo every time. She moves it to the back corner behind a low bookshelf. From her teaching spot, she can still see Theo, but classmates cannot stare at him.
Put this step into practice
Also, consider light. Harsh overhead lights or a sunny window can make some students more restless. If you can, choose a spot with softer light, or add a small lamp approved by your school. Light is a small detail, but a careful calm corner setup pays attention to how the space feels as well as how it looks.
In short, test the spot for a few days before you commit. As a result, you avoid building a space in the wrong place.
2. Stock a small set of sensory tools
Once the location works, choose what goes inside. A good calm corner setup has a few purposeful tools, not a pile of toys. Too many choices can make it harder for a student to settle.
In addition, start with comfort. A soft seat, cushion, or small rug tells students this space is different from their desk. Then, add three to five calming tools. Common options include a fidget item, a stress ball, a weighted lap pad if the student’s team has agreed to it, a breathing card, and a simple feelings chart.
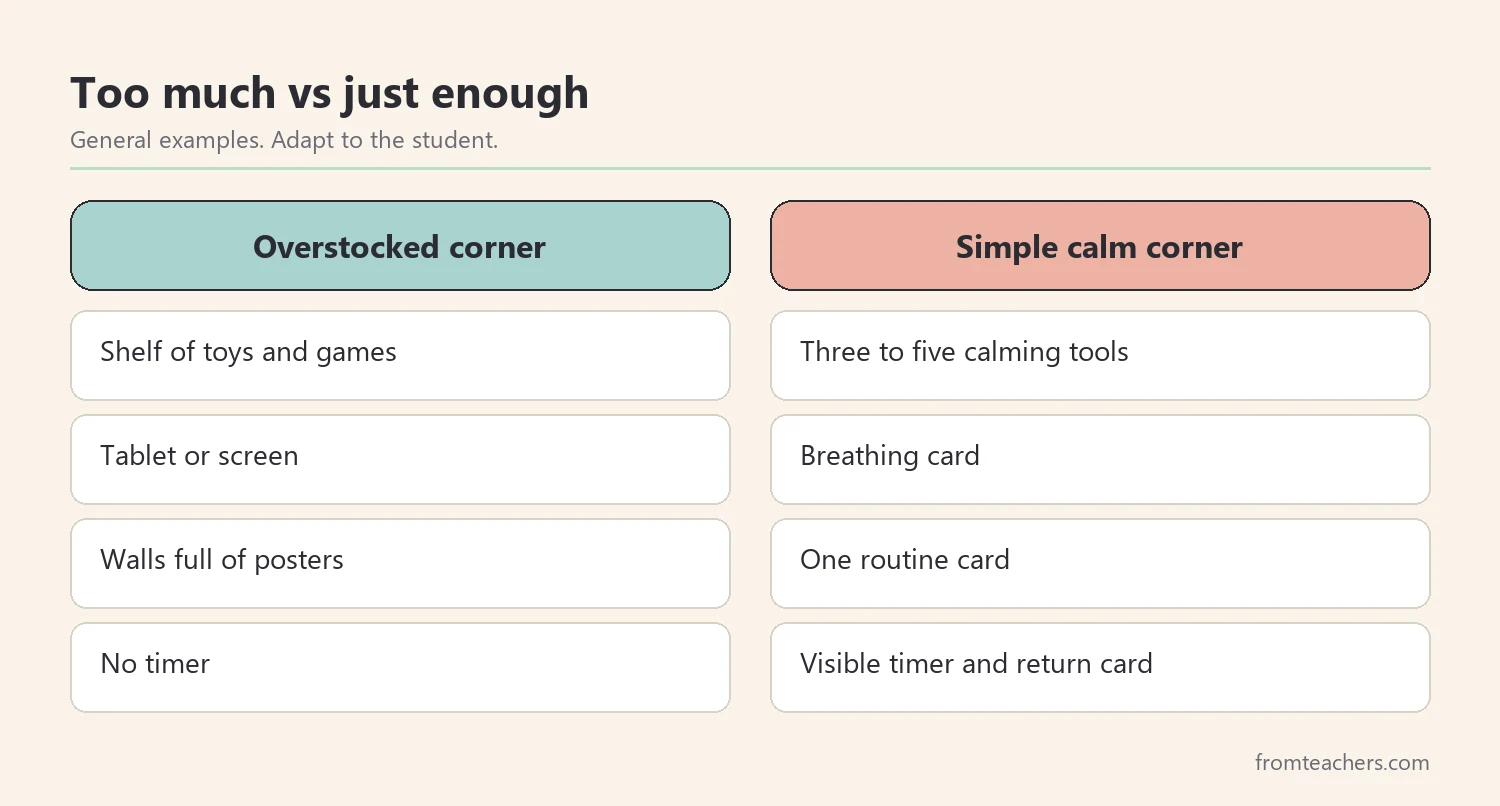
Next, choose tools that calm rather than excite. Games, building sets, and screens can turn the corner into a reward area, and students may not want to leave. Instead, pick items that help the body slow down. In addition, rotate tools every few weeks so the space stays fresh without growing cluttered.
A quick classroom example
Also, keep tools clean and in good repair. Give each item a labeled home, such as a small bin with a picture label. Clear storage helps students put things back and helps you notice when something is missing.
Then, involve students when it makes sense. Ask the class which tools help them feel calm, and try those first. When students help shape the calm corner setup, they are more likely to respect it and use it well. However, keep the final list short and check any new item with the student’s team if it relates to a written plan.
Worked example. Theo’s teacher removes the toy cars and building blocks from the corner. She keeps a cushion, a squeeze ball, a breathing card, and a feelings chart. Theo now picks one tool instead of trying everything.
3. Add visual supports to your calm corner setup
Visuals turn the corner from a place into a routine. Without them, students may not know what to do when they arrive or when to leave. Therefore, every calm corner setup needs a few clear, student-friendly visuals.
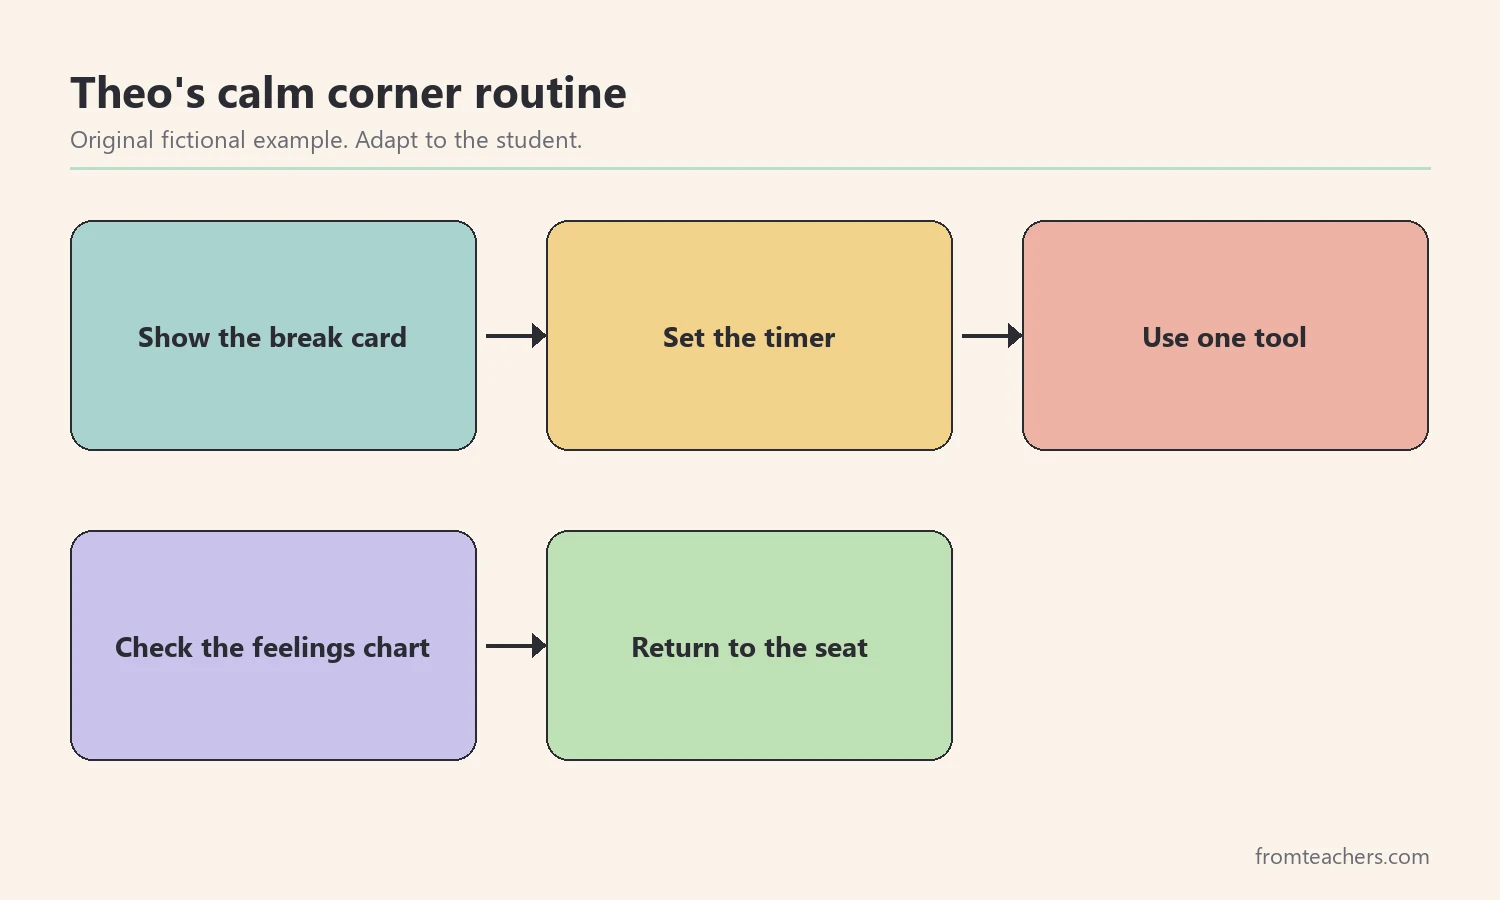
For example, keep the set small. A short step-by-step card that shows how to use the space, a feelings chart, a breathing visual, and a return card are often enough. Use pictures and few words, matched to the student’s reading level. Also, post them at the student’s eye level when seated.
Next, avoid crowding the walls. A corner covered in posters can feel as busy as the rest of the room. Choose visuals that support the routine and leave the rest of the space plain.
If you want ready-made planning pages, the Safe Space and Calm Corner Setup Guide with checklists includes a visual supports and posters checklist alongside checklists for location, sensory tools, and noise.
Worked example. Theo’s corner has one card with five pictures: show the break card, set the timer, use one tool, check the feelings chart, and return to the seat. His teacher reads it with him twice during a calm morning. After that, Theo follows the card on his own most of the time.
4. Manage noise and sound in the space
Noise is easy to forget and hard to ignore. Many students head to a calm corner because the room feels too loud. As a result, sound options are a key part of a calm corner setup.
Next, start with simple noise-reducing headphones. They are quick to use and do not disturb the class. Then, consider calm sound options, such as soft music or white noise through student headphones. Keep the volume low and the choices few.
| Option | When it helps | Watch for |
|---|---|---|
| Noise-reducing headphones | Busy or loud lessons | Fit and comfort |
| White noise | Background chatter | Volume stays low |
| Calm music | Settling after upset | Short, familiar tracks |
| Quiet, no sound | Students who dislike headphones | Location stays calm |
Also, reduce noise at the source. Rugs, curtains, and soft furniture can absorb some sound. In addition, place the corner away from speakers, fans, and the door.
However, respect student preference. Some students find headphones uncomfortable. Offer a choice and note what each student prefers.
Worked example. Theo’s teacher adds a pair of noise-reducing headphones in a labeled bin. During a loud group project, Theo uses the calm corner and wears them for his timed break. He returns to the group when the timer ends.
5. Teach the routine and track calm corner use
A calm corner works only when students know how to use it. So, teach the routine while students are calm, not in the middle of a hard moment. Model each step, practice it, and give quick feedback. Also, use positive language: “You can take a break in the calm corner” instead of “Go sit over there.”
Next, set clear limits. A visible timer, often a few minutes, helps students return. Agree on how students ask to go, such as a break card, and how adults check in. The calm corner should never be used as a punishment or a time-out.
Then, track how the space is used. Record the date, the time, the reason if known, and whether the student returned to learning when the timer ended. Simple usage observations show whether the calm corner setup is working.
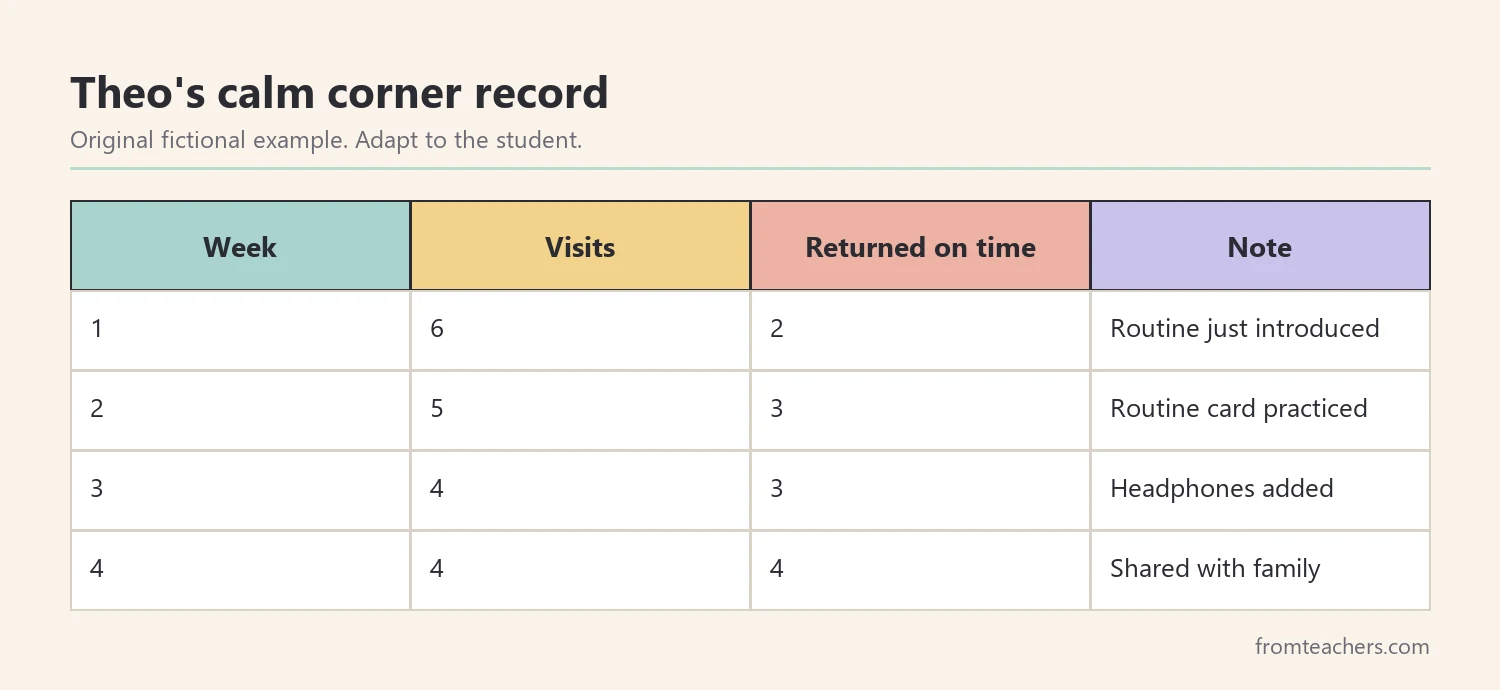
Worked example. Theo’s teacher records his calm corner visits for four weeks. In week 1, he visits 6 times and returns on time 2 times. By week 2, he visits 5 times and returns on time 3 times. In week 3, he visits 4 times and returns on time 3 times. By week 4, he visits 4 times and returns on time all 4 times. She shares the data with Theo’s family and his team.
In addition, notice patterns in your notes. For example, if most visits happen right before math or after recess, the trigger may be the task or the transition, not the room. That insight helps you plan supports outside the calm corner too. Over time, the goal is not zero visits. Instead, the goal is shorter, more independent visits and smooth returns to learning, which is what a well-planned calm corner setup is designed to support.
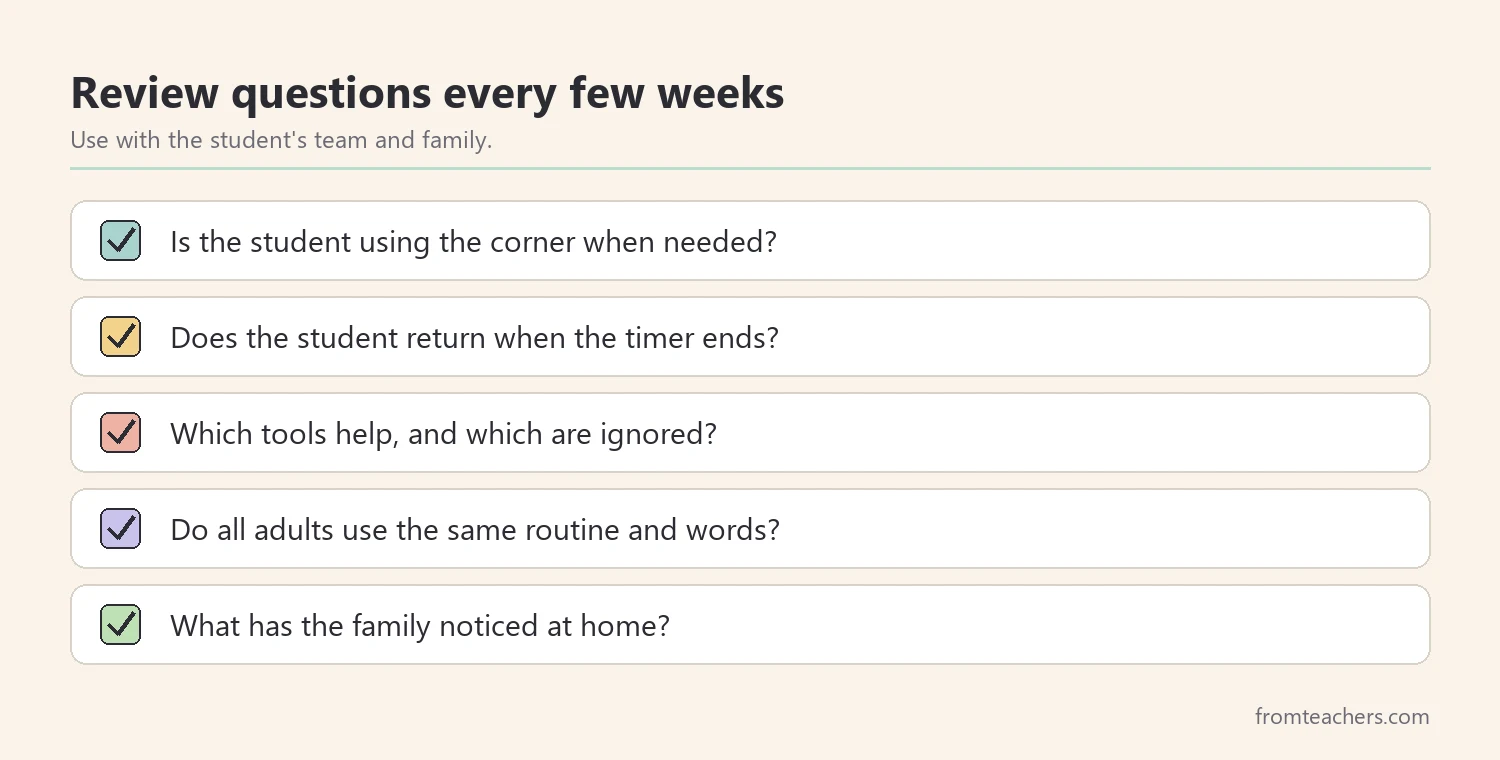
Finally, review the plan every few weeks. Ask whether students use the space, whether they return, and which tools help. Change one thing at a time so you can see the effect.
Common mistakes and how to avoid them
- Using the corner as punishment. Students then avoid it or feel shame. Fix: teach it as a tool and use positive language.
- Too many toys. The corner becomes a reward area. Fix: keep a few calming tools and rotate them.
- No time limit. Breaks stretch and learning stops. Fix: use a visible timer and a return card.
- Teaching the routine during a crisis. Students cannot learn new steps when upset. Fix: practice while calm.
- Never reviewing. Needs change. Fix: track visits and returns, then adjust the calm corner setup.
Questions teachers and parents ask about calm corner setup
How much space does a calm corner setup need?
Not much. A small corner with a cushion, a few tools, and a visual card is often enough. The location and routine matter more than size. In a crowded room, even a chair turned slightly away from the class, with a small bin of tools and a routine card beside it, can serve the same purpose when students are taught how to use it.
How long should a student stay in the calm corner?
Many teachers use a short timer of a few minutes. Start with a time the student can manage, and adjust based on your observations and the student’s plan.
Can the whole class use the calm corner?
Yes. Many teachers open the space to every student. Clear rules about how to ask, how long to stay, and how many students at a time keep it working.
What if a student uses the corner to avoid work?
Look at your data. If visits cluster around one task, the task may be too hard or too long. Adjust the work and keep the timer and return routine consistent.
Can families use a calm corner setup at home?
Yes. A quiet spot with a cushion, a few calming items, and the same visual card used at school can help. Using the same words at home and school makes the routine easier to follow.
Related reading: Managing Sensory Overload: Practical Strategies for Autism and ADHD, Meltdowns vs Tantrums: A Guide to Understanding and Responding, and Moving Beyond Shame and Behavior Charts: Positive Alternatives for Effective Classroom Management.
A companion resource for calm corner setup:
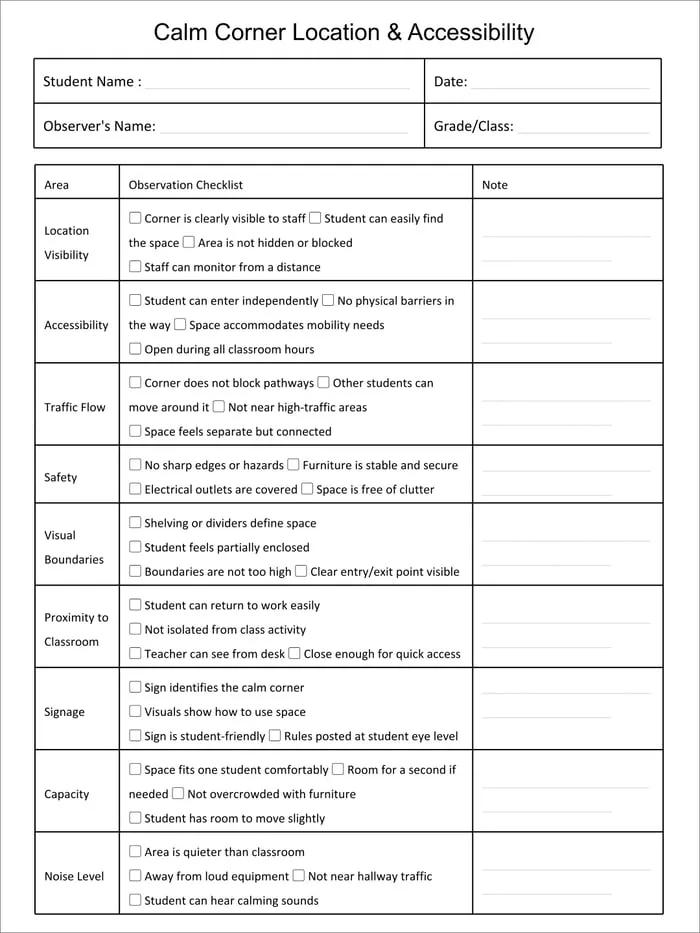
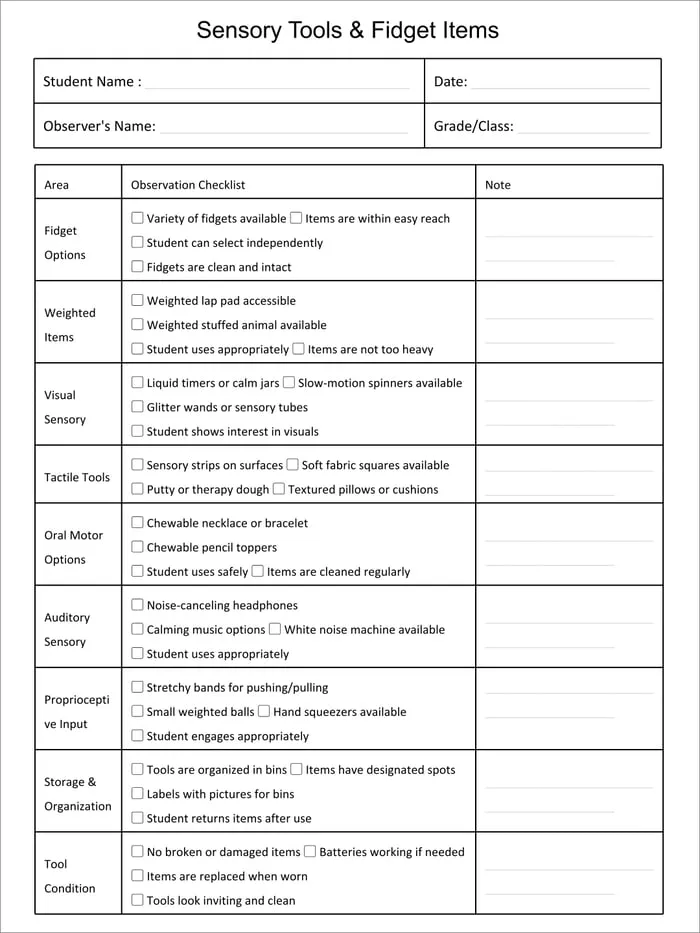
Safe Space and Calm Corner Setup Guide: checklists for location and accessibility, sensory tools and fidget items, visual supports and posters, and noise reduction and sound options, plus a usage observations page with student name, date, and observer fields.
Sources and scope
- CASEL: a leading organization for social and emotional learning, including self-management skills.
- IRIS Center, Vanderbilt University: free modules on classroom environment and behavior support.
- Center on PBIS: resources on positive behavioral interventions and supports in schools.
- Understood.org: practical articles for families and teachers on sensory needs and learning differences.
This guide covers practical classroom steps for planning and using a calm corner. It does not cover crisis response, restraint or seclusion policies, or therapy, which belong to your school’s procedures and qualified professionals.
Key takeaways
- A strong calm corner setup starts with a quiet, safe, visible location.
- Keep a few calming tools instead of a toy shelf.
- Use simple visuals for the routine and the return.
- Plan for noise with headphones and calm sound choices.
- Teach the routine while calm, then track visits and returns.










Leave a Comment