

Special education classroom setup often decides how the first week of school feels. Picture a teacher on the morning of day one: eight students arrive, two of them head straight for the bright toy shelf, one covers his ears near the noisy door, and nobody knows where to put their backpack. Nothing is wrong with the students. Instead, the room is asking them to guess.
This guide gives you a five-step plan: learn what your students need, draw a floor plan with clear zones, build work stations and independent work systems, add a sensory space and visual supports, and then set routines and review how the room works. By the end, you will have a room that teaches students where to go and what to do next.
Examples are fictional. Adapt to the student’s goals and agreed supports. This is guidance, not a diagnosis.
At a glance
- Plan the room around your students’ needs, not around the furniture you have.
- Divide the space into clear zones, each with one purpose.
- Use work systems that show students what to do, how much, and what comes next.
- Add a calm sensory space and visual supports that every adult uses the same way.
- Teach routines, check safety, and adjust the room based on what you observe.
1. Start your special education classroom setup with student needs
First, gather what you know about each student before moving a single table. A good special education classroom setup begins with needs, not furniture. Read IEP goals and accommodations, talk with last year’s teachers, and ask families what helps at home.
Next, sort what you learn into a few practical groups. For example, how many students use a visual schedule, need movement breaks, need a quiet place to reset, or use mobility equipment? These numbers will tell you how many work stations, how much floor space, and what kind of calm area you need.
Also, think about adults. How many paraprofessionals or related service providers will be in the room, and where will they work? Planning adult positions early prevents crowded corners and makes supervision easier.
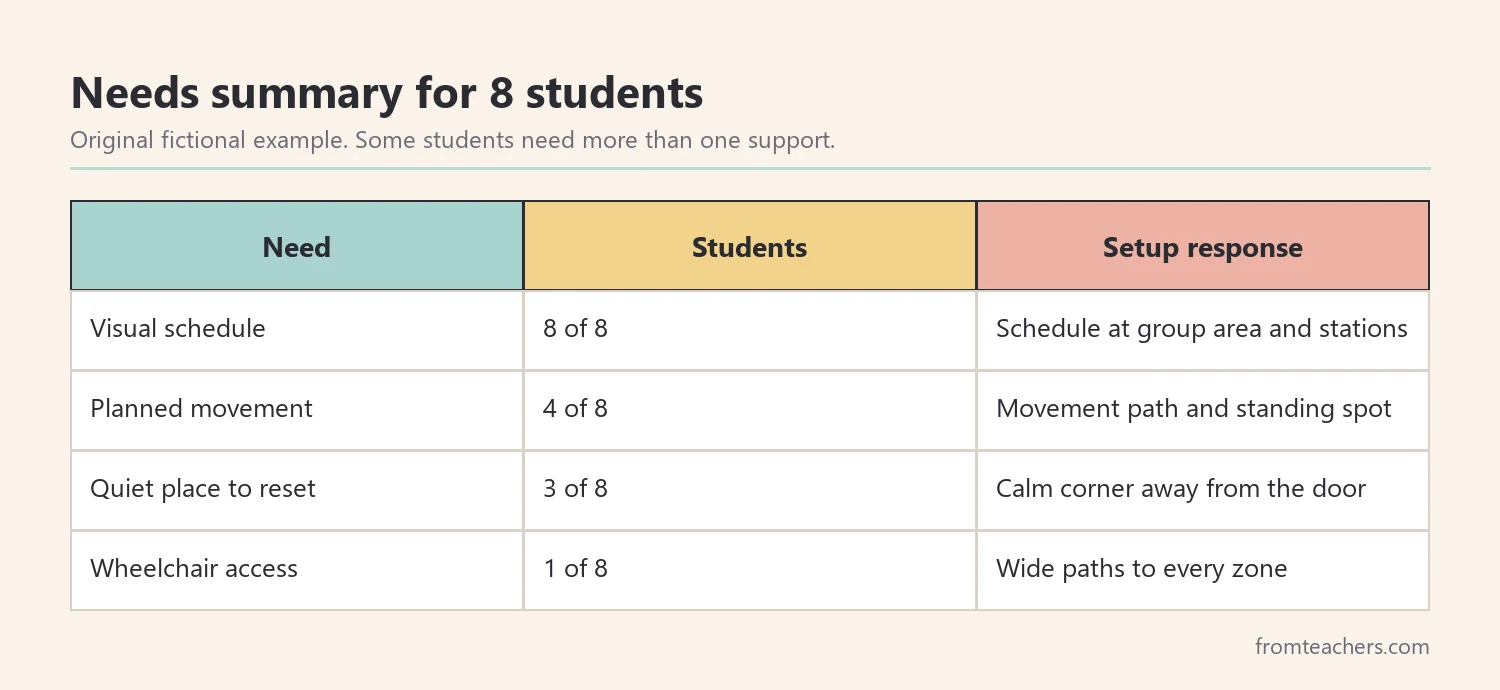
Worked example. Ms. Rivera is a fictional teacher with eight students in a grades K to 2 autism support classroom, plus two paraprofessionals. After reading files and calling families, she finds that all eight students use a visual schedule, four need planned movement, three need a quiet place to reset, and one student uses a wheelchair. Her special education classroom setup now has a clear starting list.
In short, the needs summary becomes your shopping list and your floor plan guide. As a result, every later choice has a reason.
2. Draw a floor plan with clear zones
Once you know the needs, sketch the room on paper before you move anything. Mark doors, windows, outlets, sinks, and storage that cannot move. Then, place zones around those fixed points.
Each zone should have one main purpose. Common zones include a group teaching area, one-to-one teaching tables, independent work stations, a sensory or calm space, a play or leisure area, and a storage and supply area. In addition, plan an arrival spot for backpacks and coats near the door.
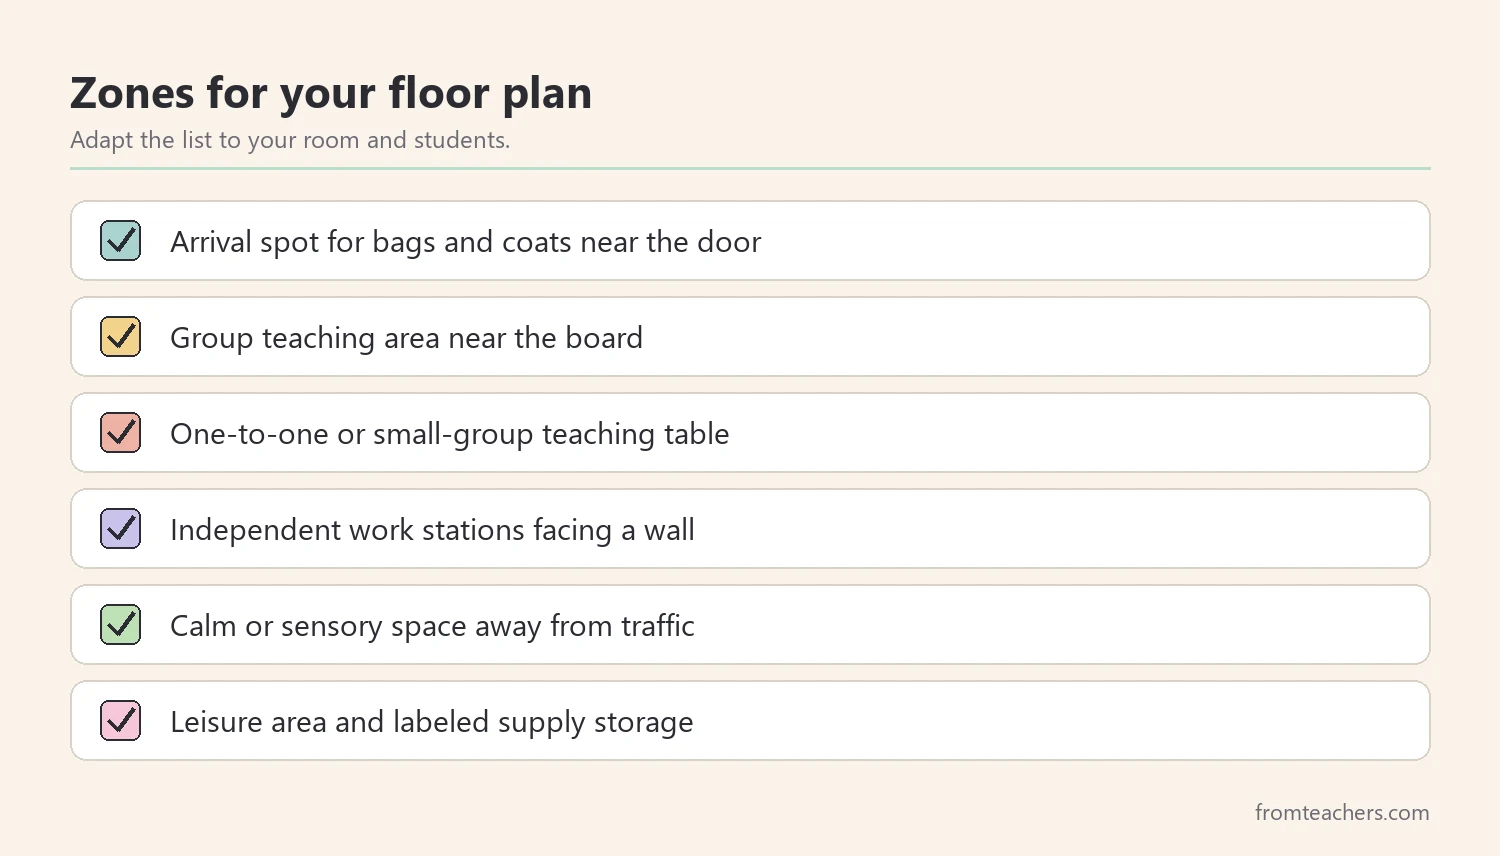
Next, think about traffic. Keep pathways wide enough for every student, including those using wheelchairs or walkers. Place quiet zones away from doors and high-traffic paths. Also, use shelves, rugs, and tape on the floor to show where one zone ends and the next begins. Clear boundaries help students know what each space is for.
Then, check sight lines. From your usual teaching spot, you should be able to see every zone. Low shelves work better than tall ones for this reason. A careful special education classroom setup balances privacy for students with clear visibility for adults.
| Zone | Place it | Why |
|---|---|---|
| Calm space | Away from the door | Less noise and traffic |
| Work stations | Facing a wall | Fewer distractions |
| Group area | Near the board | Shared visuals |
| Arrival spot | By the door | Quick, simple routine |
Worked example. Ms. Rivera places the calm space in the far corner, away from the hallway door. Her four work stations face the side wall, divided by low shelves. The group rug sits in front of the board, and a wide path runs from the door to every zone so her student who uses a wheelchair can reach each one.
3. Build work stations into your special education classroom setup
Work stations are the heart of many special education classrooms. They give students a predictable place to practice skills with less adult help. Therefore, plan them with care in your special education classroom setup.
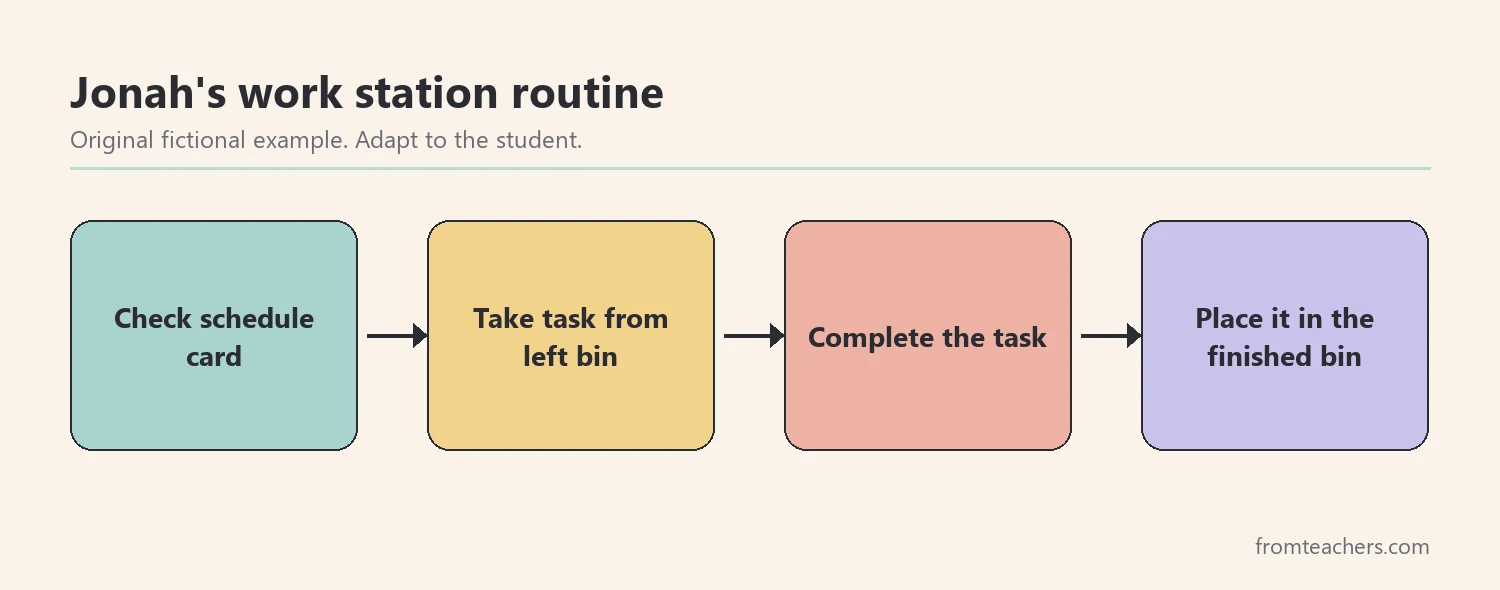
A good independent work system answers four questions for the student: what work do I do, how much work is there, how do I know I am finished, and what comes next. Usually, this means a bin or folder of tasks on one side, a finished bin on the other side, and a visual cue that shows the next activity.
Next, keep tasks at a level the student can complete without help. Independent stations are for practice, not new learning. New skills belong at the one-to-one or small-group teaching table. Also, label everything with pictures or words that match the student’s level.
Then, store materials close to where they are used. When supplies live in the zone that needs them, transitions are shorter and fewer things go missing. Clear bins with picture labels help students and adults put items back.
If you want ready-made planning pages, the Special Education Classroom Setup Guide with checklists and sample layouts covers learning stations, independent work systems, and organizing materials.
Worked example. At Ms. Rivera’s station, Jonah, a fictional second grader, checks his schedule card, takes the first task from the left bin, completes it, and places it in the finished bin on the right. When the left bin is empty, he checks his schedule for the next activity. Three tasks wait in his left bin each morning.
4. Add a sensory space and visual supports
Many students need a place to calm down and return to learning. A sensory or calm space gives them that option before stress becomes a crisis. However, it works best when it is taught, not just furnished.
Keep the space small, quiet, and simple. A soft seat, a few calming tools, noise-reducing headphones, and a visual that shows the steps for using the space are often enough. Also, decide how students ask to go and how they know when to return. A timer and a simple return card help.
Next, add visual supports throughout the room. A daily schedule at the group area, individual schedules at work stations, labels on bins and zones, and first-then boards all reduce the number of spoken directions students must hold in mind. In addition, use the same symbols in every zone so students do not have to relearn them.
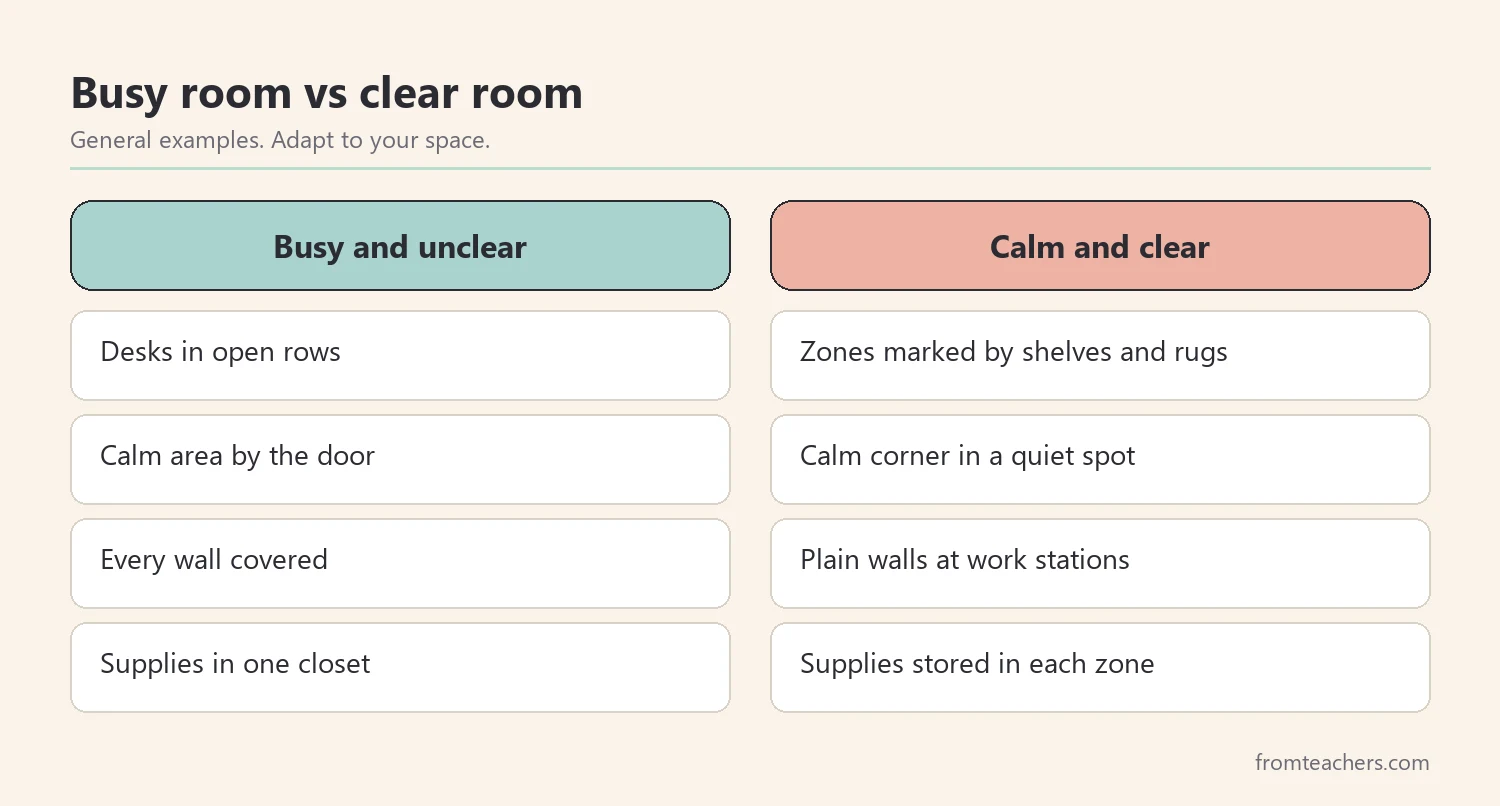
Then, look at the walls with fresh eyes. Busy walls can overwhelm some students. Keep displays near the group area purposeful and leave work station walls mostly plain. A thoughtful special education classroom setup uses visuals to teach, not to decorate.
Worked example. In Ms. Rivera’s calm corner, a picture card shows three steps: sit, breathe, and check the timer. When the timer ends, the student takes a return card back to the schedule. Each work station has its own small schedule strip, and every bin label uses the same picture set as the group schedule.
5. Teach routines, check safety, and review your special education classroom setup
A room only works when students know how to use it. So, teach each zone like a lesson. Model where to go, practice it, and give quick feedback. Start with arrival, moving between zones, and using the calm space.
Also, walk the room for safety. Check that heavy items are low, cords are covered, sharp corners are protected, and exits are clear. Make sure every student can reach the zones and materials they need. Accessibility checks belong in every special education classroom setup, not only in rooms with students who use mobility equipment.
Next, collect simple data. For example, count how many transitions need an adult prompt each day, or how often students use the calm space. Then, review the room every few weeks and change one thing at a time.
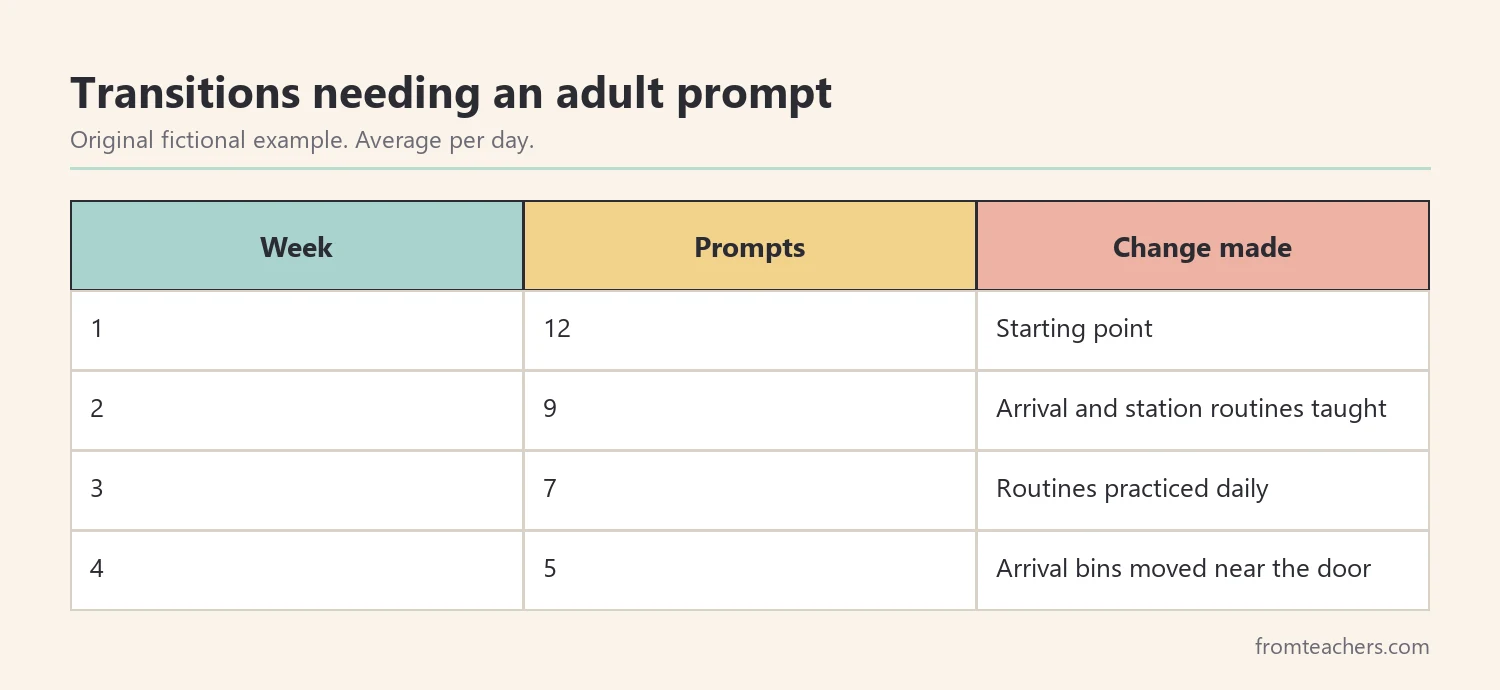
Worked example. Ms. Rivera’s team counts the transitions that need an adult prompt on an average day. In week 1, the count is 12. After the team teaches the arrival and station routines, it drops to 9 in week 2 and 7 in week 3. In week 4, she moves the arrival bins closer to the door, and the count falls to 5. She shares the results with families at the next meeting.
In addition, keep a simple setup log. Each time you move furniture, change a schedule, or add a new tool, write the date and the change in one line. Later, when the data shifts, you can look back and see what happened that week. This habit also helps substitutes and new staff understand why the room is arranged the way it is, so they do not undo a change that is working.
Finally, ask students and staff what works. Paraprofessionals often notice pinch points that you miss. When everyone shares ideas, your special education classroom setup keeps improving through the year.
Common mistakes and how to avoid them
- Arranging furniture before learning about students. The room then fits the furniture, not the learners. Fix: complete a needs summary first.
- Zones without clear boundaries. Students wander or mix activities. Fix: use shelves, rugs, and floor tape to mark each zone.
- Treating the calm space as a time-out. Students then avoid it or see it as punishment. Fix: teach it as a tool and practice using it while calm.
- Too many wall displays. Busy walls can overwhelm. Fix: keep visuals purposeful and leave work areas plain.
- Setting up once and never reviewing. Needs change during the year. Fix: review the room every few weeks with simple data.
Questions teachers and parents ask about special education classroom setup
How long does a special education classroom setup take?
It depends on the room and your starting point. Many teachers plan on paper first, then set up zones over a few days. Expect to keep adjusting during the first weeks as you watch students use the space.
What if my classroom is very small?
Combine zones where you can. For example, a group table can double as a teaching table at other times. Use vertical storage and portable dividers to save floor space.
Does every classroom need a calm space?
Many classrooms benefit from one, even if it is only a small corner with a chair and a visual. The key is teaching students how and when to use it.
How should a co-taught or inclusion classroom differ?
In co-taught and inclusion rooms, plan spaces where both teachers can work with small groups at the same time. Visual supports and quiet areas can be offered to the whole class, so no student stands out.
How can families help with special education classroom setup?
Families can share what calms their child, which visuals they use at home, and what routines work. That information helps you plan zones, schedules, and calm tools that feel familiar to the student.
Related reading: Best Assistive Technology for Special Education Classrooms, Managing Sensory Overload: Practical Strategies for Autism and ADHD, and Special Education Strategies: 10 Powerful Ways Teachers Can Succeed.
A companion resource for special education classroom setup:
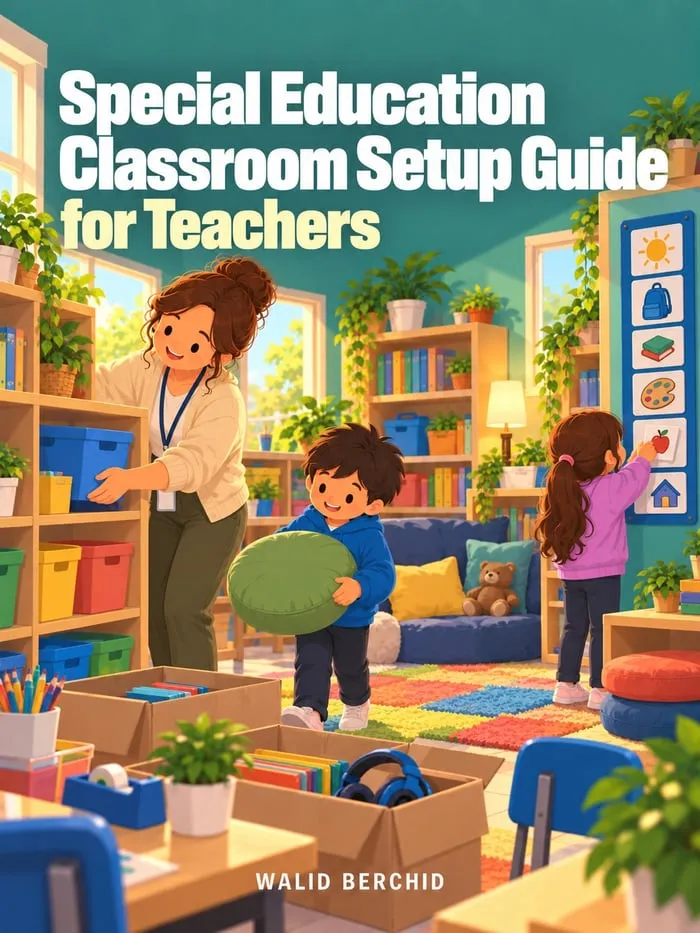
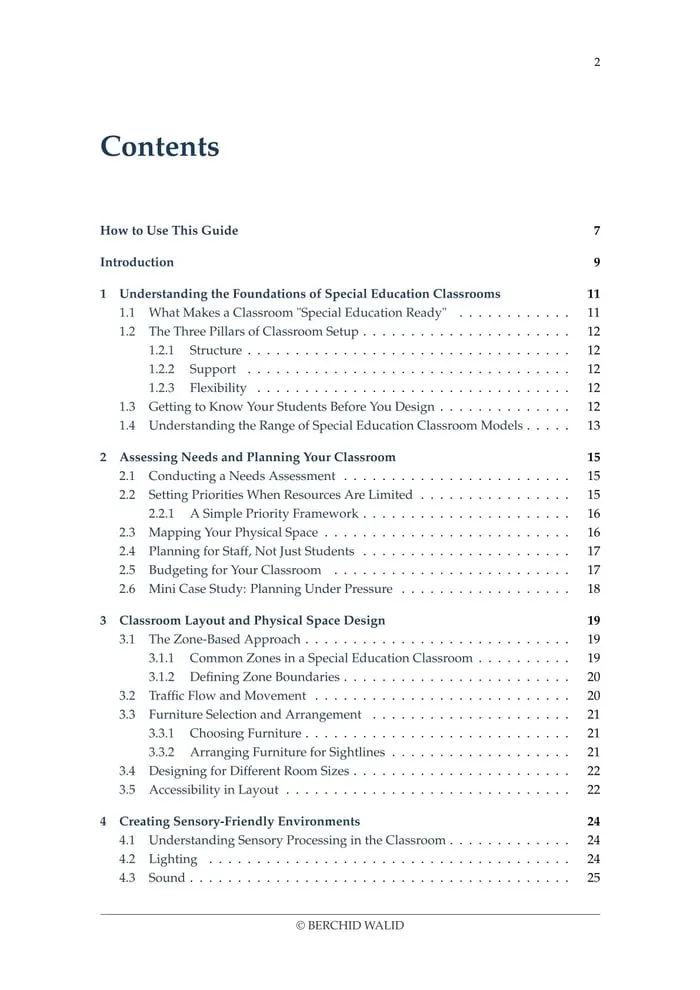
Special Education Classroom Setup Guide for Teachers: a 101-page PDF handbook covering needs assessment, layout, sensory-friendly spaces, visual supports, learning stations and independent work systems, safety, routines, and inclusion setups, with planning checklists and sample classroom layouts.
Sources and scope
- IRIS Center, Vanderbilt University: free modules on classroom environment, behavior, and evidence-based practices.
- IDEA, U.S. Department of Education: the law behind special education services and IEPs.
- CAST: the organization behind Universal Design for Learning, with ideas for flexible learning environments.
- Understood.org: practical articles for families and teachers on learning and thinking differences.
This guide covers practical room planning, zones, work systems, and routines. It does not cover building codes, district safety policies, or individual placement decisions, which belong to your school and the student’s team.
Key takeaways
- A strong special education classroom setup starts with a needs summary.
- Clear zones with one purpose each help students know where to go.
- Work systems show what to do, how much, and what comes next.
- Calm spaces and visuals work best when they are taught.
- Review the room with simple data and change one thing at a time.









Leave a Comment