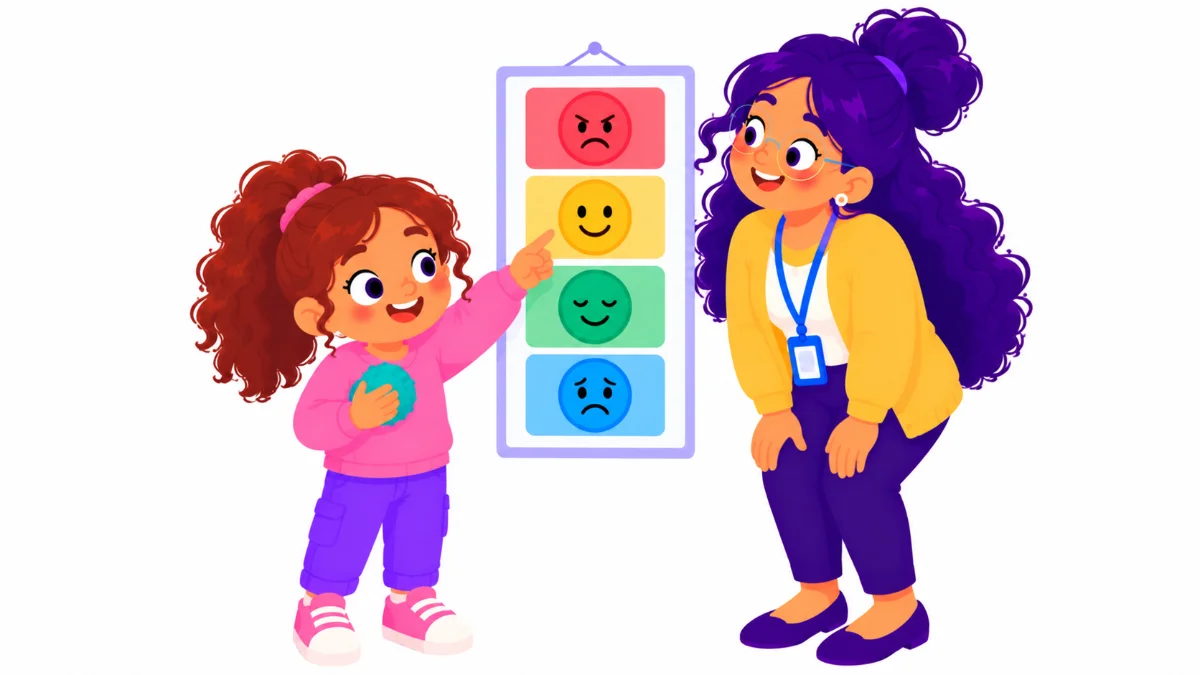

Zones of regulation tools help students notice how their body feels and then choose a strategy that brings them back to a place where learning is easier. Picture a second grader after recess, bouncing in her seat, giggling, and unable to start her reading. She is not being defiant. Her energy is simply high. If she can name it as “yellow zone” and reach for a breathing tool, she can settle in a couple of minutes instead of twenty.
This guide gives you five steps to make zones of regulation tools work in your classroom or home: understand the four zones, teach that every zone is okay, match tools to each zone, practice check-ins, and track what helps. By the end, you will have a clear routine you can introduce with confidence.
Examples are fictional. Adapt to the student’s goals and agreed supports. This is guidance, not a diagnosis.
At a glance
- Four color zones describe energy and feelings, from low to very high.
- All zones are normal, and no feeling is wrong.
- What matters is knowing your zone and choosing a helpful tool.
- Each zone needs different tools, so teach them separately.
- Short daily check-ins turn the framework into a real habit.
1. Understand the four zones
First, get to know the framework. The Zones of Regulation is a widely used approach created by occupational therapist Leah Kuypers. It sorts feelings and energy states into four color zones, so children have a simple, shared vocabulary for what is happening inside them.
Here is a student-friendly summary. The blue zone means low energy: tired, sad, sick, or slow. Green means calm, focused, and ready to learn. The yellow zone means feelings are getting bigger: frustrated, silly, wiggly, worried, or excited. The red zone means feelings are too big to manage alone: angry, out of control, or overwhelmed.
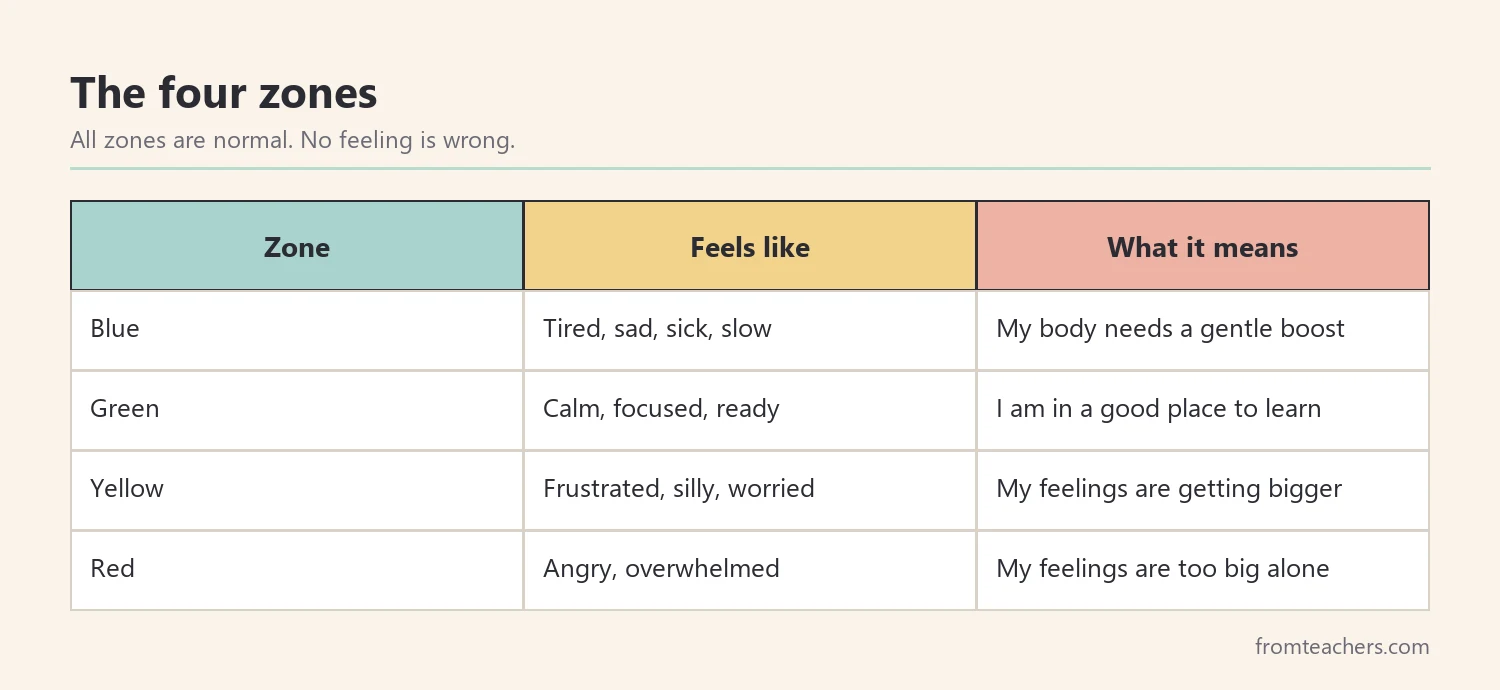
Also, explain what each zone means in practice. In the blue zone, your body needs a gentle boost. Green is the best zone for learning. In the yellow zone, your feelings are getting bigger and you need support. In the red zone, your feelings are too big to manage alone right now.
Consider Sofia, a fictional student in grade 2. Sofia often struggles after recess and lunch. She gets giggly and wiggly, then frustrated when she cannot focus. Her teacher, Mr. Dunn, decides to teach the zones and pair each one with a small set of zones of regulation tools she can actually use.
Next, connect the zones to body clues. Many children notice their body before they can name a feeling. A tight stomach, hot cheeks, heavy eyelids, or bouncy legs are all useful signals. Ask students, “Where do you feel yellow in your body?” and let them point or draw. Body clues make zones of regulation tools easier to use, because students can catch a feeling early, before it grows into the red zone.
Finally, keep the language consistent. Every adult who works with the student should use the same zone names and the same descriptions. Consistency helps students trust the vocabulary.
2. Teach that every zone is okay
This step is easy to skip, and skipping it causes problems. If students learn that green is “good” and red is “bad,” they may hide their feelings or feel ashamed. Therefore, teach clearly that all zones are normal and no feeling is wrong.
Next, explain the real goal. The aim is not to stay green all day. Excitement at a party is yellow, and that is fine. Feeling sad after losing a pet is blue, and that is fine too. What matters is knowing your zone and using the right tools when a zone gets in the way of what you need to do.
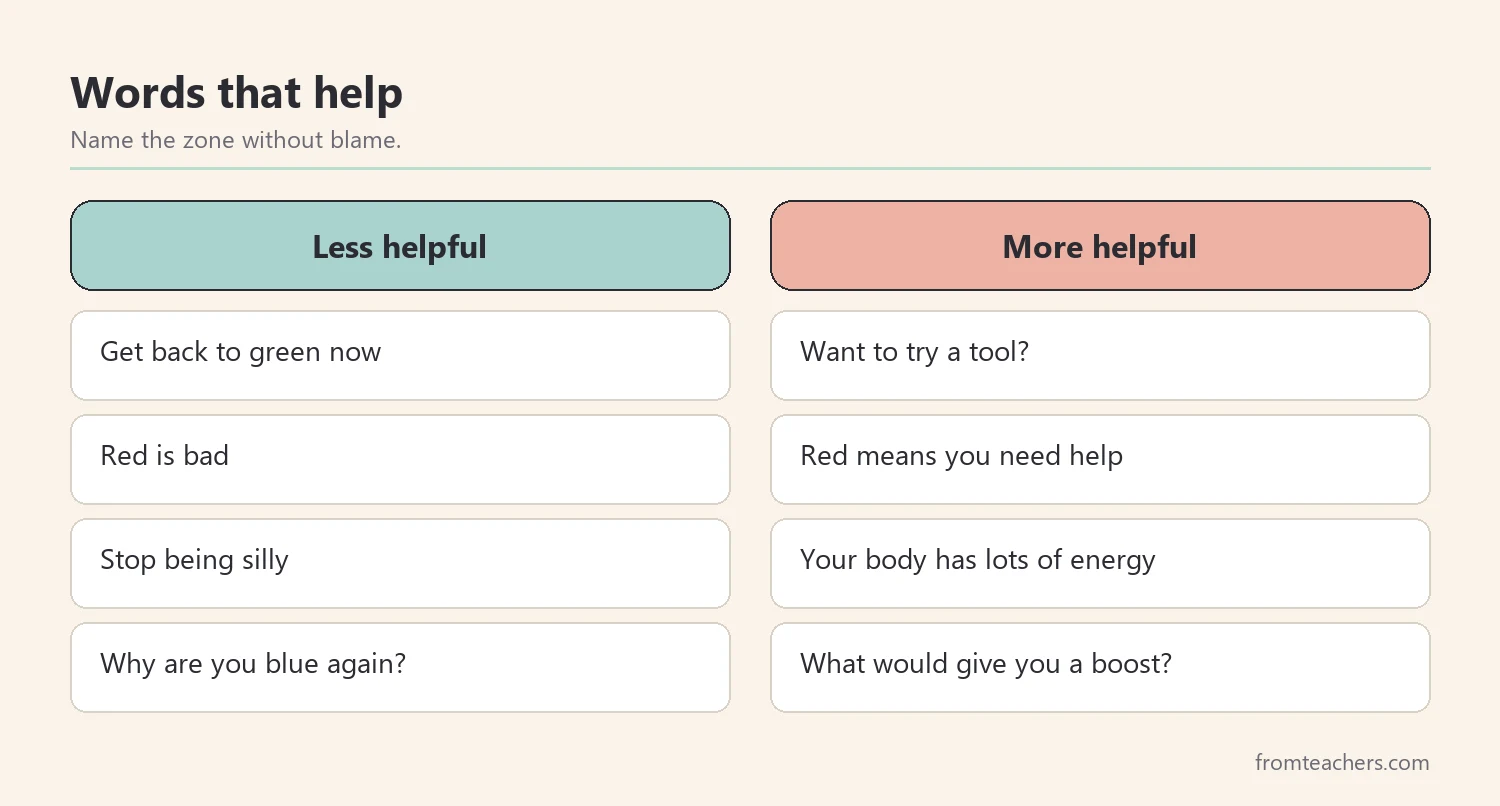
Also, watch your own words. “Get back to green” can sound like a demand. “I notice you might be in yellow. Want to try a tool?” sounds like support. The difference is small, but students hear it.
Moreover, model it yourself. Name your own zone out loud: “I’m feeling a bit yellow because the copier jammed. I’m going to take three deep breaths.” When students see adults use zones of regulation tools, they learn that regulation is a lifelong skill, not a punishment.
For Sofia, this step mattered a lot. She had started saying “I’m being bad” when she felt wiggly. Mr. Dunn gently corrected her: “You’re in yellow. That’s okay. Your body has lots of energy. Let’s find a tool.” Her shoulders relaxed when she heard it.
3. Match zones of regulation tools to each zone
Now comes the practical part. Each zone needs different kinds of tools, because the body is in a different state. A tool that wakes up a tired student would not help an overwhelmed one. So, teach tools zone by zone.
In the blue zone, tools give a gentle boost: take deep breaths, stretch or move your body, get a drink of water, talk to a trusted adult, or use a quiet, calming activity. Green zone tools keep things going: keep your routine, use your schedule or checklist, stay engaged, encourage yourself with “I can do this,” or help a friend.
In the yellow zone, tools help bring feelings down: take a break or use a calm corner, try a breathing tool, use a fidget or sensory item, ask for help or clarification, or try a grounding strategy such as 5-4-3-2-1. In the red zone, tools focus on safety: step away to a safe space, use strong body tools like wall pushes, ask an adult for help, use few words and slow breathing, and return to learning when ready.
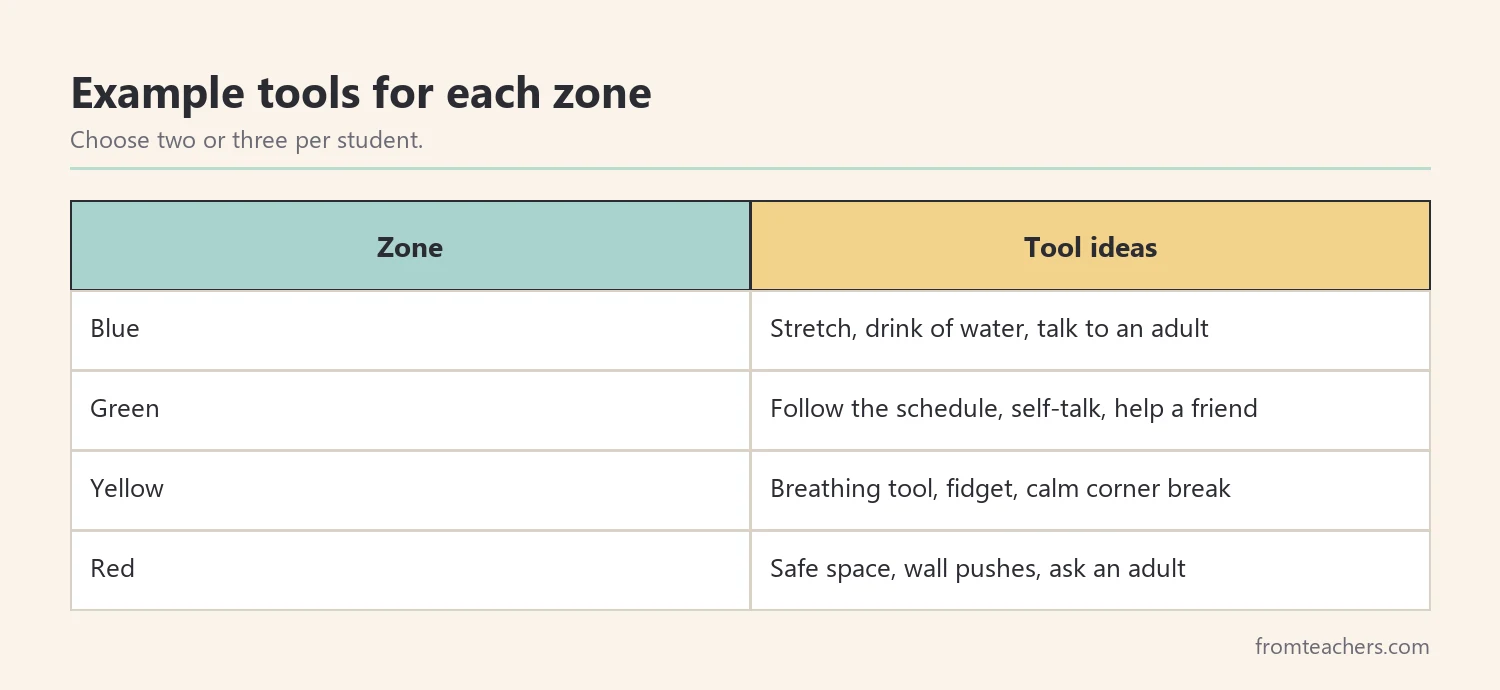
Next, keep the menu of zones of regulation tools short for each student. Five tools per zone is a lot for a young child in the moment. Pick two or three that work for the individual, and add more later.
Also, make the tools visible. A zones of regulation reminders poster with friendly animal characters and a clear tool list for each zone gives students a quick place to look when they are deciding what to do.
In addition, involve students in building their own menu. Show a few options, let students try each one during a calm moment, and ask which felt best. Students who pick their own zones of regulation tools tend to use them with less prompting. Some students also like a small personal card with their chosen tools, kept in a desk or pencil case, so they do not need to walk to a poster.
For Sofia, Mr. Dunn chose two yellow zone tools: a breathing tool and a stress ball. He also chose one red zone tool: going to the calm corner. That was the whole plan at first. Simple plans are easier to follow when feelings are big.
4. Practice check-ins with zones of regulation tools
Tools only help if students can reach for them in the moment. Therefore, practice when students are calm, so the steps feel familiar when they are not.
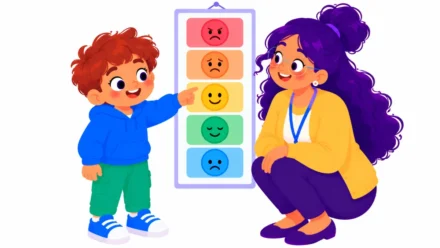
Start with daily check-ins. At the start of the day, after recess, and after lunch, ask students to name their zone. They can point to a chart, move a clip, or show a card. The check-in takes less than a minute, and it builds self-awareness over time.
Next, teach a simple four-step routine. First, check in with your body. Then, name your zone. Next, choose a tool. Finally, check again to see if the tool helped. If not, try another tool or ask for help.
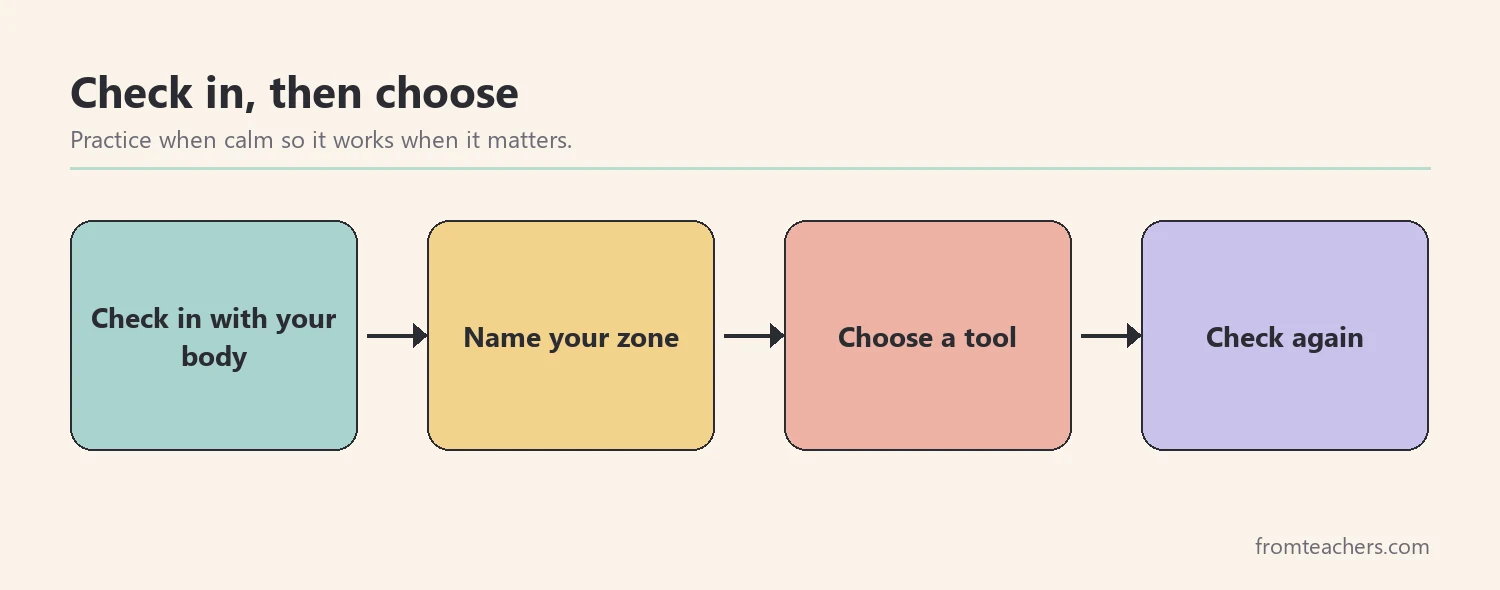
Then, rehearse each of the zones of regulation tools. Practice belly breathing together during morning meeting. Try a wall push during a movement break. Show students where the fidgets live and how to return them. Practice makes zones of regulation tools automatic.
For Sofia, the after-recess check-in became the key moment. She would point to yellow, take her stress ball, and do three slow breaths. Mr. Dunn set a quiet timer for two minutes. When it beeped, she checked again. Most days, she was ready to read.
Also, respect the red zone. A student in red cannot follow a four-step routine. Focus on safety, give space, and use few words. Teaching and reflection happen later, once the student is calm again.
5. Track what helps and adjust
Finally, gather a little information so you can improve the plan. Over a few weeks, notice which zones a student visits most, which tools they choose, and which ones actually help them return to learning.
Keep the record of zones of regulation tools simple. A quick note after each check-in is enough: the zone, the tool chosen, and whether it helped. You are not grading feelings. You are learning what works for this student.
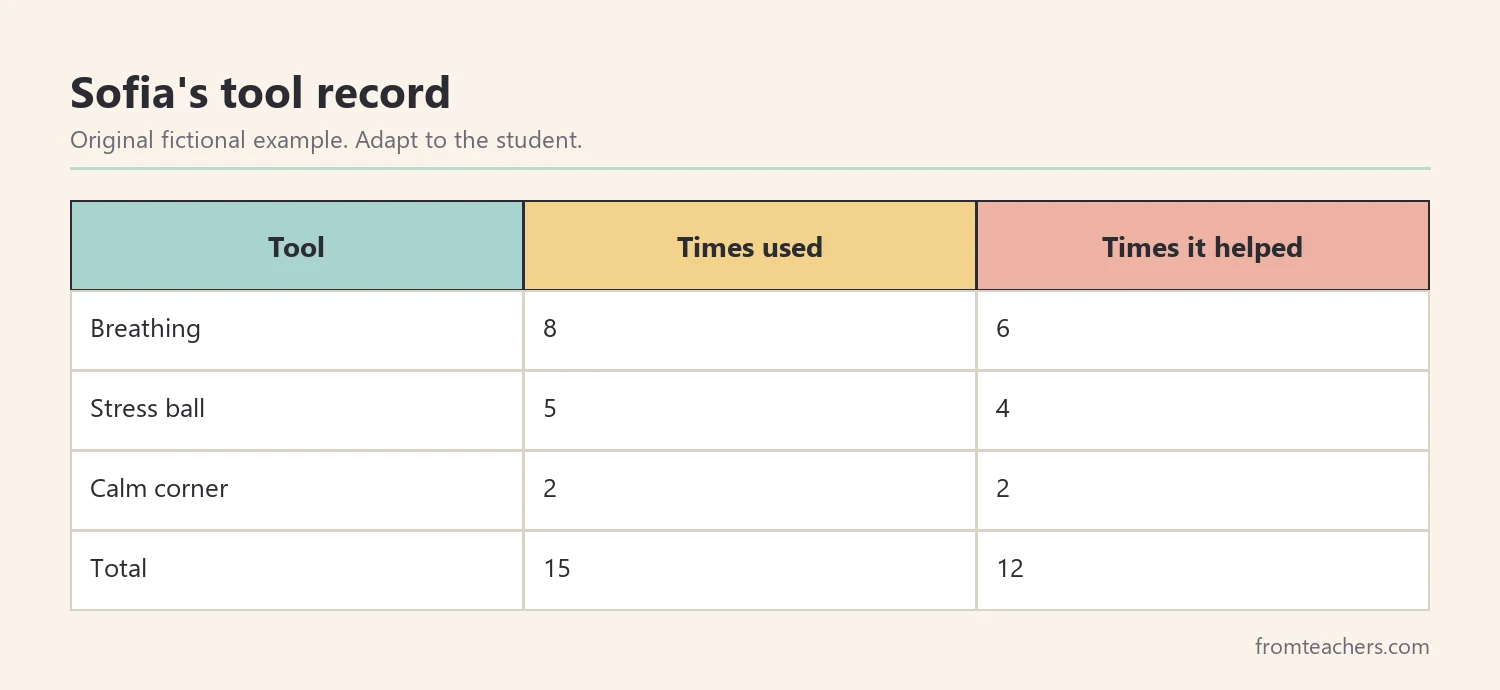
In Sofia’s fictional two-week record, she used breathing 8 times and it helped 6 times. The stress ball was used 5 times and helped 4 times. The calm corner was used 2 times and helped both times. In total, she used 15 tools, and 12 of those uses helped. That pattern told Mr. Dunn that breathing was her go-to, so he added a second breathing style to keep it fresh.
Next, share what you learn. Families can try the same zones of regulation tools at home, and specialists can build on what already works. When everyone uses the same zone words, students transfer skills more easily.
Also, look at timing. If a student lands in the yellow zone at the same time every day, the routine may need a change, such as a movement break before reading. Zones of regulation tools work best alongside a well-planned day, not as a fix for a schedule that does not fit the student.
Moreover, revisit the plan regularly. Students grow, and their needs change. A tool that worked in October may feel babyish by March. Ask the student what they want to try next, and update the menu together.
Common mistakes and how to avoid them
- Treating green as good and red as bad. Students hide feelings. Fix: teach that all zones are normal.
- Using zones as a behavior chart. Zones become punishment. Fix: use zones for self-awareness, not consequences.
- Offering too many tools. Students freeze when choosing. Fix: start with two or three per zone.
- Teaching tools only during meltdowns. Skills never stick. Fix: practice when students are calm.
- Not checking if a tool helped. Ineffective tools stay in the plan. Fix: add a quick “check again” step.
Questions teachers and parents ask about zones of regulation tools
What age is this approach best for?
The zones are often used in early elementary, but the idea works across ages. Older students may prefer simpler visuals and more say in choosing their own tools.
Is the yellow zone a warning sign?
Not always. Yellow includes excitement and silliness, which are fine in many settings. It becomes a cue for a tool only when big feelings get in the way of what the student needs to do.
How do I choose zones of regulation tools for one student?
Observe what the student already does to calm down, ask them what helps, and try a few options. Keep the ones that work and drop the rest. An occupational therapist or counselor can also help.
Can the zones be used at home?
Yes. Families can use the same color words and a few home tools, such as a quiet corner, a drink of water, or a short walk. Shared language helps students practice everywhere.
How long before students use zones of regulation tools on their own?
It varies. Some students start choosing a tool within a few weeks, while others need prompts for months. Watch for small steps, such as naming the zone without help.
Does this replace a behavior plan or therapy?
No. It is a teaching framework for self-regulation. Students with ongoing needs may also require individual plans, counseling, or therapy from qualified professionals.
Related reading: Understanding Autism ADHD Meltdowns: Signs and Support Strategies, Managing Sensory Overload: Practical Strategies for Autism and ADHD, and ADHD in Children: A Guide to Effective Classroom and Home Support.
A companion resource for zones of regulation tools:
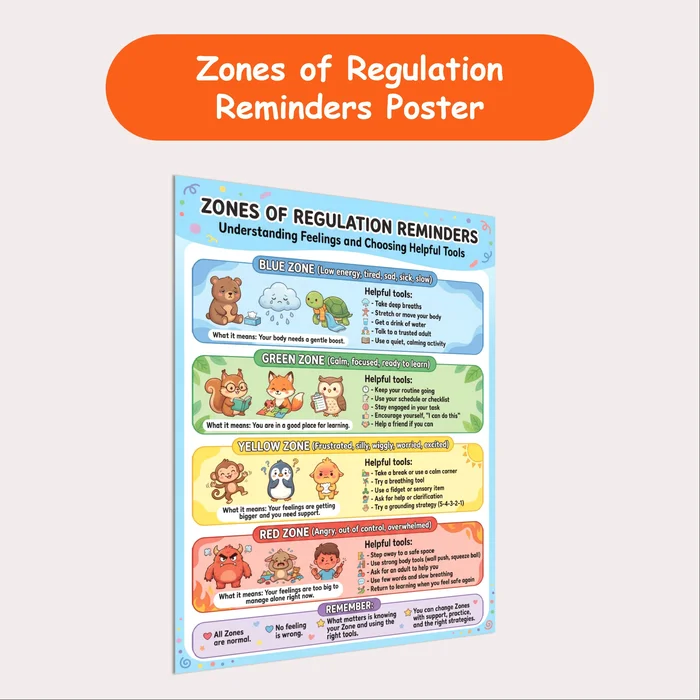
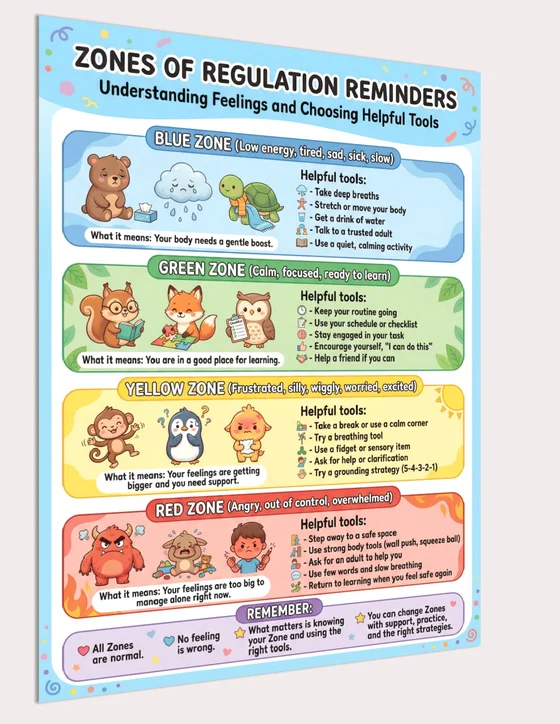
Zones of Regulation Reminders Poster: a zones of regulation style poster that helps students understand their feelings and choose helpful tools in four color zones, with friendly animal characters and clear tool lists.
Sources and scope
- The Zones of Regulation: the official home of the framework created by Leah Kuypers.
- CASEL: a framework for social and emotional learning, including self-management.
- American Occupational Therapy Association: information on occupational therapy and self-regulation in children.
- Understood.org: family-friendly information on emotions, focus, and learning differences.
This guide covers everyday classroom and home use of zone-based self-regulation tools. It is not an official curriculum and does not replace therapy, counseling, or the decisions of the student’s support team.
Key takeaways
- Four zones give students simple words for energy and feelings.
- Every zone is normal, so never use zones as punishment.
- Match two or three zones of regulation tools to each zone.
- Practice check-ins daily and rehearse tools when calm.
- Track which tools help, then adjust with the student.






Leave a Comment