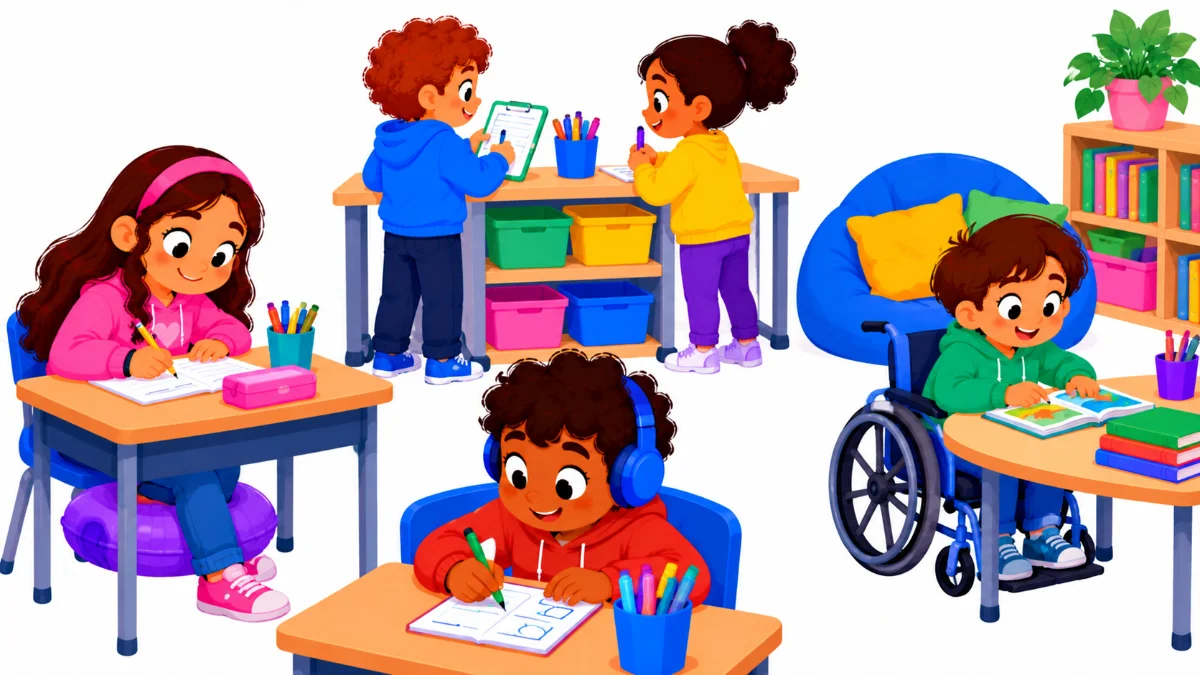

Choosing flexible seating options for an inclusive classroom is less about trendy furniture and more about giving every student a place where they can focus, move safely, and belong. Picture a grade 2 classroom during reading. Noah, who has ADHD, is rocking his chair onto two legs for the fourth time, a classmate who uses a wheelchair cannot reach the reading corner because beanbags block the path, and the teacher wonders whether the new seating plan is helping anyone.
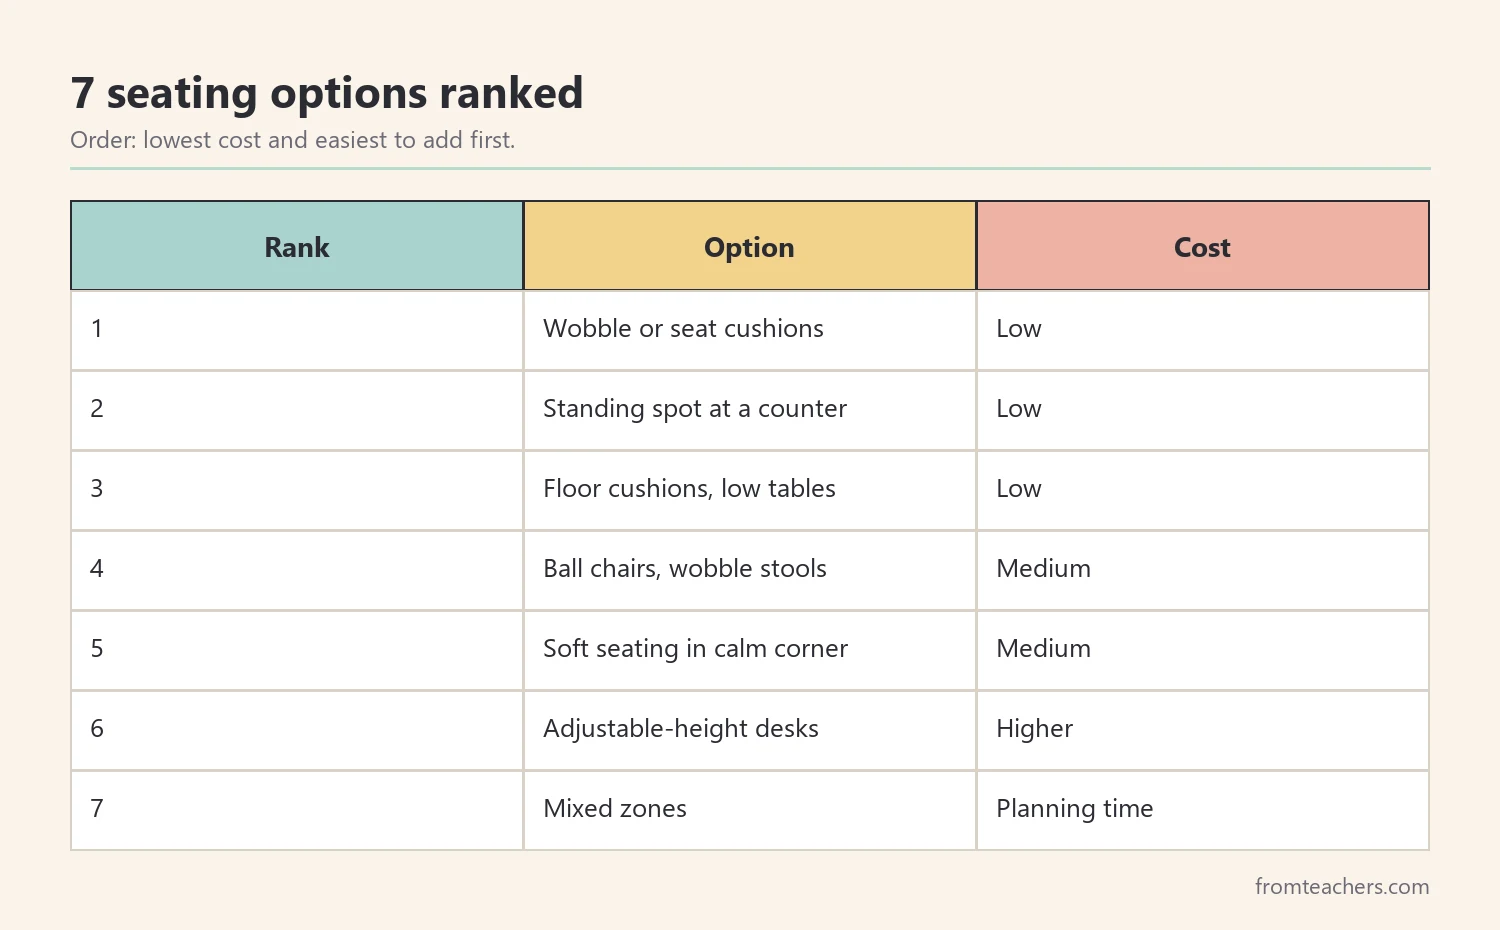
This list ranks seven seating options by how cheaply and easily they can be added to an existing room. By the end, you will know what each option is good for, the accessibility questions to ask, how to teach routines so seating does not become chaos, and how to check whether it actually helps students focus.
Examples are fictional. Adapt to students’ goals, agreed supports, and any advice from occupational or physical therapists. This is guidance, not a diagnosis.
At a glance
- Start small: cushions, a standing spot and a calm corner.
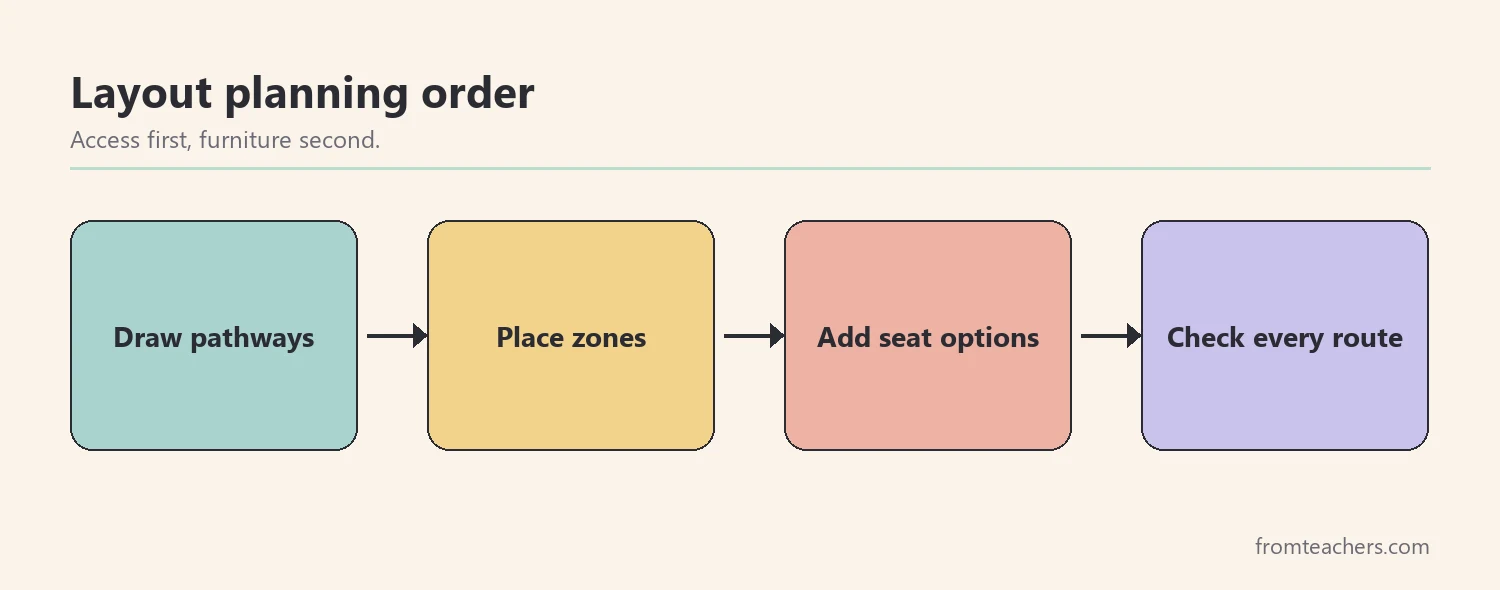
- Plan pathways first so every seat is reachable.
- Never make floor seating the only option at a station.
- Teach routines for choosing and using seats.
- Check simple focus measures to see what helps each student.
How we ranked these flexible seating options
We did not rank options by how much they improve focus, because evidence and student responses vary. Instead, we used two practical criteria: approximate cost and how easily the option fits into a room without a full redesign. Options near the top, like cushions, are low cost and portable. Options lower down, like adjustable desks, need more budget and planning.
In addition, every option is checked against one rule: it must not block access. Flexible seating that narrows pathways or leaves out wheelchair users is not inclusive, however attractive it looks.
The ready-made option: an inclusive classroom design guide
Seating is one part of a bigger design picture. The inclusive classroom design guide with UDL and flexible seating is a 53-page comic-style guide. It covers what inclusion really means, physical space and layout, the visual environment and displays, flexible seating and movement, Universal Design for Learning, and building belonging through classroom culture.
It also shows before and after comparisons, such as retrofitted accessibility versus designing for inclusion from the start, which helps when you plan a new layout.
1. Wobble cushions and seat cushions
What it is: an inflatable or foam cushion placed on a regular chair.
Good for: students who seek small movements while seated.
Accessibility check: it fits on existing chairs and does not change the room layout.
Example: Noah tried a wobble cushion during reading. The rocking stopped on most days, and he stayed at his desk longer.
2. Standing spots at a counter or high table
What it is: a counter, shelf, or raised table where students can work standing.
Good for: students who focus better standing or need a change of position.
Accessibility check: make sure standing spots do not block pathways, and that there is also a seated option at the same activity.
Example: The class used a counter by the window as a standing station during math centers.
3. Floor seating with cushions or low tables
What it is: cushions, mats, or clipboards with low tables for floor work.
Good for: reading time, small group work, and students who prefer low seating.
Accessibility check: floor seating should never be the only option at a station. Students who use wheelchairs or have difficulty getting up need an equal choice at the same table.
Example: The reading corner kept cushions, but the teacher added a low table at wheelchair height so every student could join.
4. Stability ball chairs or wobble stools
What it is: a ball chair with a base, or a stool that tilts slightly.
Good for: students who need more active sitting.
Accessibility check: check safety and stability, and ask an occupational therapist if a student has balance or motor needs.
Example: Two wobble stools were added for independent work. Students signed up for them in rotation, and the teacher checked that feet stayed flat on the floor for safety. Within a week, the sign-up sheet ran smoothly without adult help.
5. Soft seating in a calm corner
What it is: a beanbag, soft chair, or rug in a quiet area.
Good for: reading, calming down, and students who need a lower-stimulation space.
Accessibility check: keep the corner reachable for all students, with clear space around it.
Example: The calm corner moved away from the doorway, and the path to it was kept clear.
6. Adjustable-height desks and tables
What it is: desks or tables whose height can change.
Good for: students of different sizes, wheelchair users, and those who alternate between sitting and standing.
Accessibility check: confirm there is knee clearance and space to approach for wheelchair users.
Example: One adjustable table became a shared station, set at a height that worked for the student using a wheelchair and for standing classmates.
7. Mixed zones across the room
What it is: organizing the room into zones, such as quiet work, collaboration, and movement, each with suitable seating.
Good for: classes with a wide range of needs, where one seat type cannot suit everyone.
Accessibility check: plan pathways first, then furniture. Every zone should be reachable.
Example: The teacher sketched the room with pathways drawn in first, then placed zones. Movement around the room became calmer, and fewer students bumped into furniture during transitions. The sketch also made it easy to explain the layout to a substitute.
Teaching routines for flexible seating options
Flexible seating works best with clear expectations. Without them, choice can become arguments about the “best” seat.
First, teach how to use each seat, with examples and non-examples. Next, set a simple choice system, such as a rotation chart or “choose and stay for the whole task.” Then, explain that the teacher may suggest a different seat if one is not helping, without it being a punishment.
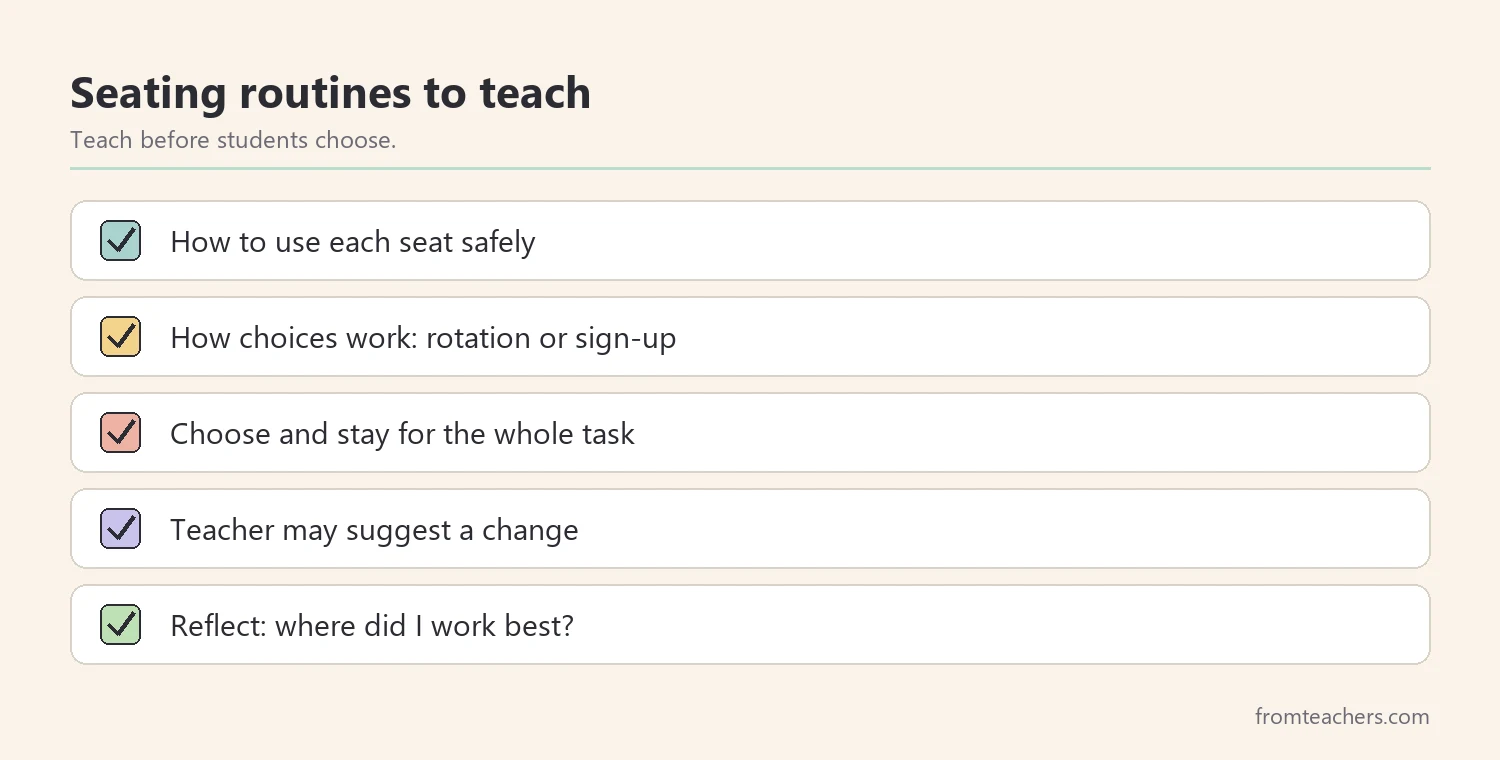
Also, involve students in reflection. A quick question such as “Where did you do your best work today?” helps students learn what works for them.
In addition, keep one standard desk available for every student who wants it. Some students prefer a regular chair and a predictable spot, and that is a valid choice. Autistic students in particular may find constant seat changes stressful, so assigned or consistent seating can itself be an accommodation.
Checking whether seating helps focus
Seating is a tool, so check whether it works. Track a few simple measures, such as minutes on task during a set activity or number of reminders, comparing different seats.
Here is how Noah’s teacher compared his reading time across seats over three weeks.
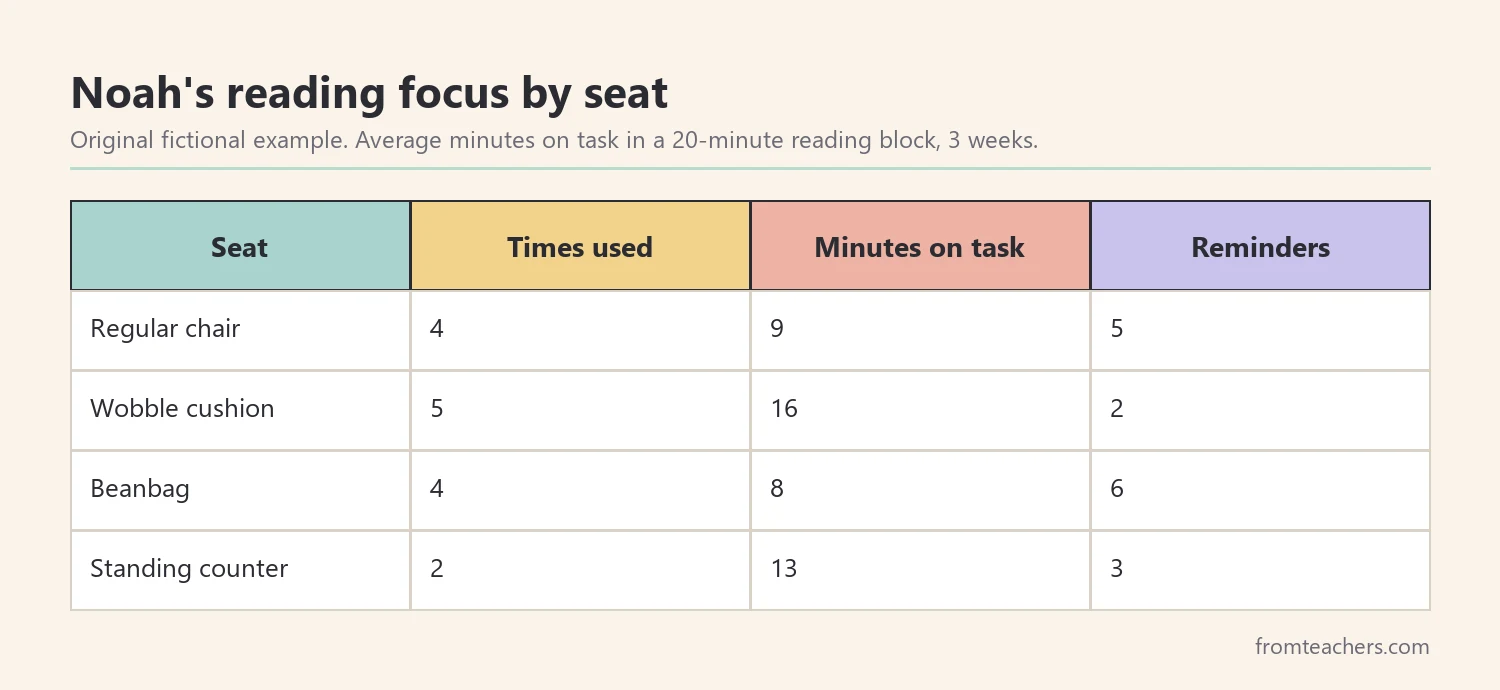
The pattern was useful. Noah did best on the wobble cushion at his own desk, not on the beanbag he chose most often. As a result, the teacher and Noah agreed he would use the cushion for reading and the beanbag for free choice time.
Introducing new seats in the first weeks
New furniture is exciting, which is exactly why it needs a slow start. Introduce one option at a time, ideally over two or three weeks, so students learn the expectations before the next choice appears.
During week one, for example, demonstrate the wobble cushion, let small groups try it, and practice returning it to its place. In week two, add the standing counter with the same routine. By the time all options are available, students already know how each one works.
In addition, think about sensory needs. Some students find certain textures, sounds, or movement uncomfortable, while others seek them out. A squeaky stool or a crinkly beanbag can bother a student nearby. Placing active seating away from students who are sensitive to noise and movement helps everyone.
Also, talk with families. Many parents are curious when children mention bouncing on a ball at school. A short note explaining the purpose, the routines, and that a regular desk is always available can prevent misunderstandings.
Finally, keep notes on what students actually use. After a month, you may find that one option is rarely chosen while another is always in demand. Those notes are the best guide for future purchases.
Planning on a budget
Flexible seating does not require a full furniture order. Many teachers start with a few cushions, one standing spot, and a calm corner, then add more as they learn what students use.
For example, a realistic first step might be four cushions, one counter cleared for standing work, and a rug with two soft seats in a quiet corner. Many of these items can be borrowed from other rooms, donated by families, or moved from storage before anything new is bought.
Moreover, check with your school before buying. Some furniture has safety requirements, and some districts have approved suppliers. Occupational or physical therapists can advise on options for individual students.
Finally, remember that seating is only part of inclusive design. Lighting, noise, visual clutter, and clear routines matter just as much for many learners. Small changes in several areas often help more than one expensive item.
Common mistakes and how to avoid them
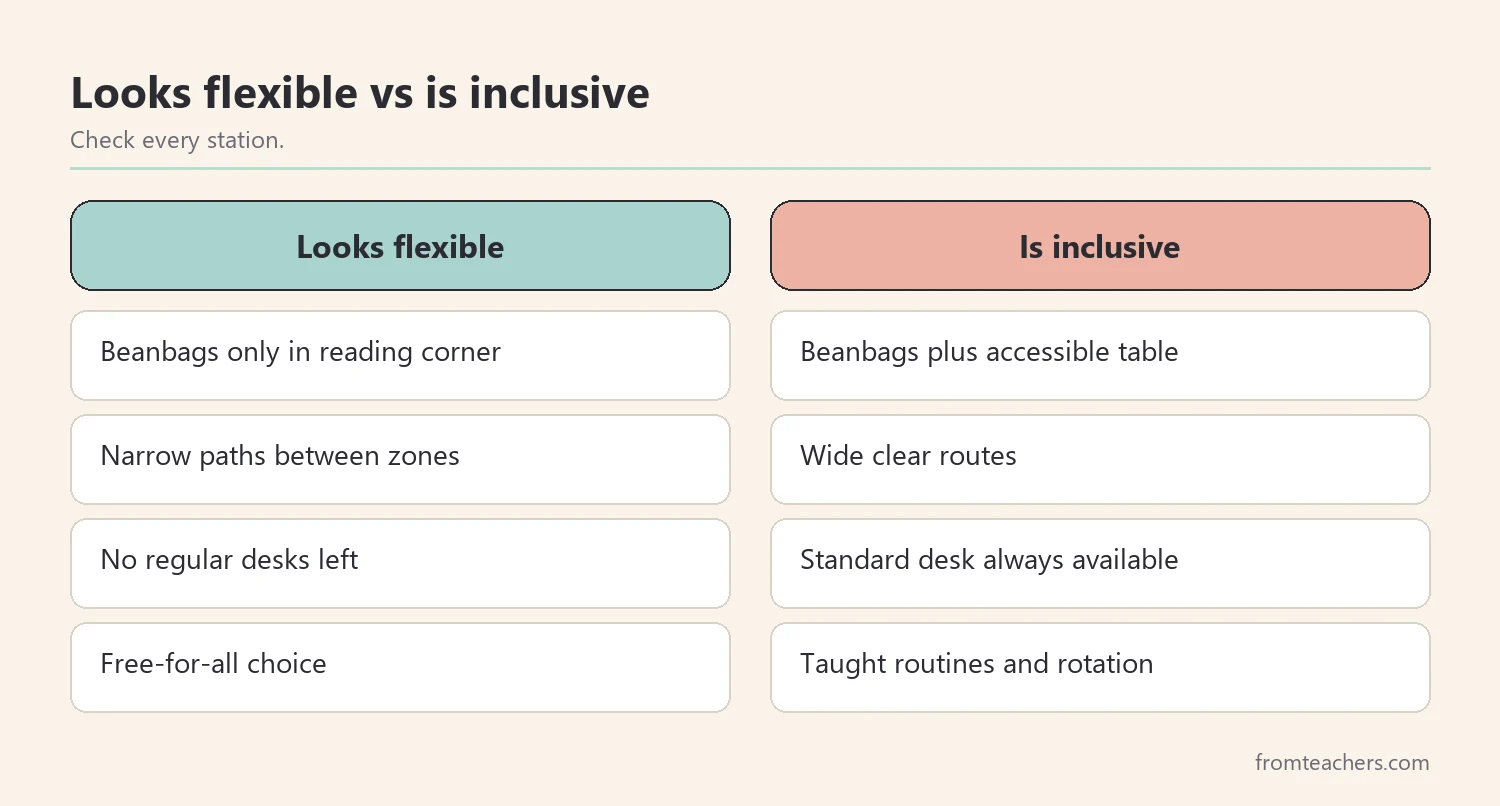
- Blocking pathways. Fix: plan routes first, then place furniture.
- Floor seating as the only option. Fix: offer an equal seated choice at every station.
- No routines. Fix: teach how to use each seat and how choices work.
- Removing regular desks. Fix: keep a standard option for students who need predictability.
- Assuming it works. Fix: compare simple measures across seats.
Questions teachers ask about flexible seating options
Is flexible seating suitable for older students?
Yes. Middle and high school classrooms often use standing tables, cushions, and collaborative zones, with expectations adjusted for age.
How do I stop arguments over seats?
Use a rotation system or sign-up chart, and teach that every seat is a tool for learning, not a prize.
Does flexible seating help students with ADHD?
Some students with ADHD report that movement-friendly seating helps them focus, while others find it distracting. Try options and check simple data for each student.
What about students who need consistency?
Offer a consistent assigned seat as one of the options. Flexibility includes the choice to stay in one place.
Who should I consult about specific needs?
Occupational and physical therapists can advise on seating for motor, balance, or sensory needs. Include them in planning when relevant.
Related reading: Managing Sensory Overload, Bridging Gaps in Special Education, and Effective ADHD Classroom Strategies.
You may also need: Special Education Classroom Setup Guide for Teachers & Autism Support.
A companion resource for flexible seating options:
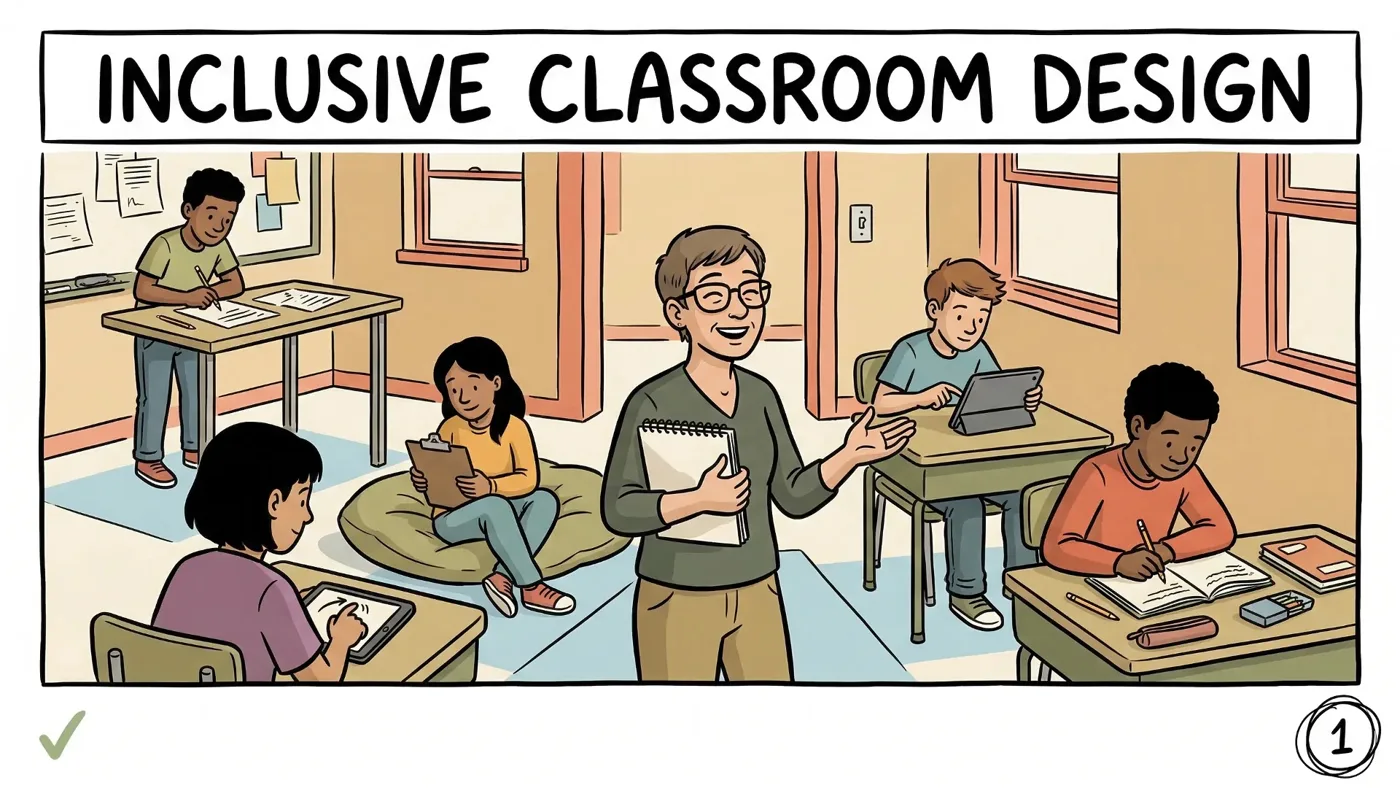
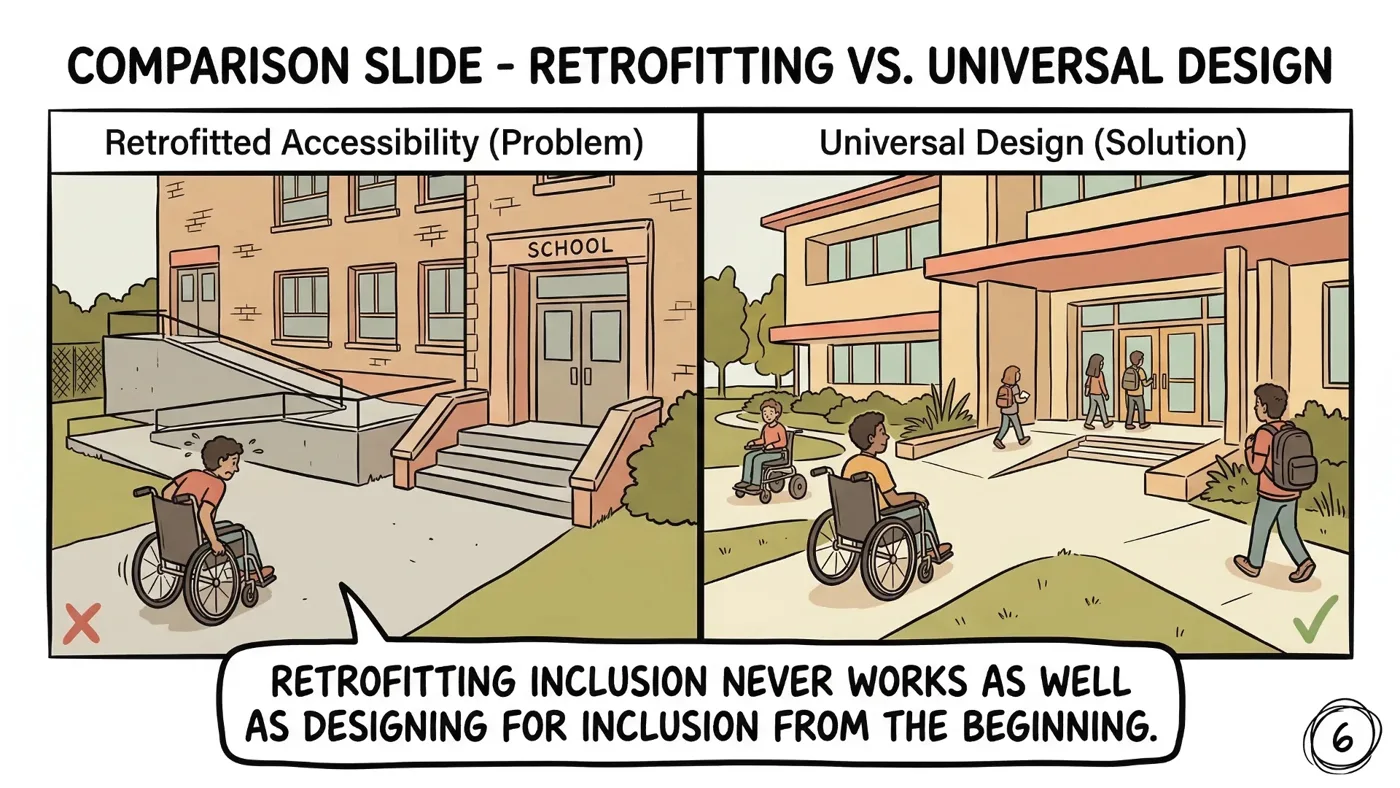
Inclusive Classroom Design Guide: UDL & Flexible Seating: a 53-page comic-style guide covering what inclusion means, physical space and layout, the visual environment, flexible seating and movement, Universal Design for Learning, and building belonging, with before and after comparisons.
Sources and scope
- CAST UDL Guidelines: a framework for designing flexible learning environments.
- American Occupational Therapy Association: information about occupational therapy, including school-based practice.
- Understood.org: articles on classroom supports for students with ADHD and learning differences.
- CHADD: information on ADHD for educators and families.
This list covers classroom seating choices and routines for inclusive classrooms. It does not replace individual recommendations from occupational or physical therapists, or school safety requirements for furniture.
Key takeaways
- Start with low-cost flexible seating options like cushions and a standing spot.
- Plan pathways first so every seat is reachable for every student.
- Teach routines for choosing and using seats.
- Keep a regular desk available for students who need consistency.
- Compare simple focus measures to see which seats help each student.









Leave a Comment