

Supporting non-speaking students in crisis starts with a hard truth: when a student is overwhelmed, the usual tools of talking, explaining, and asking questions often make things worse. Picture a student who drops to the floor during a fire drill, covers her ears, and cannot use her communication device. The adults around her want to help, yet every new instruction adds to the overload.
By the end of this guide, you will be able to spot early signs, lower demands, respond with calm and minimal language, keep everyone safe, and support recovery afterward. Each step is practical and built for real school moments.
Examples are fictional. Adapt to the student’s goals and agreed supports. This is guidance, not a diagnosis. Always follow your school’s crisis and safety plan.
At a glance
- Learn each student’s early signs of distress before a crisis happens.
- In a crisis, reduce demands, words, and sensory input first.
- Use one calm adult, a short script, and visual or gesture cues.
- Keep the student and others safe, following the school’s agreed plan.
- After the crisis, offer quiet recovery time before any reflection or teaching.
1. Know the student’s early signs
Crisis rarely starts out of nowhere. Usually, there is a build-up, and non-speaking students often show it through their body rather than words. Knowing those signs gives you time to act early.
First, gather information from the family, past staff, and any behavior or communication plan. Ask what the student does when they are starting to feel overwhelmed. Common examples include pacing, humming, covering ears, rocking faster, or pushing materials away.
Next, note the triggers that tend to come before these signs. Loud noises, crowded spaces, unexpected changes, and long waits are frequent ones. However, every student is different, so record what you actually observe.
Consider Maya, a fictional grade 5 student who uses a tablet with picture symbols. Her team notices that before a crisis, Maya hums loudly, then rubs her hands together, then covers her ears. Loud transitions, such as assemblies and fire drills, are her most common triggers.
| Stage | What Maya does | What adults do |
|---|---|---|
| Early | Hums loudly | Offer break card |
| Rising | Rubs hands, looks for exit | Lower noise, fewer words |
| Crisis | Covers ears, drops to floor | One adult, safe space |
| Recovery | Quiet, tired | Quiet company, no demands |
In addition, notice what helps when the early signs appear. Maybe the student calms with a short walk, a favorite object, or simply more space. These details matter as much as the triggers, because they tell adults what to offer first.
Finally, keep this profile short and share it with every adult who works with the student. A substitute who knows the first sign can prevent a long crisis.
2. Lower demands and sensory input for non-speaking students in crisis
When a student is in crisis, their capacity to process language and directions drops. Therefore, the first move is to take things away rather than add them. Reduce noise, light, people, and requests.
To start, pause the task. A worksheet, a question, or a reminder about rules can all feel like more pressure. Instead, remove the demand quietly, without a lecture.
Then reduce sensory input. Dim the lights if possible, turn off music, and move other students away calmly. If the student uses noise-reducing headphones or another agreed sensory tool, then place it within reach rather than putting it on them.
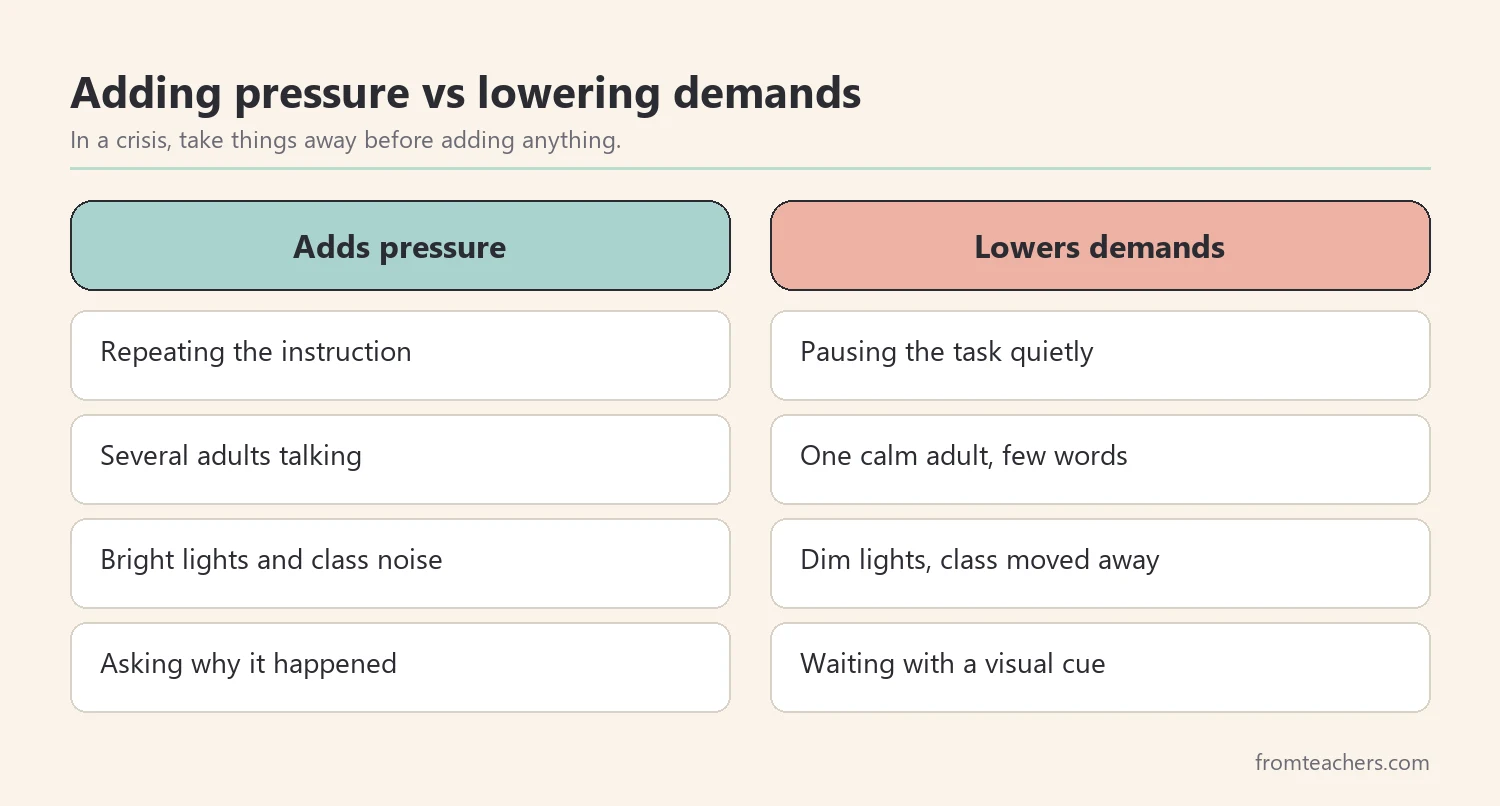
For Maya, the team agrees on a short plan. When she starts humming loudly, an adult offers her break card. If she reaches the crisis stage, the adult turns off the lights near her, asks other students to line up at the door with a second adult, and stays nearby without talking.
Also think about the timing of your support. The earlier you lower demands, the less intense the moment tends to become. Waiting until the student is on the floor leaves fewer options for everyone.
Importantly, lowering demands is not giving in. It is giving the student’s nervous system a chance to settle. Teaching and expectations come back later, when the student is ready to learn.
3. Respond with one calm adult and minimal language
During a crisis, many voices can feel like noise. As a result, it helps to agree in advance that one adult leads and others support quietly. The lead adult uses very few words and a calm, low voice.
To prepare, write a short script with three or four phrases. For example: “You are safe.” “I am here.” “Break.” Use the same phrases every time, so they become familiar. Meanwhile, keep your body relaxed, stay at the student’s level or lower, and give plenty of space.
Next, add visual and gesture cues. A break card, a picture of the calm space, or a simple sign can carry meaning without asking the student to process speech. Hold the card where the student can see it, then wait.
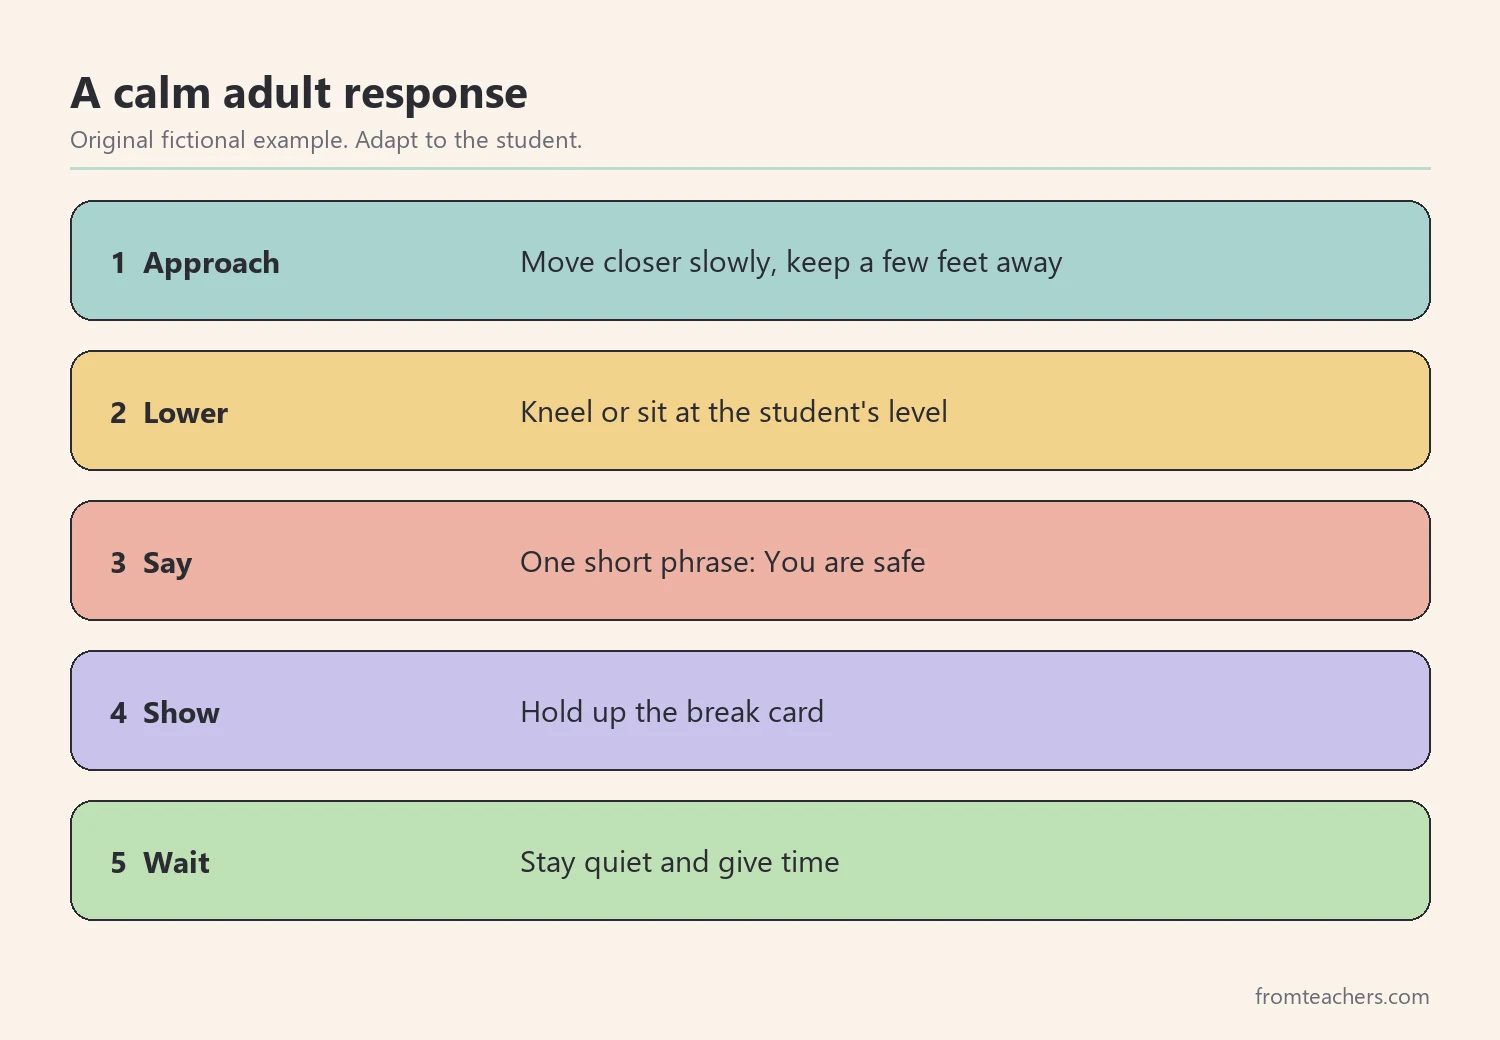
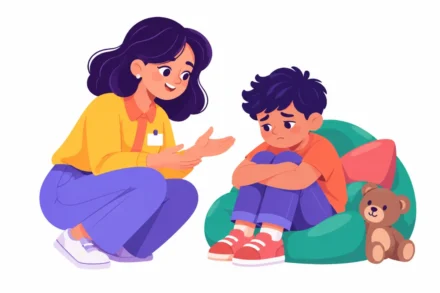
For Maya, the lead adult kneels a few feet away, says “You are safe” once, and holds up the break card. Then the adult waits quietly. After a few minutes, Maya touches the card, and the adult walks slowly with her to the calm corner.
4. Keep everyone safe with a shared plan
Safety comes first for the student, classmates, and staff. Every school has its own crisis and safety procedures, and those always guide what you do. This step is about the calm, everyday actions that support that plan.
First, clear the area rather than moving the student, when that is safer. Lead other students out with a second adult and a simple routine, such as a quiet line to the library. This protects classmates and reduces the audience for the student in crisis.
Then remove objects that could cause harm, if you can do so calmly. Keep your distance, keep exits clear, and avoid blocking the student in. Some students try to leave the room, so the team should agree in advance on how to respond to elopement.
Planning ahead makes these moments steadier. The printable toolkit for supporting non-speaking students in crisis includes guidance for full crisis, elopement, and physical aggression, using scripted, minimal language that staff can practice together.
In Maya’s case, the second adult leads the class to the hallway with a hand signal they practiced earlier. The lead adult stays near Maya, keeps the door open, and moves a pair of scissors off the nearby table. Within a few minutes, the room is quieter and safer.
Likewise, think about classmates. They may feel worried or curious. A short, kind explanation later, such as “Maya needed a quiet break, and she is okay now,” protects her dignity and reassures the group without sharing private details.
Afterward, record what happened using your school’s incident process. Short, factual notes help the team see patterns later.
5. Support quiet recovery after the crisis
After a crisis, many students feel tired, embarrassed, or still on edge. Therefore, recovery needs its own plan. This is not the time for questions, consequences, or a long talk about what went wrong.
To begin, offer quiet companionship. Sit nearby, stay calm, and let the student rest. Offer water or a preferred calming item if the plan includes one.
Next, return to routine slowly. A familiar, easy task is better than jumping back into the hardest work of the day. Use visuals to show what comes next, such as “rest, then drawing, then lunch.”
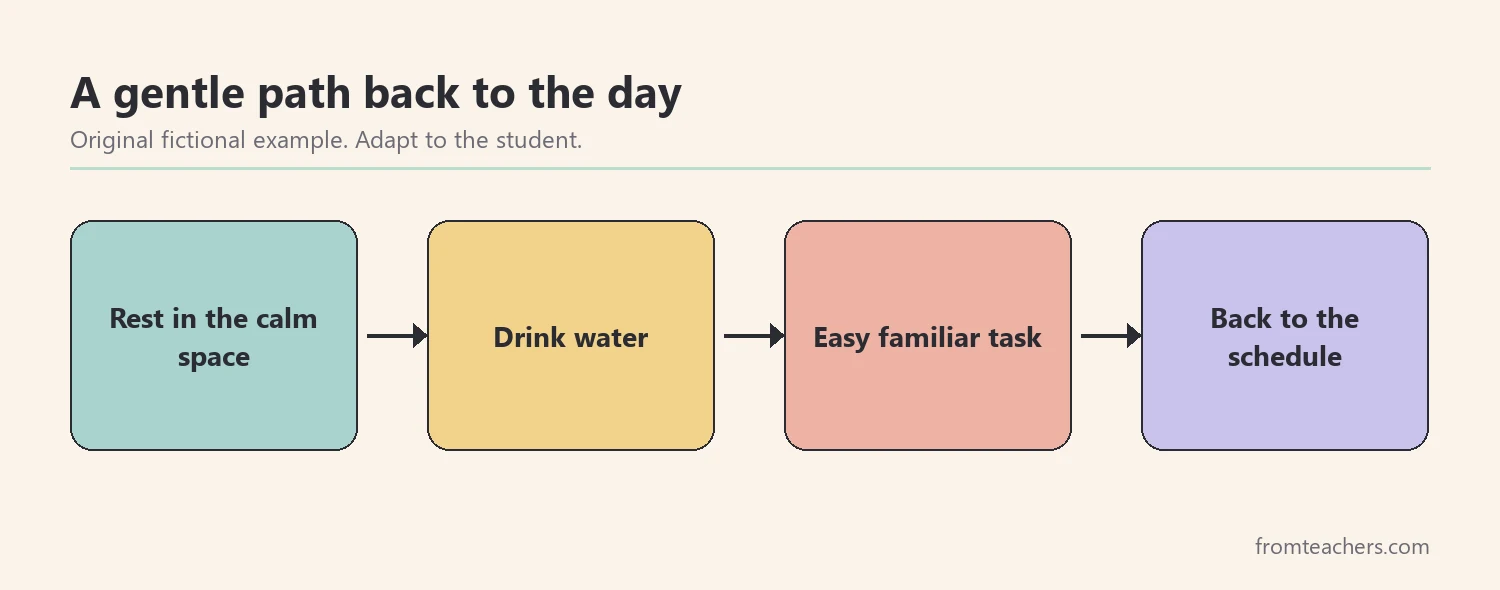
For Maya, recovery means 10 minutes in the calm corner with her weighted lap pad and a quiet adult nearby. Then she chooses a drawing task from two picture options. Only after lunch does the team use her tablet to ask a simple question about how she feels.
Meanwhile, look after the adults too. A crisis can be stressful for staff, and a calm adult is one of the most helpful supports a student can have. A short check-in with a colleague, or a few minutes of quiet before returning to the class, helps adults stay steady for the rest of the day.
Some students withdraw or hide after a crisis. If that happens, then keep the space safe, stay close but not too close, and wait. Connection comes back more easily when the student does not feel pushed.
6. Review the plan and prevent the next crisis
Once everyone is calm, the team can look back and plan. The goal is not to blame anyone but to reduce how often crises happen and how long they last. Prevention is where most progress comes from.
First, look at your notes. What came right before the crisis? Which early signs appeared, and how did adults respond? Often, small patterns appear, like crises clustering on assembly days.
Then choose one or two changes. For example, you might prepare the student for loud events with a visual story, offer headphones in advance, or schedule a movement break before a known trigger. In addition, teach the student a way to ask for a break with their communication system when they are calm.
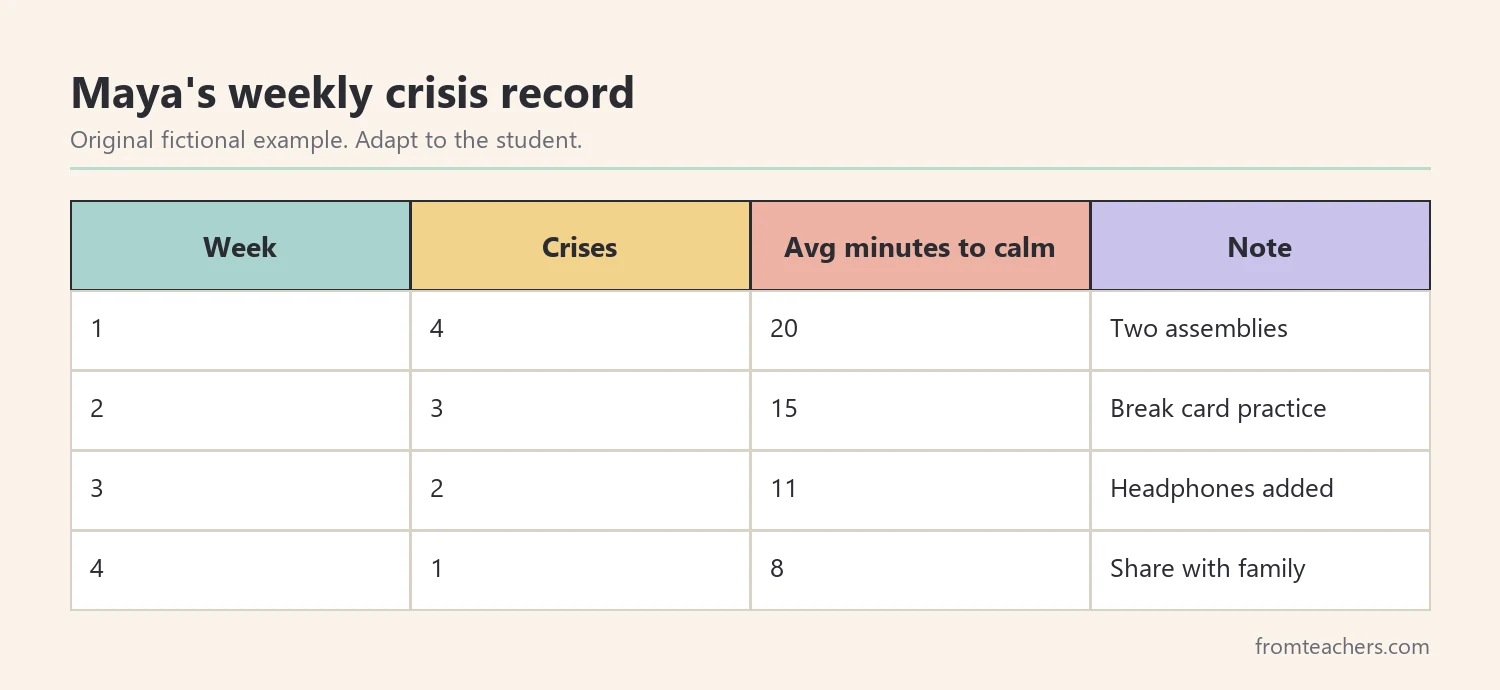
Maya’s team tracks two numbers each week: how many crises happened and the average minutes until she was calm. In this fictional example, crises drop from 4 in week 1 to 1 in week 4, and minutes to calm drop from 20 to 8. After adding headphones before assemblies, the team also notices Maya using her break card more often.
Beyond the numbers, ask the adults involved how the response felt. Did everyone know their role? Was the script easy to remember under pressure? Short practice sessions, done when no student is in crisis, help staff respond calmly when it counts.
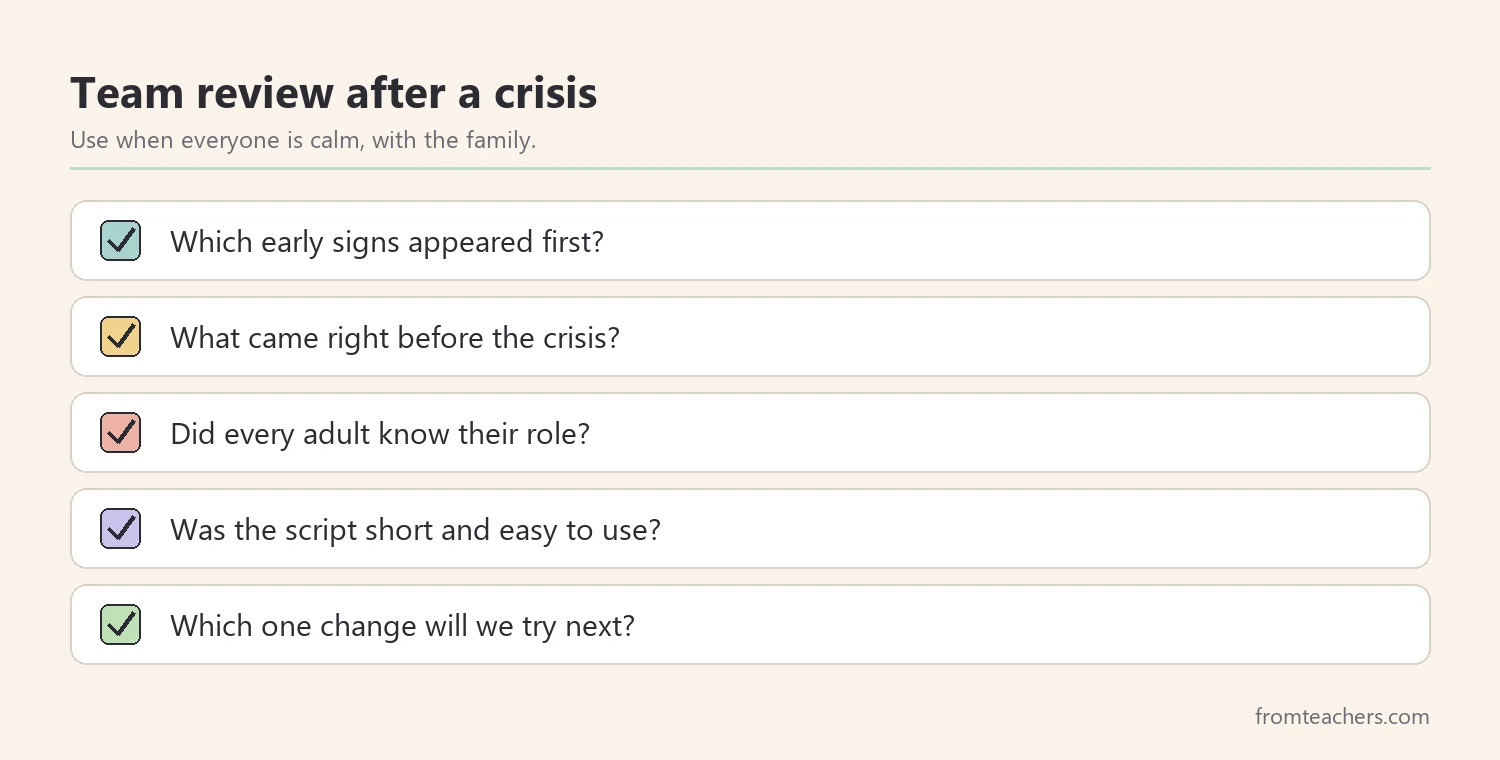
Similarly, keep the student’s own voice in the review. When Maya is calm, her team uses her tablet to show two pictures, “too loud” and “too long,” and lets her point to what was hard. Her answer helps the team choose the next change.
Finally, share the review with the family. Ask what helps at home, and agree on one next step together.
Common mistakes and how to avoid them
- Talking too much. Fix: use a short, practiced script and wait.
- Too many adults responding. Fix: agree on one lead adult and give others quiet support roles.
- Insisting the student use their device mid-crisis. Fix: offer simple visuals and save communication practice for calm times.
- Jumping to consequences. Fix: focus on recovery first, then plan prevention as a team.
- No written plan. Fix: write early signs, scripts, and roles on one page and share it.
Questions teachers and parents ask about non-speaking students in crisis
Should I ask the student to use their AAC device during a crisis?
Usually not. During a crisis, the student may not be able to use complex communication. Keep the device nearby, offer simple visuals, and practice requesting breaks during calm times.
Is lowering demands the same as rewarding behavior?
No. Lowering demands helps the student regulate so they can return to learning. Expectations and teaching come back once the student is calm.
How long should recovery take?
It varies by student and by event. Watch the student’s body and follow the recovery steps in the plan rather than a fixed clock.
What if the student tries to leave the room?
Follow your school’s safety procedures for elopement. Plan this in advance with the team so every adult knows their role.
How can families help?
Families can share early signs, calming items, and words or signs used at home. Using the same supports in both places helps the student feel safer.
Related reading: Meltdowns vs Tantrums: A Guide to Understanding and Responding, Managing Sensory Overload: Practical Strategies for Autism and ADHD, and Understanding Autistic Burnout and School Exhaustion.
A companion resource for non-speaking students in crisis:
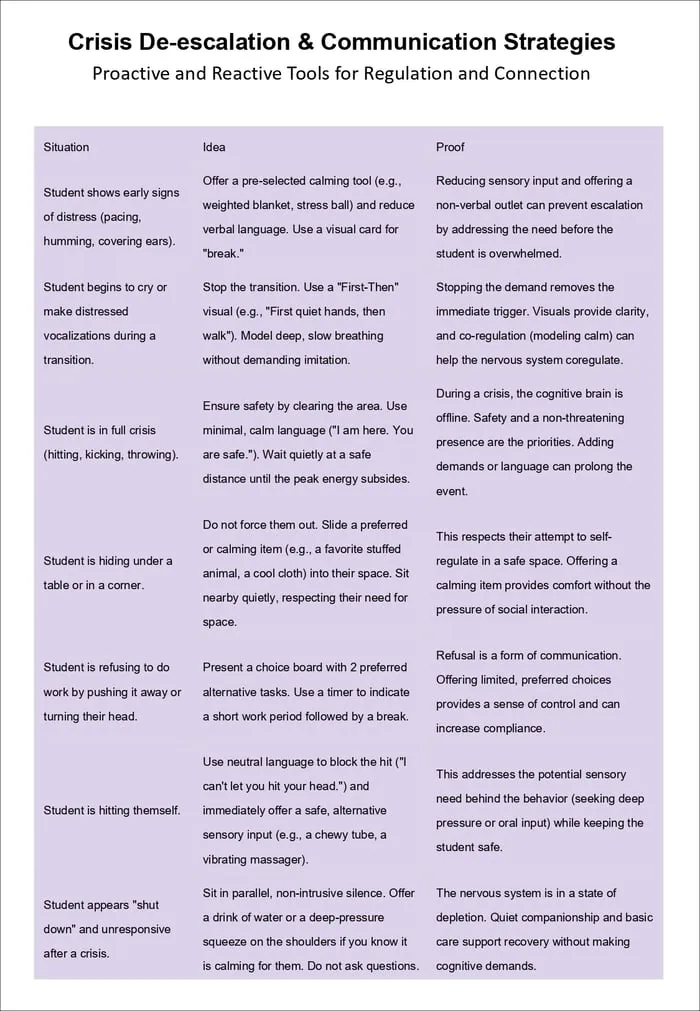
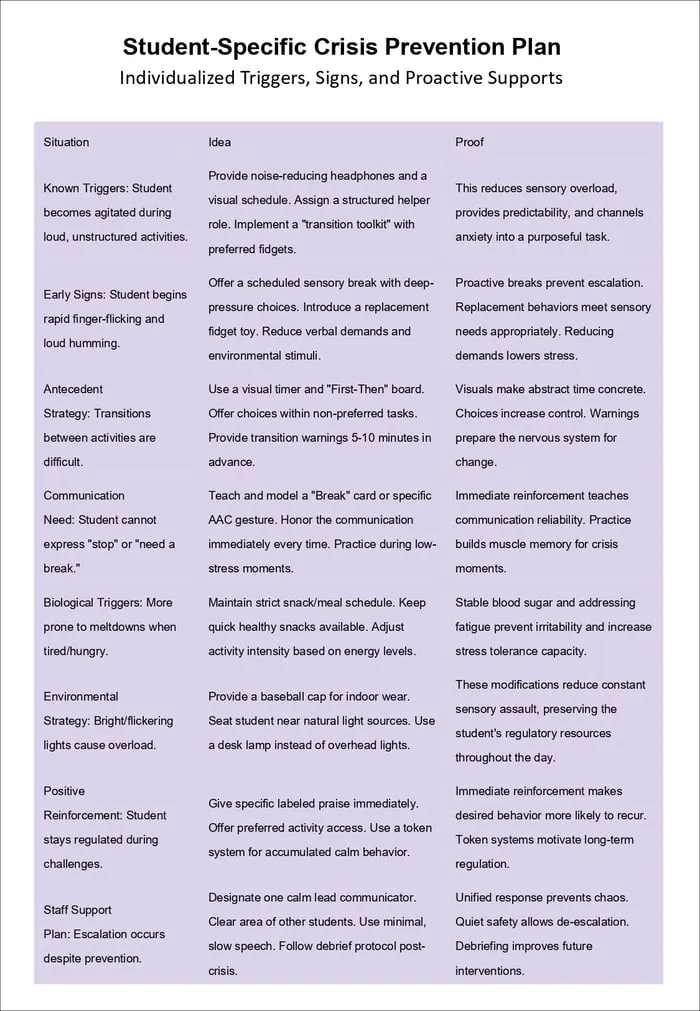
When There Are No Words: Supporting Non-Speaking Students in Crisis: a 12-page printable toolkit with calm, non-verbal strategies in a Situation/Idea/Proof format, staff response protocols, scripted minimal language, sensory tool ideas, and post-crisis recovery guidance.
Sources and scope
- IRIS Center, Vanderbilt University: free modules on behavior, de-escalation, and evidence-based practices.
- American Speech-Language-Hearing Association (ASHA): information on communication and augmentative and alternative communication (AAC).
- Center on PBIS: resources on positive behavior support and prevention in schools.
- IDEA, U.S. Department of Education: the law behind special education services and behavior supports in IEPs.
This guide covers calm, everyday classroom responses before, during, and after a crisis. It does not replace your school’s crisis procedures, physical intervention training, or medical and clinical advice.
Key takeaways
- Know each student’s early signs and triggers, and share them with every adult.
- For non-speaking students in crisis, reduce demands, words, and sensory input first.
- Use one calm adult, a short script, and simple visual cues.
- Protect recovery time before any reflection or teaching.
- Review simple data with the family and plan prevention together.





Leave a Comment