

A learning disability checklist helps when you notice that a student works hard yet keeps getting stuck in the same place. Maybe he reads slowly and guesses at words, or his written work looks nothing like what he can tell you out loud. You want to know what you are seeing, and you want to respond before months slip by.
After reading this guide, you will be able to choose the right checklist area, observe with care, collect simple work samples, plan first supports, and bring clear notes to the student’s team. Examples are fictional. Adapt to the student’s goals and agreed supports. This is guidance, not a diagnosis.
At a glance
- A checklist organizes what you observe. It never replaces a formal evaluation.
- Pick one or two areas that match your concern, such as reading, writing, or math.
- Observe across several days and settings, and attach real work samples.
- Start supports right away while you keep gathering information.
- Share patterns, not labels, with the family and the student’s team.
1. Define your concern before you open a learning disability checklist
Start with one sentence that describes what you see. For example, “Leo reads grade-level text slowly and often skips small words.” A clear sentence keeps you focused and stops you from checking every box on every page.
Next, match your sentence to a skill area. Common areas include reading and decoding (often linked to dyslexia), handwriting and written expression (dysgraphia), number sense and calculation (dyscalculia), and motor planning (dyspraxia). Other areas, such as executive functioning, sensory processing, and organization, can affect learning in every subject.
Then, write down what you already know. Note attendance, vision and hearing screening dates, and whether the student is learning English. These factors can look like a learning difficulty, so the team will want to rule them in or out.
| What you notice | Checklist area to start with |
|---|---|
| Slow, effortful reading, guessing at words | Reading and decoding |
| Ideas spoken well but written poorly | Handwriting and written expression |
| Counting on fingers long after peers stop | Number sense and math facts |
| Loses materials, misses steps in directions | Executive functioning and organization |
In our fictional example, Leo is in grade 3. His teacher, Ms. Rivera, writes her concern sentence and chooses the reading area first. She adds organization as a second area because Leo often cannot find his reading folder. Two areas are enough to start.
Finally, set a short window for your observations, such as two or three weeks. A clear window keeps the process moving and gives the team something concrete to review.
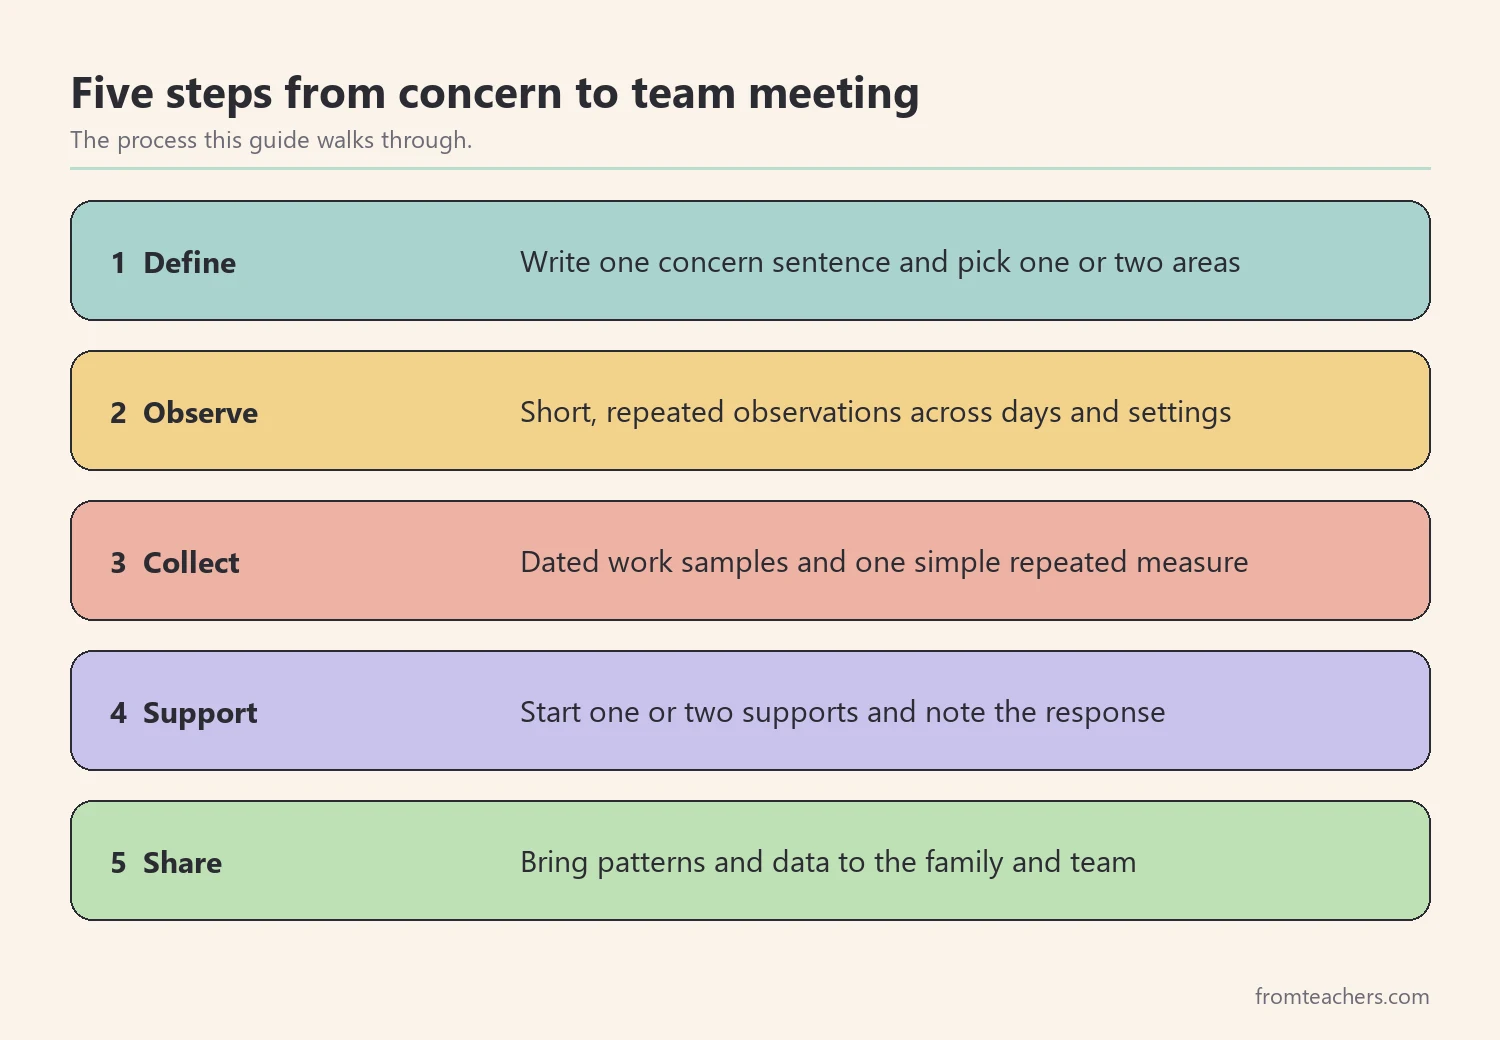
2. Observe with the checklist across settings
A good observation is specific, short, and repeated. Instead of one long session, plan several brief ones across different days, subjects, and times. Patterns that appear in many settings tell you more than one hard morning.
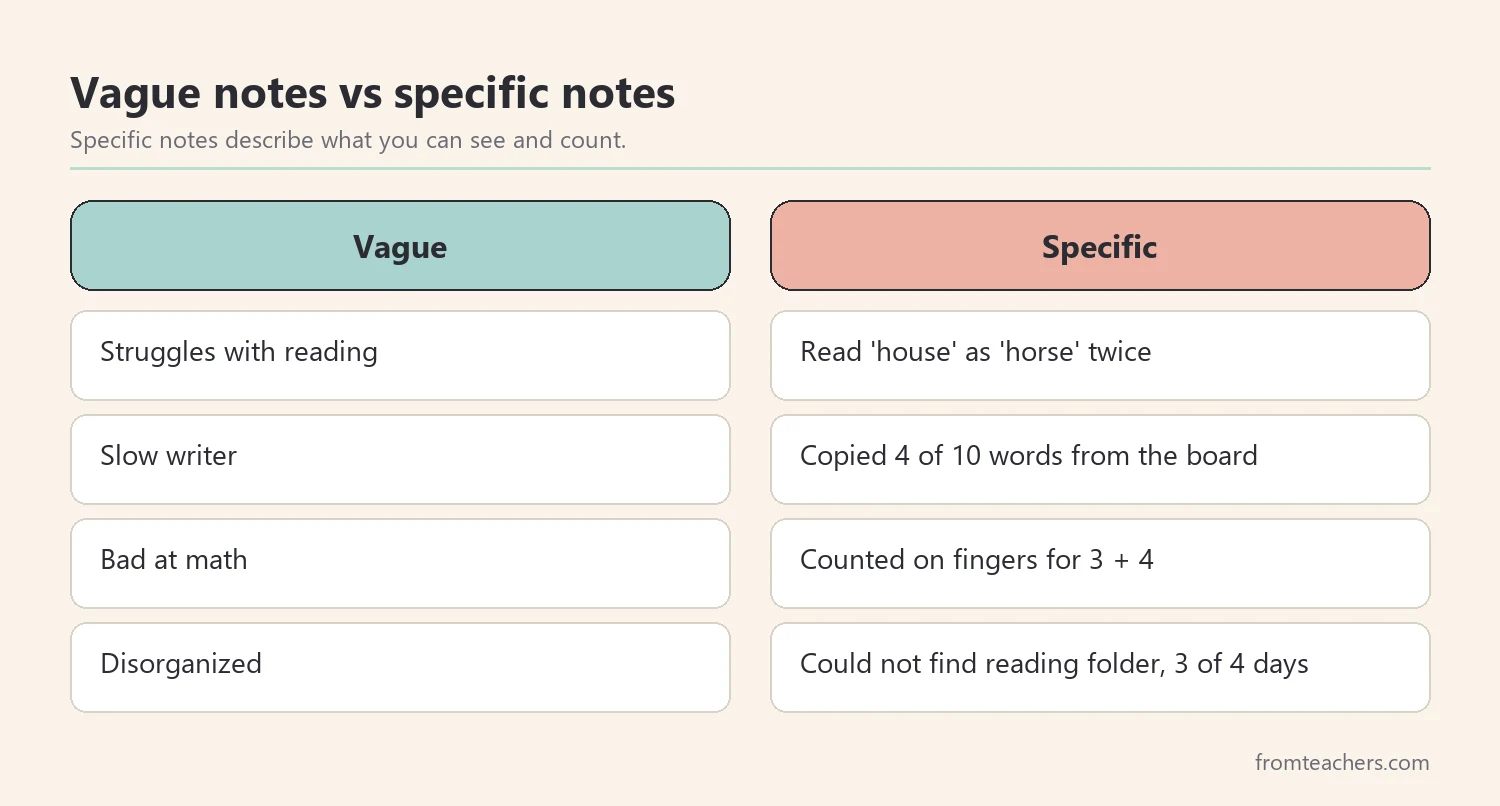
When you observe, write what the student does, not what you think it means. “Read ‘house’ as ‘horse’ twice” is more useful than “struggles with reading.” Similarly, “copied 4 of 10 words from the board” is more useful than “slow writer.”
Use a simple rating for each checklist item. For example, mark “not seen,” “sometimes,” or “often.” Then add a short note or date beside any item you mark “often.”
Also, notice strengths. A student who decodes slowly may understand stories well when they are read aloud. That contrast is important information for the team, and it helps you plan supports that build on what already works.
A ready-made tool keeps your notes consistent. The fillable learning challenges checklist bundle includes observation and strategy checklists for dyslexia, dysgraphia, dyscalculia, dyspraxia, executive functioning, and more, each with student, date, observer, and grade fields.
For Leo, Ms. Rivera observes four reading moments over two weeks: two small-group lessons, one independent reading block, and one science lesson. She marks “often” for guessing at unfamiliar words and for losing his place on the line. She marks “not seen” for difficulty answering questions after a story is read aloud, which is a strength.
3. Collect work samples and simple data
A learning disability checklist becomes much stronger when real work sits beside it. Work samples show the team exactly what you saw, and they help families understand the concern without jargon.
Collect a small set of samples, not a whole folder. For instance, choose two writing samples, one math page, and a short reading record. Date each sample and add one line about the conditions, such as “independent, 15 minutes, no help.”
Then, add one simple measure you can repeat. In reading, that might be words read correctly in one minute on a familiar passage. In math, it might be the number of facts answered correctly in a short quiz. Keep the task the same each time so your numbers can be compared.
| Date | Task | Result |
|---|---|---|
| Week 1, Mon | Reading passage, 1 minute | 38 words correct |
| Week 1, Thu | Same passage level, 1 minute | 41 words correct |
| Week 2, Mon | Same passage level, 1 minute | 40 words correct |
These fictional numbers are steady rather than rising. That pattern matters, because it suggests Leo needs more targeted support, not just more time. Ms. Rivera writes the three results on the back of his checklist so all her information stays together.
Lastly, keep everything in one place. A single folder or digital file with the checklist, samples, and data makes the next steps much faster.
4. Start first supports while you keep watching
You do not need to wait for a meeting to help. Good teaching supports can begin the same week, and the student’s response to them becomes part of your information.
Choose supports that match the area you checked. For reading, that might be a reading guide strip, pre-teaching key vocabulary, or audio for content texts. For writing, try a word bank, a sentence starter, or the option to dictate a first draft. For math, use number lines, worked examples, and fewer problems per page.
However, change only one or two things at a time. If you change everything at once, you will not know what helped. Write down the support, the date you started, and how often you use it.
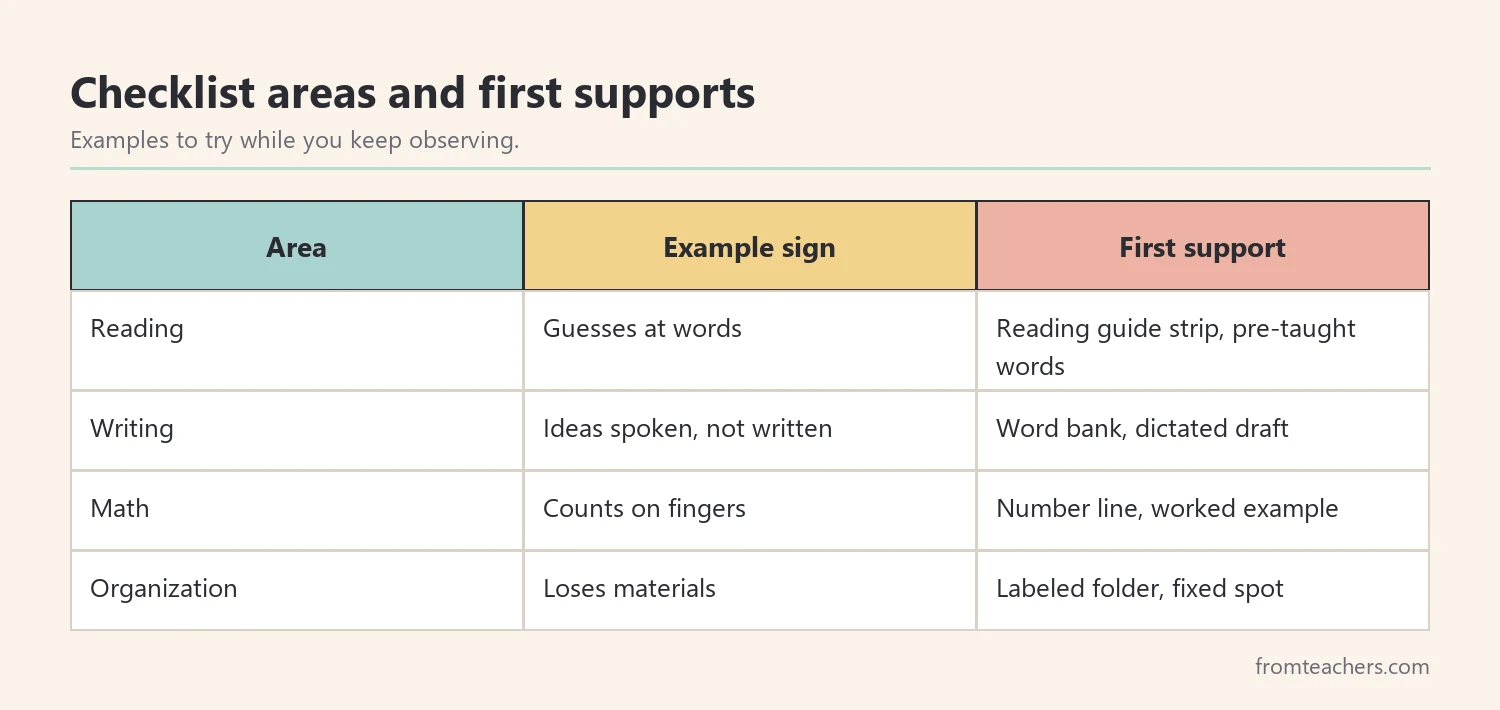
For Leo, Ms. Rivera adds two supports. First, he uses a reading guide strip to keep his place. Second, she pre-teaches five tricky words before each small-group text. For organization, she tapes a picture label on his reading folder and keeps it in the same bin every day.
After two weeks, Leo loses his place less often, according to her notes. His one-minute reading results are still flat, though, which tells the team that decoding remains the main need. That is useful: the support helped one problem and revealed the real one more clearly.
Meanwhile, keep the checklist open. Update ratings when something changes, and add the date. A living document is more helpful than one completed once and filed away.
5. Share your learning disability checklist with the team
When your observation window ends, summarize what you found on one page. Include your concern sentence, the areas you checked, the patterns you saw, the supports you tried, and the data. Keep the tone neutral and factual.
Above all, avoid labels. A learning disability checklist shows signs and patterns, but only a qualified evaluation team can identify a disability. Phrases such as “the pattern suggests a closer look at decoding” are accurate and respectful.
Before the meeting, talk with the family. Ask what they notice at home, such as homework time, reading at bedtime, or frustration after school. Families often add details you could never see in class.
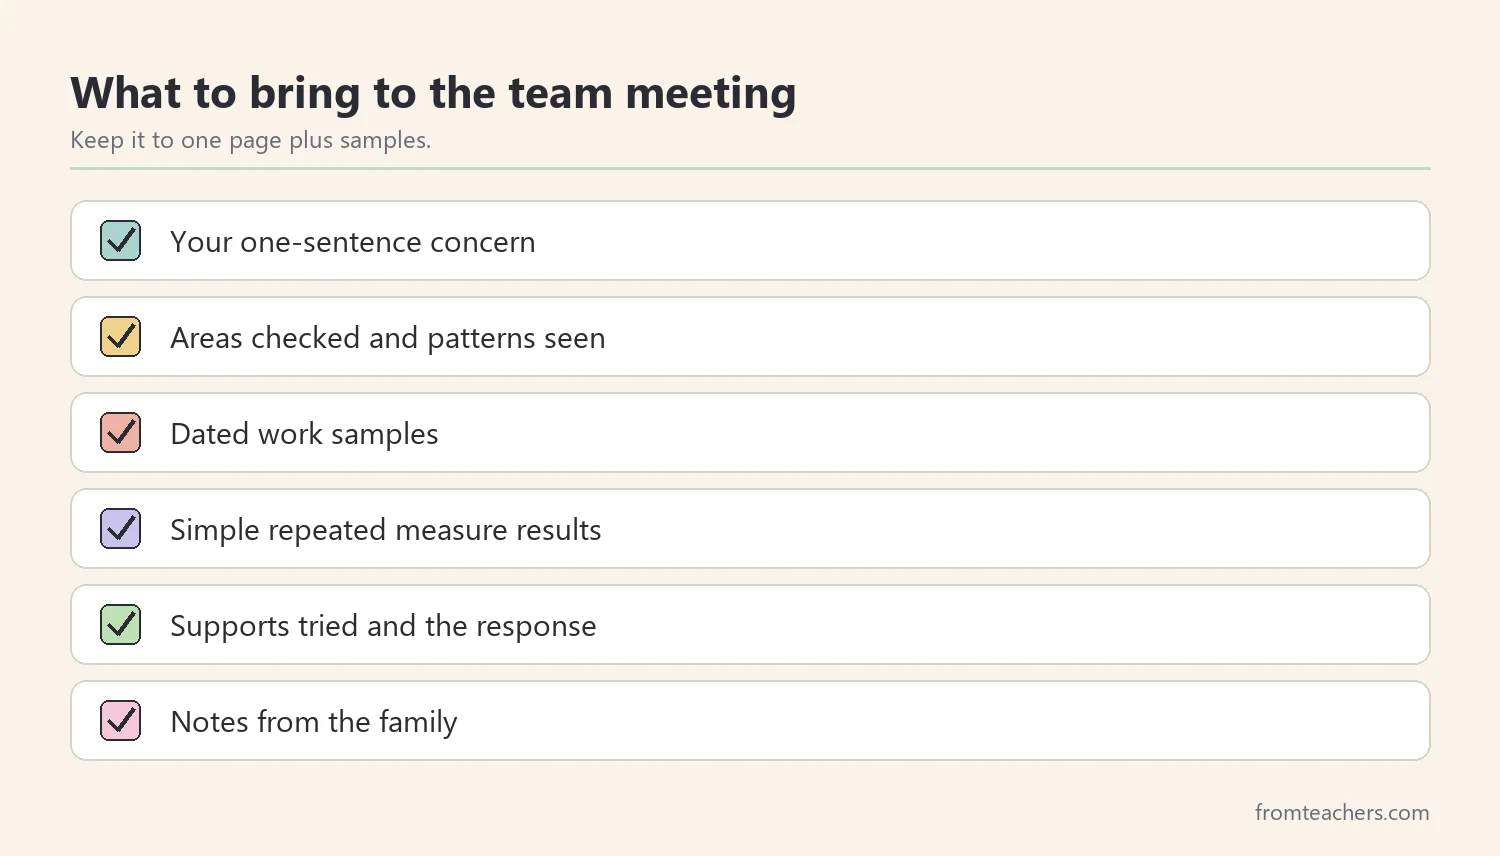
In the meeting, let the data lead. Show the work samples and the simple measures. Then, ask the team what they would like to try next: more intensive intervention, a formal evaluation, or another round of support with closer monitoring. Under federal special education law, families can also request an evaluation, so make sure they know how that process works in your school.
For Leo, the team agrees to add a structured reading intervention three times a week and to review his data again in six weeks. His parents share that he avoids reading at home and gets tired quickly. Ms. Rivera adds that note to the checklist, dated and signed.
Common mistakes and how to avoid them
- Treating the checklist as a diagnosis. Fix: describe patterns and refer questions about disability to the evaluation team.
- Checking every area at once. Fix: start with the one or two areas that match your concern sentence.
- Writing opinions instead of observations. Fix: record what the student did, with a date and a short example.
- Waiting to help. Fix: start one or two simple supports while you keep observing.
- Leaving the family out. Fix: ask what they see at home before any meeting, and share your notes in plain language.
Questions teachers and parents ask about learning disability checklist use
Can a learning disability checklist diagnose dyslexia?
No. A checklist helps you notice and organize signs, but identification requires a formal evaluation by qualified professionals. Use the checklist to decide what to watch, what to try, and what to share.
How long should I observe before sharing concerns?
Two to three weeks of short, repeated observations is often enough to show a pattern. If a student is clearly struggling, share early with the family and team. You can keep collecting information at the same time.
Can parents use a learning disability checklist at home?
Yes, parents can note what they see during homework, reading, or daily routines. Those notes are helpful at school meetings. Still, the checklist is a starting point for a conversation, not a conclusion.
What if the student has strengths and struggles in the same area?
That is common and useful information. For example, a student may understand stories well but decode slowly. Record both, because strengths help the team design supports that work.
Should I use the same checklist for every student?
Use the same format, but choose the areas that fit each student. A consistent format makes notes easier to compare. Matching the areas to the concern keeps the process focused and fair.
Related reading: Dyslexia Solutions in the Classroom: Evidence-Based Strategies for Success, Accommodations vs Modifications in Special Education: The Difference Explained, and The Power of Data Tracking in Special Education.
A companion resource for using a learning disability checklist:
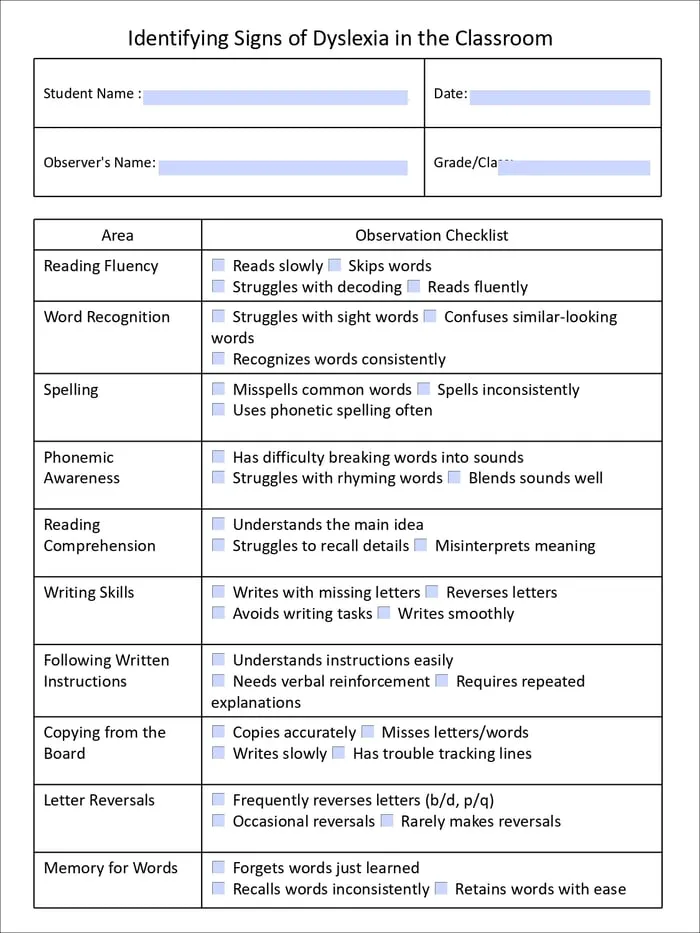
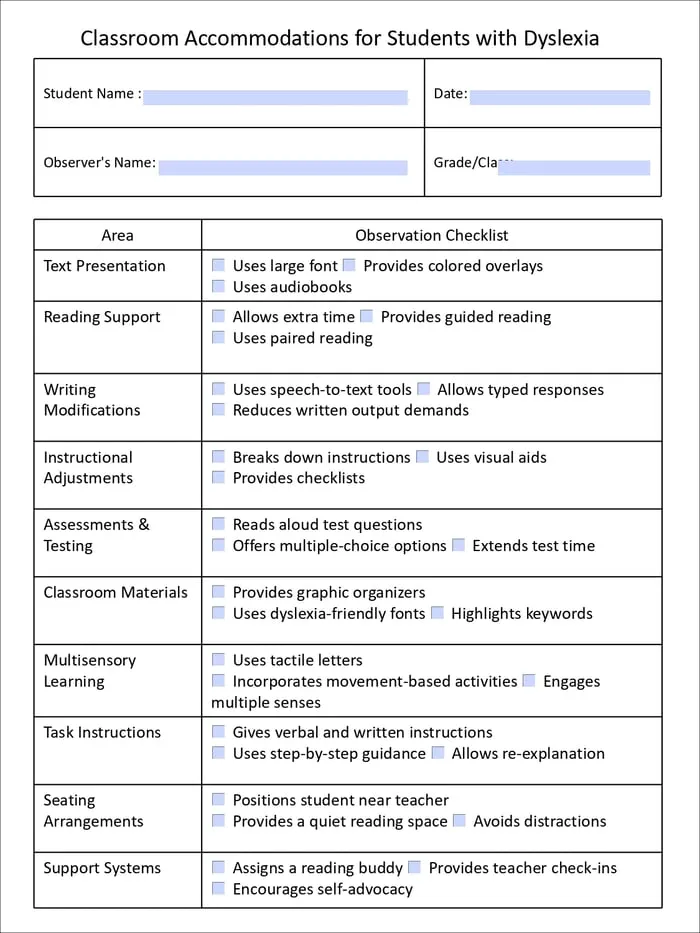
Special Education Learning Challenges Checklist Bundle: twenty fillable observation and strategy checklists covering dyslexia, dysgraphia, dyscalculia, dyspraxia, executive functioning, sensory processing, social skills, organization, self advocacy, and test taking.
Sources and scope
- IDEA, U.S. Department of Education: the federal law that covers evaluation, eligibility, and special education services.
- IRIS Center, Vanderbilt University: free modules on data collection, intervention, and progress monitoring.
- Understood.org: plain-language articles for families and teachers on learning and thinking differences.
- International Dyslexia Association: background on dyslexia and structured literacy.
- National Center for Learning Disabilities: information and advocacy on learning disabilities.
This guide covers classroom observation, documentation, and first supports. It does not cover formal testing, eligibility decisions, or diagnosis, which belong to qualified professionals and the student’s team.
Key takeaways
- A learning disability checklist organizes observations; it does not diagnose.
- Start with one clear concern sentence and one or two areas.
- Record specific actions, strengths, and dated work samples.
- Begin simple supports early and note how the student responds.
- Share patterns and data with the family and team, then agree on next steps.








Leave a Comment