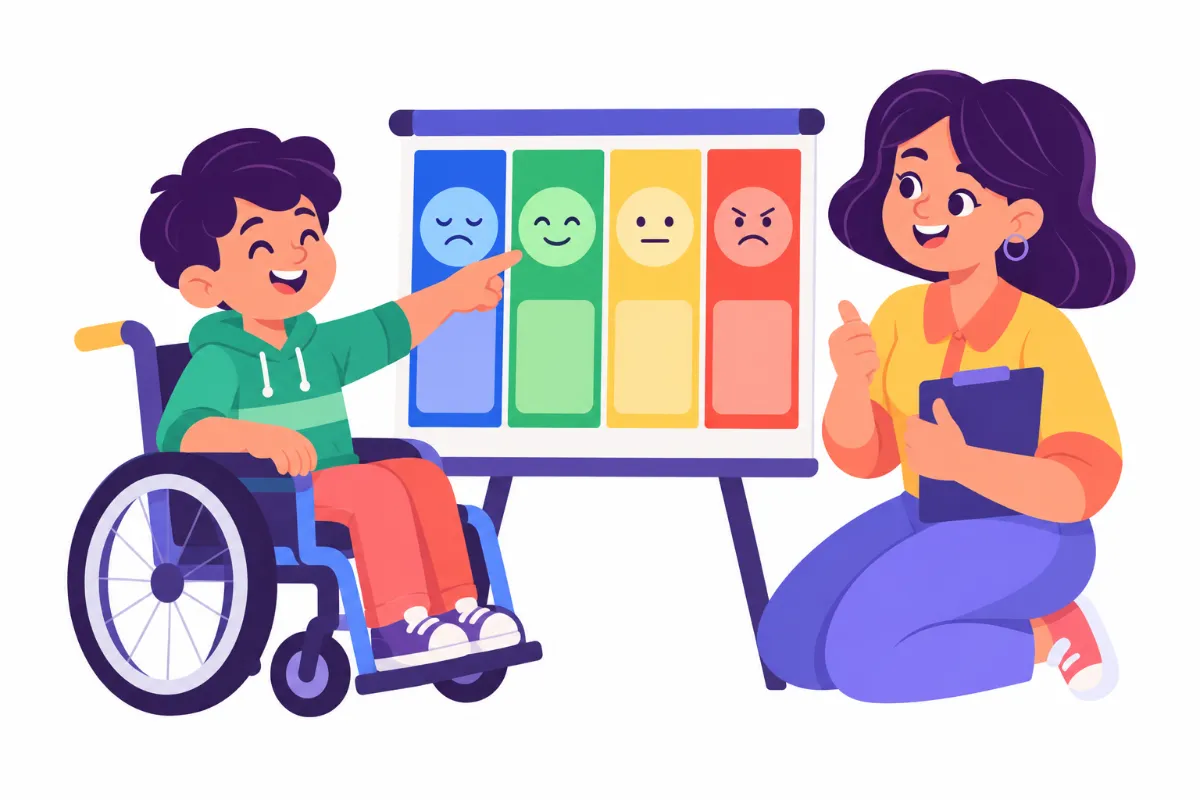

Teaching self-regulation skills starts long before the hard moment. Picture a fifth grader who pushes his worksheet away, slams his hand on the tray of his wheelchair, and shouts that he is “done” five minutes into math. In that moment, he cannot learn a new strategy. However, with a plan that is taught, practiced, and tracked, he can learn to notice the feeling earlier and choose a better next step.
This guide gives you a five-step plan for students with disabilities. By the end, you will be able to define a clear target, build visual supports, teach coping strategies in calm moments, add simple self-monitoring, and track progress with the family and team.
Examples are fictional. Adapt to the student’s goals and agreed supports. This is guidance, not a diagnosis.
At a glance
- Self-regulation is a set of skills that can be taught, not a matter of willpower.
- Start by learning the student’s triggers and early body signals.
- Use a simple feelings scale and visuals the student can access.
- Teach and rehearse coping strategies when the student is calm.
- Track a few measures and share one plan with the family.
1. Define the target for teaching self-regulation skills
First, decide exactly what you want the student to do. “Calm down” is too vague to teach or measure. Instead, name one observable behavior, such as “When frustrated during independent work, the student will ask for a break card or use a breathing strategy.”
Next, collect a few days of simple observation. Notice what happens before a hard moment, what the student does, and what happens after. This “before, during, after” pattern shows you triggers and early signals. For example, a student may rub his eyes, go quiet, or tap his foot several minutes before an outburst.
Also, talk with the people who know the student. Families, paraprofessionals, and related service providers such as occupational therapists often notice signals that teachers miss. In addition, ask the student, in simple words, what is hard for him and what helps.
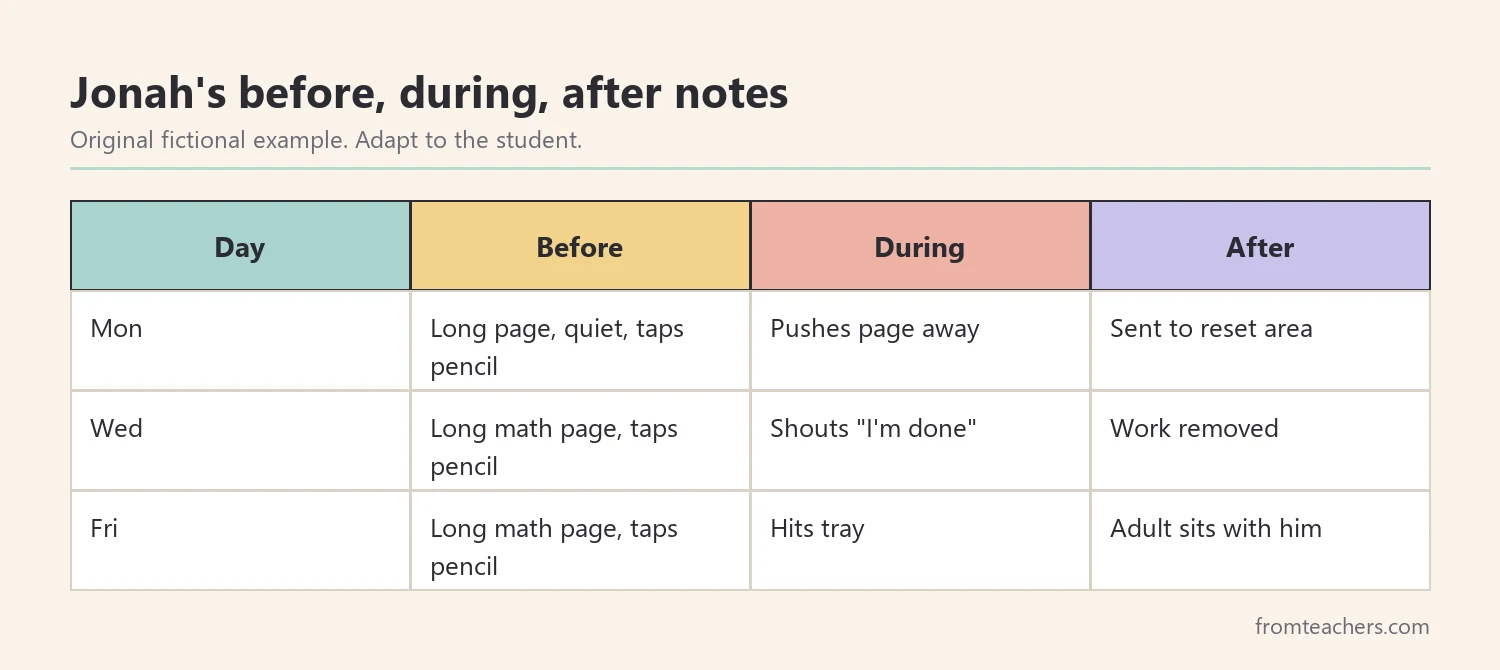
Worked example. Jonah is a fictional student in grade 5 who uses a wheelchair and has an IEP. Over one week, his teacher notes three hard moments. All three happen during independent math, after a page with more than ten problems. Before each one, Jonah goes quiet and taps his pencil. So, his target becomes: “During independent math, Jonah will use his break card or three slow breaths when he notices he is frustrated.”
In short, a clear target guides every later choice. As a result, teaching self-regulation skills becomes focused and measurable.
2. Build visual supports and a feelings scale
Next, give the student a way to name feelings and their size. Visual tools are a core part of teaching self-regulation skills, because a picture stays the same even when the student’s words disappear. Many students with disabilities find it hard to put feelings into words, especially when upset. A visual tool lets them point instead of explain.
For example, use a simple 1 to 4 scale. Level 1 means calm and ready. Level 2 means a little bothered. Level 3 means upset, and level 4 means too upset to work. Under each level, add a picture of a face or body cue and one matching action, such as “keep working,” “take three breaths,” “use my break card,” or “go to the calm space with an adult.”
| Level | How it feels | What I can do |
|---|---|---|
| 1 | Calm and ready | Keep working |
| 2 | A little bothered | Take three slow breaths |
| 3 | Upset | Use my break card |
| 4 | Too upset to work | Go to the calm space with an adult |
Also, make the visuals accessible. Place them where the student can reach and see them, such as on a desk strip or a wheelchair tray. If the student uses a communication device, add the levels to it. In addition, keep words short and consistent across settings.
Put this step into practice
In addition, a detailed reference such as strategy tables for teaching self-regulation to students with disabilities can help you choose visuals and next steps. It includes tables on visual supports, emotional awareness, coping, sensory strategies, self-monitoring, and family collaboration, each with a strategy, a tip, and why it works.
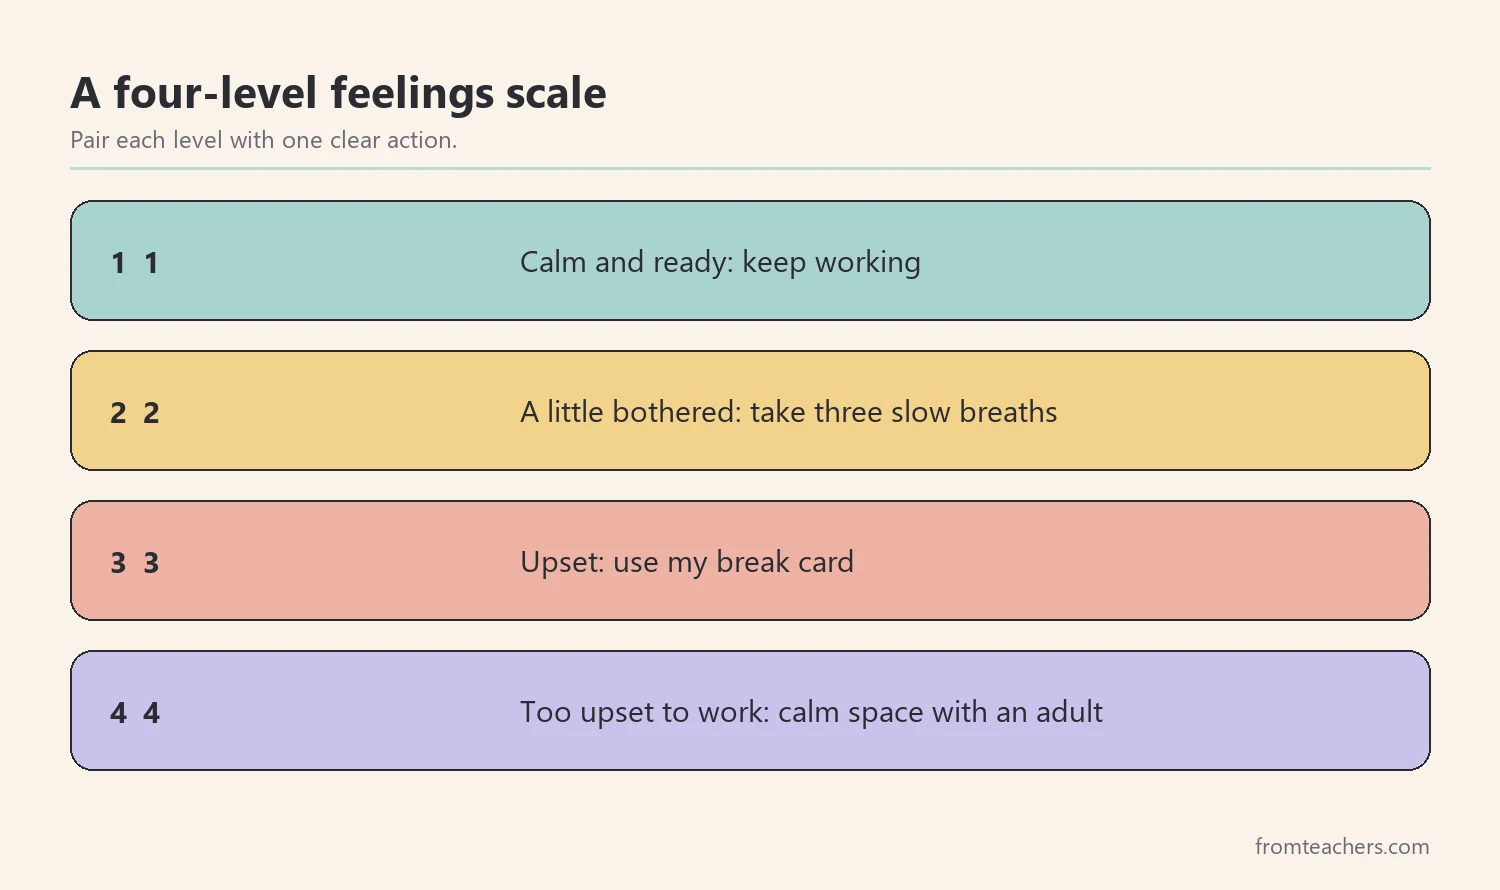
Worked example. Jonah’s scale is taped to his tray. During the first week, his teacher points to it at the start of math and asks, “What number are you right now?” Jonah points to 1 or 2 most days. This quick daily check-in is a small but steady part of teaching self-regulation skills, because it builds the habit of noticing before feelings grow.
3. Teach coping strategies in calm moments
Then, teach the actual strategies. This is where teaching self-regulation skills looks most like teaching reading or math: explain, model, practice, and give feedback. However, never teach a new skill in the middle of a meltdown. Instead, practice when the student is calm, so the skill is ready when it matters.
For example, start with two or three strategies, not ten. Common choices include slow breathing, asking for a break, squeezing a stress ball, or a short movement break. Choose ones that fit the student’s body, setting, and preferences. For a student who uses a wheelchair, for instance, chair push-ups or arm stretches may work better than walking.
Next, teach each strategy explicitly. First, model it while you think aloud: “I feel frustrated because the printer jammed, so I am taking three slow breaths.” Then, practice it together. Finally, let the student try it alone with praise.
In addition, use short social stories or role-plays. A social story might describe a hard math page, the feeling it causes, and the steps the student can take. Role-plays let the student rehearse with a pretend trigger, such as a long worksheet, while everyone is calm.
A quick classroom example
Also, plan for generalization. A strategy learned only at the desk may not appear in the hallway or lunchroom. So, once the student uses it well in one setting, practice it briefly in a second setting with the same words and visuals.
Also, practice often. Two or three minutes a day, at the same time, works better than one long session each week. Consistent practice is the heart of teaching self-regulation skills.
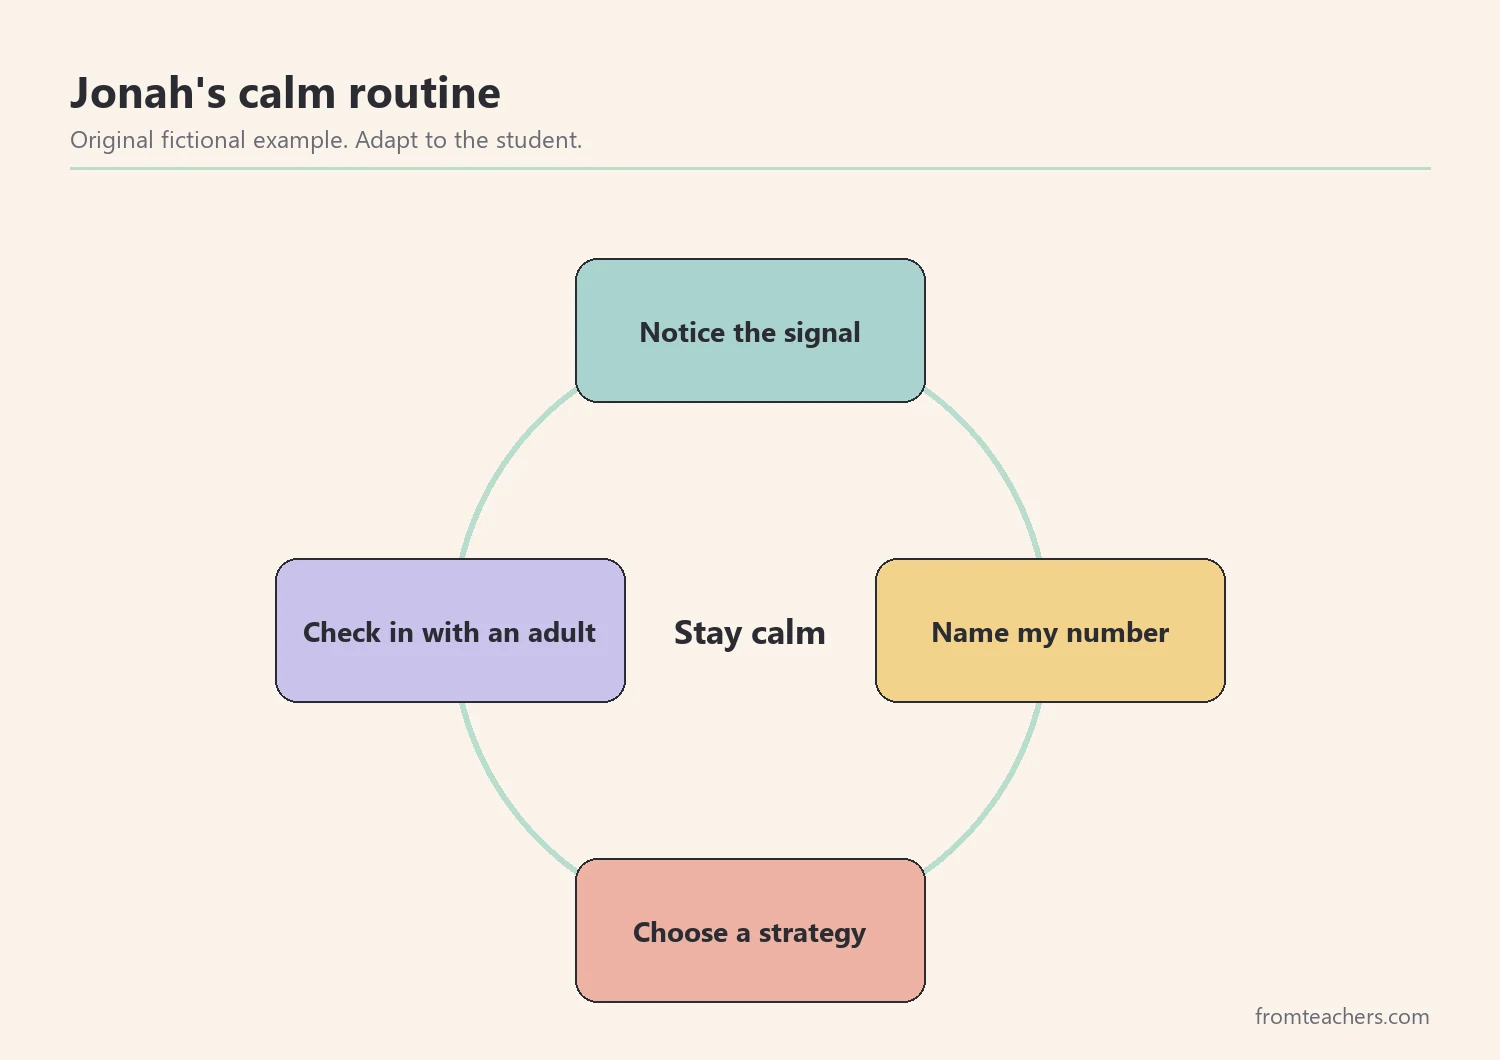
Worked example. Jonah practices his routine every morning for three minutes: notice the tapping pencil, name the number on his scale, choose breathing or the break card, then check in with his teacher. On Thursday, he role-plays with a pretend 20-problem page and uses his break card without a reminder.
4. Add self-monitoring tools for teaching self-regulation skills
Now, help the student watch his own behavior. Self-monitoring moves teaching self-regulation skills from adult reminders toward student independence. Self-monitoring means the student checks and records how he is doing. As a result, the student starts to take ownership of the skill rather than relying only on adult prompts.
For example, give the student a small card with three boxes for each work block. After the block, the student circles his highest number on the scale and checks whether he used a strategy. Then, the adult adds a quick check of agreement. When both match, praise the accurate rating, not just the calm behavior.
Make it stick
Next, keep the tool short and easy to use. If writing is hard, use stickers, a switch, or a simple tap on a device. In addition, review the card together at the end of each day for one minute. Ask one question, such as “What helped most today?”, and let the student answer by pointing, speaking, or using a device. Over time, these short talks help the student explain his own needs to new adults, which is a powerful skill for later grades.
| Block | My highest level | Used a strategy? | Adult agrees? |
|---|---|---|---|
| Reading | 1 | Not needed | Yes |
| Math | 3 | Yes, break card | Yes |
| Science | 2 | Yes, breathing | Yes |
Worked example. By week two, Jonah fills in his card after each block. On Tuesday, he rates math as a 3 and checks that he used his break card. His teacher agrees and says, “You noticed early and used your plan.”
Overall, self-monitoring builds independence. Therefore, it is a key stage in building skills that last, and in teaching self-regulation skills the student can carry into new classrooms.
5. Track progress and partner with families
Finally, keep a short record and share it. Data tells you whether teaching self-regulation skills is working or whether the plan needs a change. Choose one or two measures that match the target, such as how many times the student used a strategy independently and how many times he needed a prompt.
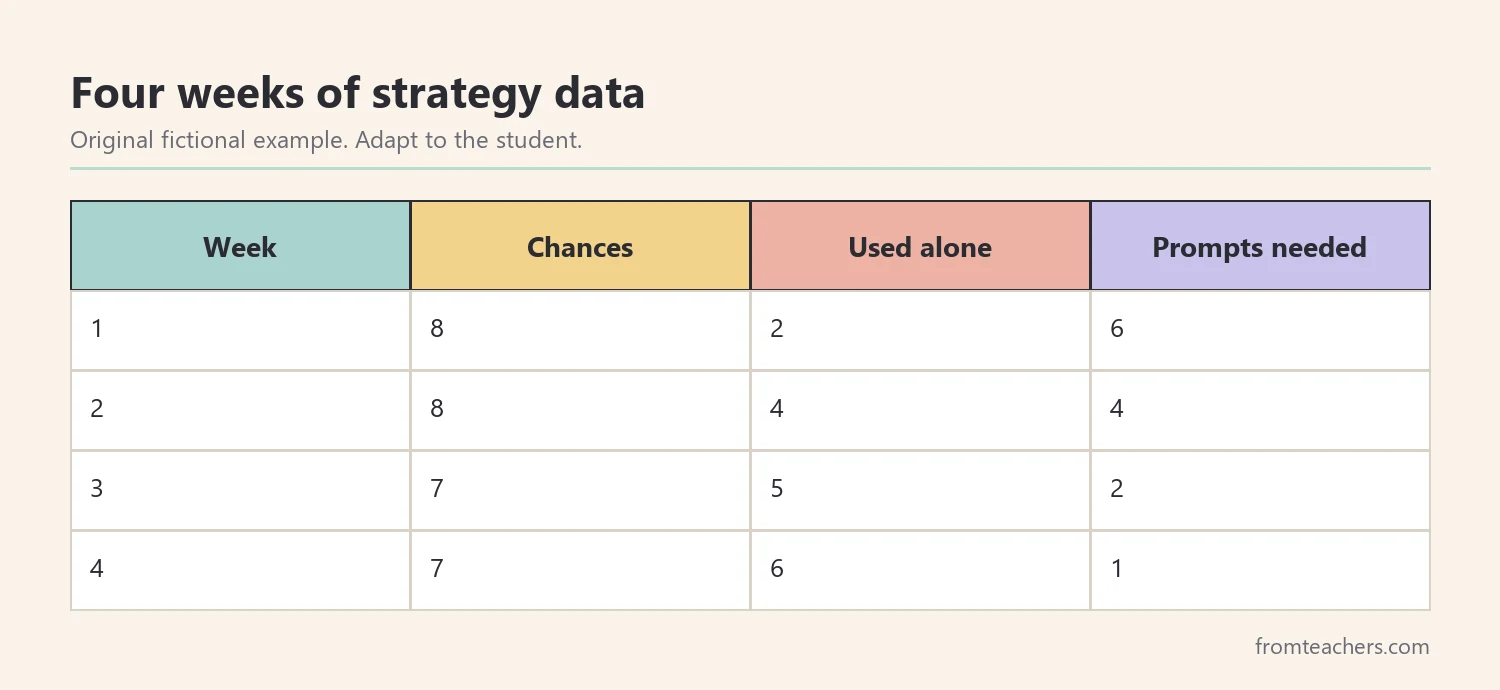
Worked example. In week one, Jonah has 8 chances to use a strategy and uses one alone 2 times, so he needs 6 prompts. By week four, he has 7 chances and uses a strategy alone 6 times, with only 1 prompt. His team agrees the plan is working and decides to add a second setting: the lunchroom.
If progress stalls, change one thing at a time: the strategy, the visual, or the amount of practice. Small, single changes show you exactly what helped.
What this looks like day to day
Next, share the plan with the family. Send home the same scale and the same words. Ask the family which strategies work at home, and add them to the plan. When school and home use one language, the student practices more and learns faster.
Also, review the whole system of supports. Most students need a mix: classroom routines that help everyone, small-group practice for some, and an individual plan for a few. Seeing it as layers helps you decide where a student needs more support.
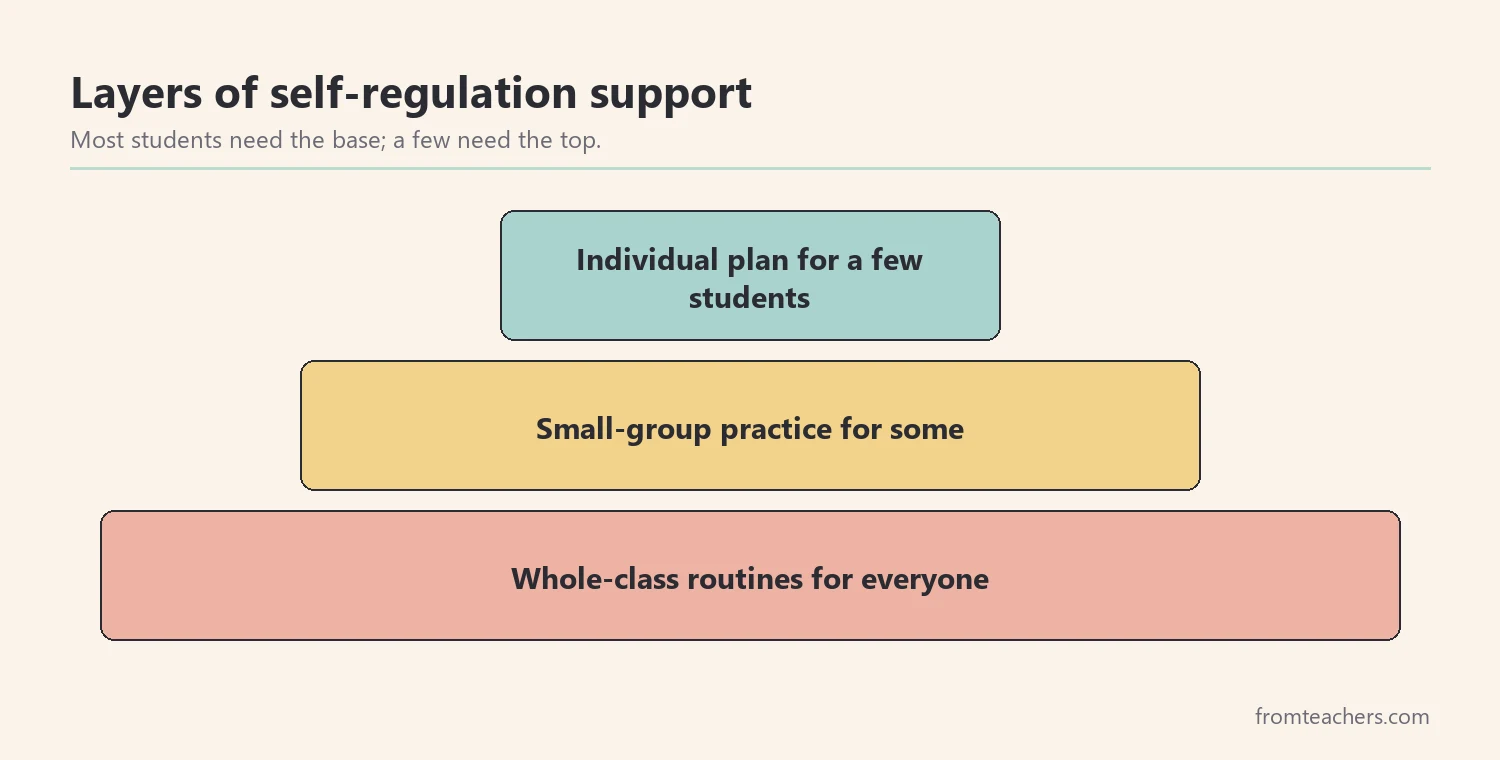
In short, data and family partnership keep the plan honest. As a result, teaching self-regulation skills becomes a shared, steady effort rather than a reaction to bad days.
Common mistakes and how to avoid them
Even a careful plan for teaching self-regulation skills can run into problems. Here are common ones and simple fixes.
- Teaching strategies during a meltdown. Fix: stay calm, keep the student safe, and teach later when the student is regulated.
- Offering too many strategies at once. Fix: start with two or three and add more only when those are used well.
- Using visuals the student cannot reach or see. Fix: place tools on the desk, tray, or device the student uses.
- Praising only calm behavior. Fix: also praise accurate self-rating and early use of a strategy.
- Different words at school and home. Fix: share the same scale and phrases with the family.
- Skipping data. Fix: record one or two simple measures every day.
Questions teachers and parents ask about teaching self-regulation skills
At what age should teaching self-regulation skills begin?
Children can start learning simple self-regulation skills in preschool, such as naming feelings and taking a breath. The steps in this guide work from early elementary through middle school. Adjust the words, visuals, and tools to the student’s age and abilities.
How long does it take to see progress?
It varies by student, and teaching self-regulation skills is rarely a straight line. Many students show small changes within a few weeks of daily practice, but lasting skills take longer. Simple data helps you see progress that is easy to miss day to day.
What if the student refuses to use the strategies?
First, check whether the strategies fit the student. Let the student choose between two options, and practice them in fun, low-pressure ways. Also, make sure the strategy is easy to access in the moment.
Can parents use the same plan at home?
Yes. Teaching self-regulation skills works best when home and school use the same scale, words, and strategies, because the student gets more practice. Families can also share what works at home so the team can add it.
Is self-regulation the same as behavior management?
Not exactly. Behavior management often focuses on adult responses to behavior. Teaching self-regulation skills focuses on giving the student skills to notice and manage feelings independently over time.
Related reading: Meltdowns vs Tantrums: A Guide to Understanding and Responding, Moving Beyond Shame and Behavior Charts: Positive Alternatives for Effective Classroom Management, and Managing Sensory Overload: Practical Strategies for Autism and ADHD.
A companion resource for teaching self-regulation
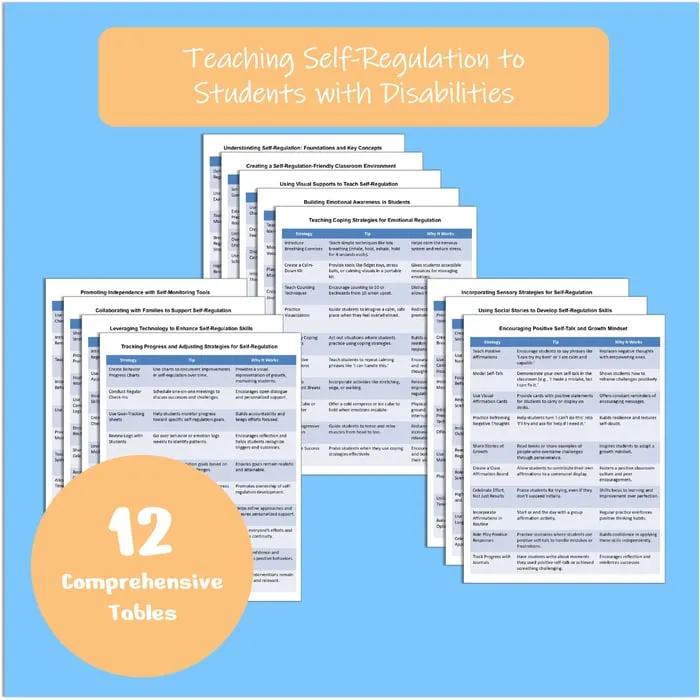
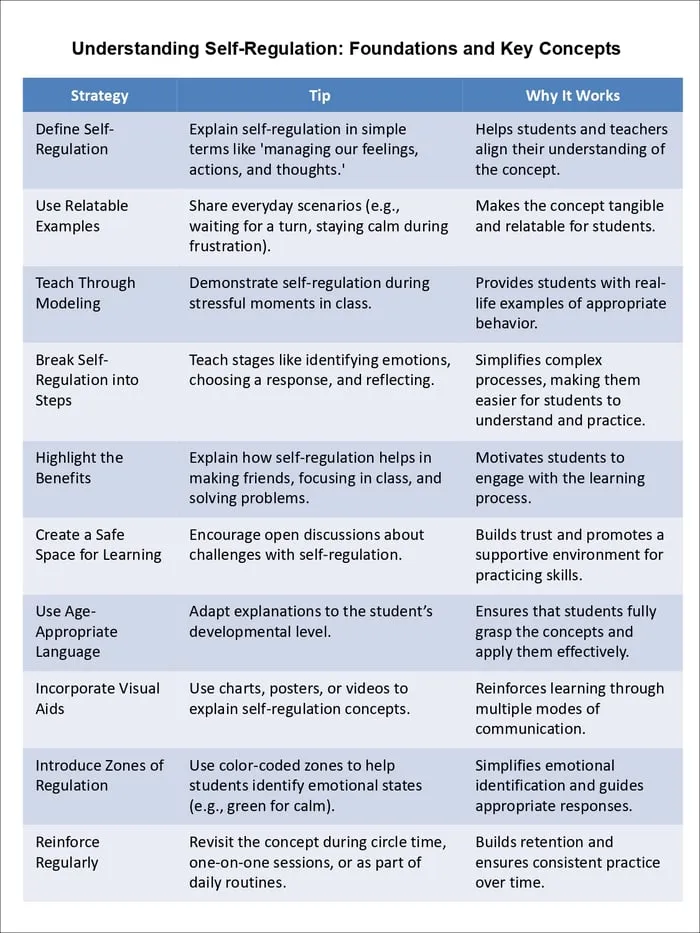
Teaching Self-Regulation to Students with Disabilities: twelve classroom-ready strategy tables, from foundations and visual supports to self-monitoring, family collaboration, and progress tracking, each in a clear Strategy, Tip, and Why It Works format.
Sources and scope
- IRIS Center, Vanderbilt University: free modules on behavior, self-regulation, and supports for students with disabilities.
- CASEL: a widely used framework for social and emotional learning, including self-management.
- Understood.org: practical guidance for families and educators of children who learn and think differently.
- IDEA, U.S. Department of Education: the law behind IEPs, including behavior and social-emotional goals.
This guide covers everyday classroom and home strategies for teaching self-regulation to students with disabilities. It does not replace a functional behavior assessment, counseling, medical care, or the decisions of the student’s IEP team.
Key takeaways
- Teaching self-regulation skills starts with one clear, observable target.
- Learn the student’s triggers and early signals before choosing strategies.
- Use an accessible feelings scale that links each level to one action.
- Rehearse a short routine daily, then add simple self-monitoring.
- Track progress and use the same words and tools at home and school.






Leave a Comment