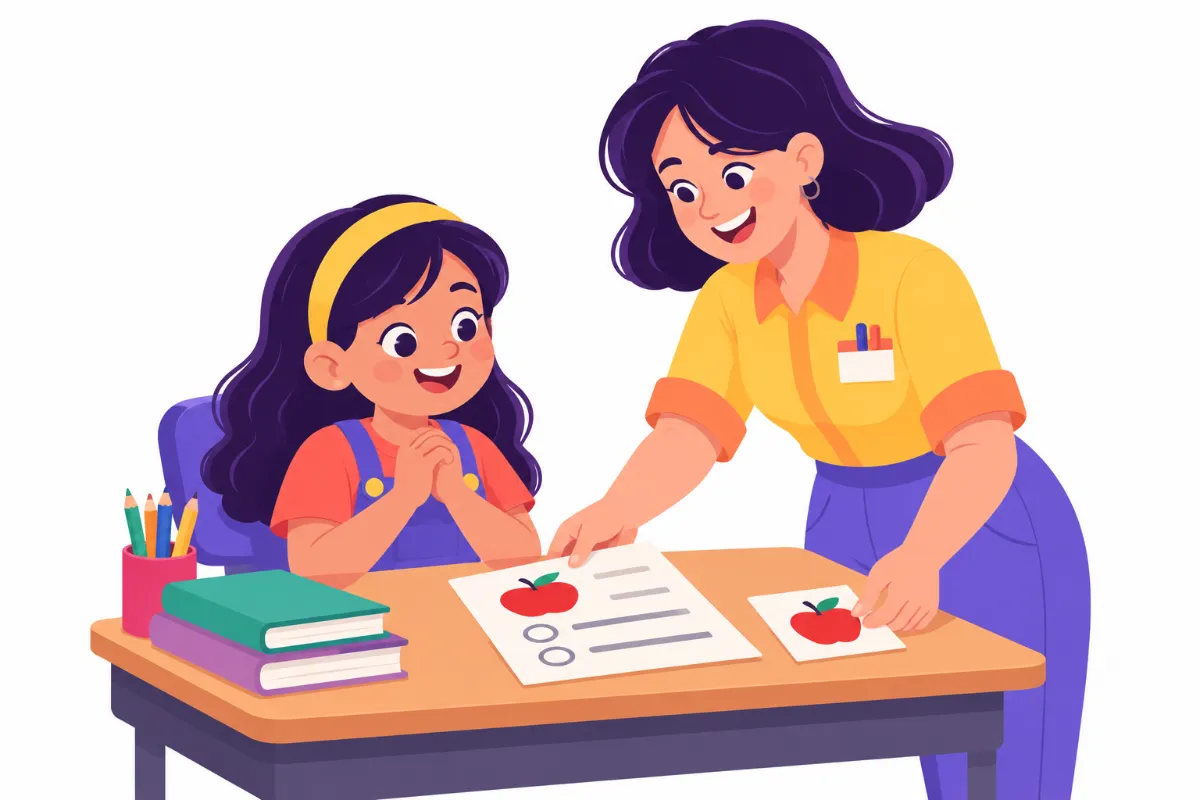

Instructional adaptations matter most in the small moments of a lesson: a student stares at a blank page while classmates write, or loses the thread of a three-step direction before step two. The lesson goal is fair, but the path to it is blocked. A well-chosen adaptation clears that path without lowering what the student is expected to learn.
This guide walks you through a simple if, then, why method for matching a specific challenge to a specific strategy. After reading, you will be able to describe the barrier, choose an adaptation, explain why it should help, try it for a short period, and decide whether to keep it.
Examples are fictional. Adapt to the student’s goals and agreed supports. This is guidance, not a diagnosis.
At a glance
- Start from the observed barrier in the lesson, not from the label alone.
- Use an if, then, why statement to link each challenge to a strategy and a reason.
- Keep the learning goal the same whenever possible, and change the path.
- Try one or two adaptations at a time and record what happens.
- Review with the team and keep only what helps the student learn.
1. Know what instructional adaptations are, and are not
Instructional adaptations are changes to how you teach, present, or ask students to respond, so that a student can reach the lesson goal. They include changes to materials, directions, pacing, grouping, and the way students show what they know.
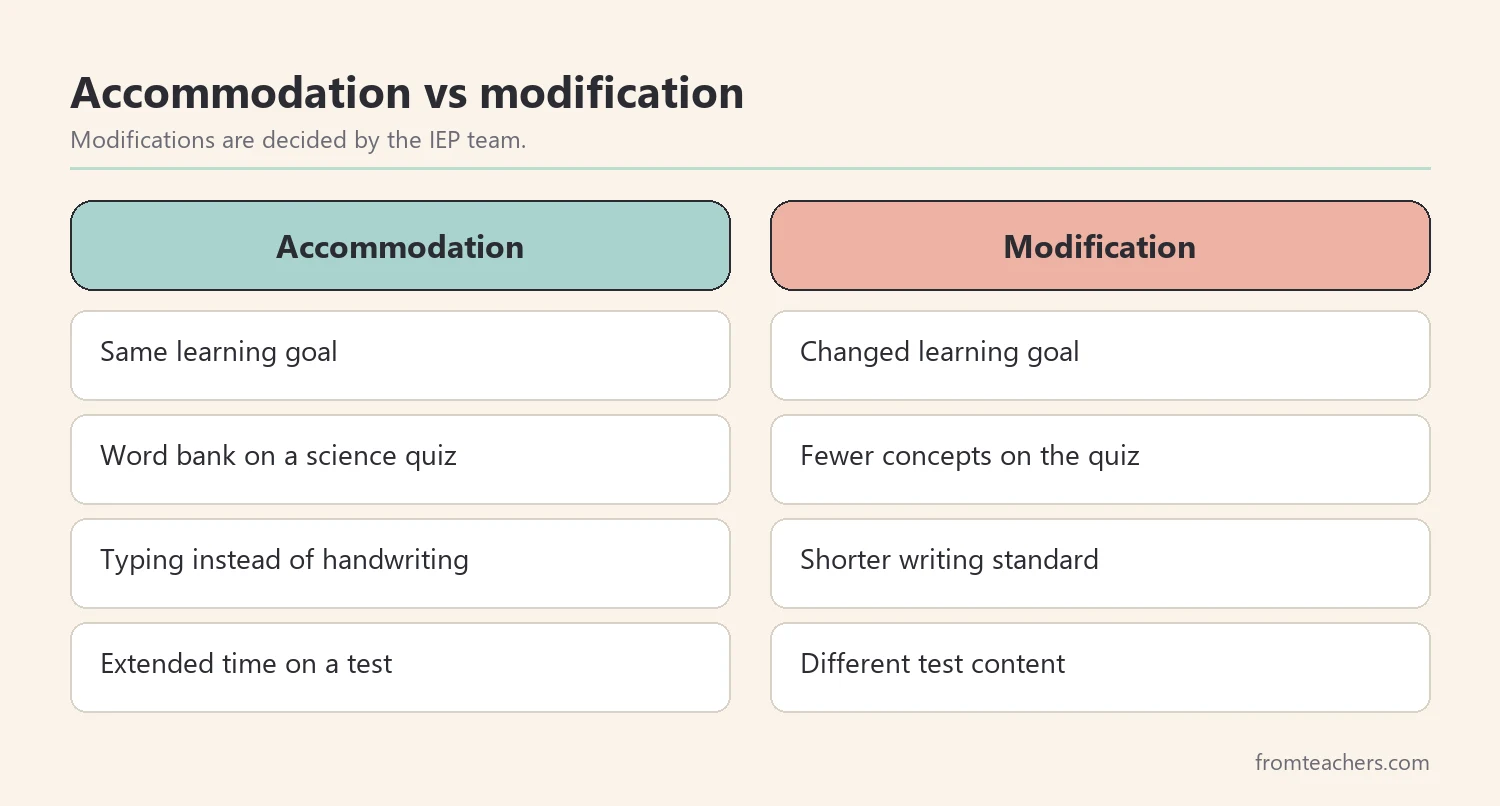
It helps to separate two ideas that teams often discuss. An accommodation changes how a student learns or shows learning, but the expectation stays the same. A modification changes what the student is expected to learn. Most of the adaptations in this guide are accommodations. Modifications are decided by the IEP team and should be written into the plan.
In addition, adaptations are not a reward or a shortcut. For example, giving a student a word bank for a science quiz does not make the content easier to understand. It removes a spelling barrier so the teacher can see what the student actually knows about the topic.
Also, remember that adaptations sit inside good general teaching. Clear goals, modeling, guided practice, and feedback still matter. An adaptation cannot replace a lesson that was unclear for everyone. However, when the lesson is solid, a small change in how a student receives or shows information can make the difference between sitting stuck and taking part.
Worked example: Jonah, grade 5
Jonah understands science ideas well when he talks about them. However, his written answers are very short, his handwriting is slow, and he often misses the second part of multi-step directions. His IEP lists support for written expression and attention. His teacher wants to adapt instruction so his written work shows what he knows.
2. Describe the barrier before choosing instructional adaptations
A disability label gives useful background, but it does not tell you exactly what is hard in your lesson. Two students with the same label can need very different supports. Therefore, start by describing the barrier you actually see.
A good barrier statement is short and observable. It names the task, the moment, and what happens. For example:
- “During independent writing, he writes one sentence in 15 minutes.”
- “When I give three directions at once, he completes the first and then waits.”
- “During read-alouds, she loses track when there are no pictures.”
Next, look for the type of barrier. Is it about taking in information (seeing, hearing, reading), processing it (memory, attention, organizing), or showing it (writing, speaking, motor tasks)? Naming the type points you toward the right family of instructional adaptations.
Finally, check with others. The special education teacher, the family, and the student often have useful information. Students in particular may say exactly what gets in the way, such as “My hand hurts after a few lines.”
Equally important, write down the student’s strengths. Strengths show you which paths are already open. For instance, a student who explains ideas well out loud may do better with dictation than with a simplified worksheet. A student who remembers pictures easily may benefit from visual models more than repeated verbal directions. When you plan from strengths, the adaptation feels like a natural route rather than a patch, and the student is more likely to use it.
Worked example: Jonah’s barrier statements
| Task | What happens | Barrier type |
|---|---|---|
| Written science answers | Writes one or two short sentences | Showing |
| Three-step directions | Does step one, then stops | Processing |
| Copying from the board | Falls behind and skips lines | Taking in and showing |
3. Match the barrier with an if, then, why statement
Once the barrier is clear, write a short if, then, why statement. This format keeps the team focused and makes the reasoning visible to anyone who reads the plan.
- If describes the challenge.
- Then names the adaptation.
- Why explains how the adaptation removes the barrier.
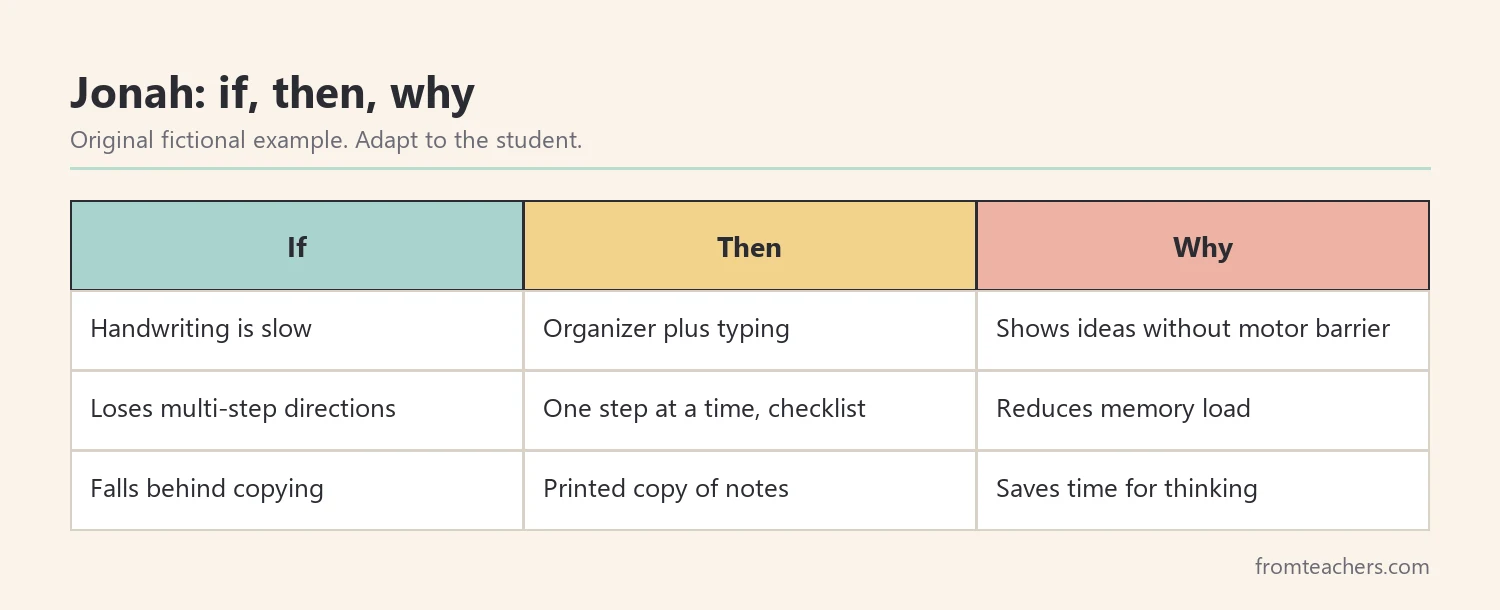
For example: “If Jonah struggles to write long answers by hand, then let him plan with a graphic organizer and dictate or type his answer, because this removes the handwriting barrier and shows his science thinking.” The why part is important. It reminds everyone that the goal is access to learning, not simply less work.
Many teachers find it helpful to keep a reference of common challenges and matching strategies by disability type. For a ready set of these, the instructional adaptations tables by disability type cover 20 disability types, each organized in an if, then, why format.
Worked example: Jonah’s three statements
| If | Then | Why |
|---|---|---|
| Handwriting is slow | Graphic organizer plus typing or dictation | Shows ideas without the motor barrier |
| Loses multi-step directions | Give one step at a time with a written checklist | Reduces memory load |
| Falls behind when copying | Provide a printed copy of notes | Saves time for thinking |
4. Choose instructional adaptations by area of need
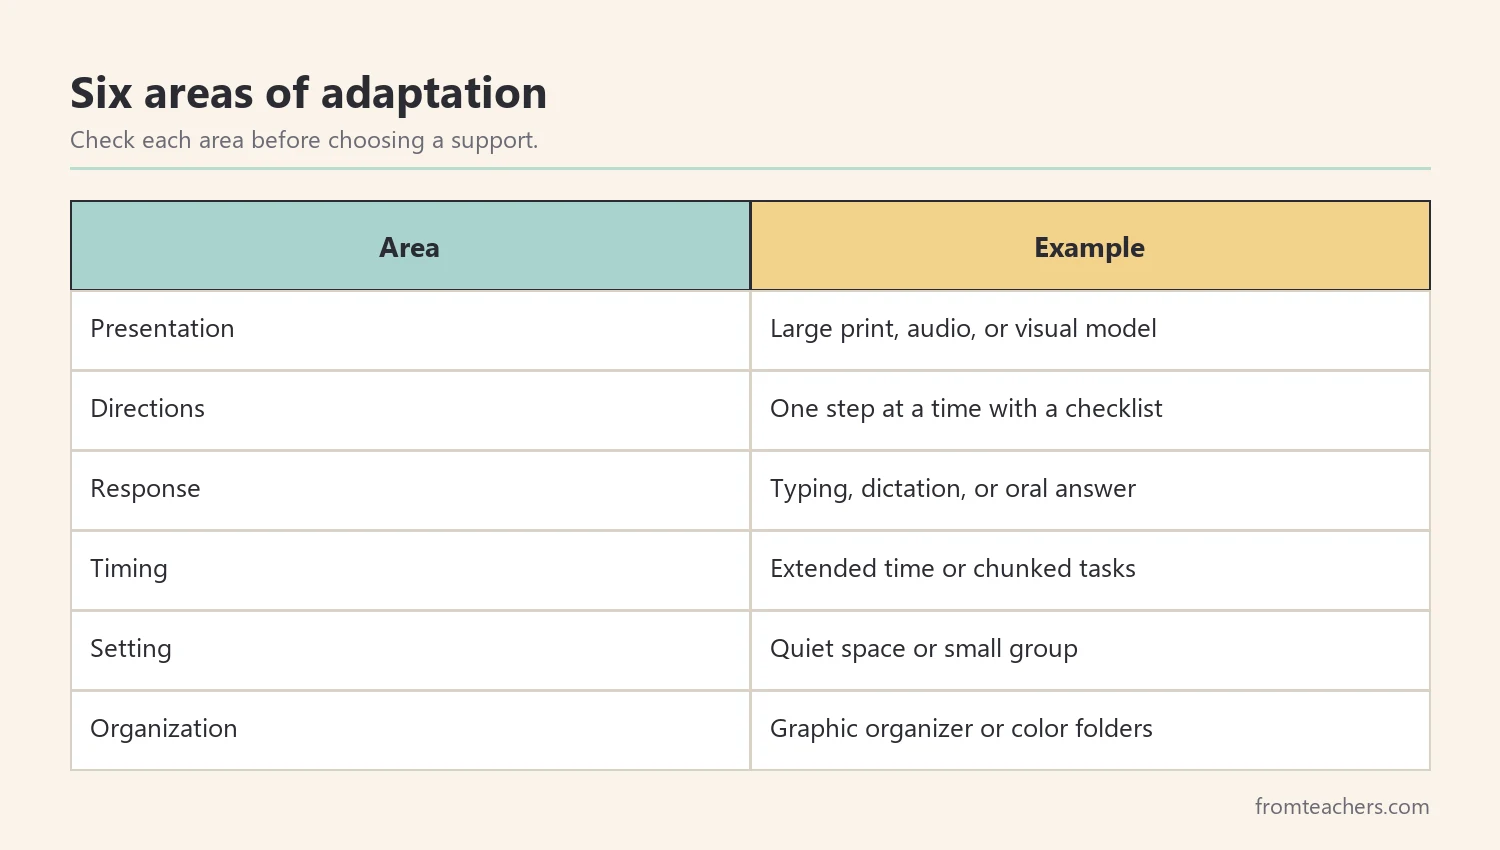
Most instructional adaptations fall into a few areas. Looking across these areas helps you avoid relying on the same support for every student.
- Presentation: large print, audio, visuals, models, or fewer items per page.
- Directions: one step at a time, written checklists, repeated or rephrased directions.
- Response: typing, dictation, choice of format, oral answers, or pointing.
- Timing and pacing: extended time, short tasks with breaks, or chunked assignments.
- Setting: seating, reduced noise, small group, or a quiet place for tests.
- Organization: graphic organizers, color-coded folders, and visual schedules.
Different disability types often point to different areas. For example, students with attention difficulties may benefit from shorter tasks and clear checkpoints. Students with auditory processing difficulties may need written backups for spoken directions. Students with intellectual disabilities may need concrete examples and more repetition. However, always return to the specific barrier, because individual needs vary.
Moreover, think about the whole class. Many adaptations, such as written directions or visual models, help many students at once. Universal design for learning encourages planning these options from the start rather than adding them later.
Worked example: Jonah across the areas
Jonah’s teacher checked each area against his barrier statements. Presentation was not a concern, because he reads grade-level text well. Directions, response, and organization were the clear needs. As a result, the team did not add extra supports that would only clutter his desk.
| Area | Needed? | Chosen support |
|---|---|---|
| Presentation | No | None |
| Directions | Yes | Step checklist |
| Response | Yes | Typing or dictation |
| Organization | Yes | Graphic organizer |
5. Try, record, and adjust
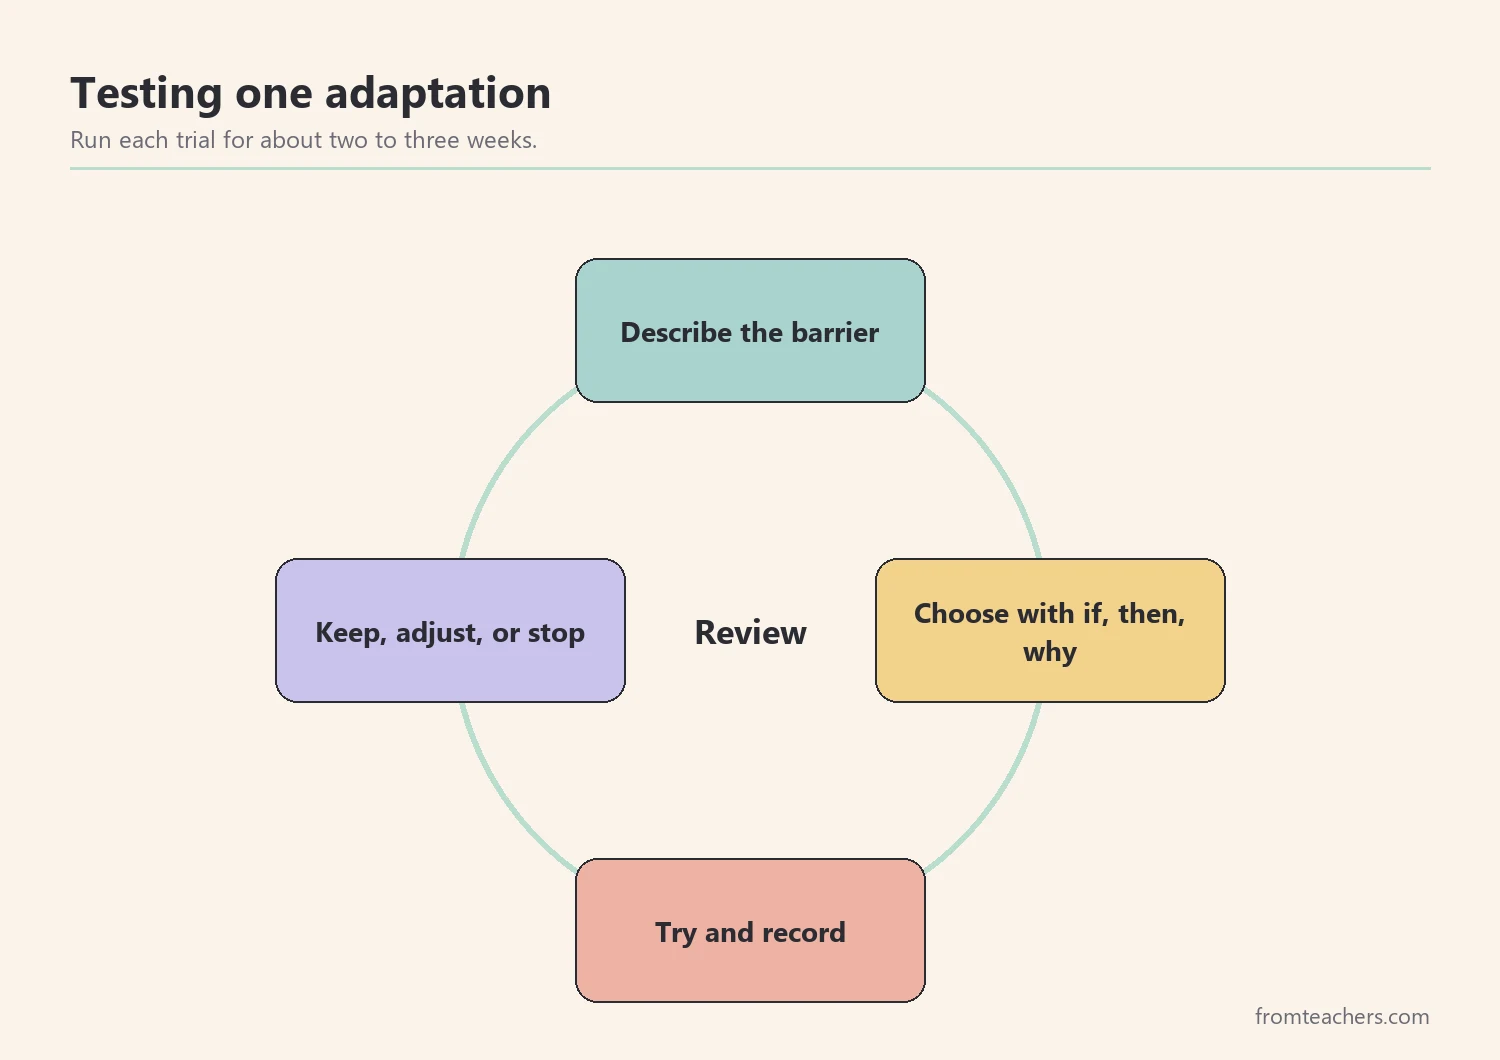
An adaptation is a hypothesis: you expect it to help, but you need to check. Therefore, try one or two changes at a time for a set period, usually two to three weeks, and record a simple measure.
Choose a measure that matches the barrier. For writing, that might be the number of relevant ideas in an answer. For directions, it might be the number of steps completed without a reminder. Keep the record short so it actually gets done.
In addition, jot down anything unexpected. A support might help with one task but cause a new problem elsewhere, such as typing that is quick but distracting on a shared device. Those notes are just as useful as the numbers when you review.
Worked example: Jonah’s three-week check
| Week | Adaptation in use | Science ideas per answer | Steps done without reminder (of 3) |
|---|---|---|---|
| Baseline | None | 1 | 1 |
| 1 | Organizer plus typing | 3 | 1 |
| 2 | Added step checklist | 3 | 2 |
| 3 | Both, plus printed notes | 4 | 3 |
As a result, the team can see that the writing support helped right away and the step checklist helped soon after. Printed notes did not need a separate measure, because Jonah stopped falling behind during copying.
6. Review with the team and plan for independence
After the trial, meet briefly with the team, the family, and when possible the student. Look at the data and decide: keep, adjust, or stop. Keep adaptations that clearly help. Adjust those that help a little. Stop those that make no difference, so the student does not carry extra steps for no reason.
Then think about independence. Over time, the goal is for the student to choose and use supports on their own. For example, Jonah can learn to ask for a printed copy of notes or open a typing tool without waiting for the teacher. Teaching students to name their own needs is a skill that will help them in later grades and beyond school.
Worked example: Jonah’s review meeting
At the review, Jonah’s teacher shared the three-week table. His parent said he now types homework answers at home too and seems less frustrated. Jonah said the checklist helps, but he does not like it on his desk where others can see it. Therefore, the team moved the checklist inside his folder and kept both supports. They also set a goal for Jonah to request printed notes himself in two classes by the next review.
Finally, write the adaptations that work into the student’s plan and share them with every adult who teaches the student. Consistency across classes matters. An adaptation that works in science but is unknown in social studies will not help much.
Common mistakes and how to avoid them
- Choosing by label only. Fix: describe the barrier you see in the lesson, then choose.
- Too many changes at once. Fix: try one or two, so you can tell what is helping.
- Lowering the goal by accident. Fix: check whether you changed the path or the expectation, and involve the IEP team for modifications.
- No measure. Fix: pick one simple number that matches the barrier and record it weekly.
- Keeping supports the student no longer needs. Fix: review regularly and fade supports when data show independence.
Questions teachers and parents ask about instructional adaptations
Are instructional adaptations only for students with an IEP?
No. Many adaptations, such as written directions, visual models, or chunked tasks, can help any student. Students with IEPs or 504 plans have specific supports that must be provided, but good adaptations often benefit the whole class.
Do adaptations make work easier?
Accommodations should not lower what a student must learn. They remove barriers to access. Modifications do change expectations, and those decisions belong to the IEP team.
How do I choose between two strategies?
Go back to the why. Ask which strategy most directly removes the barrier you described. If both seem reasonable, try one for two weeks, record a measure, and then compare.
What if the student refuses to use the adaptation?
Ask why. Some students feel singled out. Offer the support to a group or to the whole class, or make it more private, such as a checklist taped inside a folder.
How can families help?
Families can share what helps at home, such as typing homework or breaking tasks into small steps. They can also reinforce the language of the plan, so the student hears the same message in both places.
Related reading: Accommodations vs Modifications in Special Education, Special Education Strategies Guide, and Assistive Technology in Special Education.
A companion resource for instructional adaptations:
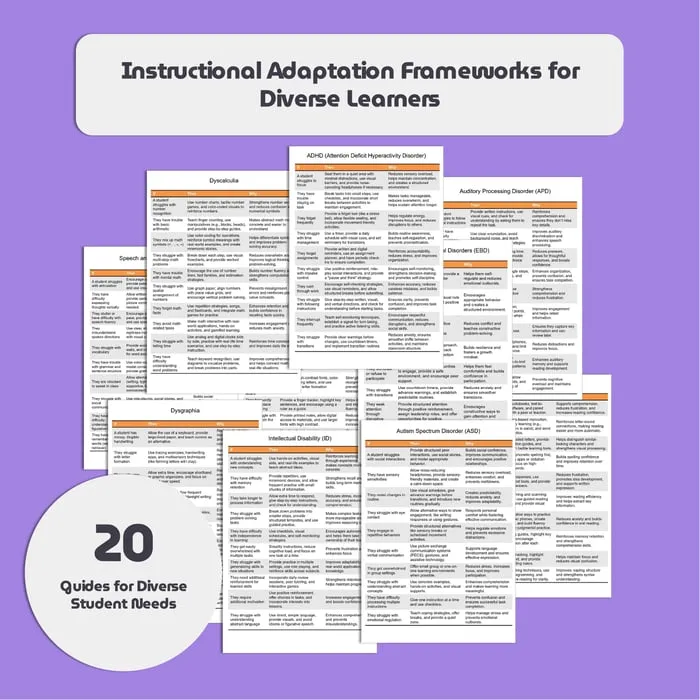
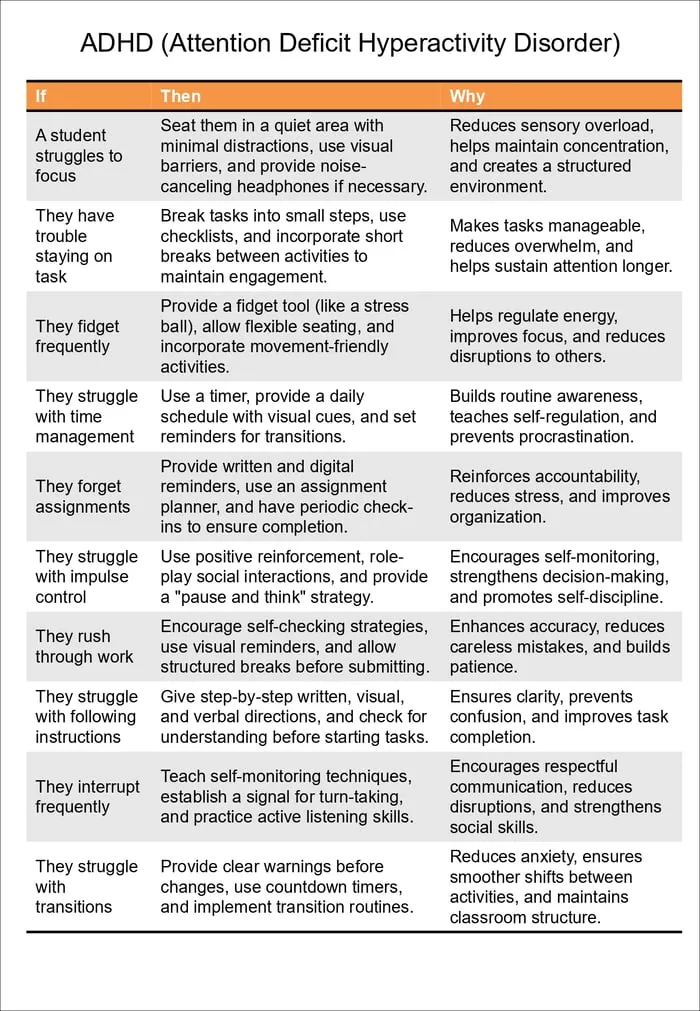
Instructional Adaptations by Disability Type: 20 complete if, then, and why tables, each dedicated to a specific disability type, including ADHD, autism, dyscalculia, dysgraphia, intellectual disability, speech and language disorders, auditory processing disorder, and emotional and behavioral disorders.
Sources and scope
- Individuals with Disabilities Education Act (IDEA): the federal framework for IEPs, accommodations, and modifications.
- IRIS Center, Vanderbilt University: free modules on accommodations and differentiated instruction.
- CAST UDL Guidelines: a framework for planning flexible lessons from the start.
- Understood.org: practical information on learning and thinking differences.
Scope: this guide explains a method for choosing and testing classroom adaptations. It does not replace the decisions of the student’s IEP or 504 team.
Key takeaways
- Describe the barrier you see before choosing a strategy.
- Use if, then, why statements to link challenge, adaptation, and reason.
- Change the path, not the goal, unless the IEP team decides otherwise.
- Try adaptations briefly, measure, and adjust.
- Build toward the student choosing their own supports.






Leave a Comment