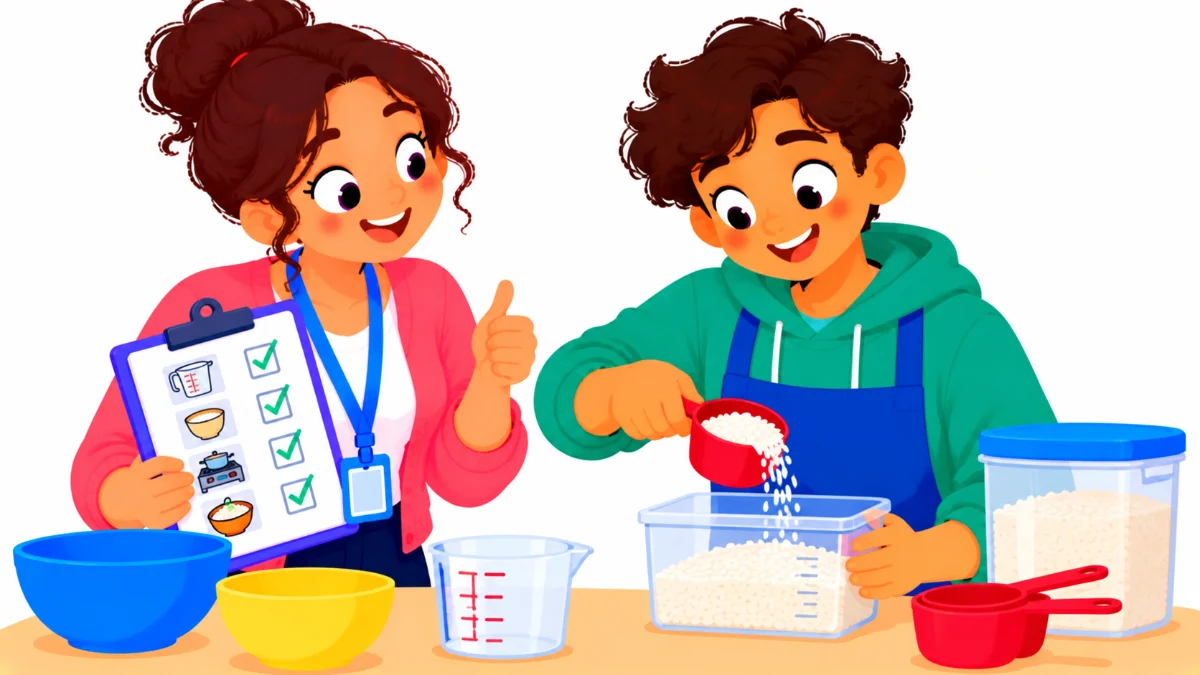

A life skills checklist can answer a question that often comes up at transition meetings: what can this student actually do on their own? Picture a sixteen-year-old who can describe how to make lunch, yet in the classroom kitchen he waits for someone to tell him to wash his hands, forgets the bread in the cupboard, and leaves the counter covered in crumbs.
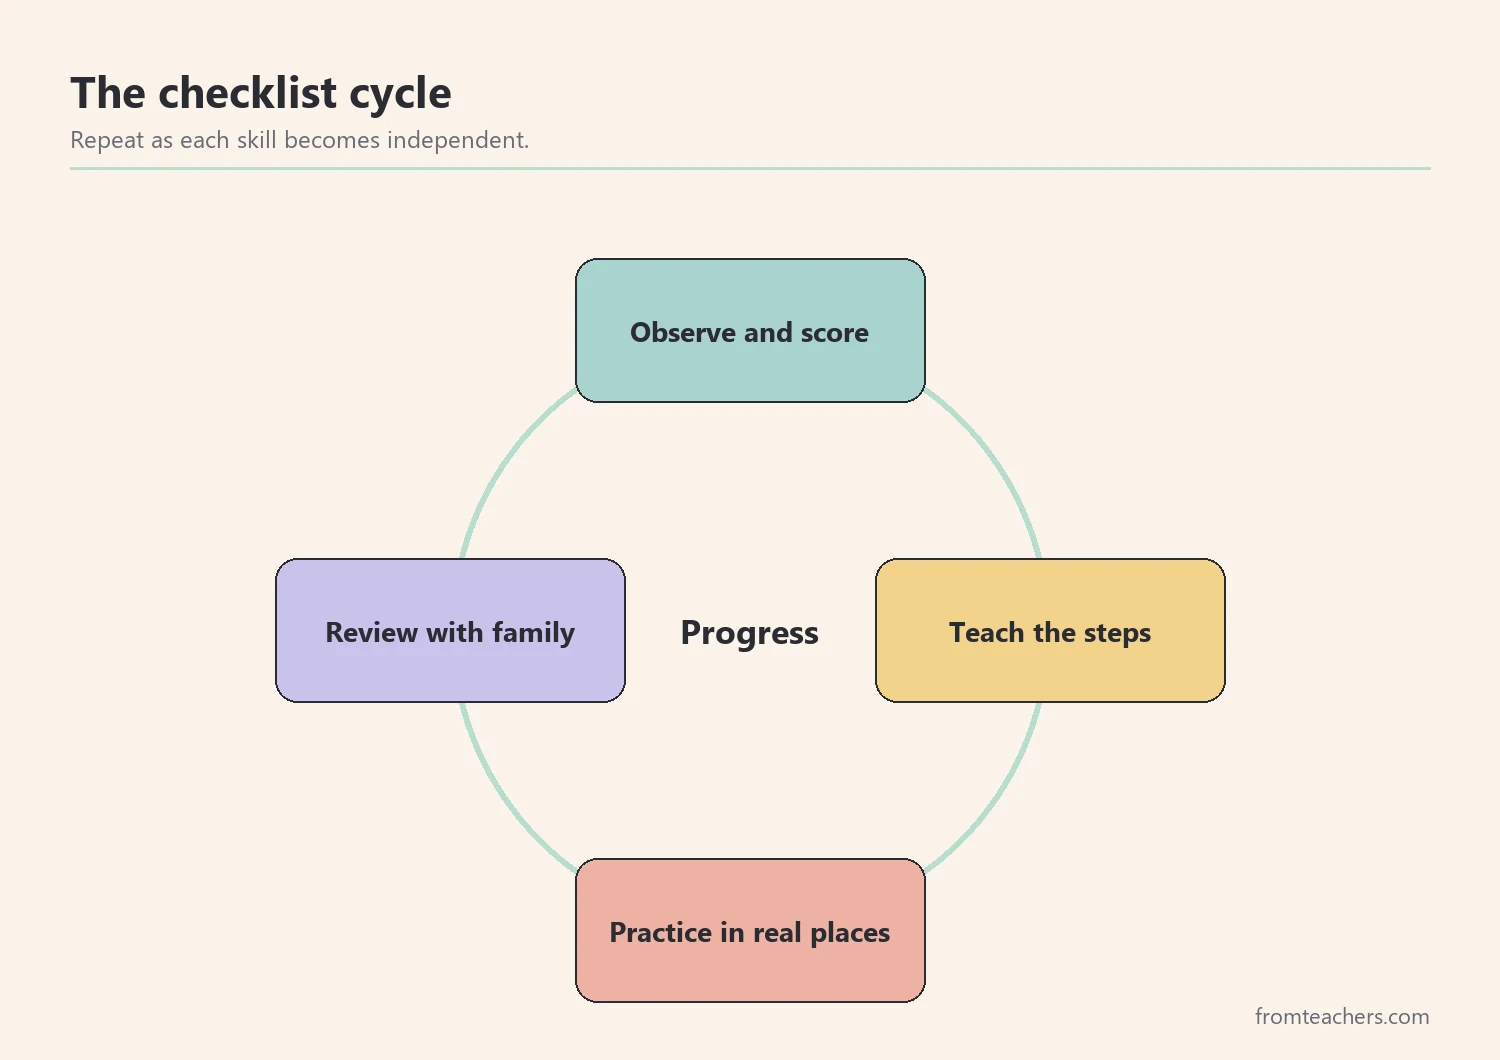
This guide walks teachers, transition staff, and families through a five-step process for tracking everyday independence at home, at school, and in the community. By the end, you will know how to choose the right skill areas, break each skill into observable steps, record progress with a simple code, practice in real settings, and review results with the student’s team.
Examples are fictional. Adapt to the student’s goals and agreed supports. This is guidance, not a diagnosis.
At a glance
- Start with the skill areas that matter most for this student’s next few years.
- Break every skill into small steps you can see and check off.
- Use one simple scoring code so every observer records the same way.
- Practice in real places, because skills learned only in class often stay there.
- Review the checklist with the student and family, then update the goals.
1. Choose the skill areas that matter for this student
First, decide where to focus. Life skills cover a huge range, from brushing teeth to budgeting a paycheck. Trying to track everything at once produces long forms that nobody fills in. Instead, choose two or three areas that connect to the student’s goals and daily life right now.
Most life skills programs group skills into a handful of familiar areas. The table below shows common areas with a few sample skills in each.
| Skill area | Sample skills |
|---|---|
| Daily living | Morning routine, dressing |
| Hygiene and grooming | Handwashing, showering |
| Meals | Planning, simple preparation |
| Money | Counting, paying, budgeting |
| Community safety | Crossing streets, using transit |
| Chores | Laundry, cleaning up |
To choose, ask the student and family a few questions. What does a typical day look like? Where does the student rely on others the most? What would make the biggest difference at home or in a future job? The answers usually point to two or three clear priorities.
Also, think about the student’s age and plans after school. A younger student may focus on hygiene and morning routines, while an older student preparing for work or further training may need money and travel skills sooner. In either case, the student’s own interests deserve a voice. A teen who wants to cook for friends will practice meal steps far more willingly than one who sees no point in them.
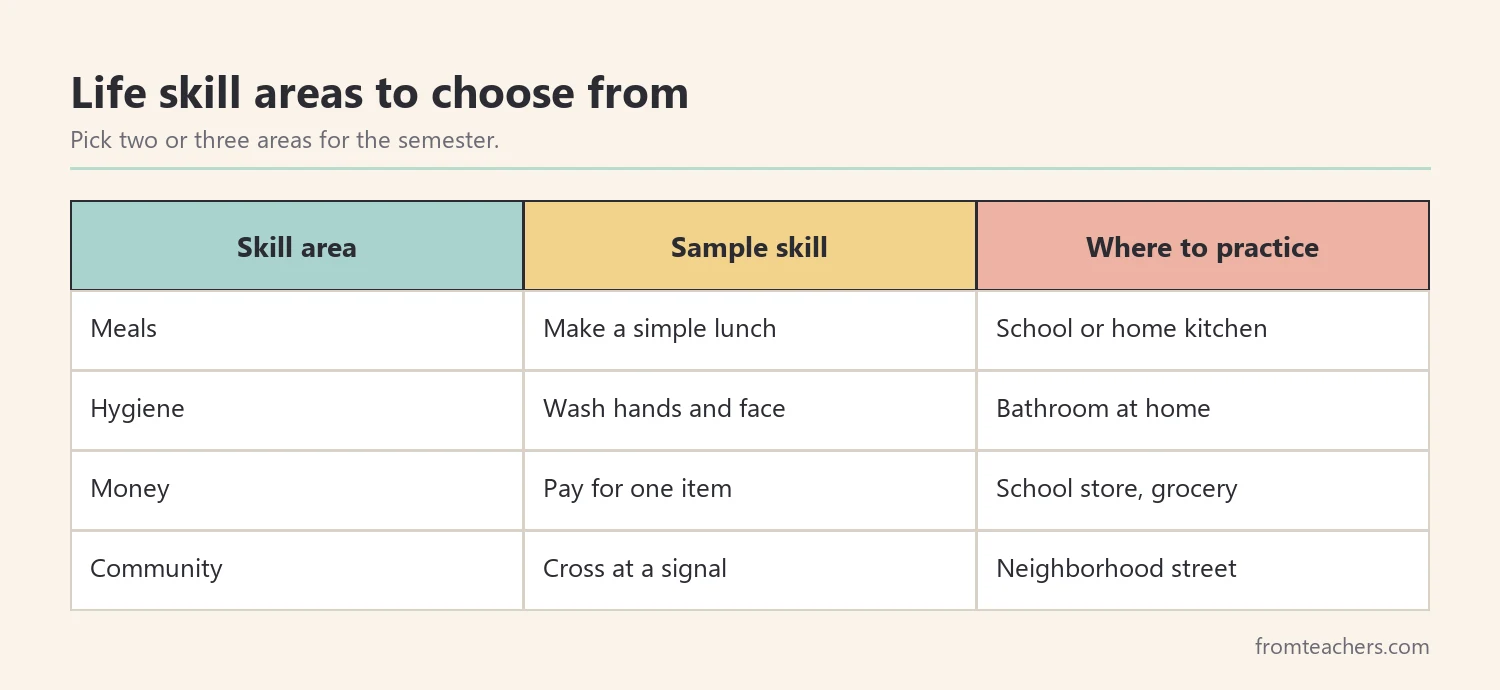
Worked example. Jordan is a fictional sixteen-year-old in a high school transition program. His family says mornings and lunch are the hardest parts of the day. Together with his teacher, they choose three areas for the semester: preparing a simple meal, personal hygiene, and paying for an item at a store.
2. Break each skill into steps on the life skills checklist
Next, turn each skill into a short list of steps. This is called a task analysis, and it is what makes a life skills checklist useful. “Makes lunch” is hard to score. However, “gets bread and fillings from the cupboard” is something any observer can see and check off.
Write steps that are observable and in order. Start each one with a verb, and keep it short. Most everyday tasks break into five to ten steps. If a step is still hard to score, split it into two.
The fastest way to write a task analysis is to do the task yourself and note every move. Then, compare it with how the student’s family does it at home. Small differences, such as where the bread is kept, matter more than you might think.
Ready-made checklists save a lot of writing time here. The Life Skills and Transition Monitoring Checklists cover areas such as daily living, hygiene, meal preparation, money management, community safety, and chores, with the same student, date, and observer fields on every page.
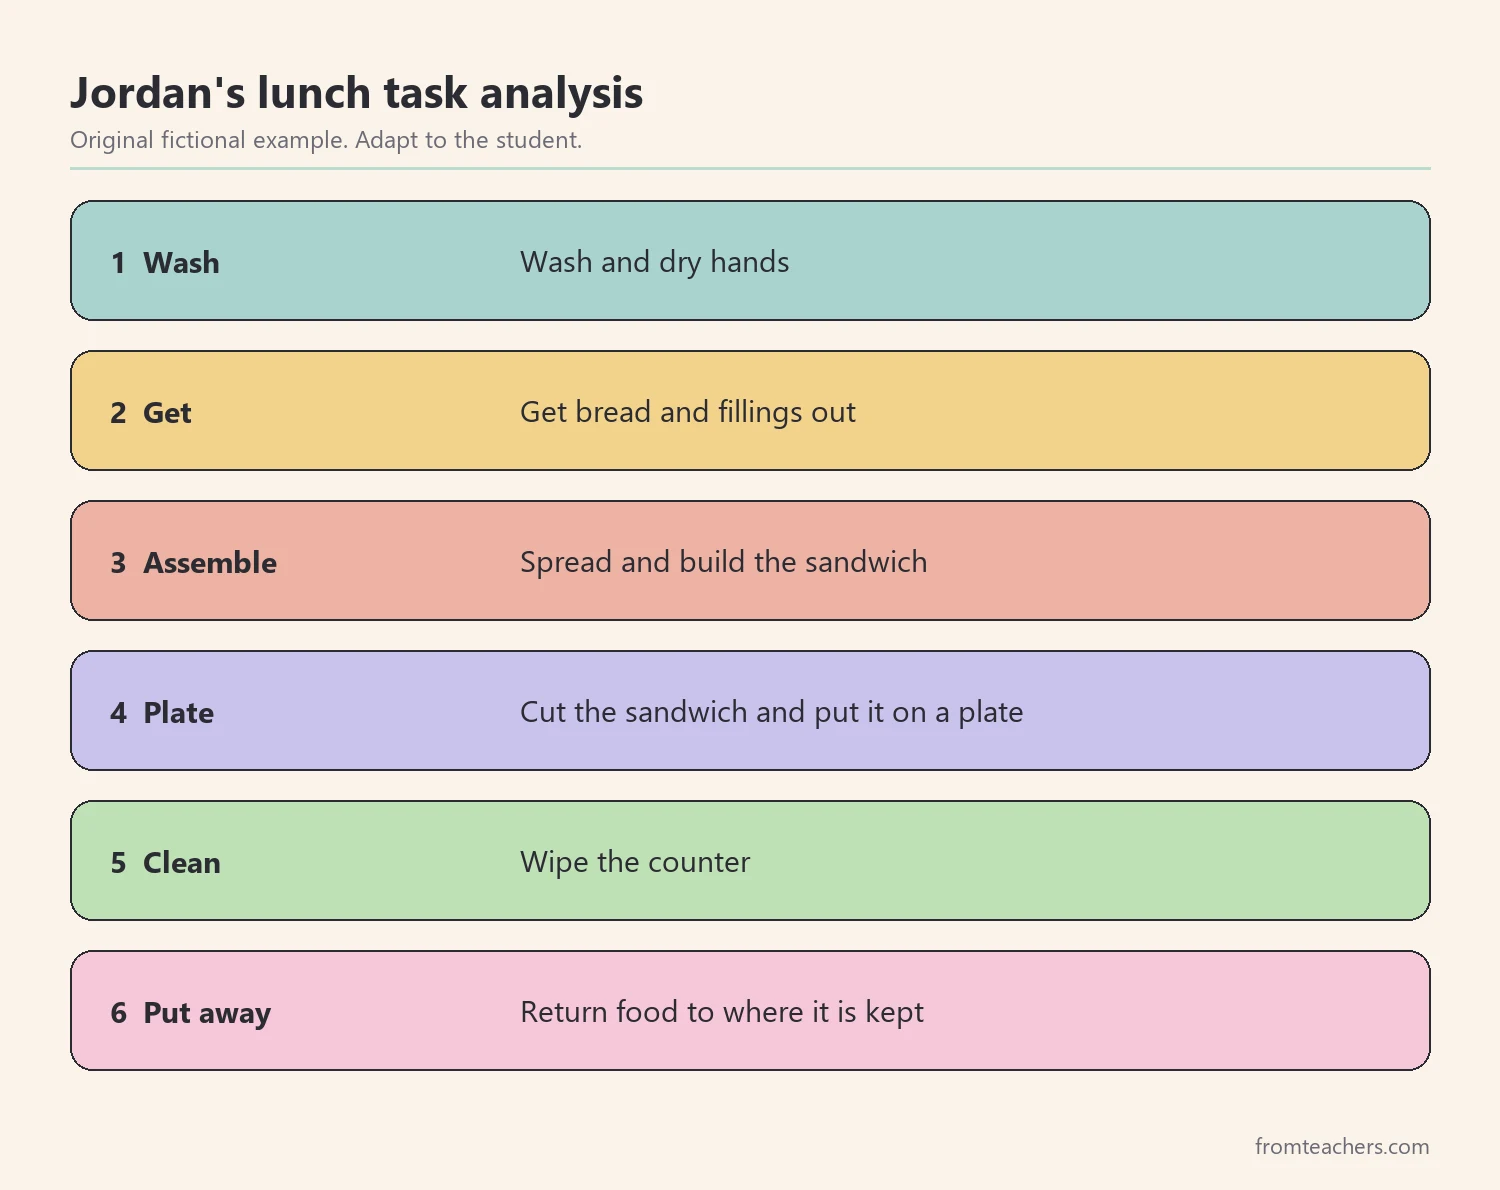
Worked example. Jordan’s teacher breaks “makes a simple lunch” into six steps: wash hands, get bread and fillings, spread and assemble, cut and plate, clean the counter, and put food away. The list fits on one line of his checklist page.
Before using the list, his teacher walks through it once with Jordan’s parent, who points out that at home the fillings are kept in the fridge, not the cupboard. They adjust the wording of step two so it works in both kitchens. As a result, home and school can score the same six steps, and Jordan practices one routine instead of two slightly different ones. In addition, Jordan reads the steps aloud and suggests a picture next to each one, which his teacher adds.
3. Record progress with a simple, consistent code
Then, decide how to score each step. A checklist is only as good as its consistency. If one adult writes “done” and another writes “mostly,” the data cannot be compared. A short, shared code fixes that.
Many teams use three levels. “I” means independent, with no help. “P” means prompted, with a reminder, gesture, or demonstration. “N” means not yet, where an adult did the step or the student did not attempt it. Some teams add more detail, but three levels are easy for everyone to use.
Write the date and observer on every page. Then, score each step as the student does the task, not afterward. Over time, the number of “I” marks becomes a clear measure of progress.
Also, agree on how often to observe. Once or twice a week per skill is enough for most students. More frequent checks can be useful at the start, when you are learning where the student needs help.
When several adults observe, compare notes once early on. For example, two staff members can score the same lunch task side by side and check whether their marks match. If they disagree on a step, the step usually needs clearer wording. This small check makes the whole record more trustworthy.
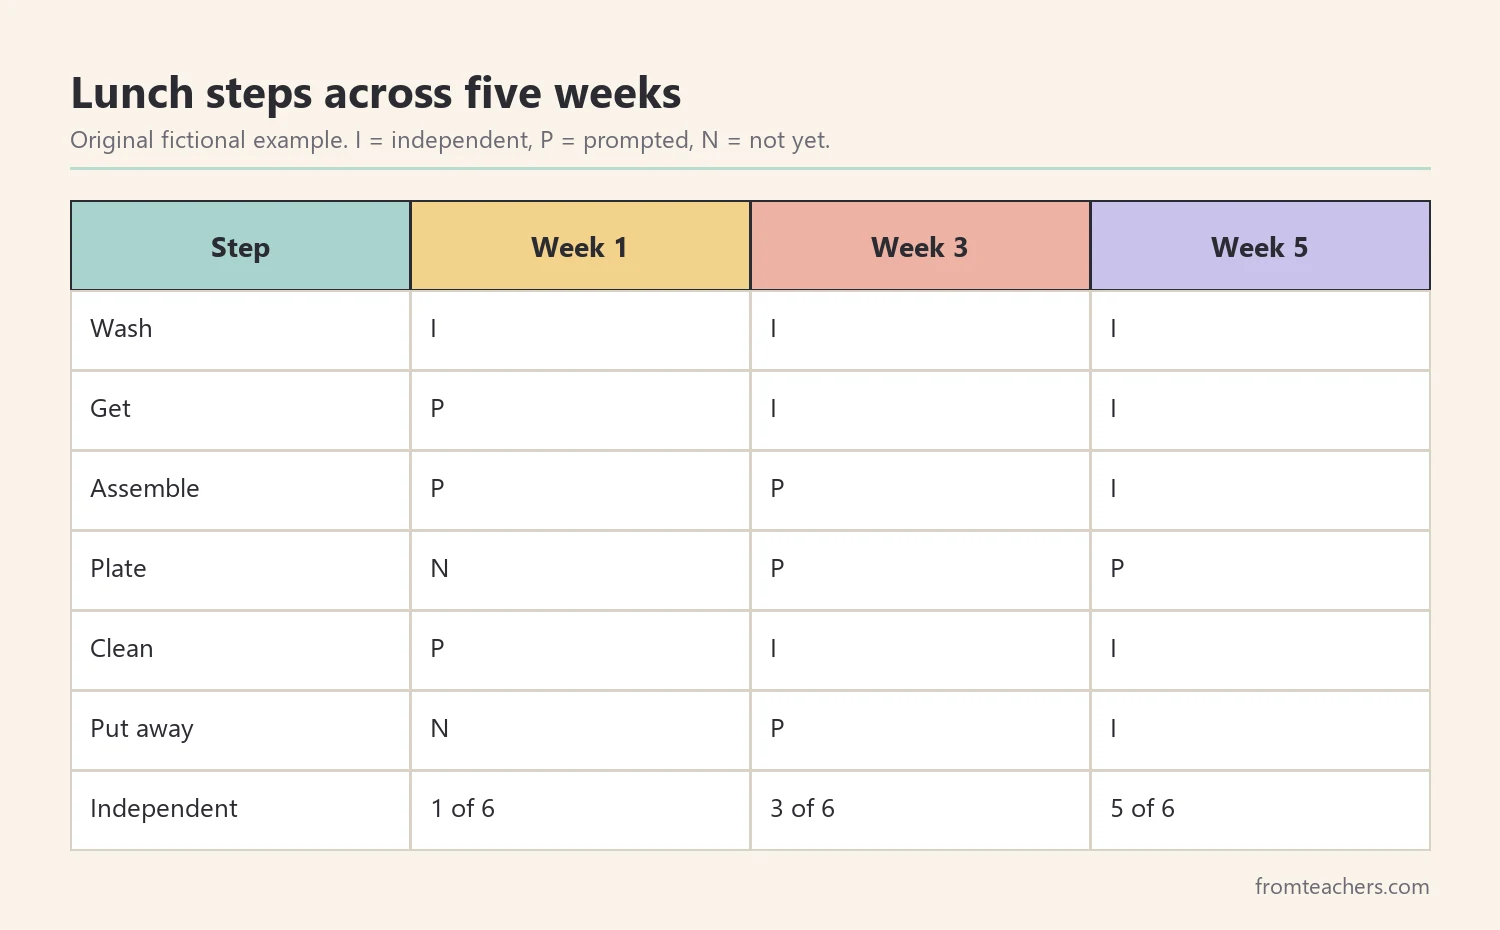
Worked example. In week 1, Jordan completes 1 of the 6 lunch steps independently. By week 3, he completes 3 of 6, and by week 5, he completes 5 of 6. The step that still needs a prompt is cutting and plating. His life skills checklist makes that pattern obvious at a glance.
4. Practice life skills in real settings
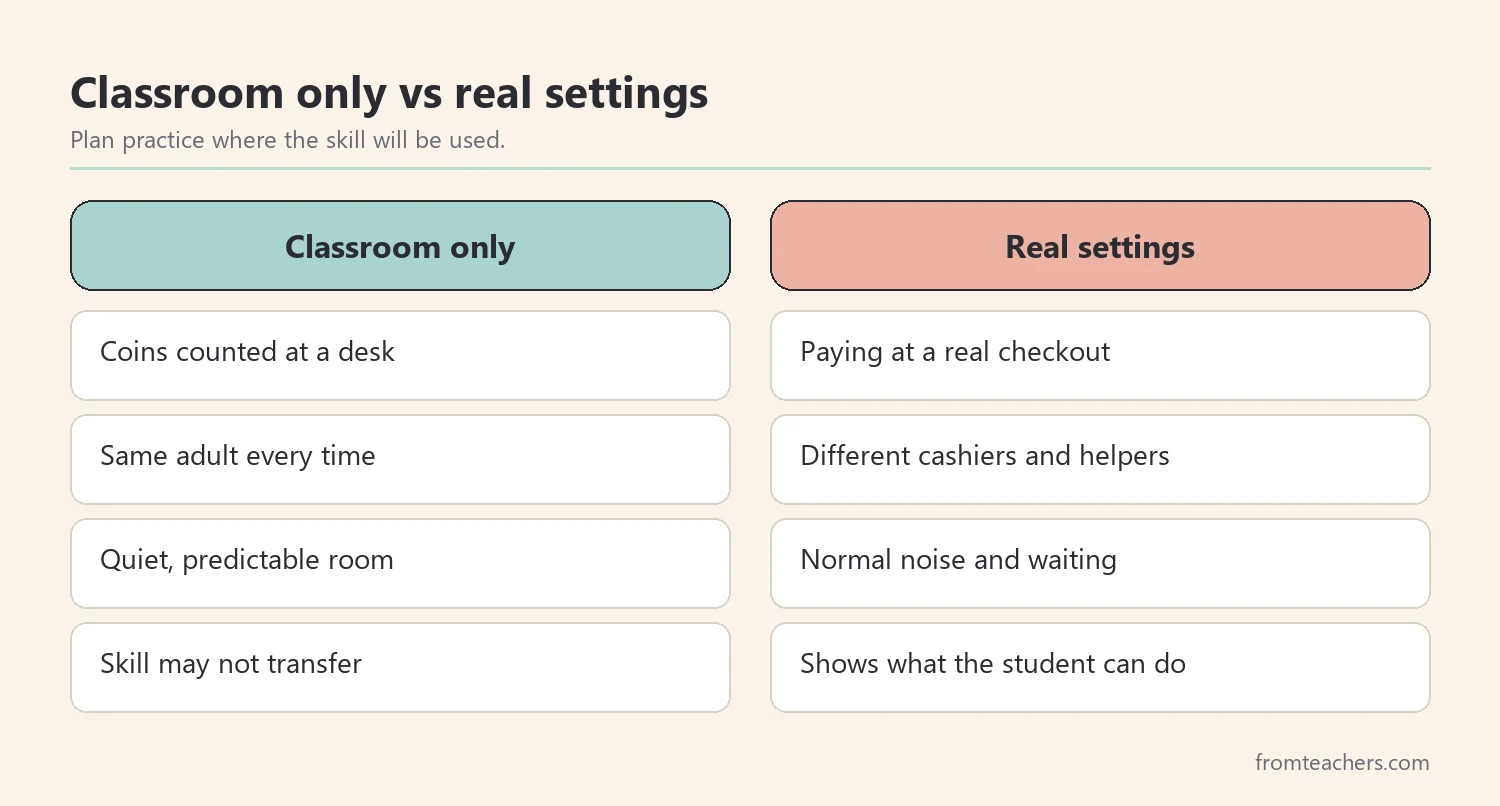
Skills practiced only in a classroom often stay in the classroom. A student who can count coins at a desk may still freeze at a real checkout with a line behind him. Therefore, plan practice in the places where the skill will actually be used.
Start in a calm version of the real setting. For example, practice paying at a quiet time of day, or practice making lunch in the family kitchen on a weekend. Then, slowly add the normal challenges: a busier store, a different cashier, a new recipe.
Families are key partners here. Share the same steps and scoring code so home practice counts too. A copy of the checklist on the fridge lets a parent score a few steps during a normal weekday, without turning home into school.
Plan prompts carefully when you are out in the community. Use the least help needed, and fade it quickly. In addition, step back physically when you can, so the cashier talks to the student, not to you.
Safety comes first in community practice. Before any outing, review the plan with the student, agree on a meeting point, and decide what the student should do if something unexpected happens. Similarly, check school policies for off-campus instruction. With a clear plan, both the student and the adult can stay calm and focused on the skill itself.
Worked example. Jordan practices paying at the school store for two weeks, then at a small grocery store with his teacher. On his second store visit, he chooses a drink, waits in line, hands over a five-dollar bill for a two-dollar drink, and checks that he received three dollars in change. His teacher stands near the exit and does not prompt.
5. Review the life skills checklist and update goals
Finally, look at the data together. Every few weeks, sit down with the student and, when possible, the family. Review which steps moved to independent, which are stuck, and what will change next.
Invite the student into the review. Ask what felt easier and what still feels hard. Students who see their own progress, such as more “I” marks than last month, often become more motivated. Moreover, their answers can reveal problems an observer would miss, such as a step that feels embarrassing in public.
Then, decide on next steps. If a skill is mostly independent, plan how to keep it going and choose a new skill. If a step is stuck, change one thing: the prompt, the practice setting, or the way the step is taught. Bring this information to IEP and transition planning meetings, where the team can use it to shape goals.
| Review question | Jordan, week 5 |
|---|---|
| What is now independent? | 5 of 6 lunch steps |
| What is still prompted? | Cutting and plating |
| What will change? | Practice with a safer knife at home |
| What comes next? | Packing lunch the night before |
Common mistakes and how to avoid them
- Tracking too many skills at once. Long checklists go unfinished. Fix: choose two or three areas per semester.
- Writing vague steps. “Cleans up” means different things to different adults. Fix: name each observable action, such as “wipes the counter.”
- Using different scoring words. Data from home and school cannot be compared. Fix: share one simple code, like I, P, and N.
- Practicing only at school. Skills may not transfer to real places. Fix: plan practice at home and in the community.
- Leaving the student out of reviews. Students lose ownership of their goals. Fix: ask what feels easier and what they want to work on next.
Questions teachers and parents ask about a life skills checklist
Who should use a life skills checklist?
Special education teachers, transition coordinators, related service staff, and families can all use one. The key is that everyone uses the same steps and scoring code. That way, observations from different places fit together.
How often should I update the checklist?
Many teams score each target skill once or twice a week and review the whole checklist every few weeks. Update the steps when the student masters a skill or when a step proves too big. Keep old pages so you can show progress over time.
At what age should students start working on life skills?
Everyday skills like handwashing and dressing can start very early. More complex skills, such as budgeting or using public transit, often become a bigger focus in middle and high school as transition planning begins.
Can families use the checklist at home?
Yes. Home is where many life skills happen naturally. Share a copy of the steps and the scoring code, and ask the family to score a few steps each week during normal routines.
How does this connect to transition planning?
Checklist data shows what the student can already do and where support is still needed. Teams can use that information when discussing transition goals and services. The final decisions belong to the IEP team, including the student and family.
Related reading: Navigating the Path to Adulthood: Building Essential Life Skills, Building Workplace Readiness: Essential Skills for Career Success, and Dignity in Daily Care: Respectful Approaches to Toileting and Personal Hygiene.
A companion resource for a life skills checklist:
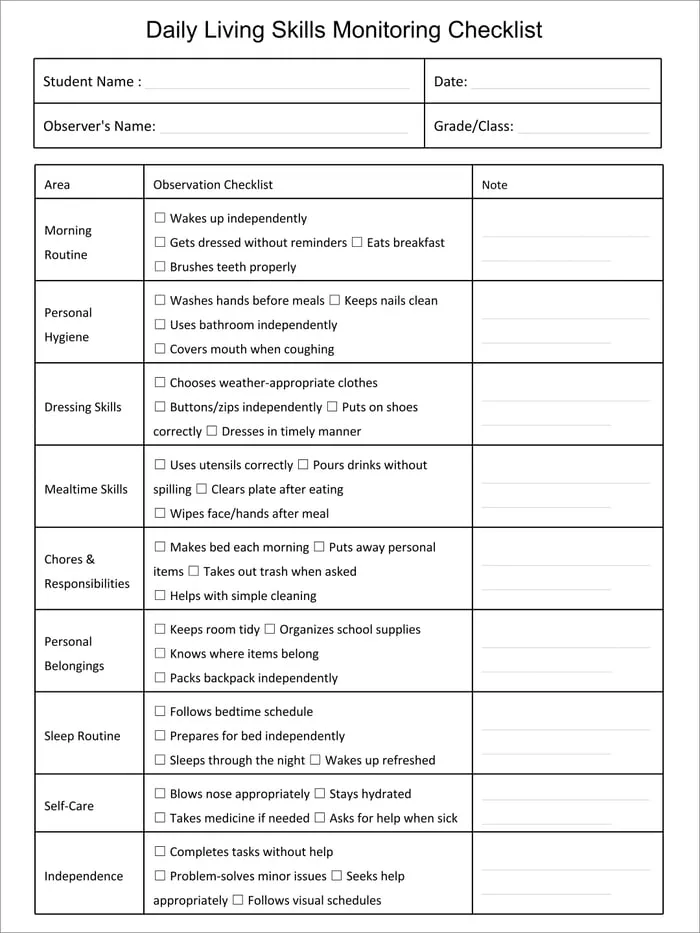
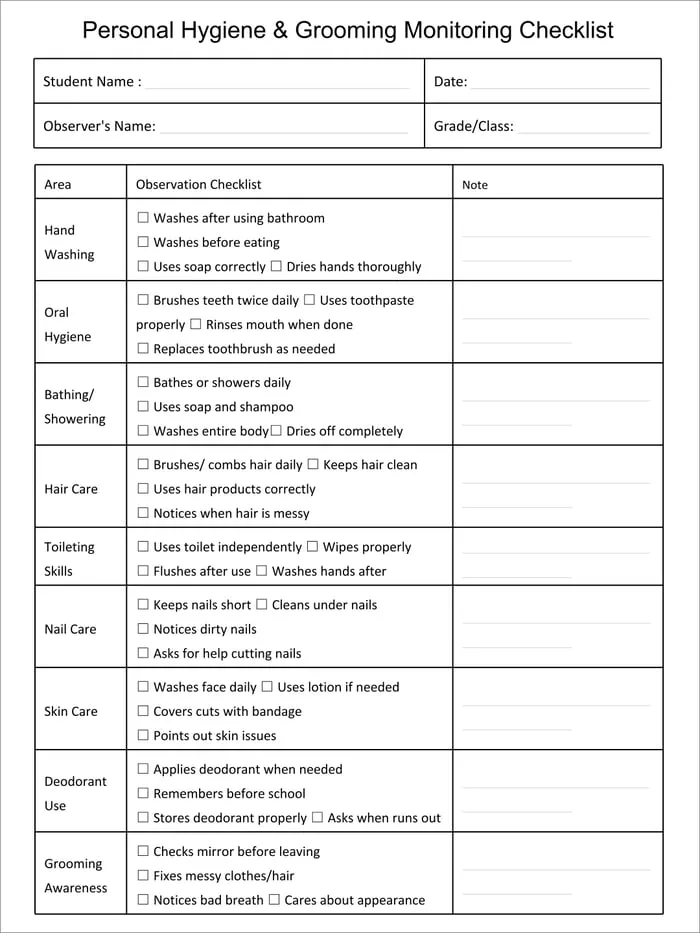
Life Skills and Transition Monitoring Checklists: a set of reusable checklists for daily living, personal hygiene and grooming, meal planning and preparation, money management and budgeting, community safety and navigation, and chores, with consistent student name, date, and observer fields on every page.
Sources and scope
- IDEA, U.S. Department of Education: the law behind IEPs, including transition services for older students.
- National Technical Assistance Center on Transition: The Collaborative: resources on transition planning and practices for students with disabilities.
- IRIS Center, Vanderbilt University: free modules on transition, instruction, and data collection.
- Understood.org: practical articles for families on building independence.
This guide covers practical tracking of everyday living skills at school, at home, and in the community. It does not cover formal adaptive behavior assessment or eligibility decisions, which belong to qualified professionals and the IEP team.
Key takeaways
- A life skills checklist works best when it targets two or three priority areas.
- Break each skill into short, observable steps in order.
- Use one shared code, such as independent, prompted, and not yet.
- Practice in real settings and involve the family.
- Review progress with the student and use it to update goals.
Leave a Comment