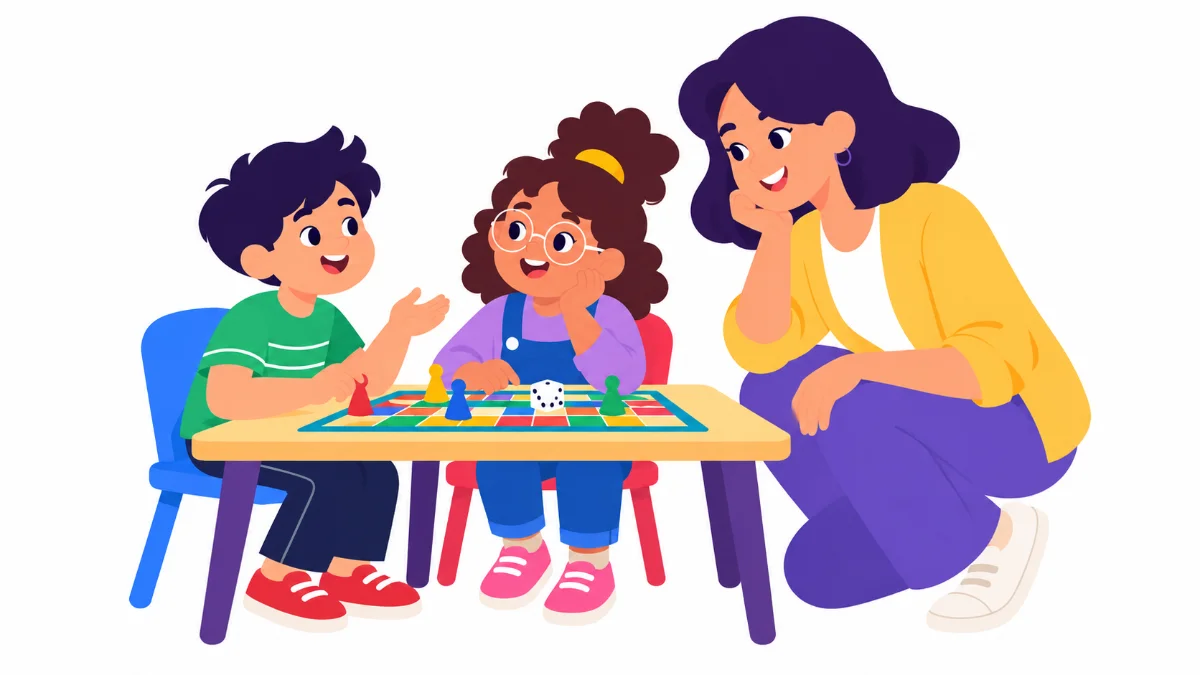

Social problem solving is the skill students use when a game goes wrong, a friend says something hurtful, or two people want the same thing. Picture two fifth graders at recess, both holding the same ball and both shouting. Neither one is a bad kid. They simply do not have a clear plan for what to do next, so the conflict grows.
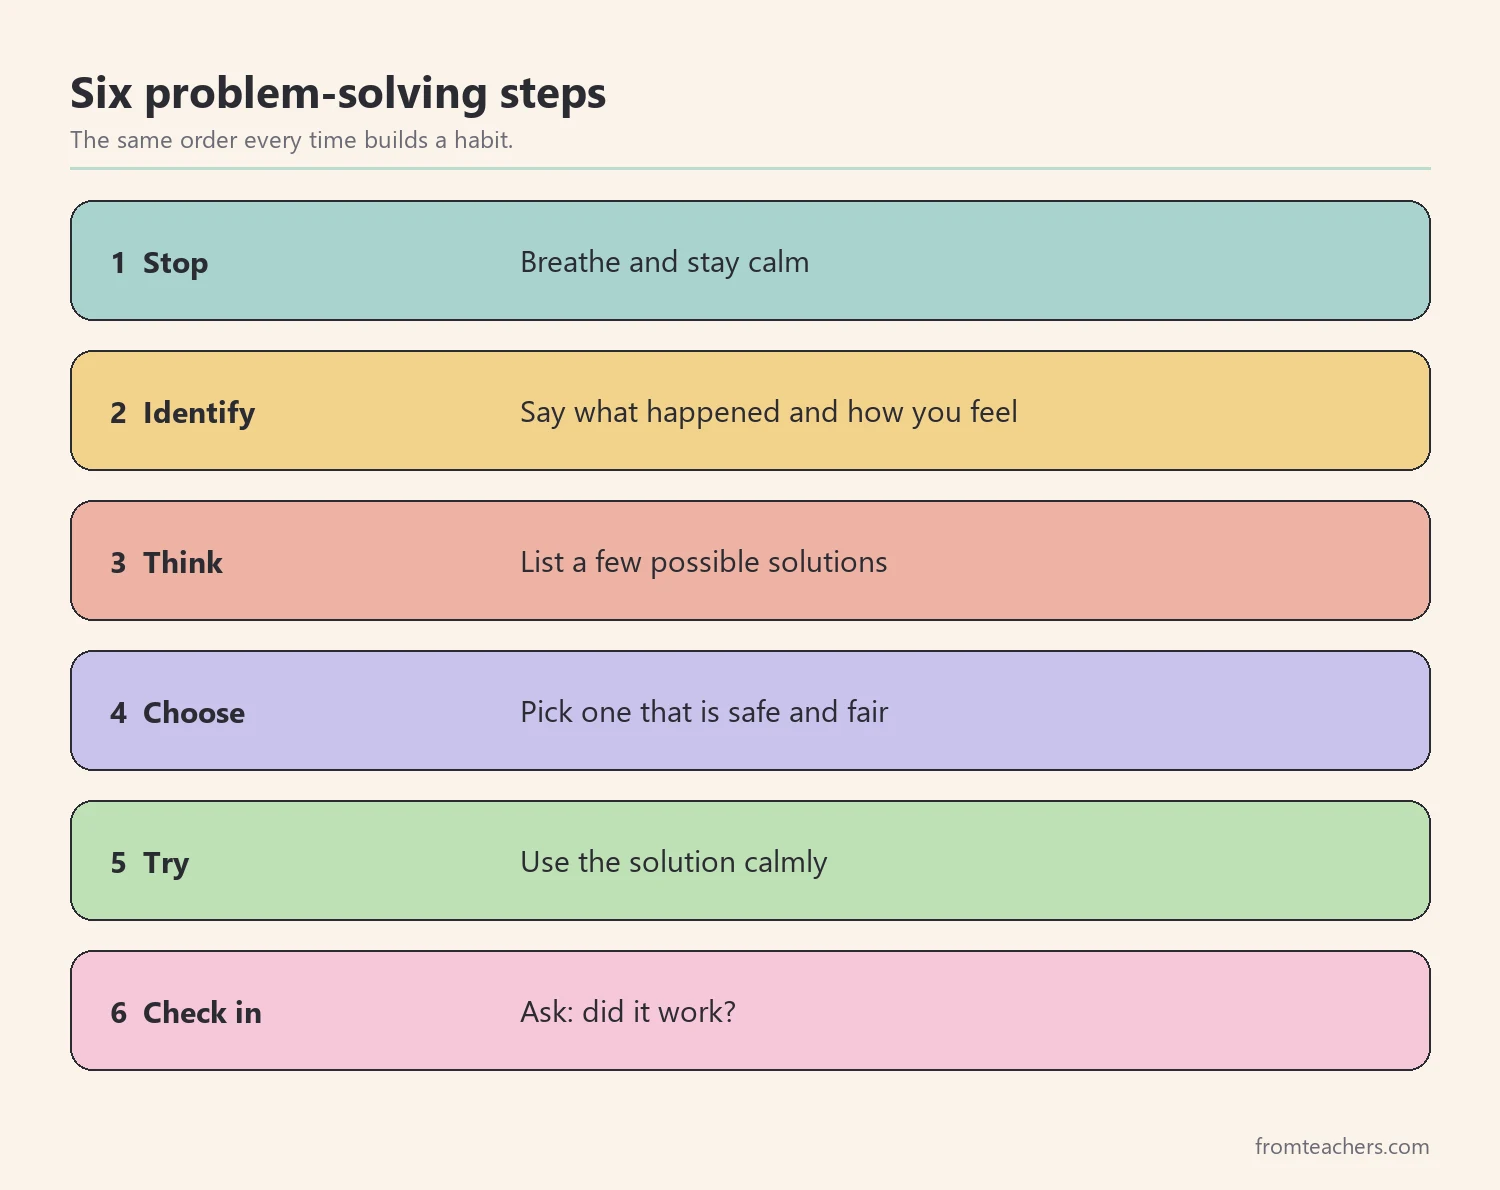
This guide gives you six steps to teach social problem solving calmly: stop and stay calm, identify the problem, think of solutions, choose a solution, try it out, and check in. By the end, you will be able to teach each step, coach students through real conflicts, and help them build a habit that lasts.
Examples are fictional. Adapt to the student’s goals and agreed supports. This is guidance, not a diagnosis.
At a glance
- Social problems are normal. Solving them is a skill students can learn.
- Calm comes first, because thinking is hard when emotions are high.
- Students name the problem, list ideas, and choose a safe, fair solution.
- Trying the solution and checking in afterward builds flexibility.
- Practice the steps when calm, then coach them in real moments.
Before the steps, a quick note. The six social problem solving steps work best when they are taught in calm moments first, through short lessons and role-play. Then, during real conflicts, adults coach students through the same steps in the same order. Over time, students need less coaching and use the steps on their own.
1. Start social problem solving with a calm stop
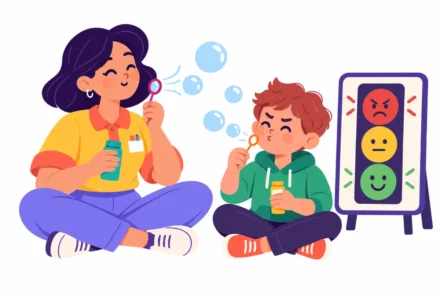
First, teach students to pause. When emotions are high, it is hard for the brain to think clearly. Calming first helps students make safer choices and listen to others more easily. Every round of social problem solving starts here.
Next, give students simple calming tools. Common choices include taking a deep breath, stepping back or taking space if needed, and using a calming strategy before responding. Practice these tools when students are calm, so they are familiar during conflict.
Also, model the pause yourself. Say, “I’m feeling frustrated, so I’m going to take a breath before I answer.” Students learn a great deal from watching adults handle hard moments.
Moreover, agree on a calm signal for the class. A hand on the chest, a raised palm, or a short word like “pause” can remind everyone to start social problem solving with a breath. Shared signals save words when tension is high.
Then, make calm the first coaching move. When you arrive at a conflict, avoid asking “What happened?” right away. Instead, say, “Let’s take a breath first.” A calmer start makes every later step easier.
Worked example. Eli is a fictional fifth grader. At recess, he and his classmate Sam both grab the same ball. Eli’s teacher, Ms. Brooks, walks over and says, “Let’s both step back and take a breath.” Eli drops his arms and takes two slow breaths.
2. Identify the problem
Now, help students name what happened. Three questions guide this step: What happened? What am I feeling? What might the other person be feeling? These questions turn a messy moment into a clear problem.
In addition, focus on the problem, not the person. Students learn that understanding the problem, without blaming, is the first step toward solving it. “You ruined the game” becomes “The game stopped, and I’m upset.” This shift lowers defensiveness on both sides.
Also, build feeling words. Many students, including students with language or social communication needs, have a small feelings vocabulary. A short list of feeling words or a feelings chart can help them describe their experience.
In addition, help students say the problem in one sentence. “We both wanted the ball” is clearer than a long story about who did what first. A one-sentence problem keeps social problem solving focused and fair to both sides.
Then, invite perspective-taking. Asking what the other person might feel builds empathy. Some students find this hard at first, especially autistic students or students who are still very upset. Offer choices, such as “Do you think Sam felt angry or disappointed?”
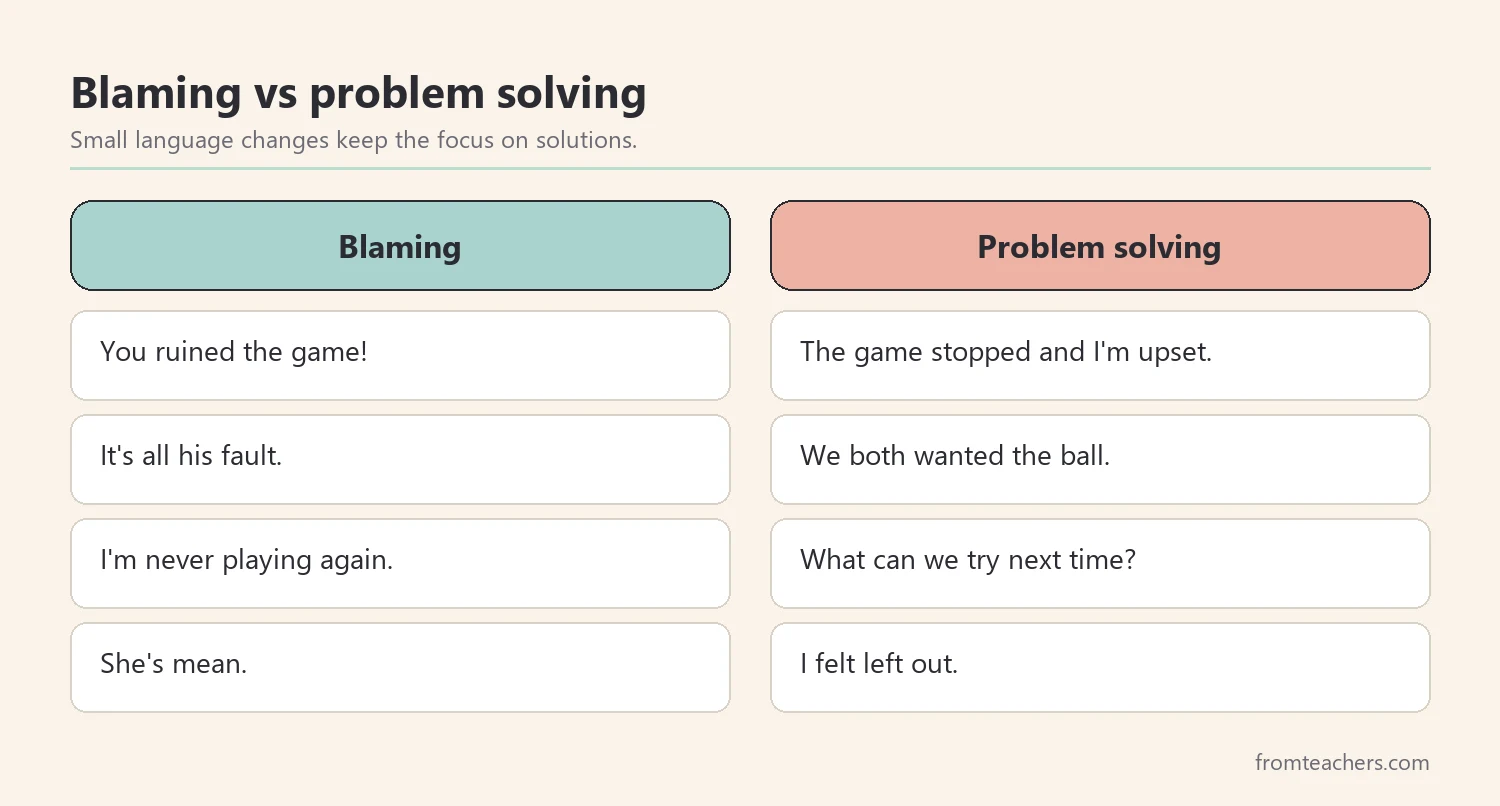
Worked example. Ms. Brooks asks each boy what happened. Eli says, “We both wanted the ball, and I felt angry.” Sam says he felt frustrated because he had been waiting. Ms. Brooks repeats the problem: “You both wanted the ball at the same time.”
3. Think of solutions for social problem solving
Next, brainstorm. Ask, “What are some ideas we could try? What would help everyone feel okay? What choices do I have?” At this stage, list ideas without judging them. Brainstorming builds flexibility, which is a core part of social problem solving.
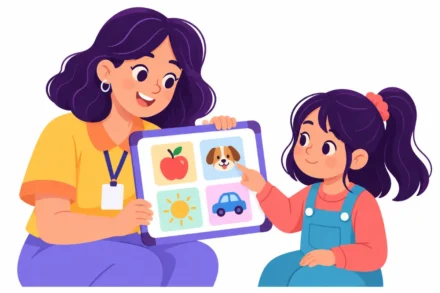
Moreover, support students who struggle to generate ideas. Visual solution cards, sentence starters, or teacher modeling can help, especially for students in special education. A card with common options, such as take turns, share, trade, or ask for help, gives students a starting point.
Also, accept silly or unhelpful ideas at first. “Grab it back” may come up. That is fine during brainstorming. The next step is where students evaluate ideas, and seeing a poor idea fail the test is a useful lesson.
For a classroom reference, the Social Problem-Solving Steps poster gives students six steps to work through conflicts safely and calmly. Each step includes a “why this helps” note, which makes it a practical tool for social skills and SEL lessons.
Next, teach ideas in advance. During calm lessons, read short scenarios and let the class brainstorm. When students have practiced social problem solving with pretend problems, real ideas come more quickly during real conflicts.
Then, keep the list short. Three or four ideas are usually enough. Too many choices can overwhelm students who are still settling after a conflict.
Worked example. Eli and Sam list four ideas: grab the ball back, take turns for five minutes each, tell Sam he can’t play, or ask the teacher to decide. Ms. Brooks writes them on a small whiteboard so both boys can see them.
4. Choose a solution
Now, help students choose. Three questions make this step simple: Is it safe? Is it fair? Does it help everyone move on? A good solution passes all three. Decision-making becomes easier when students use clear criteria.
First, check each idea together. Go down the list and ask the three questions. Students quickly see that “grab it back” is not safe or fair. This turns social problem solving into a predictable routine rather than a fight.
Next, let students make the final choice when possible. Ownership matters. A solution students choose themselves is more likely to work than one an adult imposes.
Also, accept that more than one solution can work. If two ideas pass, let the students pick. If none pass, go back to brainstorming with a little more support.
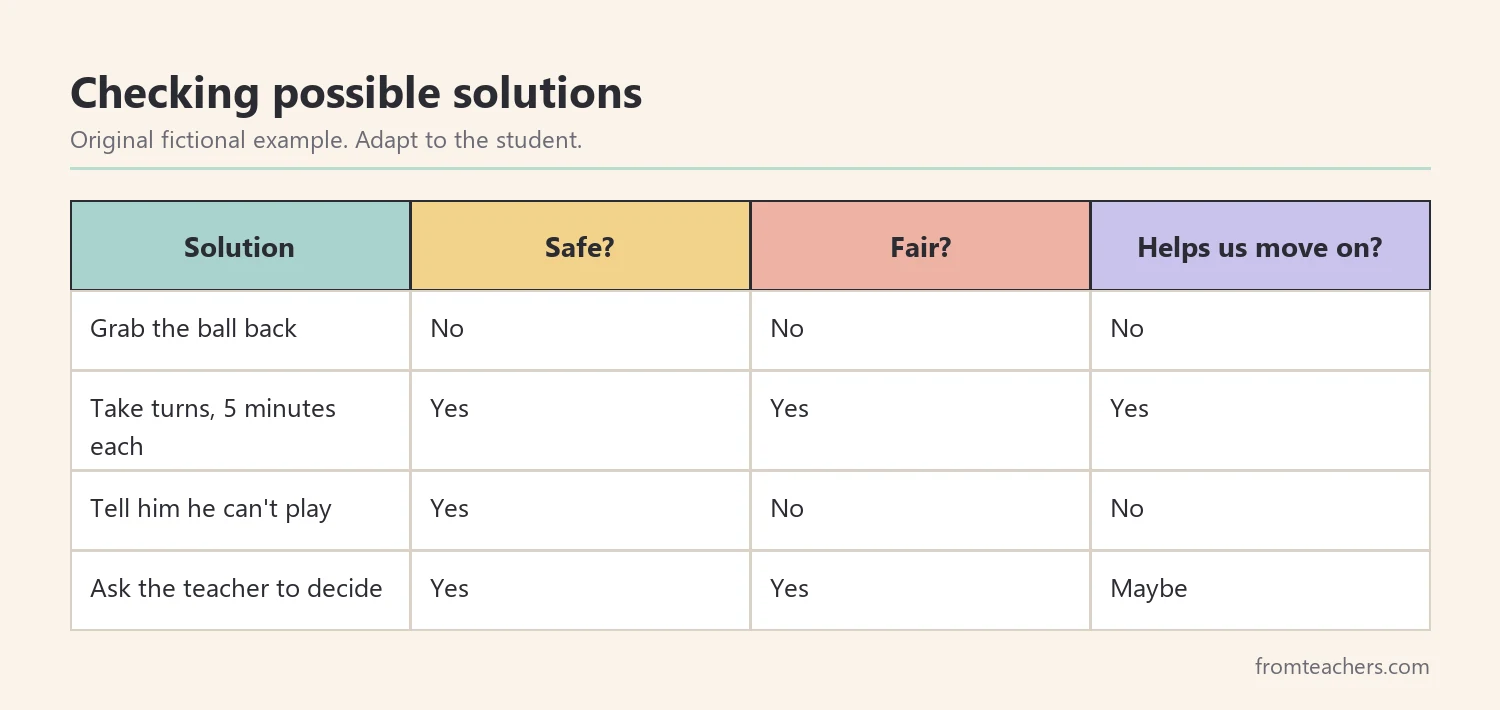
Worked example. Eli and Sam check each idea. Grabbing fails all three questions. Excluding Sam is not fair. Asking the teacher is okay, but they want to decide themselves. Taking turns for five minutes each passes all three questions, so they choose it.
5. Try it out
Next, put the solution into action. Students learn that solving problems requires action, not just talking. They also practice self-monitoring and asking for support.
In addition, coach the first try. Remind students to use the solution calmly, to ask for help if needed, and to notice if the problem gets better. A timer can help with turn-taking solutions. A nearby adult can offer a quick prompt if things start to slip.
Also, praise effort. Say, “You both chose a fair solution and you’re using it calmly.” Specific praise shows students that social problem solving is worth the effort.
Moreover, step back gradually. The first few times, stay close and coach every step. Later, watch from a distance and step in only if needed. Fading adult support is how social problem solving becomes the student’s own skill.
Then, be ready for bumps. Sometimes a solution does not work on the first try. That is not failure. It is information for the next step.
Worked example. Ms. Brooks sets a five-minute timer. Eli goes first. When the timer rings, he hands the ball to Sam without being asked. Ms. Brooks gives Eli a thumbs up from across the playground.
6. Check in and grow social problem solving skills
Finally, reflect. Ask, “Did the solution work? Do we need to try something different? Can we move on?” Reflection reinforces flexibility and shows students that problem-solving is a process. Adjustments are okay.
First, keep the check-in short. A one-minute conversation after recess is often enough. Ask both students how it went and what they would do next time.
Next, keep a light record. Note conflicts and whether the student used the steps. Over time, you should see more conflicts solved with the steps and fewer that need adult help. This record also helps the team if a student has social skills goals in an IEP.
Also, celebrate growth. Remind students that social problems are normal, and that learning how to solve them is a skill. Students do not need to get it perfect. They just need tools and support.
In addition, notice which step is hardest for each student. Some students calm down quickly but struggle to brainstorm. Others list ideas easily but find it hard to try the solution. Targeted practice on one step often moves social problem solving forward faster than repeating all six.
Then, share the steps with families. When families use the same steps at home, for example during sibling conflicts, students practice in more settings and build the habit faster.
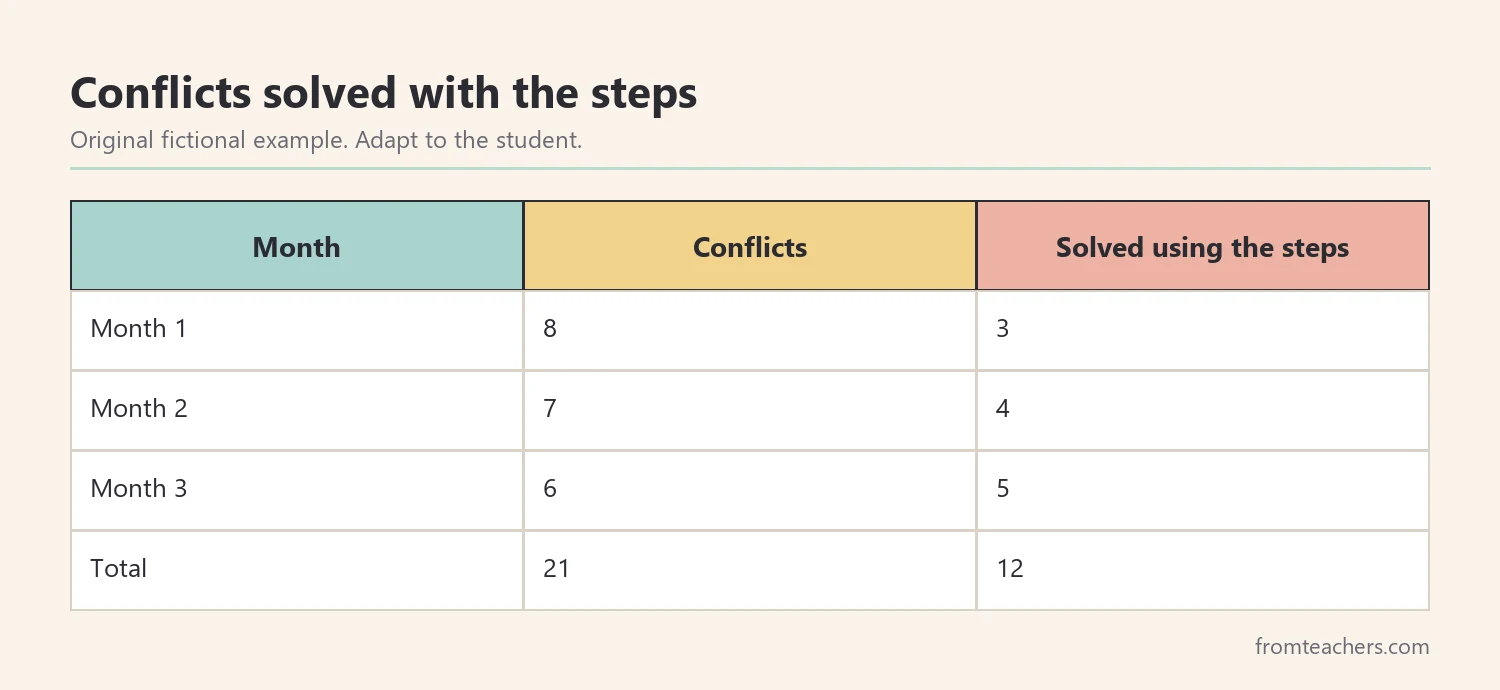
Worked example. Over three months, Ms. Brooks tracks Eli’s conflicts. He has 8 conflicts in month one and solves 3 with the steps. In month two, he solves 4 of 7. By month three, he solves 5 of 6. Across 21 conflicts, he uses the steps successfully 12 times.
A quick role-play idea. Write a few everyday problems on cards, such as two students wanting the same seat, a friend not sharing markers, or someone cutting in line. Let pairs pick a card and act out all six steps while the class watches. Afterwards, ask the audience which step went well and which one could be stronger.
Common mistakes and how to avoid them
- Skipping the calm step. Students cannot think clearly when upset. Fix: always start with a breath or space.
- Asking “Who started it?” It invites blame. Fix: ask what happened and how each person feels.
- Adults choosing the solution. Students learn less. Fix: guide, but let students choose.
- Teaching only during conflicts. New skills are hard to learn when upset. Fix: practice with role-play during calm times.
- Skipping the check-in. Students miss the chance to learn. Fix: take one minute to reflect afterward.
Questions teachers and parents ask about social problem solving
What age can students learn these steps?
Many elementary students can learn them, and older students can use them too. Younger students may need more pictures and adult coaching. Adjust the language to the student’s level.
How do I teach the steps outside of conflicts?
Use short lessons, stories, and role-play with pretend problems. Practicing when calm makes the steps familiar, so students can use them during real conflicts.
What if a student is too upset to talk?
Stay with the first step longer. Give space, offer calming tools, and wait. Problem-solving can happen later, once the student is calm.
Does this work for autistic students?
It can, with supports such as visuals, scripts, and extra practice. Perspective-taking questions may need choices or examples. Work with the student’s support team on individual goals.
When should adults step in?
Step in right away if anyone is unsafe. For smaller conflicts, coach the steps and let students do as much as they can. Over time, reduce your support.
Related reading: Autism Social Skills Development: Practical Strategies for Growth, Moving Beyond Shame and Behavior Charts: Positive Alternatives for Effective Classroom Management, and Building Stronger School Counseling Programs: A Framework for Student Success.
A companion resource for social problem solving:
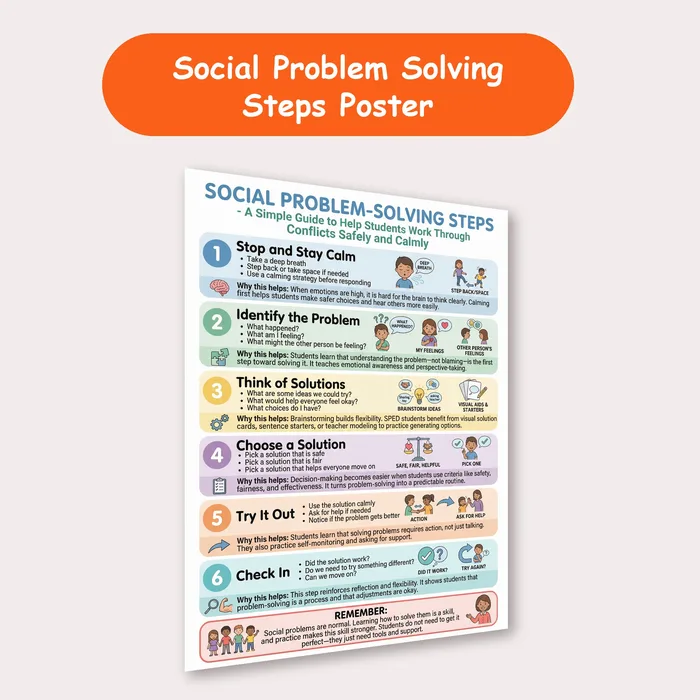
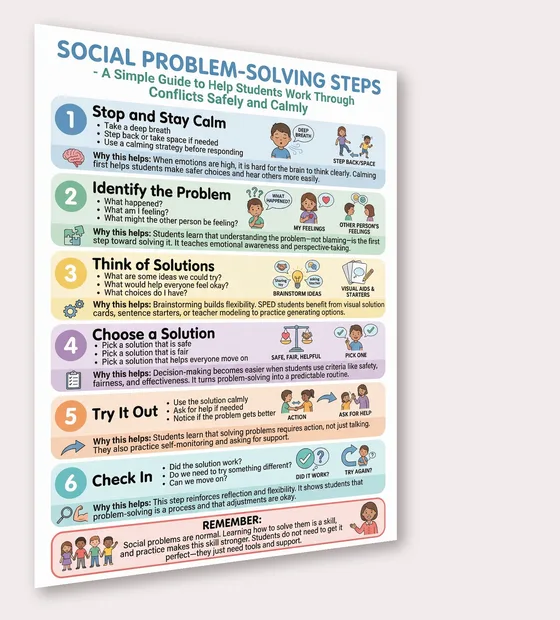
Social Problem-Solving Steps Poster: six steps to help students work through conflicts safely and calmly, each with a “why this helps” note, for special education and SEL lessons.
Sources and scope
- CASEL: a widely used framework for social and emotional learning, including responsible decision-making.
- Center on PBIS: information on positive behavioral interventions and supports in schools.
- IRIS Center, Vanderbilt University: free modules on behavior and social supports for students with disabilities.
- Understood.org: family-friendly information on social and learning differences.
This guide covers everyday teaching and coaching of peer problem-solving. It does not replace counseling, behavior intervention plans, or the decisions of the student’s support team.
Key takeaways
- Start every conflict with a calm pause.
- Name the problem and feelings without blame.
- Brainstorm, then choose a safe, fair solution.
- Try the solution and check in afterward.
- Practice when calm and coach in real moments.



Leave a Comment