

A visual schedule for home can turn a rushed, noisy morning into a calmer one. Picture a six-year-old who is still in pajamas ten minutes before the bus, while a parent repeats “teeth, shoes, breakfast” for the fifth time. The child is not ignoring the words. Spoken reminders simply disappear the moment they are said, and pictures stay.
This guide walks you through five steps: map your family’s day, choose and prepare the picture cards, set up the schedule where your child will use it, teach it like any other skill, and adjust it as your child grows. By the end, you will have a simple routine board that helps your child know what comes next without a running commentary from you.
Examples are fictional. Adapt to the child’s needs and any supports agreed with the child’s team. This is guidance, not a diagnosis.
At a glance
- Pictures last longer than spoken reminders, so children can check them on their own.
- Start with one hard routine, such as mornings or bedtime, not the whole day.
- Place the schedule where the routine happens, at your child’s eye level.
- Teach it with short practice, a pointing cue, and a clear “done” step.
- Review every few weeks and make the schedule shorter or longer as needed.
1. Map your family’s day before building a visual schedule for home
First, look at your real day, not the ideal one. A visual schedule for home works best when it matches what actually happens in your house. Write down the main parts of a typical weekday from wake-up to lights out.
Next, circle the hardest part. For many families, it is the morning rush or the slide into bedtime. For others, it is the gap after school. Starting with one routine keeps the job small and gives your child an early win.
Then, break that routine into steps your child can see. Each step should be one clear action, like “brush teeth,” not a bundle like “get ready.” Four to six steps is a good size for most young children.
Also, think about who runs each routine. If one parent handles mornings and another handles bedtime, both should help plan the visual schedule for home. That way, the steps match how each adult actually does things.
| Part of the day | Example steps |
|---|---|
| Morning | Get up, brush teeth, get dressed, breakfast |
| Daytime | Toys, painting, cooking, computer time |
| Evening | Homework, bath, bedtime story, good night |
Worked example. Sami is a fictional six-year-old who finds mornings hard. His parents list their weekday and agree that 7:00 to 7:45 is the most stressful time. They break the morning into four steps: get up, brush teeth, get dressed, and breakfast. Bath stays in the evening, where it already happens.
In short, a good map makes the rest of the work easier. As a result, the schedule fits your family instead of the other way around.
2. Choose and prepare the picture cards
Once you know the steps, pick a picture for each one. Children read pictures faster when the style is consistent. Mixing photos, clip art, and drawings can make the board harder to scan.
Also, keep each card simple. One action, one picture, and one or two words underneath. The words help early readers connect pictures to print, while the picture does the main work for children who do not read yet.
A ready-made set saves a lot of cutting and searching. For example, a 24-hour visual schedule set of home routine cards includes morning cards such as Get Up, Brush Teeth, and Breakfast, daytime cards such as Toys and Painting, and evening cards such as Homework, Bedtime Story, and Good Night, all in one illustration style.
Card preparation checklist
- Print the cards you need for the first routine only.
- Laminate them or slip them into clear sleeves so they last.
- Add hook-and-loop dots or magnets to the back.
- Make a “done” spot: a pocket, an envelope, or the other side of the strip.
- Store spare cards in a small box for later routines.
Worked example. Sami’s parents print four morning cards, laminate them, and add magnets. They also cut a small envelope and label it “Done.” The remaining cards go into a shoebox for when they add bedtime later.
Meanwhile, they let Sami pick where the magnets go and press each card onto the strip himself. Because he helped build it, he is curious about the visual schedule for home before it is even used.
3. Set up the visual schedule for home where it is used
Where the schedule lives matters as much as what is on it. A visual schedule for home should sit where the routine happens and at your child’s eye level. If your child has to walk to another room to check it, the schedule will be forgotten.
Next, choose a direction. Top to bottom or left to right both work, but keep the same direction every time. Your child learns that the next step is always “the next one down” or “the next one over.”
Then, decide how a step gets finished. Moving the card to the “done” spot gives a clear ending and a small sense of success. In addition, it shows your child how much is left, which can lower worry.
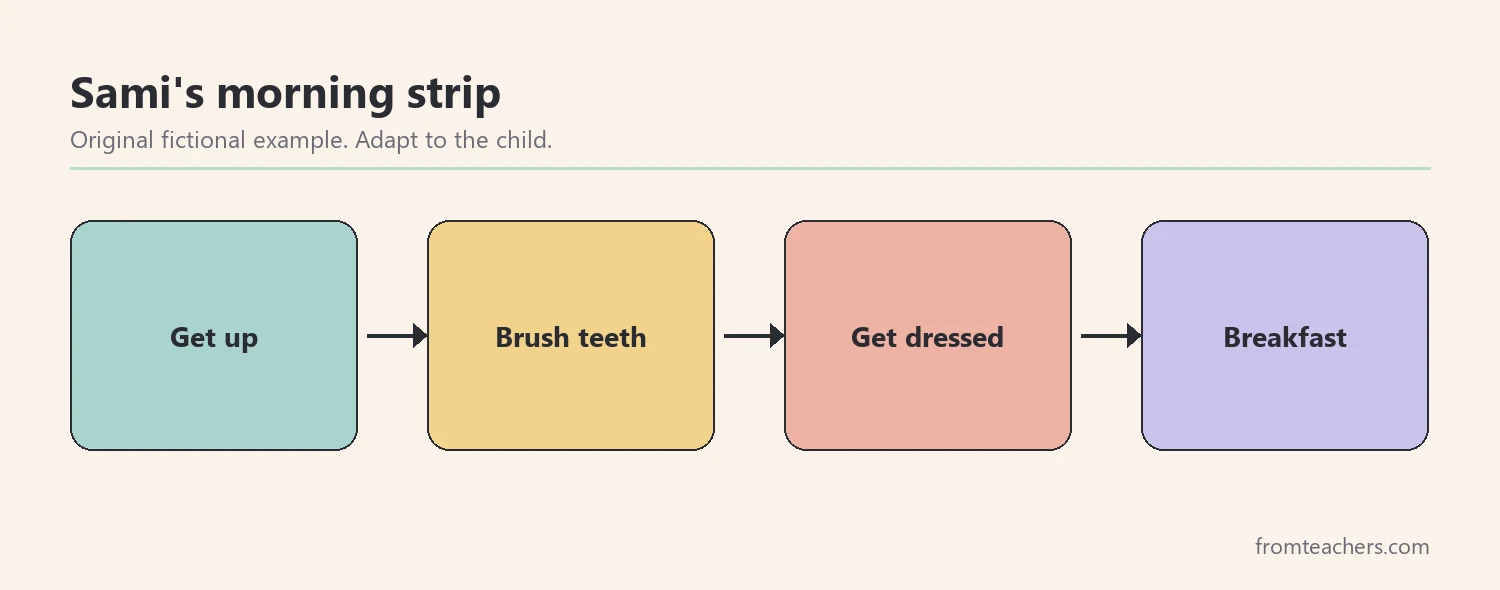
Some families use two boards. One sits on the fridge for the morning and one in the bedroom for the evening. Others use a single strip and swap cards at lunchtime. Either way is fine, as long as it stays predictable.
Also, think about small details. Keep the board away from busy clutter, such as school notices and photos, so the cards stand out. If your child uses a wheelchair or is still small, lower the board so every card is easy to reach. A visual schedule for home only helps if your child can see it and touch it without help.
Worked example. Sami’s parents put a magnetic strip on the fridge at his eye level. The four cards run top to bottom, with the “Done” envelope taped at the bottom. Because breakfast is in the kitchen, the board sits right where the last step happens.
4. Teach your child to use the schedule
A schedule is a skill, so it needs to be taught. Putting cards on the fridge is only the first part. Your child needs to learn to look, do, and move the card, and that takes a few days of guided practice.
First, practice when things are calm, such as on a weekend morning. Walk through the board together. Point to the first card, say the word, do the step, then move the card to “done.” Keep your words short.
Next, switch from telling to pointing. Instead of saying “go brush your teeth,” point to the board and say “check your schedule.” Over time, this moves the reminder from you to the pictures, which is the whole goal.
In addition, praise the checking, not just the doing. A quick “You checked your schedule, nice” teaches your child that looking at the visual schedule for home is a useful habit in itself.
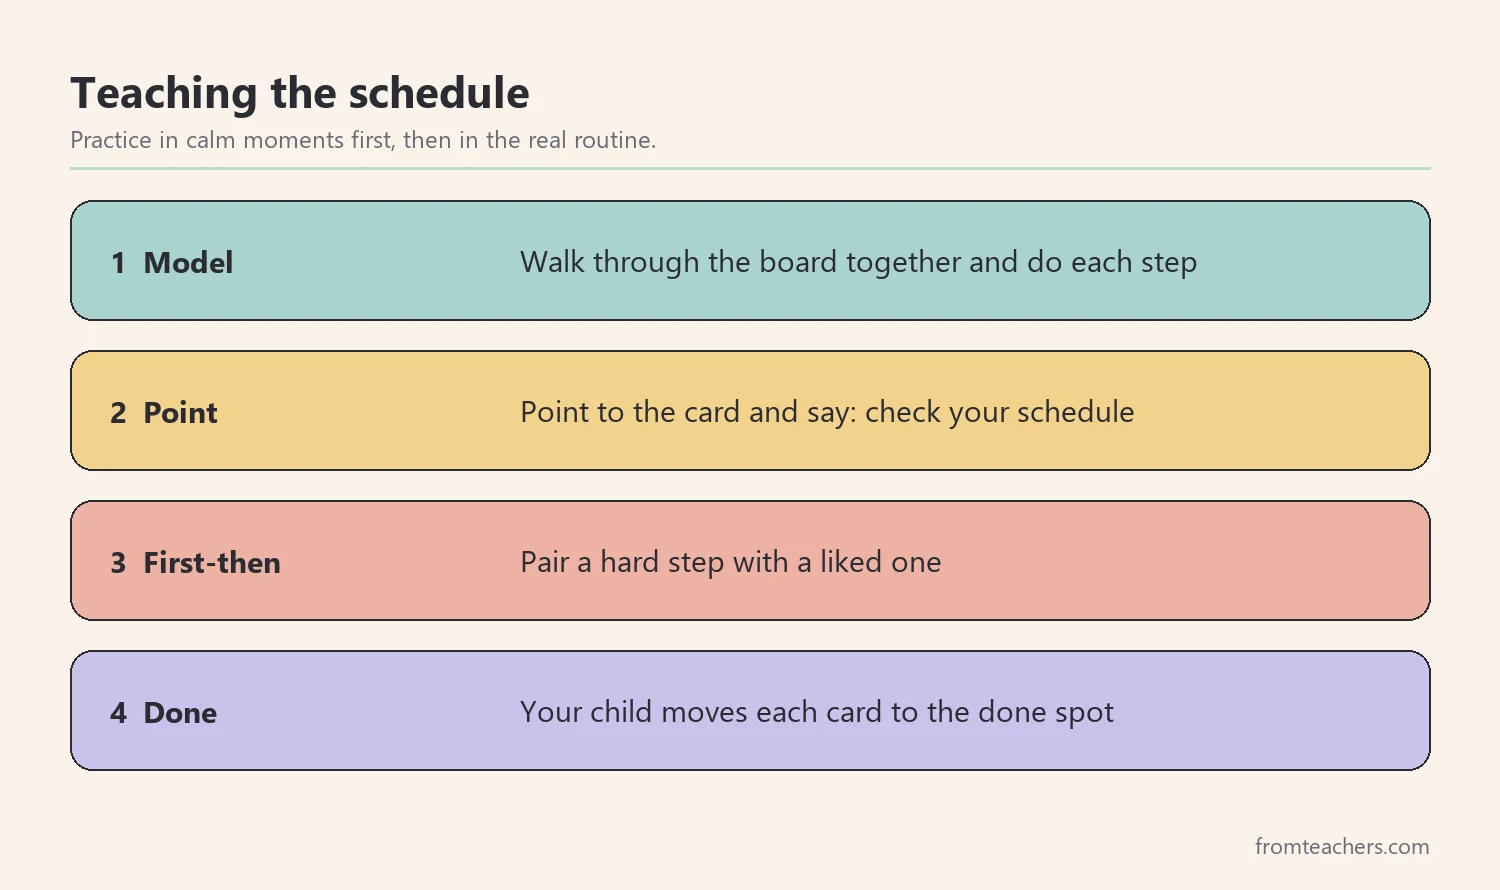
Also, use first-then language for hard steps. “First get dressed, then breakfast” connects a less-liked step to a more-liked one. Many families find that this small phrase makes a big difference.
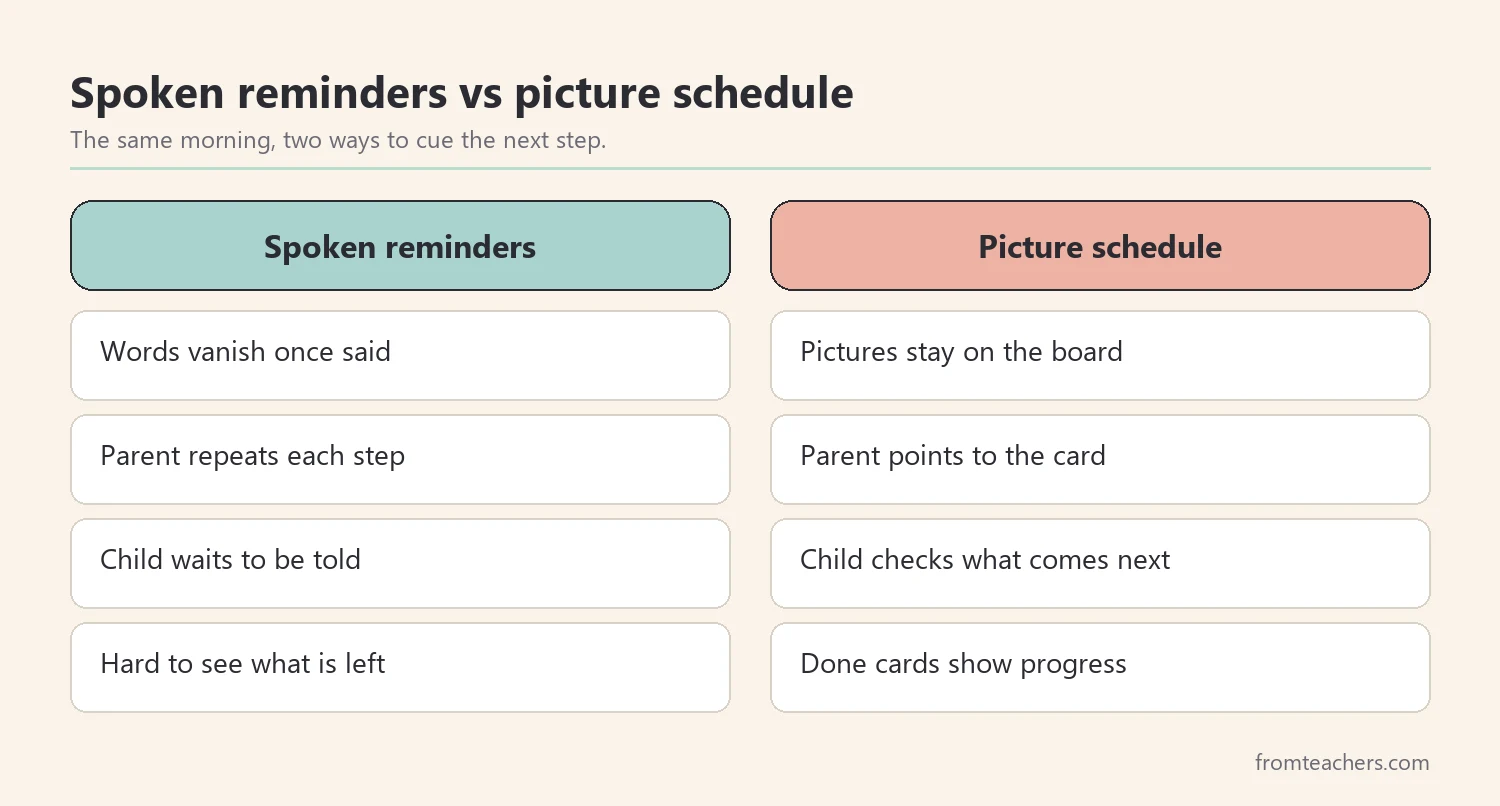
Worked example. On Saturday, Sami and his dad walk through the board twice, just for practice. On Monday, his dad points and says “check your schedule” instead of naming each step. When Sami stalls on getting dressed, his dad says, “First dressed, then breakfast,” and points to both cards.
By Wednesday, Sami walks to the fridge on his own after brushing his teeth. His dad simply smiles and points to the next card. The morning still has bumps, but the visual schedule for home is now doing much of the reminding.
5. Track, adjust, and grow the visual schedule for home
Finally, watch how the schedule is working. You do not need detailed records. A quick note on the calendar, such as how many steps your child did after just a point, is enough to see progress.
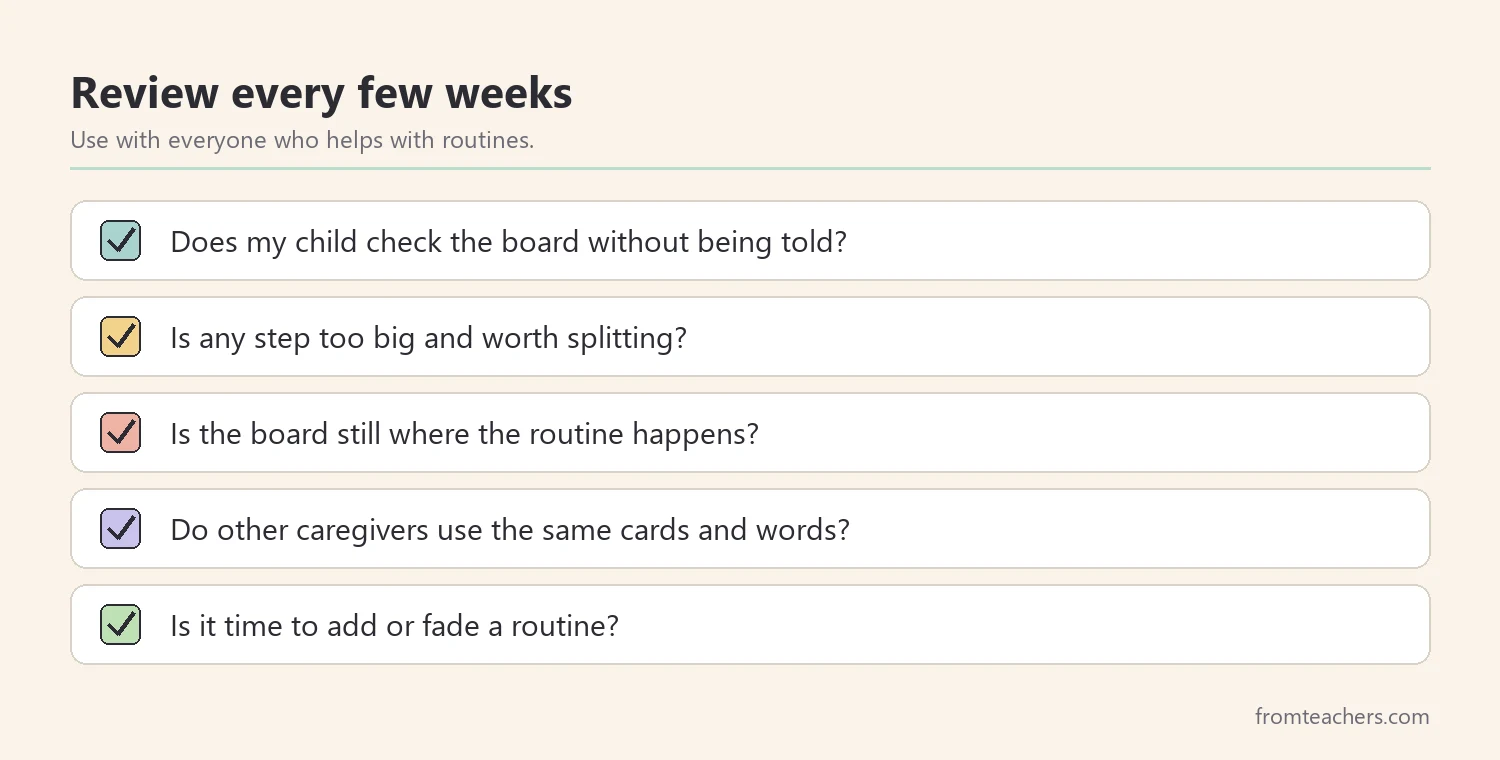
Next, adjust what is not working. If a step causes trouble every day, it may be too big. Split it into two cards. If your child breezes through, combine two cards or add the next routine. Your visual schedule for home should change as your child changes.
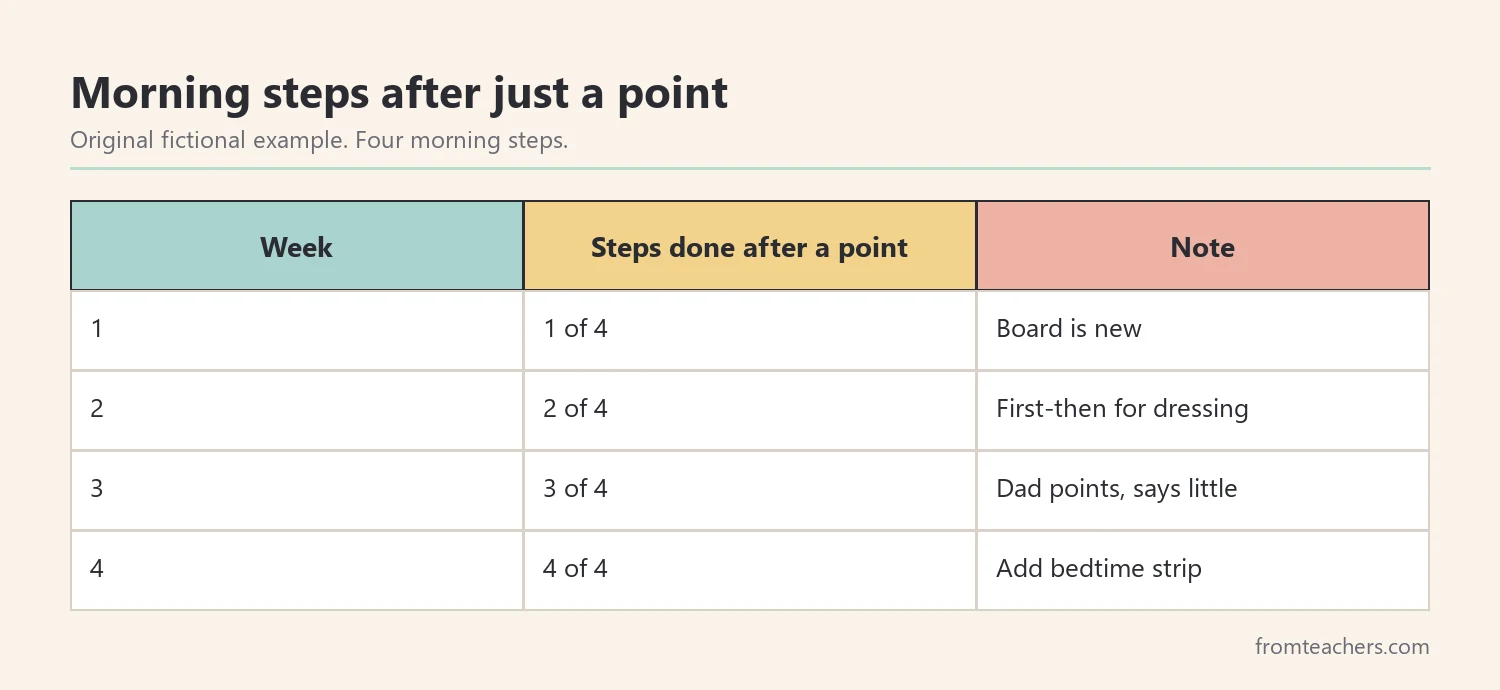
Worked example. Sami’s parents note how many of the four morning steps he does after just a point. In week 1, it is usually 1 of 4. In week 2, it is 2 of 4. By week 4, it is 4 of 4 on most days, so they add a bedtime strip with Bath, Bedtime Story, and Good Night.
Then, share the schedule with others. Grandparents, babysitters, and teachers can use the same cards and words. In addition, if your child has a visual schedule at school, ask the teacher which pictures and phrases they use, so the two schedules feel familiar.
Equally important, expect some ups and downs. Holidays, illness, or a new baby can shake any routine. When that happens, go back to pointing and short practice. A visual schedule for home is a support you can lean on more during hard weeks and less during easy ones.
Common mistakes and how to avoid them
- Starting with the whole day. A full-day board can overwhelm a child and a parent. Start with one routine and add more once it works.
- Placing the board out of sight. A schedule in the hallway will not help in the bathroom. Put it where the routine happens.
- Talking over the pictures. If you keep naming every step, your child learns to wait for you. Point and say “check your schedule” instead.
- Skipping the “done” step. Without a clear finish, the board feels endless. Give every card a place to go.
- Never changing the board. Children grow, and routines change. Review it every few weeks and adjust.
Questions teachers and parents ask about a visual schedule for home
What age is right for a visual schedule for home?
A visual schedule for home can help young children and older children alike. What matters is whether your child benefits from seeing the steps. Older children may prefer a written checklist or a schedule with smaller pictures.
Is a visual schedule only for children with autism?
No. Many children with autism and other needs benefit from visual supports, but so do many children without a diagnosis. Any child who likes knowing what comes next can use one.
What if my child refuses to use the schedule?
Go back to calm practice and make the first card something your child enjoys. You can also let your child help choose the cards or place them. Children are more likely to use a board they helped build.
Should weekends have a different schedule?
Many families keep one visual schedule for home and the same order for the parts that stay the same, like teeth and breakfast, and swap in different cards for weekend activities. Keeping the core steps steady helps your child feel secure.
When can we stop using the schedule?
Some children need the board for a long time, and that is fine. Others start doing the routine without looking. You can then fade it slowly, for example by removing one card at a time, and bring it back during busy or stressful weeks.
Related reading: Autism Spectrum Disorder: A Guide to Early Signs, Support, and Effective Strategies, Meltdowns vs Tantrums: A Guide to Understanding and Responding, and How Parents and Teachers Can Team Up for Special Education Success.
A companion resource for a visual schedule for home:


24-Hour Visual Schedule: Home Routine Cards: a set of 17 illustrated cards (15 individual cards plus 2 compilation pages) covering morning, daytime, and evening routines, from Get Up and Brush Teeth to Bedtime Story and Good Night.
Sources and scope
- CDC autism information: general background on autism in children and family resources.
- HealthyChildren.org, American Academy of Pediatrics: parenting information on routines, sleep, and child development.
- American Speech-Language-Hearing Association (ASHA): information on communication, including visual supports.
- Understood.org: practical articles for families on routines and learning differences.
This guide covers practical steps for building and using a picture schedule at home. It does not cover diagnosis, therapy, or medical advice, which belong to qualified professionals and the child’s care team.
Key takeaways
- A visual schedule for home shows the next step, so children rely less on spoken reminders.
- Start with one hard routine and break it into four to six clear steps.
- Place the board where the routine happens, at your child’s eye level.
- Teach it with calm practice, a pointing cue, and a clear “done” spot.
- Review every few weeks and grow the schedule as your child grows.


Leave a Comment