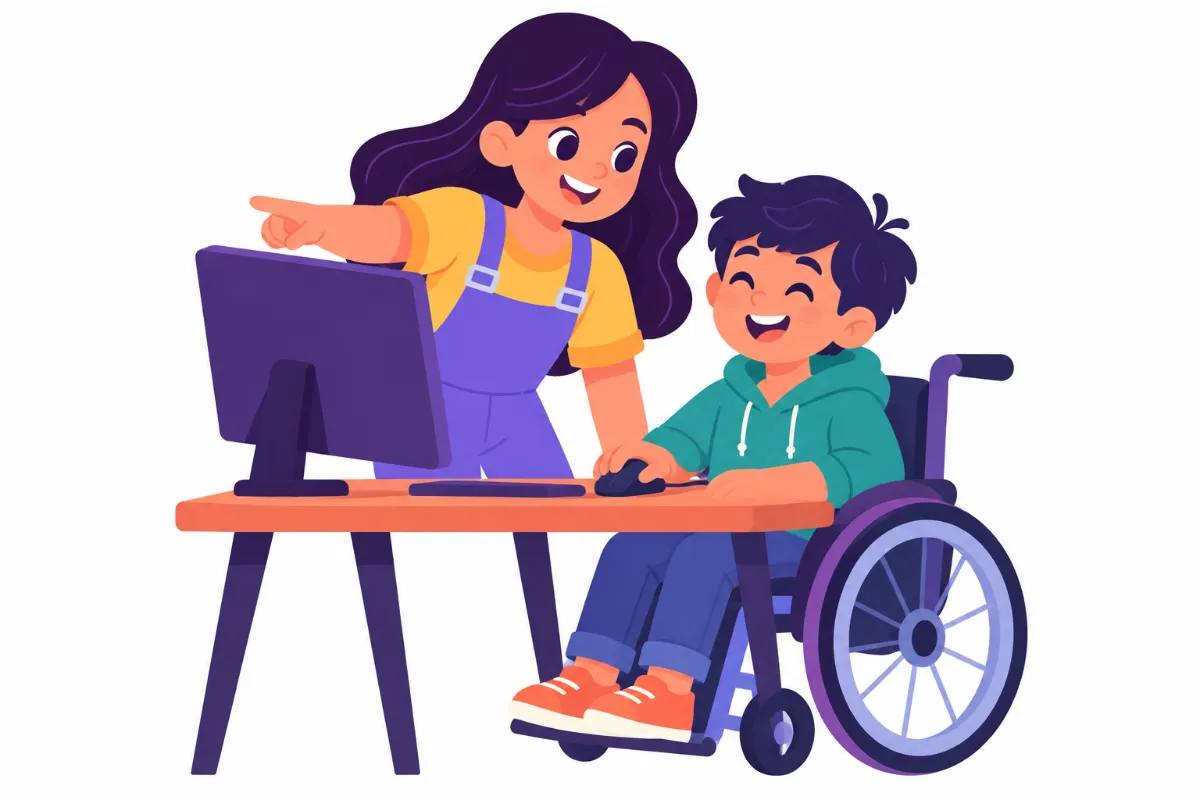

Computer parts for kids can feel like a dry list of names until a story gives each part a job. Picture a second grader who uses a tablet every day but calls the whole desktop computer “the TV with buttons.” He knows how to click, yet he has no idea what happens between pressing a key and seeing a letter on the screen.
This guide gives you a five-step lesson process that works in a classroom or at the kitchen table. By the end, you will be able to open with a story, name each part with a simple job, sort parts into input and output, build a paper computer, and check what children really understood.
Examples are fictional. Adapt to the student’s goals and agreed supports. This is guidance, not a diagnosis.
At a glance
- Start with a story and a question, not a vocabulary list.
- Give each part one short job, such as “the screen shows.”
- Sort real parts or picture cards into input and output.
- Build a paper computer so children can point to each part.
- Check understanding with a quick talk, not a long test.
1. Open computer parts for kids with a story and a question
First, hook curiosity before you name anything. Children remember ideas that arrive inside a story. A character who meets a computer for the first time and guesses wildly about each part gives your class permission to wonder out loud too.
Next, read or tell a short story, then pause at a key moment and ask one open question. For example: “How does the computer know which letter you pressed?” Accept every guess. Wrong guesses are useful here, because they show you what children already believe.
Then, write the children’s guesses on chart paper. Later in the lesson, you will come back to this list and check which guesses were close. As a result, the lesson feels like solving a mystery rather than memorizing words.
For example, meet Leo, a fictional second grader. His teacher, Mr. Diaz, reads a picture book where a boy calls the computer case a “boss box.” Afterward, he asks, “What do you think is inside the boss box?” Leo guesses “a tiny person who types really fast.” Mr. Diaz smiles and writes it on the chart.
Also, choose a story where children can see themselves. Characters with different families, abilities, and backgrounds tell every child that technology belongs to them. For instance, a story about computer parts for kids told through Zayd, a boy who uses a wheelchair, presents a main character who is curious, funny, and capable, with no lecture attached.
| Good opening question | Why it works |
|---|---|
| What is inside the box? | Invites wild, useful guesses |
| How does the screen know? | Leads to input and output |
| Where does a picture go? | Opens a memory talk |
2. Give each of the computer parts for kids one simple job
Now, introduce the parts one at a time. Good lessons on computer parts for kids move slowly here, because each new name needs a moment to settle. The secret is to give each part a single, short job that a child can say in three or four words. Long definitions get lost. Short jobs stick.
Start with the parts children can touch: the keyboard, the mouse, and the monitor. Then move to the parts inside or behind the computer: the CPU, the memory, the motherboard, and the cables. Finally, connect each part to something familiar, such as a body part or a household object.
Be accurate while keeping it simple. The CPU is a small chip inside the computer that follows instructions, so “the brain” is a helpful comparison. Similarly, the motherboard is the main board that connects the parts, and memory, often called RAM, holds what the computer is working on right now.
| Part | Simple job | Kid comparison |
|---|---|---|
| Keyboard | Types letters in | Your voice |
| Mouse | Points and clicks | Your finger |
| Monitor | Shows pictures | The face |
| CPU | Follows instructions | The brain |
| Memory (RAM) | Holds work for now | A desk top |
| Cables | Carry signals | Roads |
Next, show how the parts work together in order. When Leo presses the letter L, a signal travels from the keyboard through a cable or wireless link. Then the CPU processes it, and finally the letter appears on the monitor. Walking through one key press makes the abstract idea concrete.
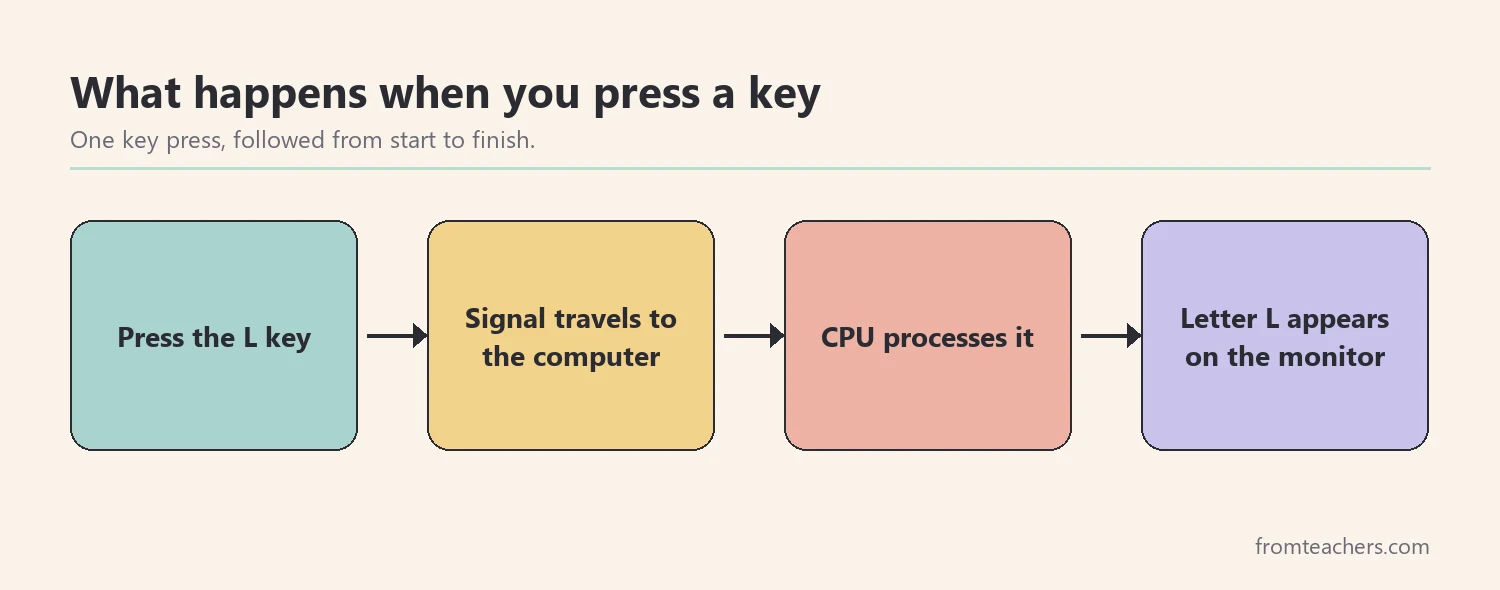
For Leo, the turning point is this flow. He presses L, watches it appear, and says, “So the keyboard tells the brain, and the brain tells the face.” In short, that is a solid second-grade explanation of computer parts for kids.
3. Sort parts into input and output
Once children know a few parts, give them a way to organize them. Sorting turns computer parts for kids from a list into a system. Input and output is the simplest big idea in computer parts for kids. Input parts send information into the computer. Output parts send information out to us.
First, model with two hula hoops or two labeled trays on the floor. Hold up the keyboard and ask, “Does this send information in or out?” Children decide together, then place it in the right hoop. Next, repeat with the monitor. Finally, let small groups sort a stack of picture cards on their own.
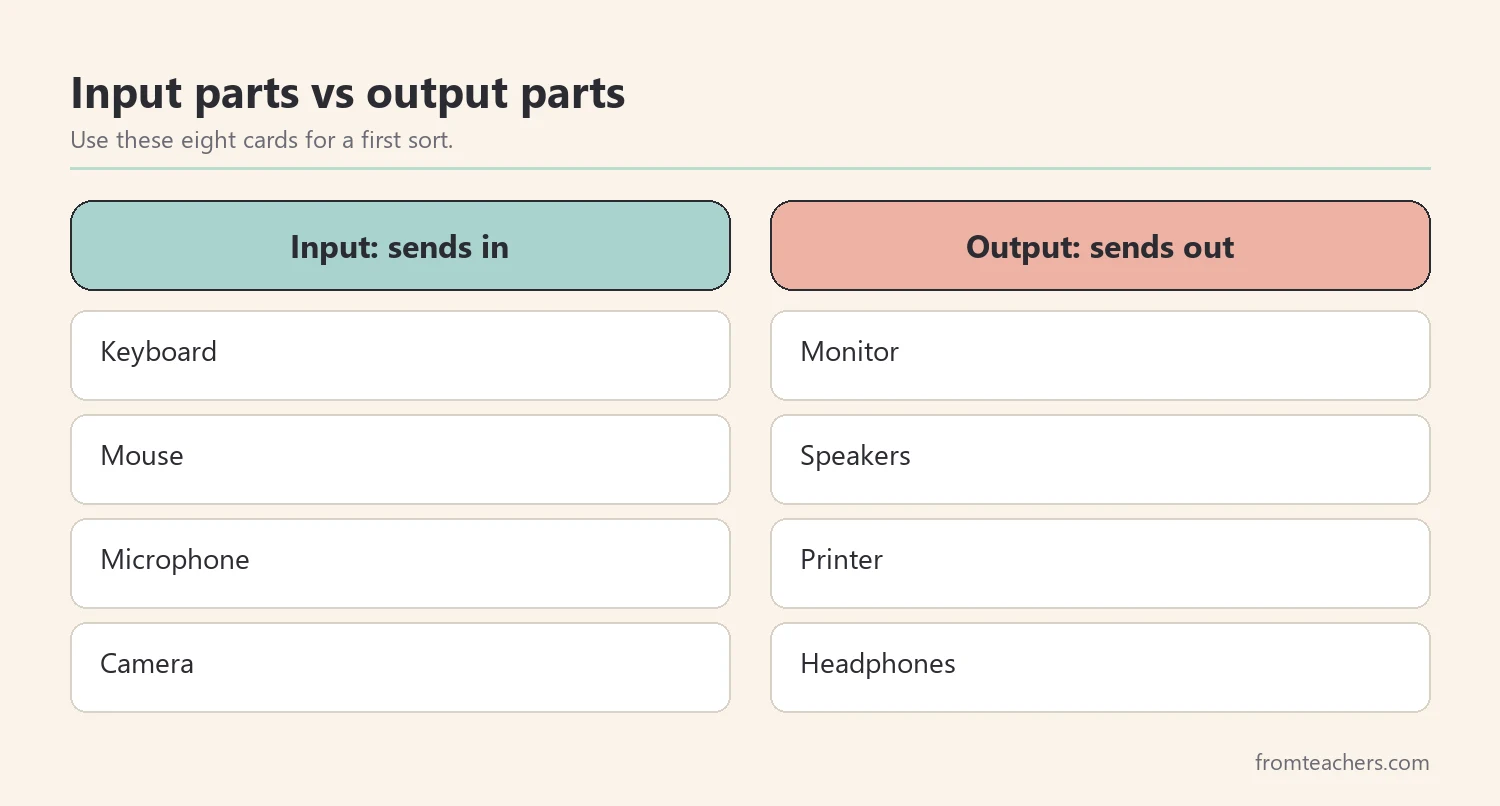
Use eight picture cards to start: keyboard, mouse, microphone, and camera for input, plus monitor, speakers, printer, and headphones for output. That gives four cards in each group, which makes it easy to check the sort at a glance.
Also, expect healthy debate, which is one of the best parts of teaching computer parts for kids. Some devices do both. A touchscreen takes your touch as input and shows pictures as output. Rather than avoiding the question, celebrate it. Ask, “Could a part belong in both hoops?” Then place a third, overlapping space for those parts.
In Leo’s group, the first sort goes well for most cards. However, Leo places the speakers in the input hoop because “they are part of the computer.” Mr. Diaz asks him to listen while a sound plays. Leo moves the card and says, “Sound comes out, so output.” As a result, the mistake becomes the most memorable moment of the lesson.
Finally, keep the sort quick and active. Children can jump to the correct hoop, hold up a card, or use a thumbs up for input and a thumbs down for output.
4. Build a paper computer for computer parts for kids
Next, make the ideas physical. Building is where computer parts for kids becomes truly hands-on, and children who struggle with words often shine. A paper computer lets each child hold, label, and arrange the parts. It also gives quieter children a way to show what they know without speaking in front of the class.
Gather simple materials: a cereal box for the case, a sheet of paper for the monitor, a printed keyboard strip, a bottle cap for the mouse, and yarn for the cables. Then add a small square of paper inside the box labeled “CPU” and a sticky note labeled “memory.”
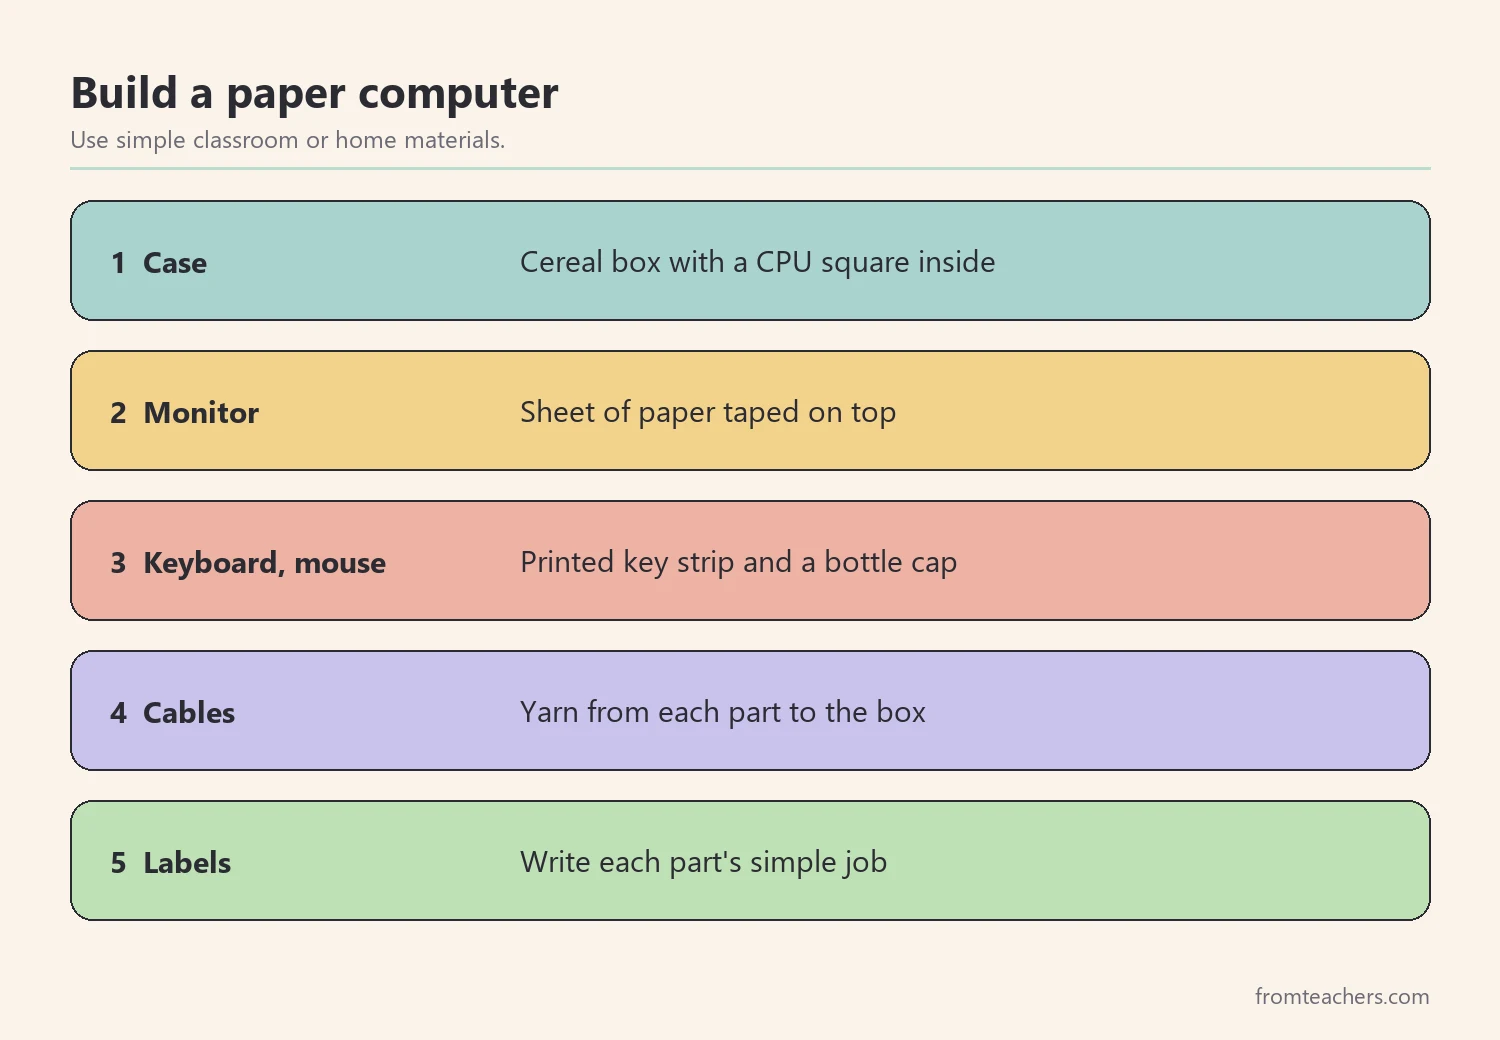
Follow the build in a clear order. First, set up the case. Second, attach the monitor. Third, add the keyboard and mouse. Fourth, connect everything with yarn cables. Last, label each part with its simple job from Step 2.
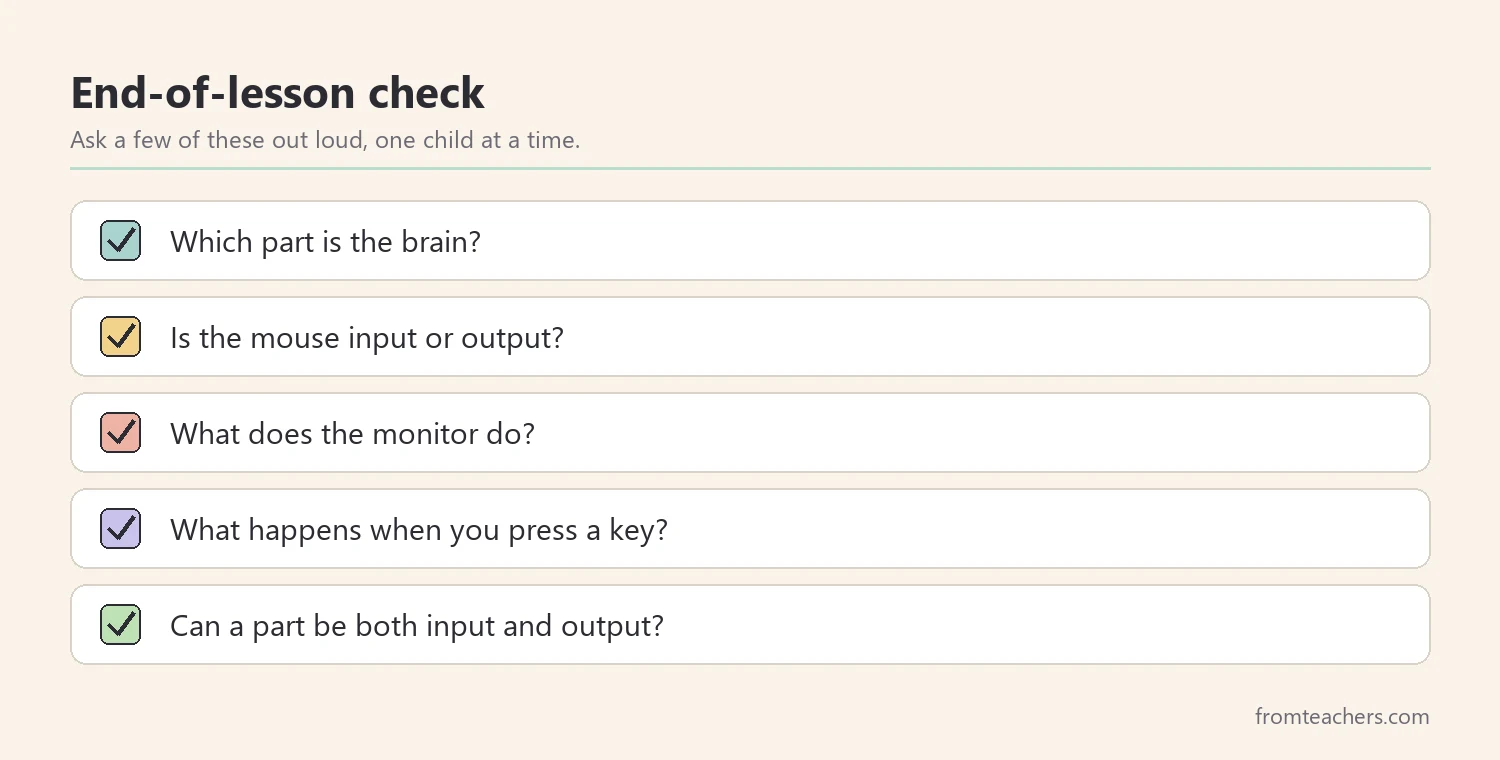
While children build, circulate and ask one question per child: “Which part is the brain?” or “Which cable carries the letter to the brain?” These short checks tell you far more than a worksheet would. Moreover, children enjoy explaining their own model.
Leo adds two yarn cables, one from the keyboard and one from the mouse, both running into the box. Then he draws an arrow from the box to the monitor and writes “shows.” When Mr. Diaz asks why, Leo traces the path with his finger: keyboard, cable, CPU, monitor. In other words, he has rebuilt the flow from Figure 1 on his own.
At home, families can do a smaller version on a sheet of paper. A parent and child draw the parts, label them, and connect them with arrows. Similarly, they can point to the real parts of a home computer or laptop and match each one to the drawing.
5. Check understanding and connect to home
Finally, find out what stuck. Checking understanding of computer parts for kids does not need a long test. Instead, use short, playful checks that show whether children can name a part, explain its job, and sort it.
First, return to the guess chart from Step 1. Read each guess aloud and ask, “Was this close? What do we know now?” Children love revising their own ideas. For example, Leo’s “tiny person who types really fast” becomes “the CPU follows instructions really fast.”
Next, run a quick card check. Each child sorts the eight input and output cards and names the job of six parts: keyboard, mouse, monitor, CPU, memory, and cables. Record two simple numbers per lesson.
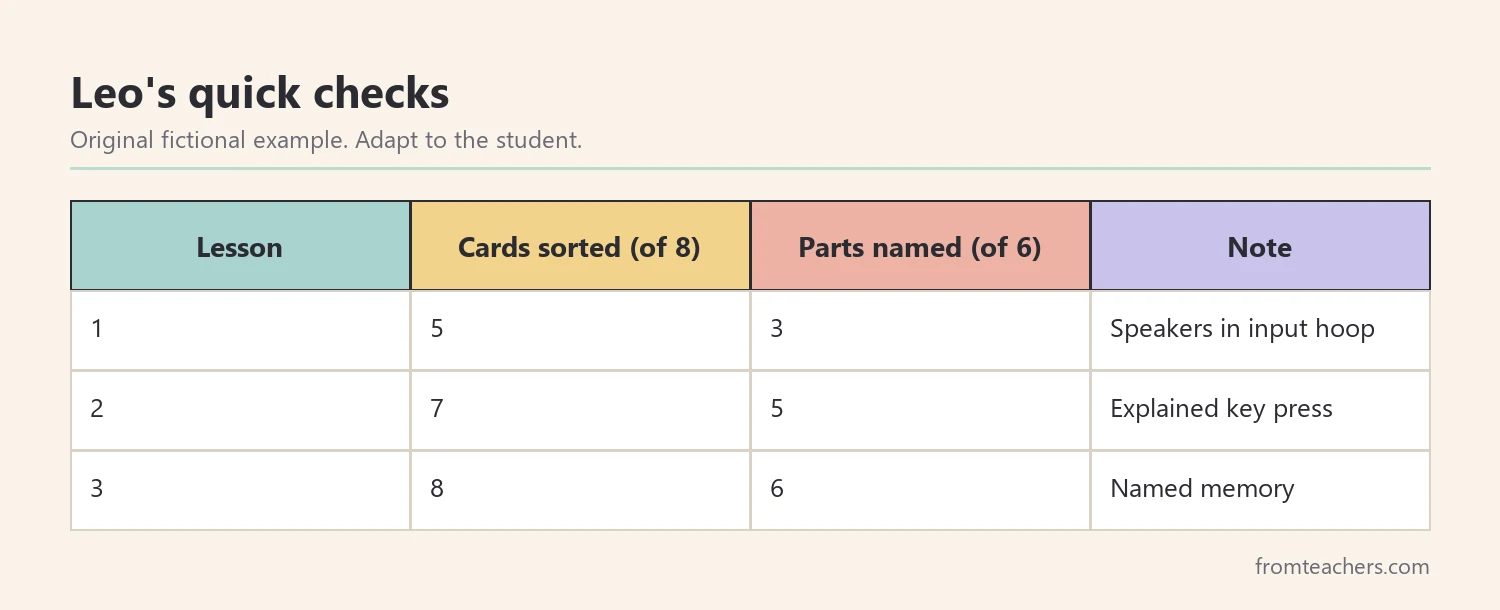
Look at Leo’s record. In lesson 1, he sorted 5 of 8 cards correctly and named 3 of 6 parts. By lesson 2, he sorted 7 of 8 and named 5 of 6. In lesson 3, he sorted all 8 cards and named all 6 parts, including memory, which had been the hardest word for him.
Then, send the learning home. Computer parts for kids are everywhere in a house, so families have plenty of examples to point to. A short note can invite families to play “input or output” with devices around the house, such as a TV remote, a doorbell camera, or a speaker. Furthermore, children can teach a family member the key-press flow using their paper computer.
Above all, keep the tone light. Computer parts for kids should feel like a fun discovery, not a test of memory. The goal at this age is curiosity and confidence. Children who feel that computers make sense are far more willing to explore coding, typing, and digital creativity later.
Common mistakes and how to avoid them
- Starting with a long vocabulary list. Fix: open with a story and one question, then name parts as they come up.
- Using long, technical definitions. Fix: give each part one job of three or four words.
- Teaching parts in isolation. Fix: walk through one key press so children see the parts working together.
- Avoiding devices that do both. Fix: add an overlap space for parts like touchscreens and celebrate the debate.
- Checking with a long written test. Fix: use card sorts, short questions, and the paper computer model.
- Using stories where only some children appear. Fix: choose books with varied characters, including children with disabilities.
Questions teachers and parents ask about computer parts for kids
What age is right for teaching computer parts?
Many early elementary children are ready for the basics, especially when the lesson uses stories and hands-on sorting. Younger children can start with the parts they touch, such as the keyboard, mouse, and screen. Older children can add the motherboard, memory, and how signals travel.
Which computer parts for kids should I teach first?
Start with the parts children can see and touch: keyboard, mouse, and monitor. Then add the CPU as the brain and cables as the roads. After that, introduce memory and the motherboard once the first ideas feel solid.
Is it accurate to call the CPU the brain?
It is a helpful comparison for young learners, because the CPU follows instructions and processes information. Just keep it clear that the CPU is a chip inside the computer, not the whole box. Older children can learn that other parts, such as memory, also play key roles.
How do I teach this without a computer in the room?
Use picture cards, a read-aloud story, and a paper computer model. In fact, the paper model often works better for first lessons, because every child can hold and label each part.
How can families support learning at home?
Families can play “input or output” with home devices, point to parts of a laptop or tablet, and ask children to explain what happens when they press a key. A short, playful conversation is enough.
Related reading: Best Assistive Technology for Special Education Classrooms, Learning Styles Student Success Guide, and 5 Practical Teaching Tips to Boost Classroom Focus and Learning.
A companion resource for computer parts for kids:
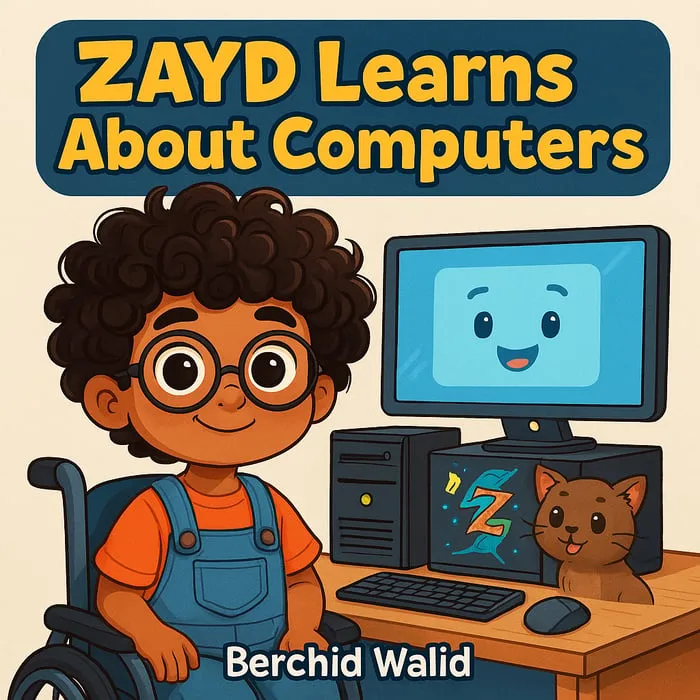
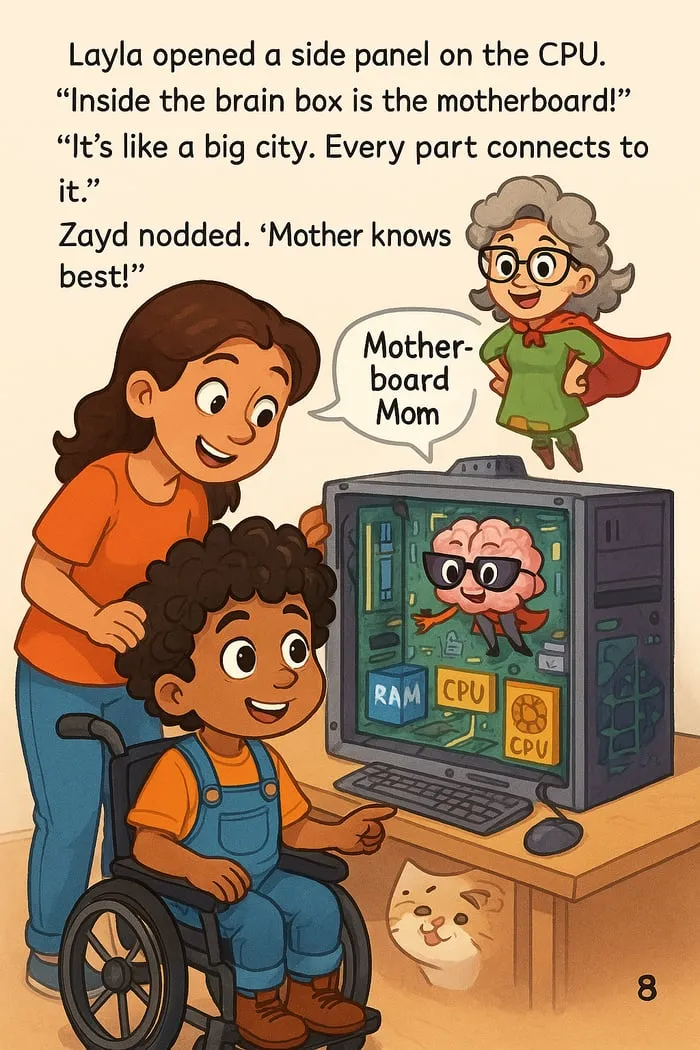
Computer Parts for Kids: Zayd’s Story: a warm, funny picture book in which Zayd, a boy who uses a wheelchair, learns about the CPU, keyboard, mouse, monitor, wires, motherboard, and memory with help from his big sister Layla.
Sources and scope
- ISTE (International Society for Technology in Education): standards and guidance for teaching with and about technology.
- Computer Science Teachers Association (CSTA): K-12 computer science standards and teacher resources.
- Code.org: free computer science lessons for elementary students.
- Common Sense Education: digital citizenship and technology lessons for classrooms.
This guide covers introductory lessons on computer hardware for elementary children at school and at home. It does not cover coding, networking, or detailed technical specifications.
Key takeaways
- Open computer parts for kids with a story and one curious question.
- Give each of the computer parts for kids a short job and a familiar comparison.
- Sort parts into input and output, and celebrate devices that do both.
- Build a paper computer so every child can show what they know.
- Check understanding with quick sorts and questions, then send the learning home.

Leave a Comment