

A special education binder is the difference between searching for a missing report the night before a meeting and opening one tab to find it. Picture a parent at the kitchen table with a shopping bag of school papers: evaluation pages, two old IEPs, progress reports, printed emails, and a note from the speech therapist. Everything is there, yet nothing can be found.
This guide shows you how to build and use a binder in five steps: gather, set up sections, file in order, bring it to meetings, and keep it current. By the end, you will have one place for your child’s records and a simple routine that takes a few minutes a week.
Examples are fictional. Adapt to the student’s goals and agreed supports. This is guidance, not a diagnosis.
At a glance
- Gather every school record into one pile before you sort anything.
- Use a small set of clear tabs, the same ones every year.
- File the newest paper on top and keep a simple contact log.
- Bring the binder to meetings with a one-page summary and your questions.
- Spend ten minutes a week keeping it current.
1. Gather every record for your special education binder
First, collect everything in one place before you try to organize it. Sorting while you are still searching leads to half-built sections and lost pages. So, set aside one evening for gathering only.
Check every likely spot: backpacks, the kitchen drawer, your email inbox, the school’s parent portal, and the folder from your last meeting. In addition, print or save key emails, especially ones that confirm a decision, a date, or a change in services. If a record is missing, you can request a copy from the school. Under federal privacy law, parents generally have the right to review their child’s education records, and your school can explain its request process.
Next, put everything in a single box or pile. Do not throw anything away yet. Even a short note may matter later, for example a teacher’s comment about a new strategy that worked.
Worked example. Dana is the fictional mother of Leo, who is in grade 3 and has an IEP. She gathers 46 pieces of paper: 12 evaluation pages, 18 IEP pages from two different years, 9 progress reports, and 7 printed emails. That is 12 + 18 + 9 + 7, or 46 pages in one pile. She also finds that she is missing last spring’s speech report, so she emails the case manager to ask for a copy.
In short, this step is about completeness, not neatness. Once everything is in one pile, building your special education binder becomes a sorting job instead of a treasure hunt.
Also, keep a sticky note on the box listing anything you still need to request. That short list becomes the first entry in your contact log in step 3.
2. Set up clear special education binder sections
Now choose your sections. A special education binder works best with a small set of tabs that you keep the same every year. Too many sections make filing slow; too few turn each tab into another pile.
Start with a sturdy two-inch binder, a set of tab dividers, a three-hole punch, and a few sheet protectors for papers you cannot punch. Then, label the tabs. The table below shows a common setup that fits most families.
| Tab | What goes in it | Example |
|---|---|---|
| Contacts | Names, roles, phone, email | Case manager, therapists |
| Current IEP or 504 | The plan in effect now | This year’s IEP |
| Evaluations | School and outside reports | Psychological, speech |
| Progress | Progress reports, report cards | Quarterly goal reports |
| Communication | Emails, notes, contact log | Printed decisions |
| Work samples | A few pieces showing growth | Writing from fall and spring |
| Past plans | Older IEPs or 504 plans | Last year’s IEP |
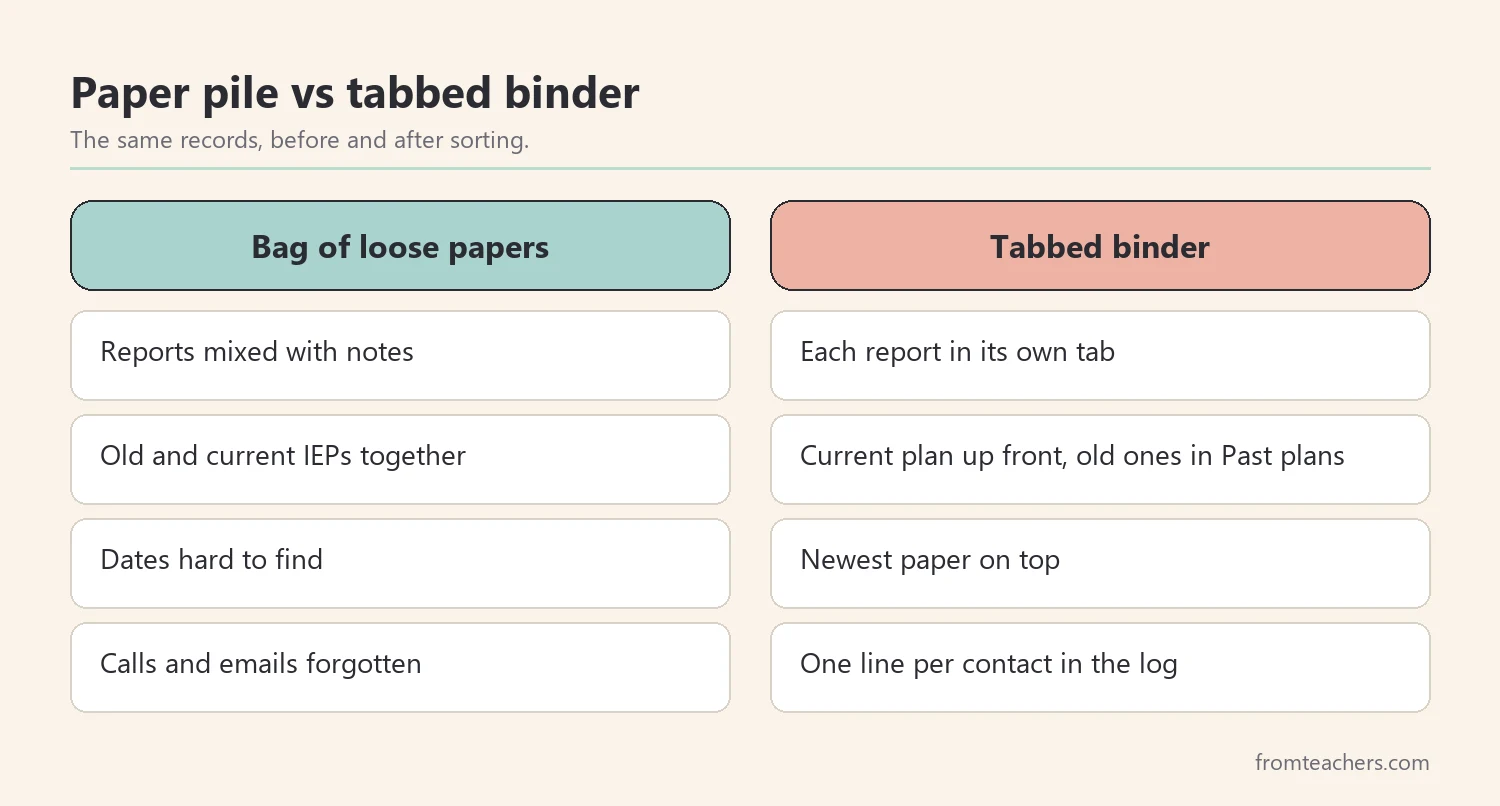
Some families prefer color-coded tabs, while others write the tab names in large print. Either way, the label should tell you at a glance what is inside your special education binder, even when you are tired or rushed.
Also, add a front pocket for papers you have not filed yet. That pocket is your inbox. As a result, new papers always have somewhere to go, even on a busy day.
If you want ready-made pages for this step, the Back to School Survival Guide for special education parents includes guidance on organizing IEP and 504 records, plus printable templates and checklists in its appendix.
Worked example. Dana sets up seven tabs using the table above. She keeps the current IEP right after Contacts, because it is the section she opens most. Leo’s older IEP goes in Past plans, so nobody at a meeting confuses the two versions.
3. File records in date order and keep a contact log
Next, file the pile into your tabs. Within each tab, put the newest paper on top. This way, the most recent report is the first thing you see, and the history sits underneath in order.
Before filing, write the date in the top corner of any paper that does not show one clearly. Then, use a highlighter sparingly. For instance, highlight goal statements, service minutes, and recommendations, not whole paragraphs.
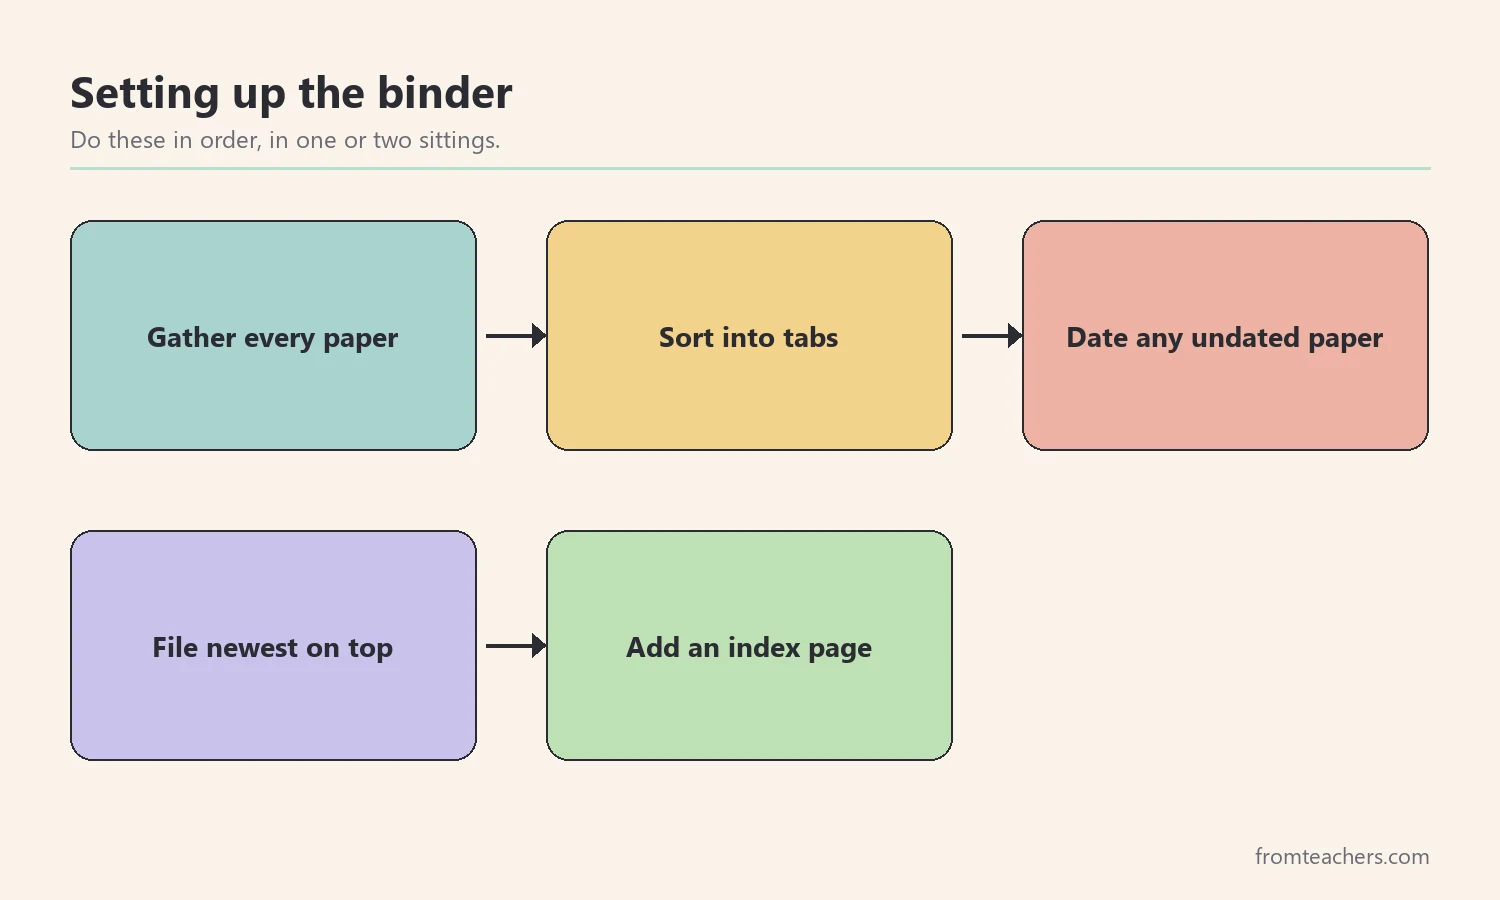
In addition, start a contact log in the Communication tab. Every call, email, or meeting gets one line: the date, who you spoke with, the topic, and any next step. A contact log turns scattered conversations into a clear record of what was agreed and when.
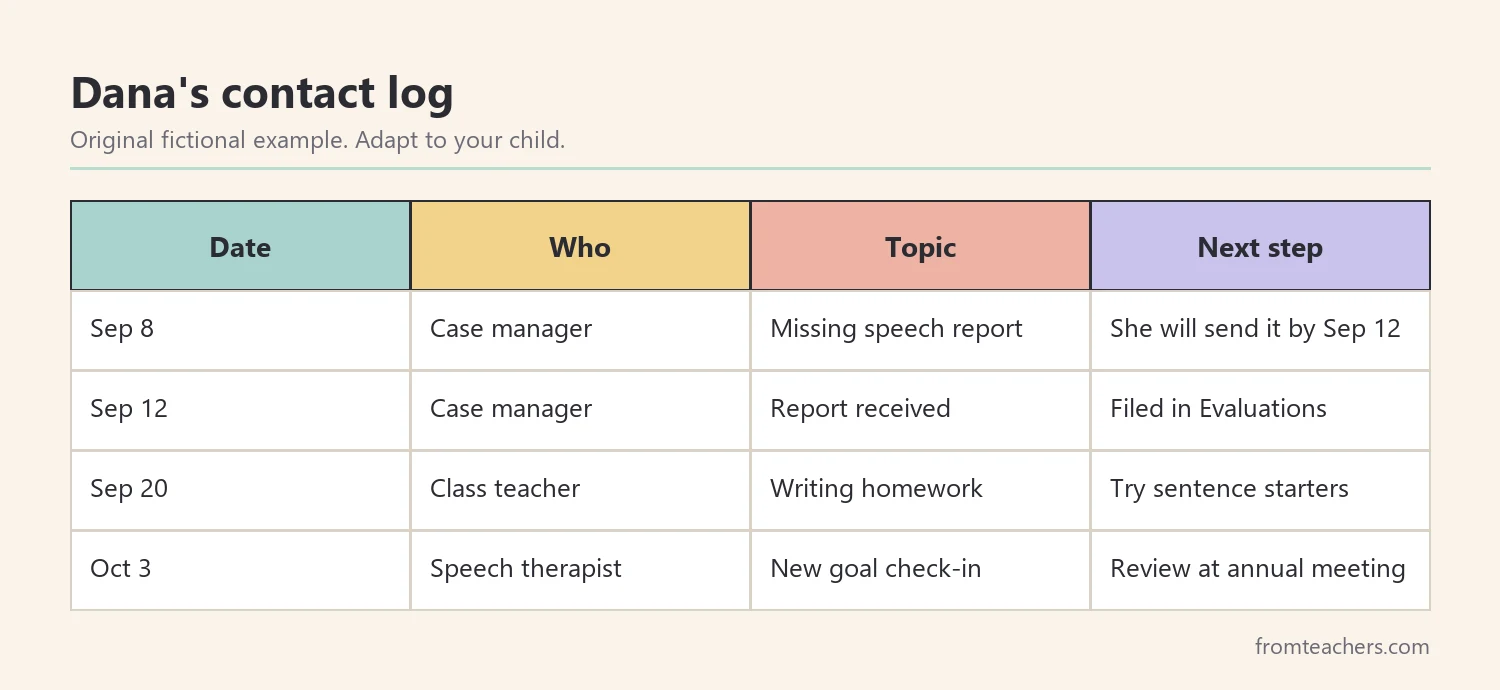
Keep the log honest and short. For example, “Asked about speech report, case manager will send by Friday” is enough. If a promised step does not happen, the log shows exactly when you asked, which makes a polite follow-up easy. Over a school year, the contact log often becomes the most useful page in a special education binder.
Finally, add an index page at the front of your special education binder. List each tab and the most important documents inside it. When you are nervous in a meeting, an index lets you find a page in seconds.
Worked example. Dana files Leo’s 46 pages in one sitting. She dates three notes that had no date and highlights the goals in the current IEP. Then she starts the contact log with her request for the missing speech report. Over the next month, it grows to four lines, as Figure 3 shows.
4. Use the special education binder before and during meetings
A binder only helps if you use it. Before any IEP meeting, spend twenty to thirty minutes reviewing it. Read the current goals, then look at the latest progress report for each goal. Ask yourself: is my child moving toward this goal, staying the same, or slipping?
Next, write a one-page summary to place at the front of your special education binder. Keep it simple: your child’s strengths, your main concerns, what is working at home, and three to five questions. A written list keeps you focused when the meeting moves quickly.
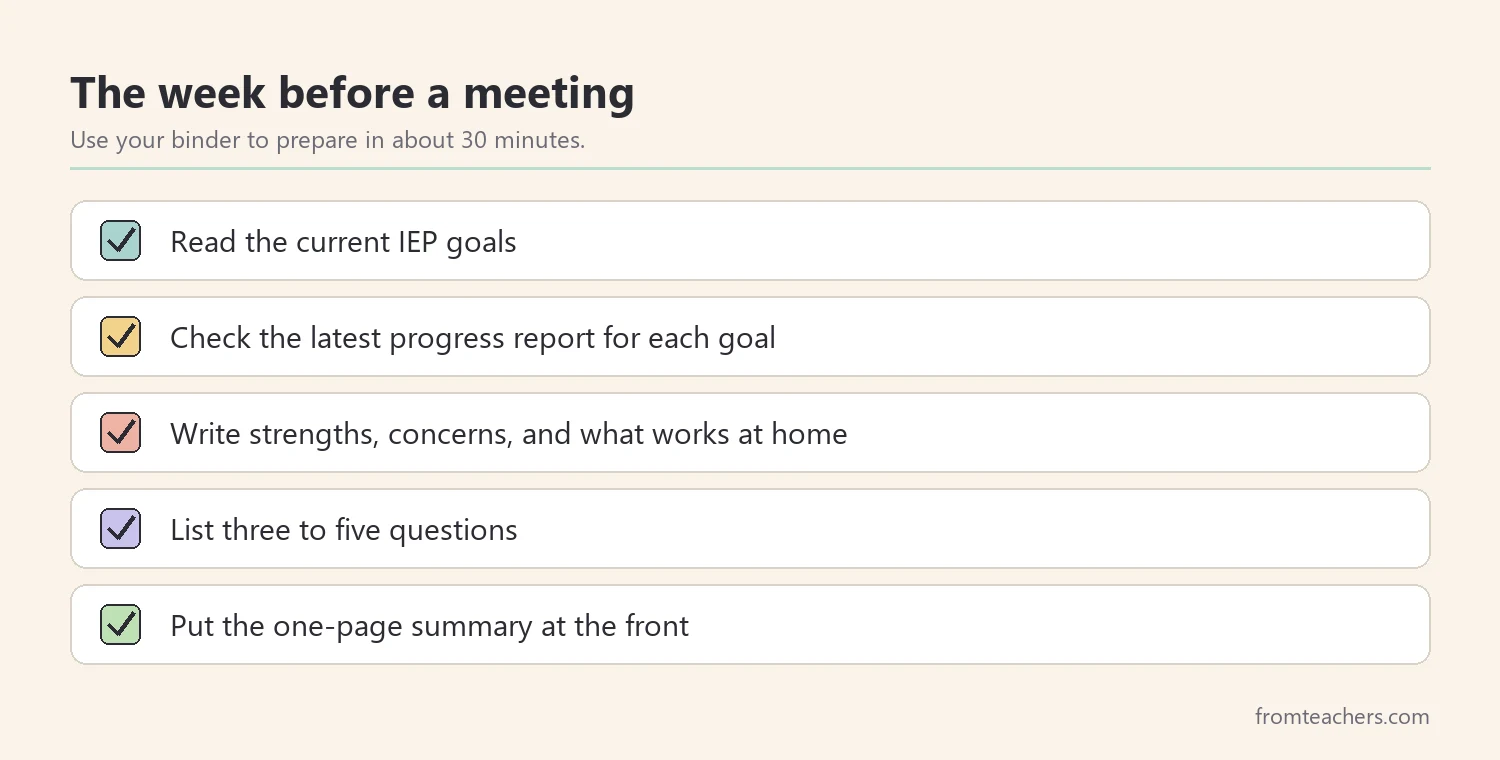
During the meeting, keep the binder open to your summary. When someone mentions a report or a past decision, turn to it and check the details. Take short notes on decisions, dates, and who will do what. Moreover, it is fine to ask for a moment to find a page or to ask a question again.
Also, remember that the special education binder is a tool for teamwork, not a weapon. Using it to point to facts, dates, and progress keeps the conversation calm and focused on your child.
After the meeting, file your notes in the Communication tab and add a line to the contact log. Then, when you receive the new IEP, move the old one to Past plans.
Worked example. Before Leo’s annual review, Dana notices that his reading progress report shows steady growth, but his writing goal shows little change. She adds the question “What could we try differently for writing?” to her summary. During the meeting, she turns to the last two progress reports to show the pattern.
5. Keep your special education binder current all year
Last, protect the work you have done. A special education binder stays useful only when new papers keep moving into it. The best routine is short and regular, not long and rare.
Choose one time each week, for example Sunday evening, and spend about ten minutes. Empty the front pocket into the right tabs. Add any new calls or emails to the contact log. Then, glance at the index page and update it if a key document has changed.
If a week gets busy, do not try to catch up all at once. Simply empty the pocket the following week. A special education binder that is mostly current is far better than a perfect one that you avoid opening.
In addition, do a bigger tidy once or twice a year. At the start of a new school year, move last year’s IEP to Past plans, keep only a few work samples, and check that the contact list is current. A digital backup also helps. Scanning key documents, such as the current IEP and recent evaluations, protects you if the binder is lost.
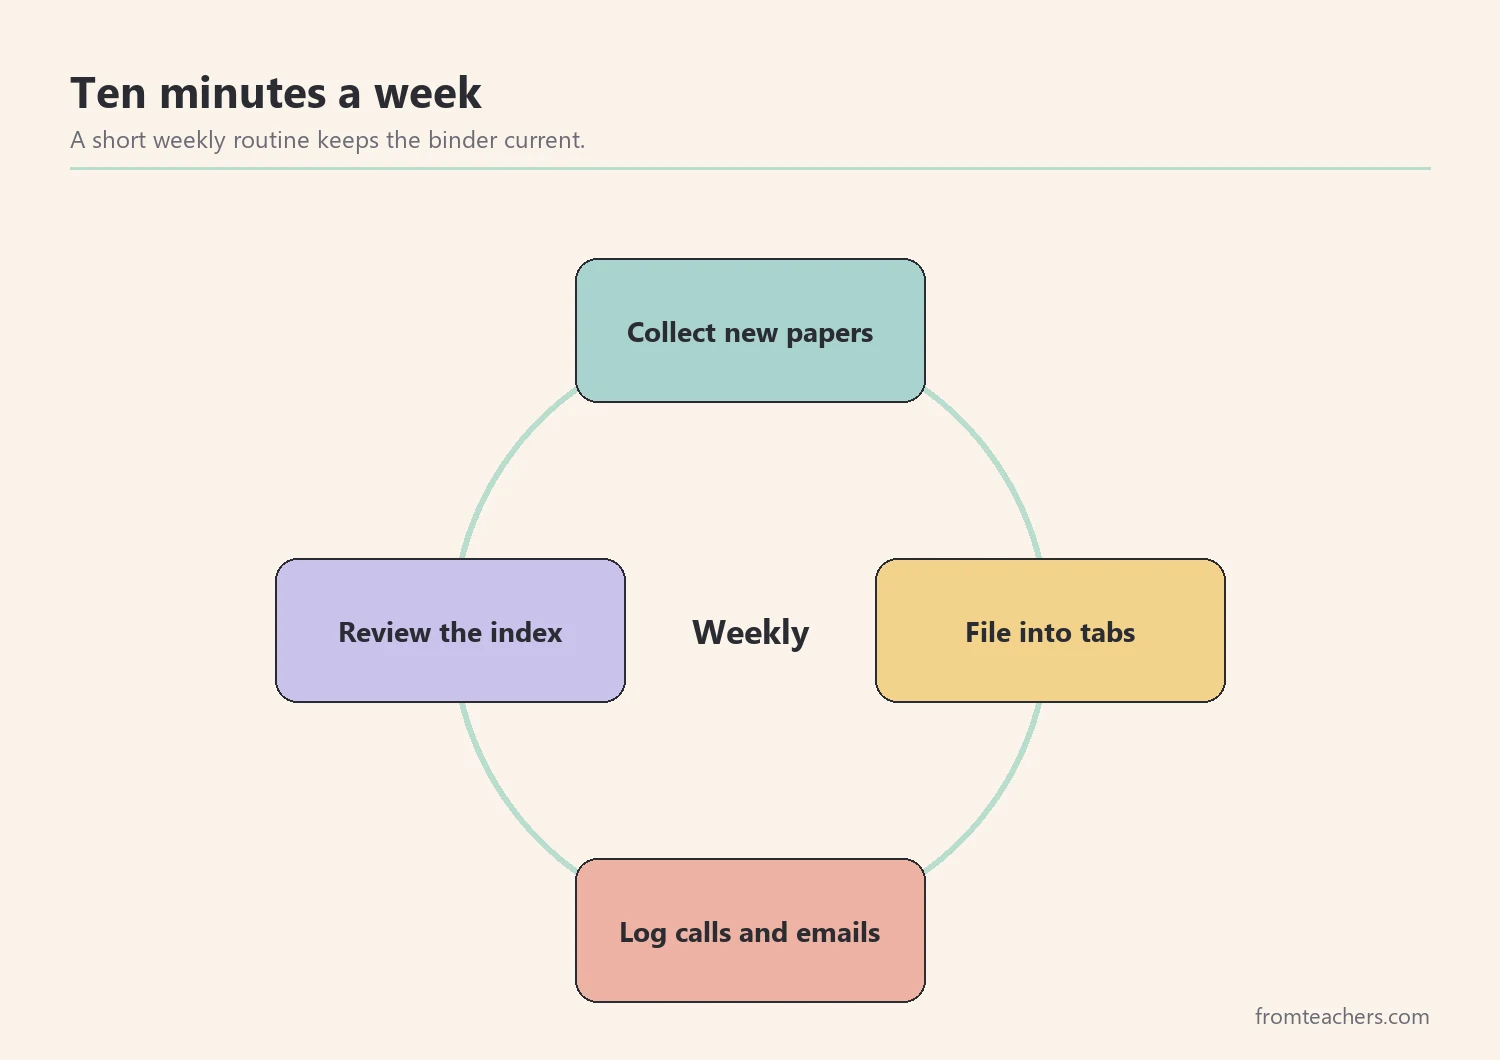
Worked example. Dana sets a Sunday reminder on her phone. Most weeks she files two or three papers and adds one log entry. In August, she moves the old IEP to Past plans, removes extra worksheets, and scans the new plan into a folder on her computer.
Consequently, she never faces another shopping bag of papers. The binder grows a little each week, and it is always ready.
Common mistakes and how to avoid them
- Too many sections. A special education binder with twenty tabs makes filing slow, so papers pile up again. Fix: use about seven tabs and keep them the same every year.
- Mixing old and current plans. Meetings get confusing when two IEPs sit side by side. Fix: keep only the current plan in its tab and move older ones to Past plans.
- No dates on papers. You cannot show a pattern without dates. Fix: date every paper before you file it.
- Relying on memory for conversations. Details fade within days. Fix: add one line to the contact log after every call or meeting.
- Building it once and forgetting it. An outdated binder fails when you need it most. Fix: a ten-minute weekly routine.
Questions teachers and parents ask about a special education binder
Should my special education binder be paper or digital?
Either can work, and many families use both. A paper binder is easy to bring to meetings and flip through. A digital copy protects you if the paper version is lost or damaged.
What is the most important section of a special education binder?
For most families, the current IEP or 504 plan and the latest progress reports matter most. Together, they show what was promised and how your child is doing. Keep both easy to reach at the front.
How many work samples should I keep?
Keep only a few that show growth or a concern, such as one writing sample from fall and one from spring. Date each one. A small, chosen set is more useful than a thick stack.
Can teachers use a binder like this too?
Yes. Many teachers keep a similar binder or folder for each student on their caseload. The same ideas apply: clear sections, dates, newest on top, and a regular update routine.
What if the school will not give me a copy of a record?
Ask in writing and keep a copy of your request in the Communication tab. Parents generally have the right to review their child’s education records. If you have trouble, your state’s Parent Training and Information Center can explain your options.
Related reading: How Parents and Teachers Can Team Up for Special Education Success, Accommodations vs Modifications in Special Education, and Special Education: A Complete Guide for Parents and Educators.
A companion resource for your special education binder:

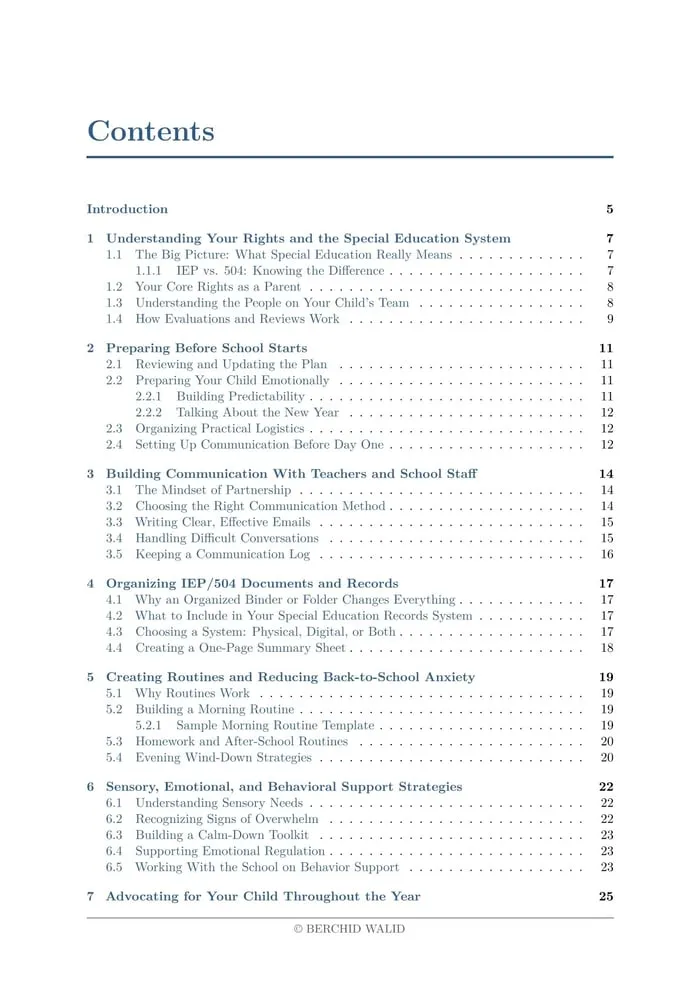
Back to School Survival Guide for Special Education Parents: a 42-page PDF companion covering your rights, organizing IEP and 504 records, communicating with the school, routines at home, and advocacy, with printable templates and checklists.
Sources and scope
- IDEA, U.S. Department of Education: the law behind special education services, IEPs, and parent participation.
- Center for Parent Information and Resources: information for families and a directory of Parent Training and Information Centers.
- Student Privacy Policy Office, U.S. Department of Education: general guidance on education records and parents’ rights to review them.
- Understood.org: practical articles for families on IEPs, 504 plans, and meetings.
This guide covers practical ways for families to organize and use school records. It does not provide legal advice or replace guidance from your school team or local parent center.
Key takeaways
- Gather every record into one pile before building your special education binder.
- Use about seven clear tabs and keep them the same each year.
- Date every paper, file newest on top, and keep a contact log.
- Bring a one-page summary and your questions to every meeting.
- Keep the binder current with a ten-minute weekly routine.








Leave a Comment