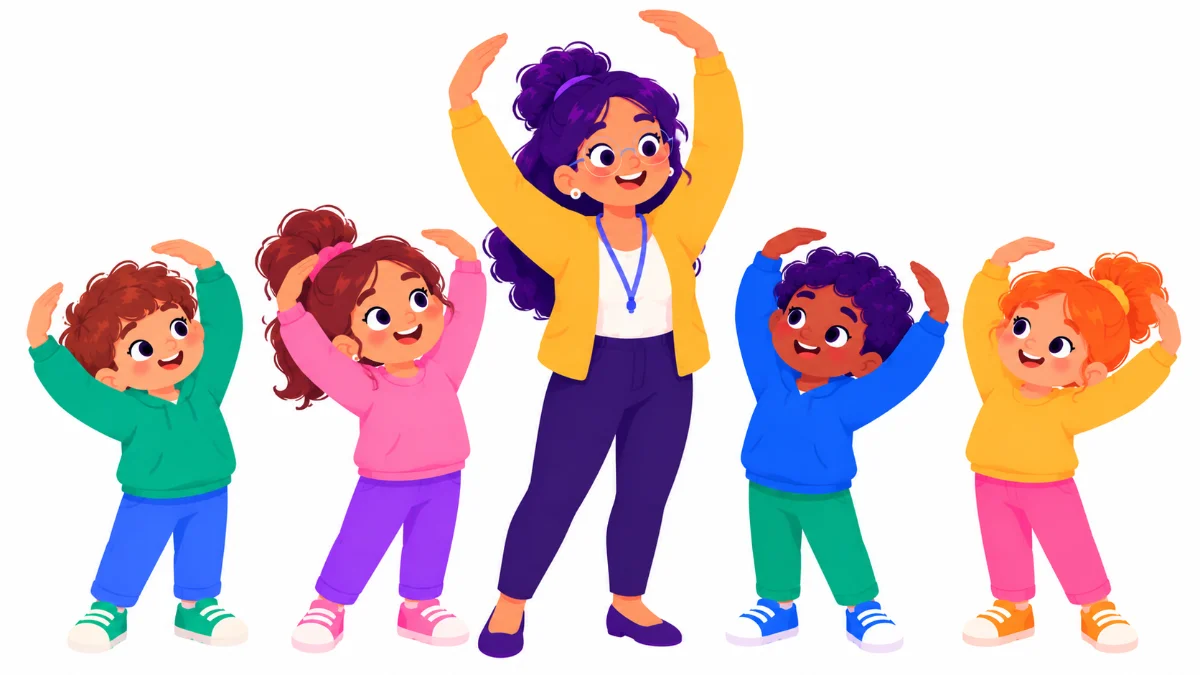

Calming breathing techniques give children a tool they carry everywhere: their own breath. Picture a first grader after a loud fire drill, cheeks red, talking fast, unable to settle back into reading. A few slow, guided breaths can help that child’s body move from busy to steady, but only if the child already knows how to do them.
This guide gives you five steps to teach calming breathing techniques at school or at home: explain why breathing helps, start with simple techniques, add rhythm and movement, build a daily routine, and use the techniques in hard moments while tracking progress. By the end, you will be ready to teach eight child-friendly techniques with confidence.
Examples are fictional. Adapt to the student’s goals and agreed supports. This is guidance, not a diagnosis.
At a glance
- Slow, steady breathing can help many children calm their body and brain.
- Start with simple, visual techniques before counted patterns.
- Movement-based breathing suits children who find sitting still hard.
- Short daily practice makes techniques easier to use when upset.
- The more children practice, the more natural the tools become.
1. Explain why calming breathing techniques help
First, give children a simple reason. When we feel upset, scared, or excited, breathing often becomes fast and shallow. Slowing the breath down, especially the breath out, can help the body feel calmer. Children do not need a science lesson. A short explanation is enough: “Slow breaths tell your body it’s okay to relax.”
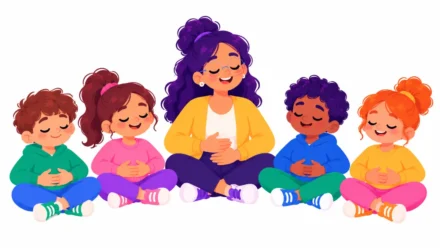
Next, make the breath visible. Ask children to put a hand on their belly and feel it rise and fall. Use a feather, a tissue, or a pinwheel to show the air moving. Seeing and feeling the breath makes calming breathing techniques concrete instead of abstract.
Also, keep expectations realistic. Breathing is a helpful tool, not a magic switch. Some children will feel a difference quickly, while others need many practice sessions. Both are normal.
Watch for comfort
In addition, watch for comfort. Some children dislike closing their eyes or holding their breath. Let them keep their eyes open and skip holds. Breathing should always feel safe and comfortable, never forced.
Then, check with the team when needed. If a child has a health condition affecting breathing, ask the family or school nurse which activities are appropriate before practicing.
Finally, practice as an adult first. Try each technique yourself for a few days before teaching it. You will notice which counts feel natural, which instructions are confusing, and how long a round really takes. Teachers who are comfortable with calming breathing techniques tend to model them more calmly and clearly.
Worked example. Eli is a fictional grade 1 student who becomes very wound up after noisy events. His teacher, Ms. Duarte, shows the class how a tissue moves when they breathe out slowly. Eli laughs and tries to make the tissue move “really slowly.”
2. Start with simple calming breathing techniques
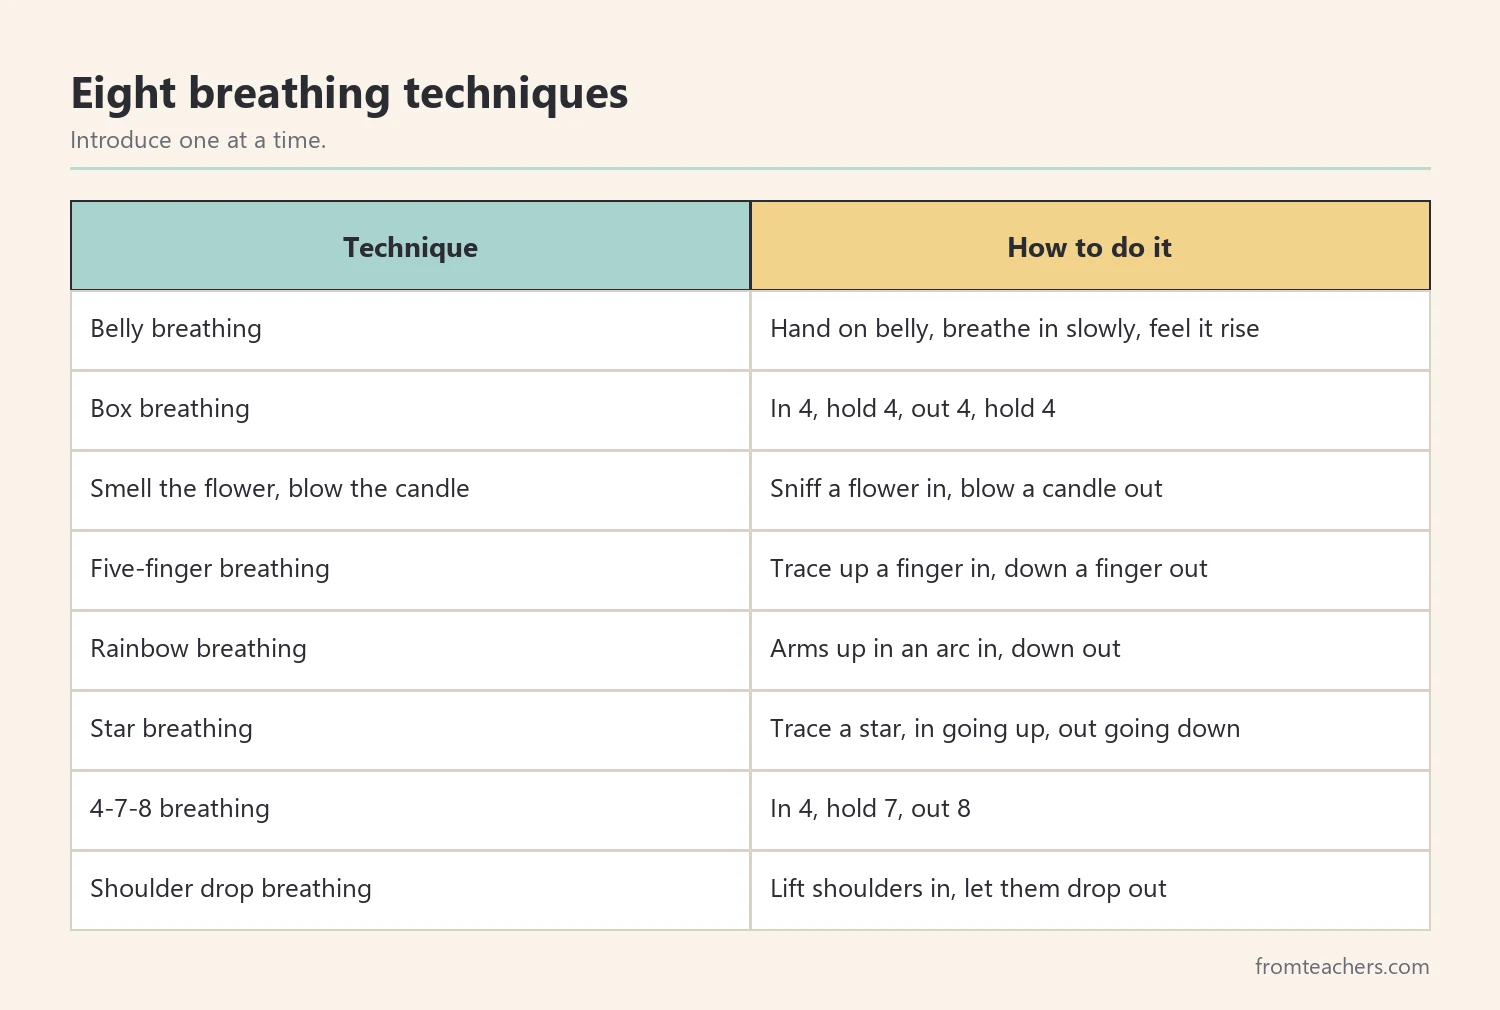
Next, begin with techniques that use pictures and play. Three good starters are belly breathing, smell the flower and blow the candle, and five-finger breathing. Each one gives children something to imagine or touch.
For example, in belly breathing, children put one hand on their belly, breathe in slowly through the nose, feel the belly rise, and breathe out slowly through the mouth. In smell the flower, blow the candle, they pretend to smell a flower as they breathe in and blow out a candle as they breathe out.
Also, try five-finger breathing. Children spread one hand and trace up a finger with the other hand as they breathe in, then trace down as they breathe out, repeating for all five fingers. It combines breath with touch and movement, which many children find grounding.
In addition, the breathing exercises poster shows eight easy techniques for students, each with simple instructions and a short benefit, so children can follow along on their own once they have learned them. It works well in a calm down corner or near the carpet area.
Count out loud at first
Also, count out loud at first. Young children often rush their breath, so a slow, steady adult voice helps them match a calm pace. After a few sessions, lower your voice and let children count silently on their own.
Meanwhile, practice one technique at a time. Introduce a new one every few days and repeat favorites. Repetition builds confidence and makes the steps automatic.
Then, use simple props. A pinwheel, a bubble wand, or a small stuffed animal resting on the belly can make calming breathing techniques more engaging for young learners. Props give children a clear goal, such as making the pinwheel spin slowly or watching the toy rise and fall.
Worked example. During the first week, Ms. Duarte teaches belly breathing on Monday, smell the flower on Wednesday, and five-finger breathing on Friday. Eli’s favorite is five-finger breathing because “my hand helps me count.”
3. Add rhythm and movement to calming breathing techniques
Next, introduce counted and movement-based patterns. Once children are comfortable with simple techniques, they can try box breathing, rainbow breathing, star breathing, shoulder drop breathing, and 4-7-8 breathing.
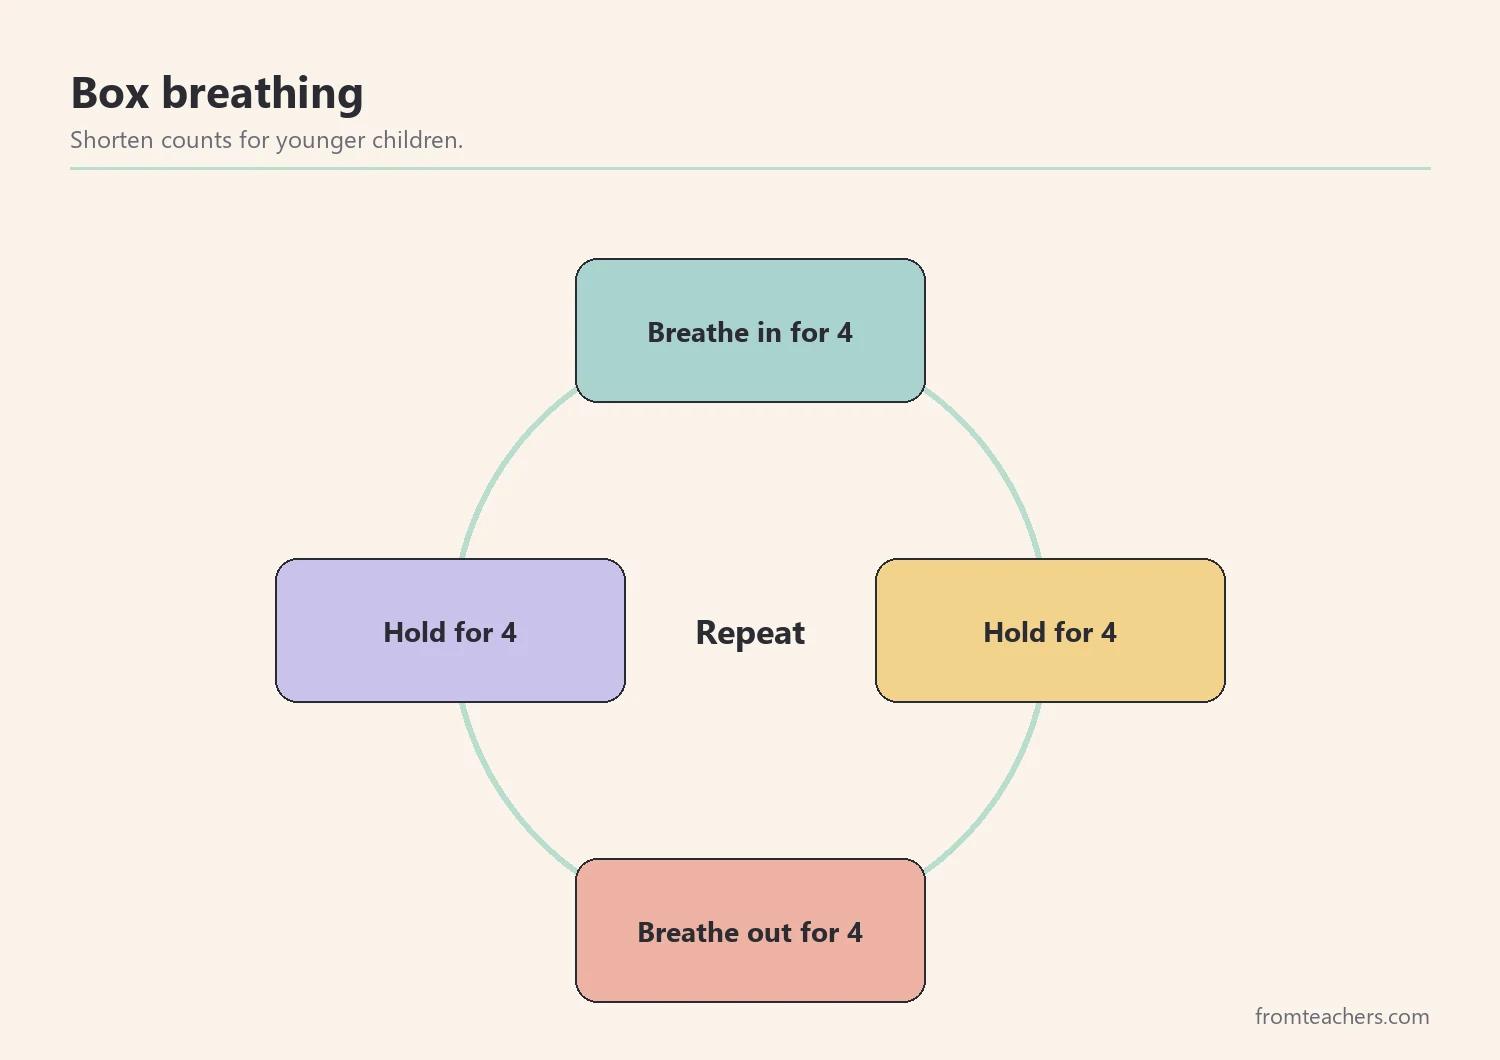
First, teach box breathing. Breathe in for 4, hold for 4, breathe out for 4, and hold for 4, then repeat. Tracing a square in the air helps children keep the rhythm. For younger children, shorten the counts to 3 or skip the holds.
Also, add movement for active learners. In rainbow breathing, children lift their arms in an arc while breathing in and lower them while breathing out, imagining they are drawing a rainbow. With shoulder drop breathing, they lift their shoulders on the in-breath and let them drop on the out-breath. In star breathing, they trace a star, breathing in on each line going up and out on each line going down.
In addition, use 4-7-8 breathing carefully. It means breathing in for 4, holding for 7, and breathing out for 8. Many people find the longer breath out calming, but the hold can feel long for young children. Offer it to older students or shorten the counts.
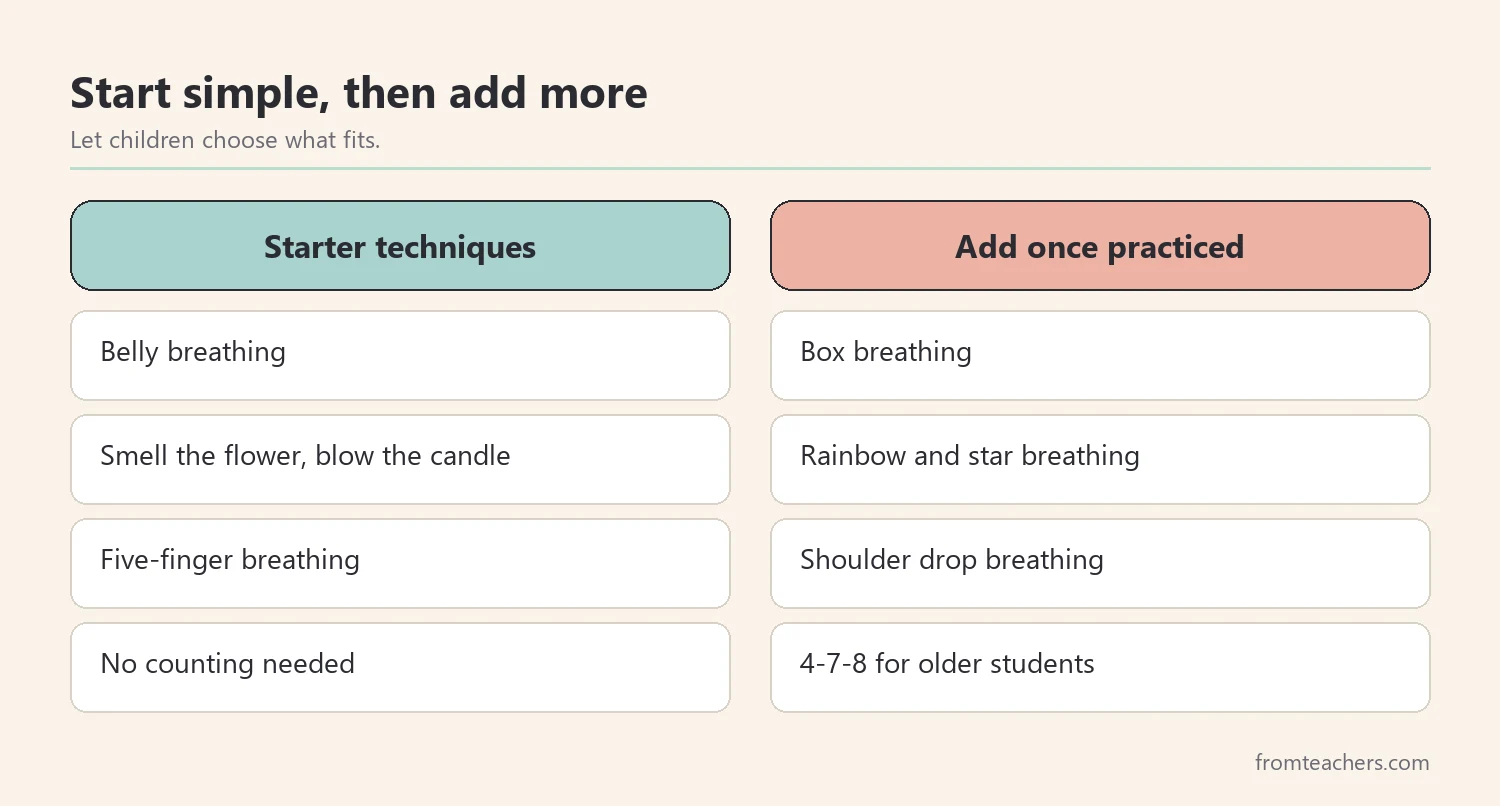
Meanwhile, let children choose. Some prefer counting, some prefer movement, and some prefer pictures. A choice of calming breathing techniques helps every child find one that fits.
Worked example. Ms. Duarte adds rainbow breathing in week two. Eli, who often struggles to sit still, loves lifting his arms. He tells his friend, “Rainbow breathing is the best one.”
4. Build a daily routine around calming breathing techniques
Next, make breathing part of the day. Children learn calming breathing techniques best when they practice them regularly, not only when they are upset. A short routine of one to two minutes, a few times a day, is enough.
Also, link practice to transitions. Good moments include the start of the day, after recess, after lunch, and before tests. These are times when bodies are often busy and a short reset helps everyone.
In addition, keep it simple and predictable. Use the same signal, such as a soft chime, and the same words each time: “Let’s take three rainbow breaths together.” Predictable routines feel safe and are easier for children to follow independently.
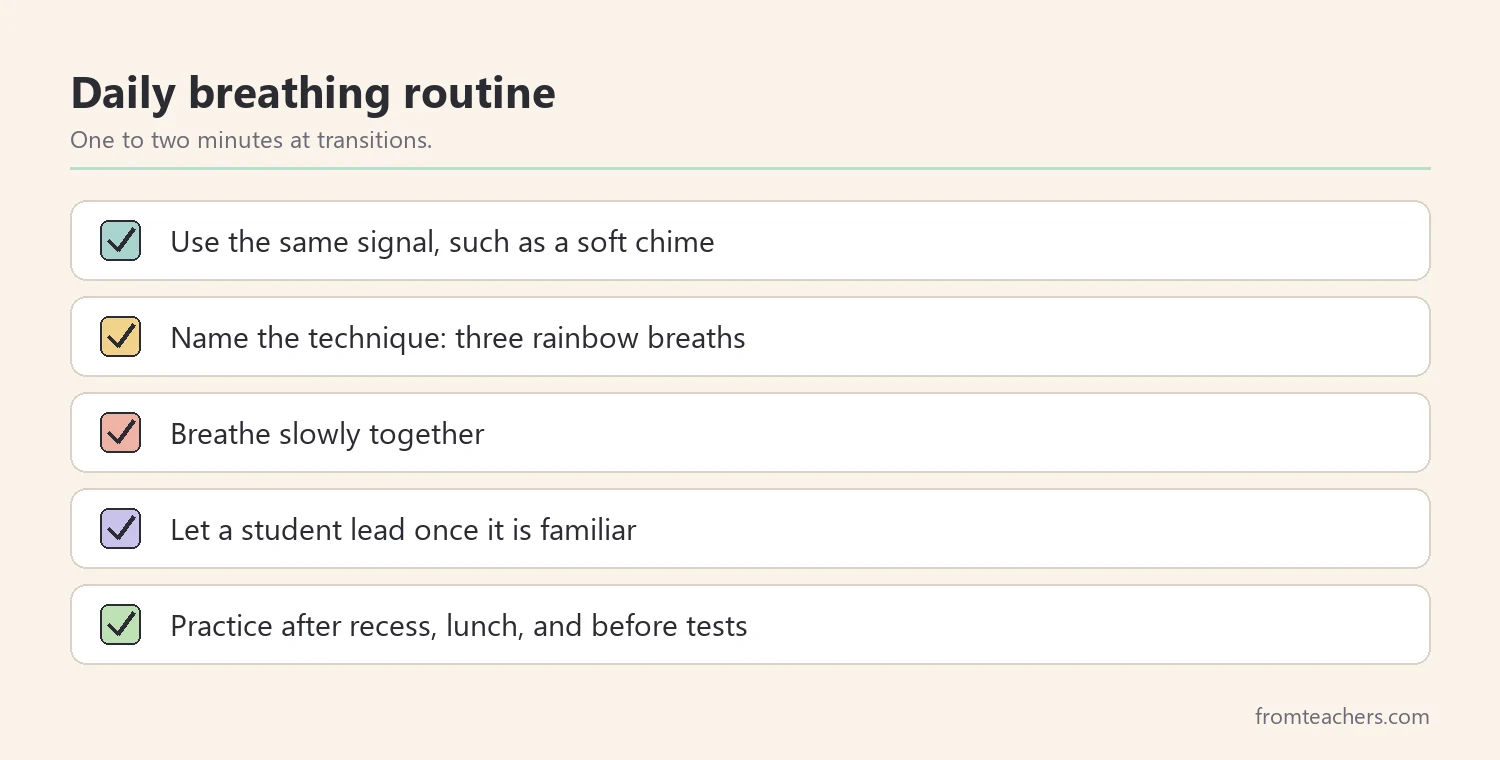
Meanwhile, invite student leaders. Once children know a technique, let one student lead the class. Leading builds confidence and keeps the routine fresh.
In addition, rotate techniques across the week. Using the same technique every day can become boring, while a new one each day can feel confusing. A simple plan, such as belly breathing on Monday, box breathing on Tuesday, and student choice on Friday, keeps practice familiar but fresh.
Then, share the routine with families. A short note listing the class’s favorite techniques helps families practice at home, at bedtime, or before stressful events.
Worked example. Ms. Duarte rings a chime after recess each day and leads three rainbow breaths. By week three, Eli asks to be the leader. He counts slowly and reminds classmates to “make the rainbow big.”
5. Use calming breathing techniques in hard moments and track progress
Finally, help children use breathing when they need it. In a hard moment, keep words short and point to the poster or a personal card: “Let’s do five-finger breathing.” Breathe together, so the child can match your pace.
First, notice the early signs. A child who is starting to talk fast, fidget more, or raise their voice may be ready for a breathing reset before the feeling grows. Prompting early is usually easier than waiting until the child is very upset, because the child can still listen and follow simple steps.
Also, avoid forcing it. If a child refuses, offer a different technique or simply sit nearby and breathe slowly yourself. Many children join in once they see an adult modeling calm breathing.
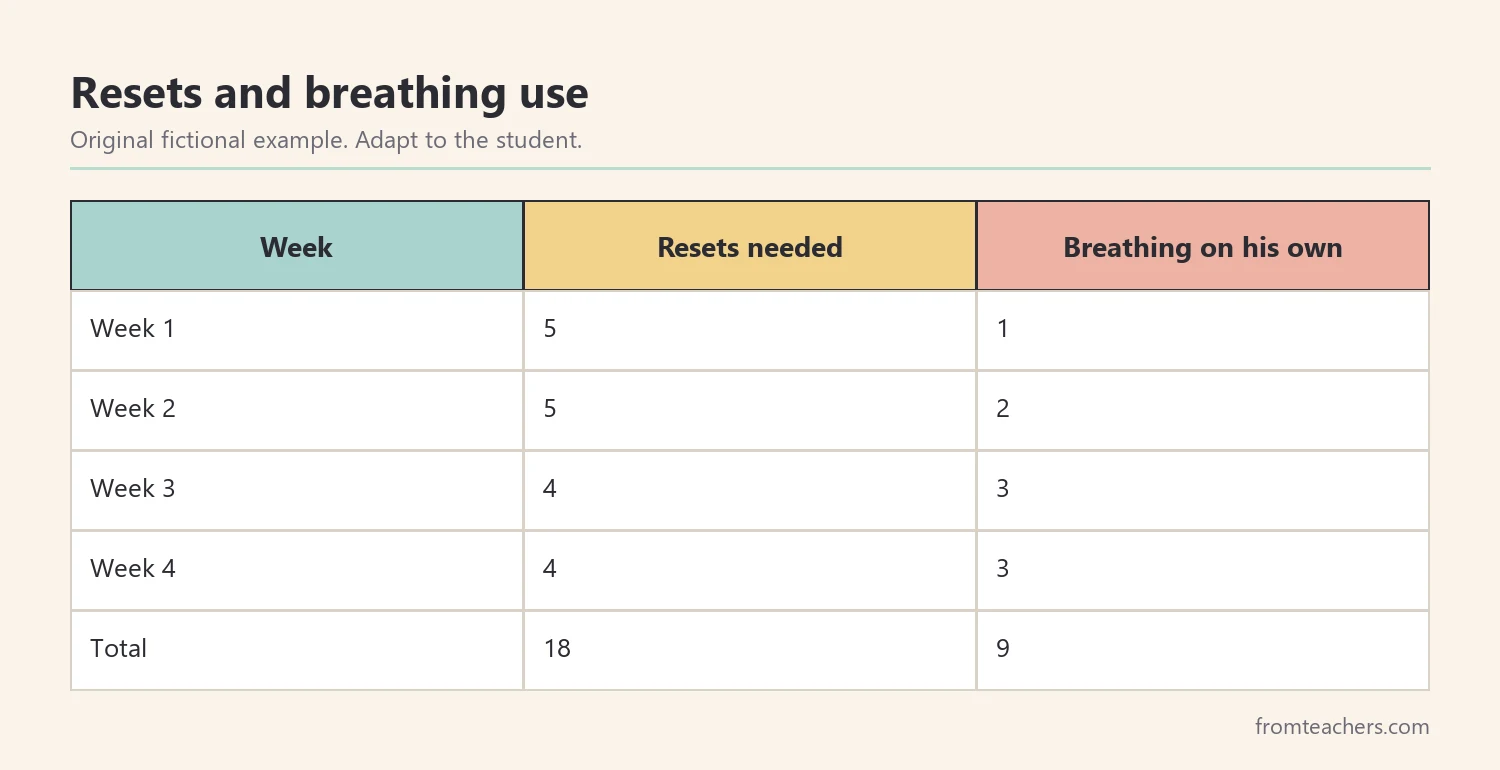
Next, track a few simple numbers. Count how often the child needed a reset and how often they used a breathing technique, either prompted or on their own. Over weeks, these records show whether calming breathing techniques are becoming a habit.
In addition, celebrate independent use. “You did your five-finger breathing all by yourself” is powerful praise. It tells the child that they can calm their own body.
Meanwhile, give each child a personal card. A small card showing one or two favorite calming breathing techniques with a simple picture lets the child use them anywhere, including in specials, at lunch, or on field trips.
Then, review and adjust. Keep techniques that help, retire ones that do not, and add new ones as children grow.
Worked example. Ms. Duarte records Eli’s resets for four weeks. In week 1, 5 resets and 1 used breathing on his own. Week 2 brings 5 resets and 2 on his own. In week 3, 4 resets and 3 on his own. In week 4, 4 resets and 3 on his own. That is 18 resets and 9 independent breathing choices across the month.
Breathing at home
Families can practice calming breathing techniques at bedtime or before school. Keep it short and playful, and let the child choose the technique.
Also, try a breathing break during car rides or while waiting in line. These everyday moments are good chances to practice without pressure, and they help children see breathing as a normal part of life.
In addition, model breathing during your own stressful moments. Children learn a great deal by watching adults calm themselves.
Common mistakes and how to avoid them
- Teaching only during meltdowns. Children cannot learn then. Fix: practice daily when calm.
- Long holds for young children. Breathing feels uncomfortable. Fix: shorten counts or skip holds.
- Forcing participation. Children resist. Fix: invite, model, and offer choices.
- Too many techniques at once. Children get confused. Fix: introduce one at a time.
- Breathing too fast. It can feel worse. Fix: slow the pace and lengthen the breath out.
Questions teachers and parents ask about calming breathing techniques
What age can children start breathing exercises?
Young children can start with playful techniques such as smell the flower, blow the candle. Older children can add counted patterns like box breathing. Adapt counts and language to the child.
How long should a breathing practice last?
One to two minutes is often enough for a class routine. Three to five slow breaths can help in a hard moment.
Which technique is best?
There is no single best option among calming breathing techniques. Offer several, and let children choose the ones that feel comfortable and helpful.
Can breathing replace other supports?
No. Breathing is one helpful tool. Children with significant anxiety or regulation needs may need additional support from the school counselor or other professionals.
What if breathing makes a child feel dizzy?
Stop, let the child breathe normally, and try again later with slower, gentler breaths and no holds. If concerns continue, check with the family or school nurse.
Related reading: Managing Sensory Overload: Practical Strategies for Autism and ADHD, Meltdowns vs Tantrums: A Guide to Understanding and Responding, and Essential Trauma-Informed Teaching Strategies for Modern Classrooms.
A companion resource for calming breathing techniques:
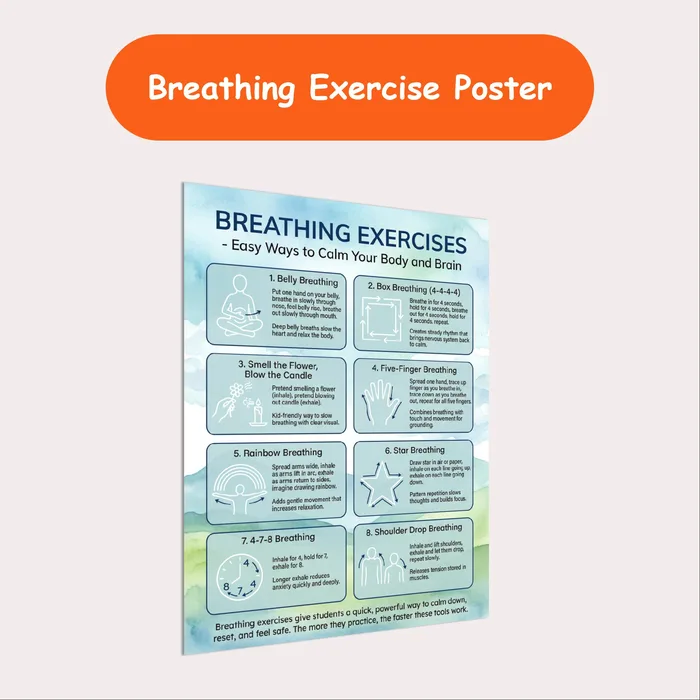
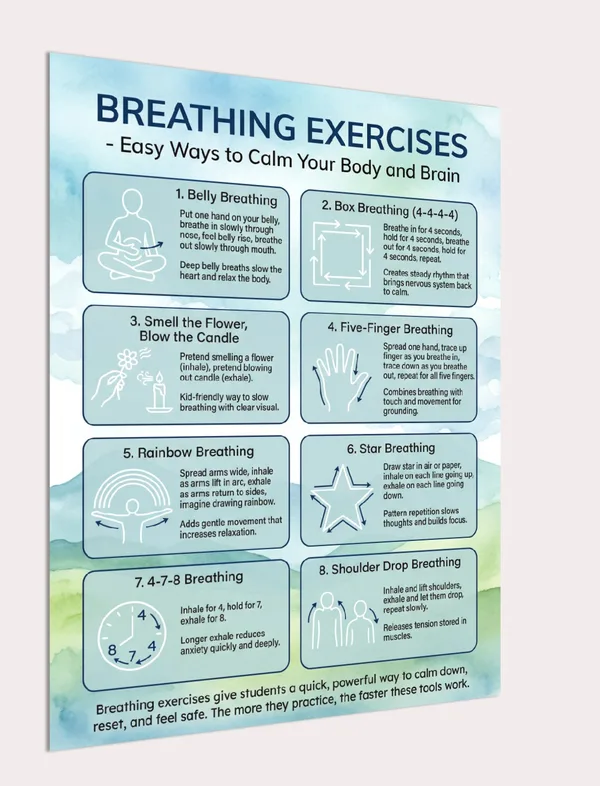
Breathing Exercises Poster: eight easy ways for students to calm their body and brain, each with simple instructions and a short benefit, for calm down corners and mindfulness routines.
Sources and scope
- CASEL: resources on social and emotional learning, including self-management.
- HealthyChildren.org, American Academy of Pediatrics: parent information on children’s emotional health.
- Centers for Disease Control and Prevention (CDC): general information on children’s mental health.
- Understood.org: family-friendly information on learning and thinking differences.
This guide covers everyday classroom and home breathing practice for children. It does not replace medical advice, mental health care, or the decisions of a child’s support team.
Key takeaways
- Calming breathing techniques give children a tool they always carry.
- Start with simple, visual techniques before counted patterns.
- Add movement-based breathing for active learners.
- Practice daily at transitions, one to two minutes at a time.
- Prompt briefly in hard moments and track independent use.








Leave a Comment