

Fillable special education forms can turn a Sunday night of paperwork into a short, calm routine. Picture a resource teacher at 4:30 on a Thursday: three data sheets half done, a parent call to log, a behavior note from recess, and an IEP meeting tomorrow. Every form lives in a different place, and half of them are handwritten copies of copies.
This guide walks you through a six-step system for choosing, organizing, filling, protecting, and reviewing your forms. By the end, you will know which forms you actually need, where each one lives, and how to fill them faster without losing accuracy.
Examples are fictional. Adapt to the student’s goals and agreed supports. This is guidance, not a diagnosis.
At a glance
- Start with a one-week audit of the paperwork you already complete.
- Match each recurring task to one form, and retire the duplicates.
- Use one folder structure and one naming pattern for every student.
- Prefill the details that never change, so you only type what is new.
- Protect student privacy and review your system once a quarter.
1. Audit the paperwork you already complete
First, find out where your time actually goes. Most teachers guess, and most guesses are wrong. A short audit gives you real numbers to work with before you switch to fillable special education forms.
For one ordinary week, keep a simple tally. Each time you complete a piece of paperwork, write down what it was and roughly how long it took. Do not change anything yet. The goal is an honest snapshot, not a perfect week.
Next, group the tally into four or five types. Common groups are data collection, family communication, behavior notes, and meeting preparation. Then, for each group, multiply how many you completed by the minutes each one took. That product shows which forms deserve your attention first.
Worked example. Ms. Rivera is a fictional K to 5 resource teacher with a caseload of twelve students. During her audit week, she tracks four types of paperwork. Data sheets come first: she completes 24 of them at about 5 minutes each. She also logs 10 parent contacts at about 6 minutes each, writes 8 behavior notes at about 5 minutes each, and prepares for 2 meetings at about 30 minutes each.
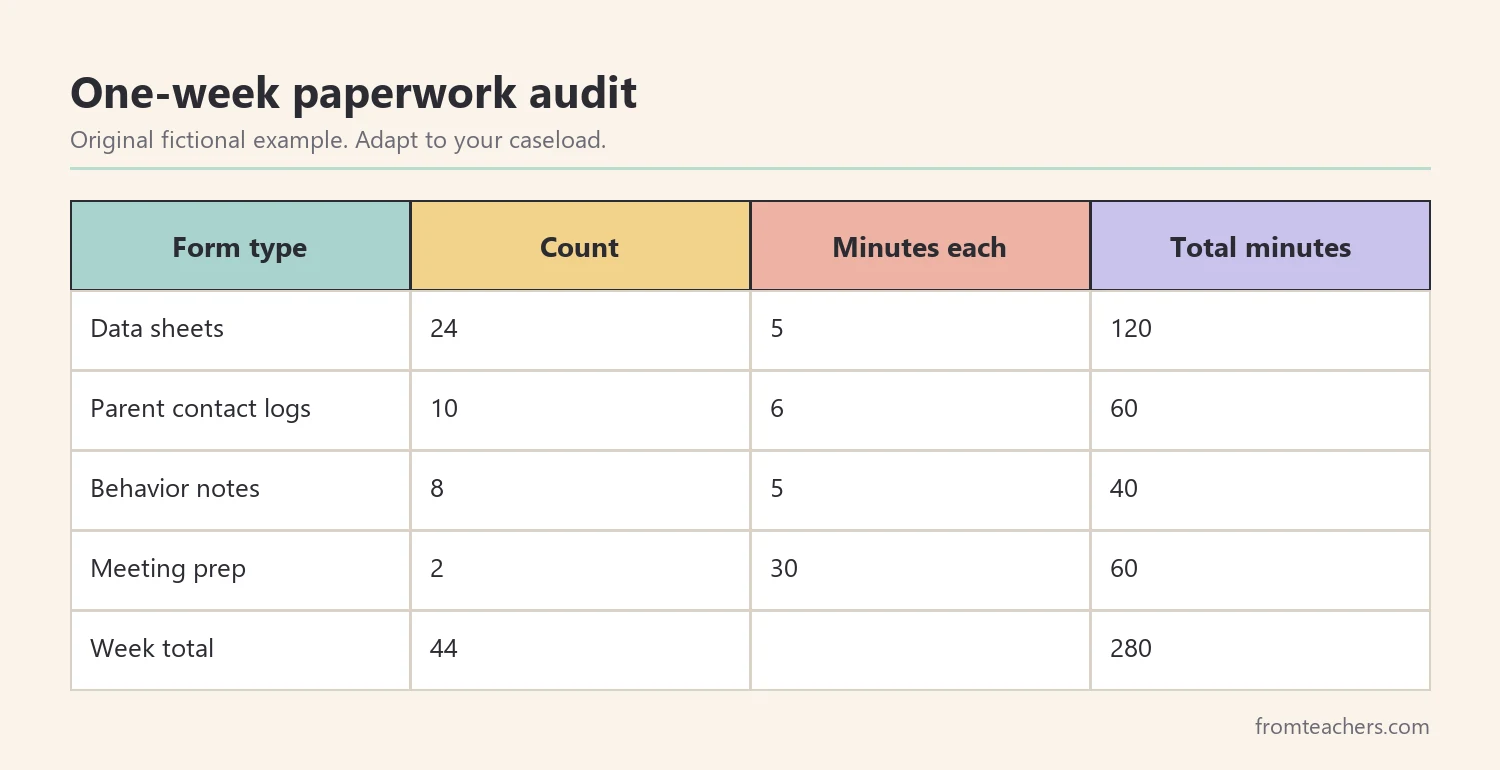
Added together, that is 120 + 60 + 40 + 60, or 280 minutes. In other words, close to four hours and forty minutes of paperwork in one week. As a result, she now knows that data sheets are the biggest single block of time, so they become her first target.
Also, note which forms you copy from scratch each time, because those are the first candidates for fillable special education forms. A fillable version removes the retyping completely.
2. Choose fillable special education forms for each job
Once you know your paperwork types, match each one to a single form. One job, one form. When two forms do the same job, keep the clearer one and retire the other. Fillable special education forms work best when the set is small and every form has a clear purpose.
When you compare fillable special education forms, look for forms with typed fields, check boxes, and dropdowns where answers repeat. Good forms also have a clear title, a date field, and space for the student’s initials or ID instead of the full name. Furthermore, a form should fit on one page whenever possible, because long forms tend to be skipped.
| Paperwork job | Form type | Key fields |
|---|---|---|
| Track a goal | Data sheet | Date, goal, trials, result |
| Talk with families | Contact log | Date, method, topic, next step |
| Record an incident | Behavior note | Time, setting, what happened, response |
| Prepare for a meeting | Meeting prep sheet | Strengths, data summary, questions |
| Share supports | Accommodations summary | Support, when, who provides it |
If you would rather not build every form yourself, a bundle of fillable and editable teacher forms gives you a ready starting set that you can adjust to your own caseload and school rules.
Worked example. Ms. Rivera finds three different data sheets in her files, each made by a different colleague over the years. She keeps one that has date, goal, number of trials, and number correct. Then she adds a short notes field. Now all twelve students use the same sheet, so she can compare progress at a glance.
Finally, write down your chosen set on one index page. That page becomes your map: if a form is not on it, you do not use it.
3. Set up one folder and naming system
Next, decide where every completed form will live, so your fillable special education forms stay easy to find. Even the best form loses its value if you cannot find it in May. A consistent structure takes about an hour to set up and saves time every single week after that.
Start with one main folder for the school year. Inside it, create one folder per student, labeled with initials or a student ID rather than a full name. Then, inside each student folder, add the same subfolders every time: Data, Family, Behavior, Meetings. Because the structure repeats, you never have to think about where something goes.
Then, agree on a file naming pattern and stick to it. A reliable pattern starts with the date written year first, so files sort in order automatically. After the date, add the form type and the student code.
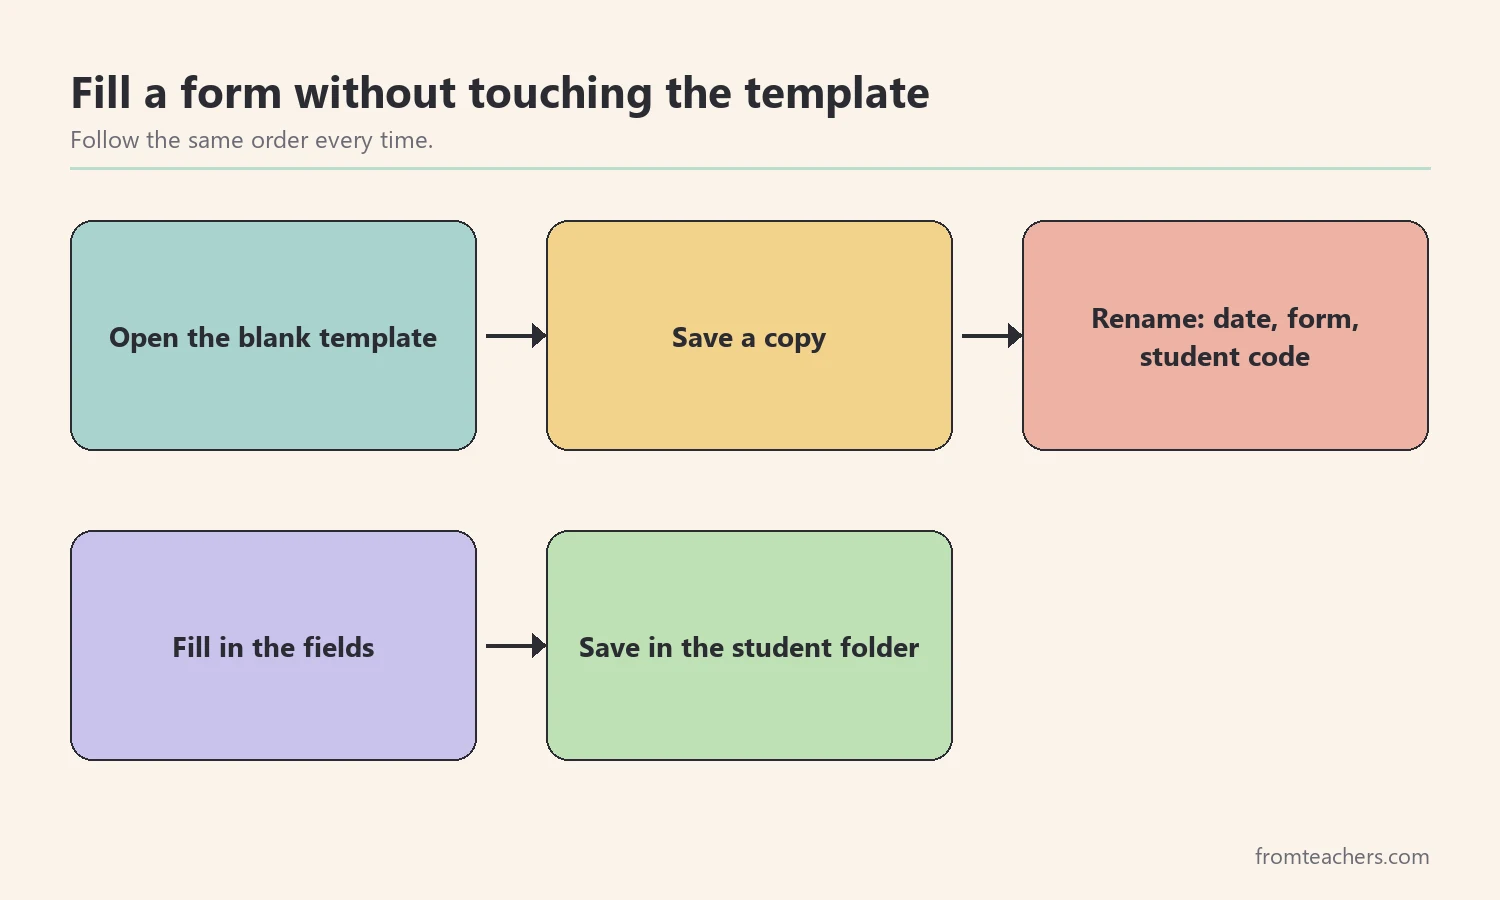
Above all, never type into the master template itself. Instead, open the template, save a copy, rename it, fill it in, and save it in the right student folder. That order protects your blank template from accidental edits.
Worked example. Ms. Rivera’s file for a fictional student, Amir, in grade 4, looks like this: 2026-10-08 Data AM4. When she searches her drive for AM4, every form about Amir appears in date order. Because her fillable special education forms all follow this pattern, before a meeting she opens his Data subfolder and sees the whole term in seconds.
In short, structure beats memory. A predictable system also helps a co-teacher or substitute find what they need without calling you.
4. Prefill and reuse fillable special education forms
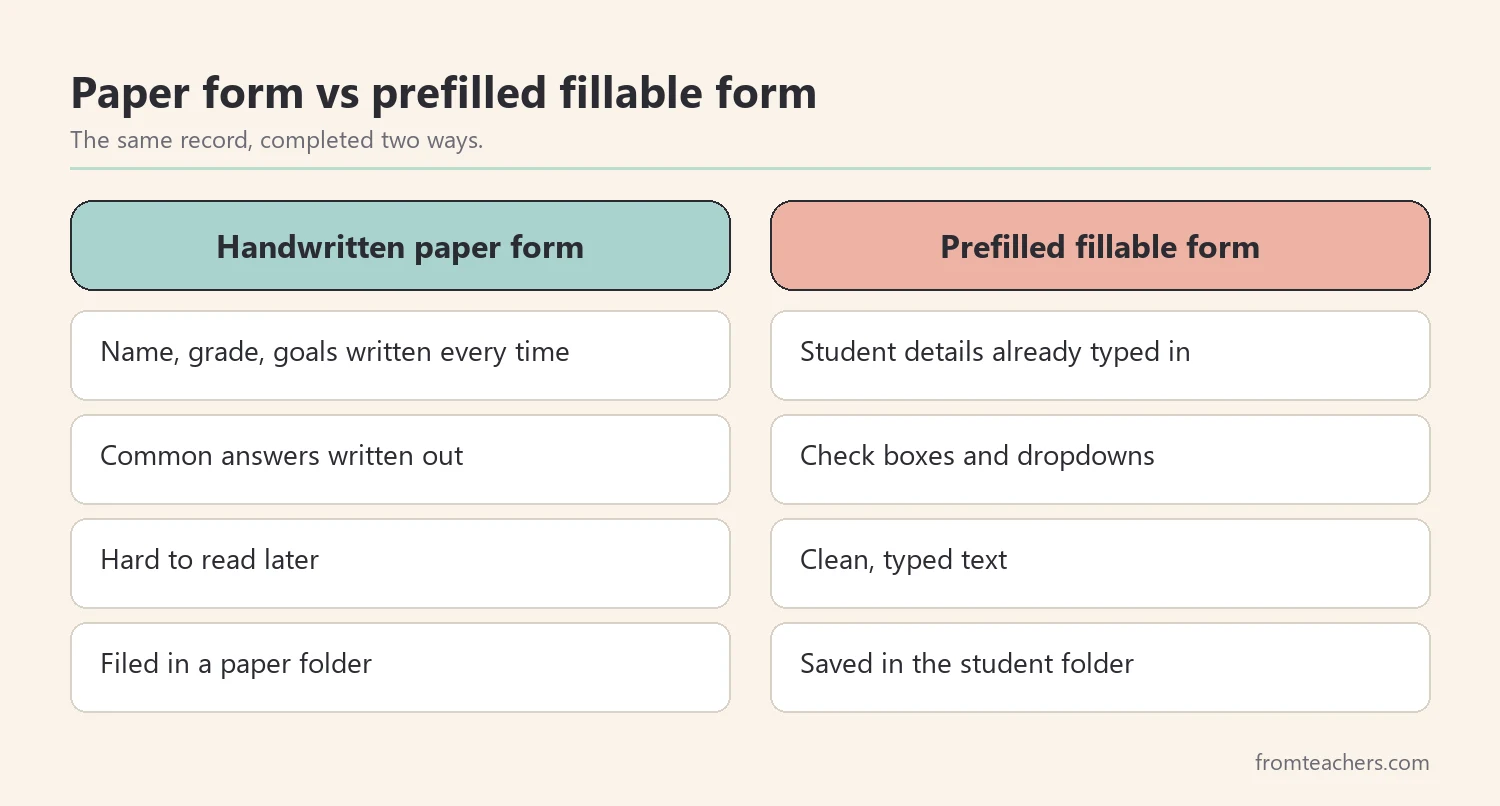
Now make the forms faster to complete. The biggest time saver is prefilling everything that does not change. For each student, create a personal copy of each form with the name code, grade, goals, and case manager already typed in.
Then, use check boxes and dropdowns for answers you give often. For example, a contact log can offer “phone, email, note home, meeting” as choices. A behavior note can list common settings such as “arrival, recess, lunch, transition.” As a result, most entries become a few clicks plus one short sentence.
However, keep one free text field on every form. Check boxes are fast, but they cannot capture the detail that makes a note useful later. One clear sentence about what happened and what you did next is enough.
Also, batch similar paperwork. Fill all data sheets for one goal area in one sitting rather than switching between form types all afternoon. Switching costs more time than most teachers expect.
Worked example. Ms. Rivera prefills a data sheet for each of her twelve students. Each data sheet now takes her about 3 minutes instead of 5. With 24 sheets a week, that cuts her data time from 120 minutes to 72 minutes, a saving of 48 minutes every week. She uses the time for a short weekly call with one family.
Consequently, prefilled fillable special education forms do more than save minutes. They also make your records more consistent, which matters when a team reviews them.
5. Protect privacy and share fillable special education forms safely
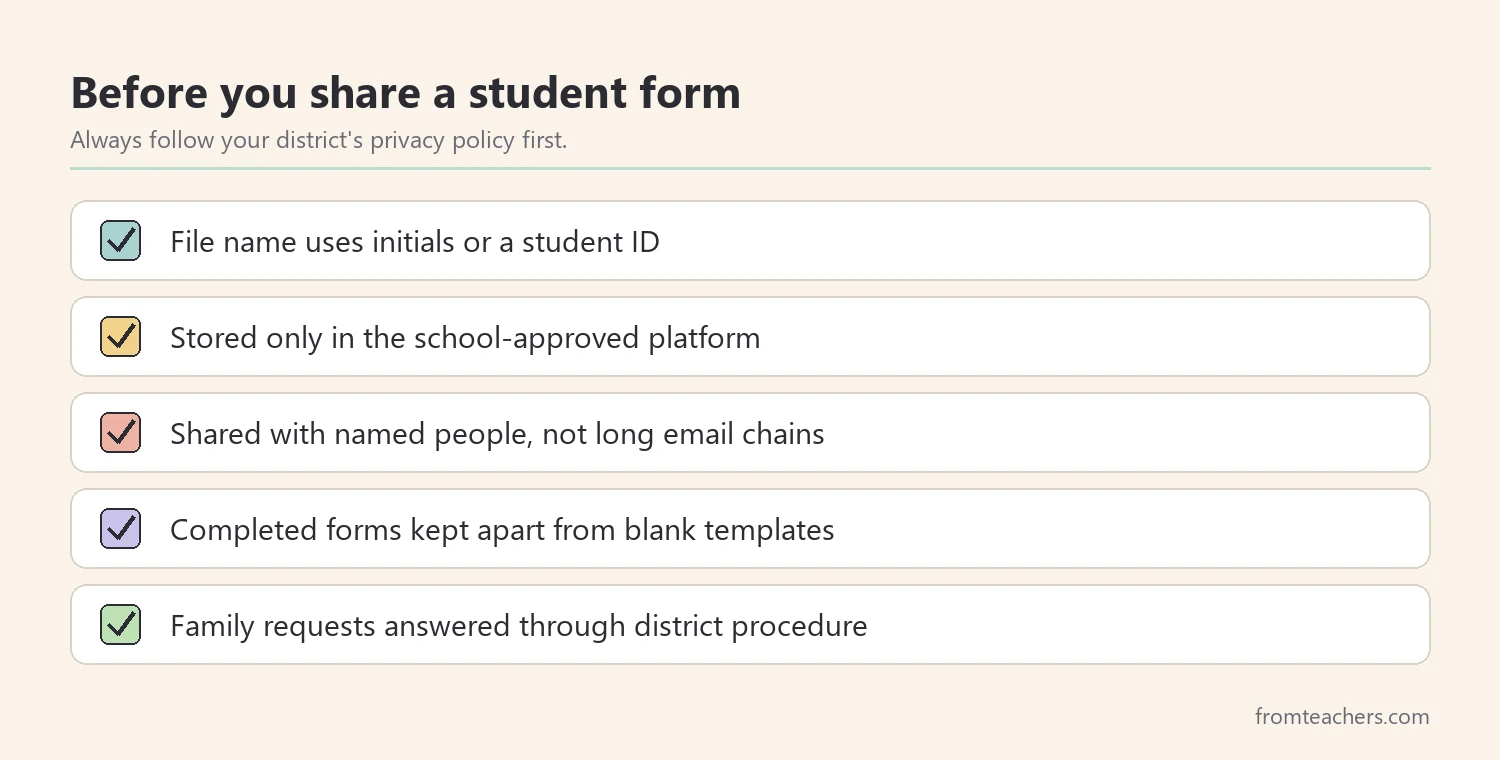
Student records are sensitive, so privacy is part of any system built on fillable special education forms, not an afterthought. Before you share any form, check your school or district policy on where student information may be stored and how it may be sent. Your district’s rules always come first.
In practice, a few habits cover most risks. Use initials or student IDs in file names. Store files only in the platform your school approves. In addition, share a link with the specific people who need it rather than attaching files to long email chains.
When families ask for copies, make the process simple and respectful. Families have rights to review their child’s education records, so answer these requests promptly and follow your district’s procedure. Moreover, a clean, typed form is easier for a parent to read than a crowded handwritten page.
Worked example. Amir’s mother asks for his recent progress notes before a meeting. Ms. Rivera checks the district procedure, exports the four most recent data sheets as one file, and shares it through the school’s approved system. She adds a short note explaining what each column means.
Finally, keep blank templates separate from completed forms. Templates can be shared freely with colleagues. Completed forms contain student information and stay inside the approved system.
6. Review your forms every quarter
Last, schedule a short review once a quarter. Fillable special education forms are only useful if they still match how you work. Needs change as caseloads, goals, and school procedures change.
During the review of your fillable special education forms, ask a few simple questions. Which forms did I use every week? Which ones did I skip? Did any field confuse a colleague or a family? Then, repeat a mini audit for one week to see whether your total paperwork time has dropped.
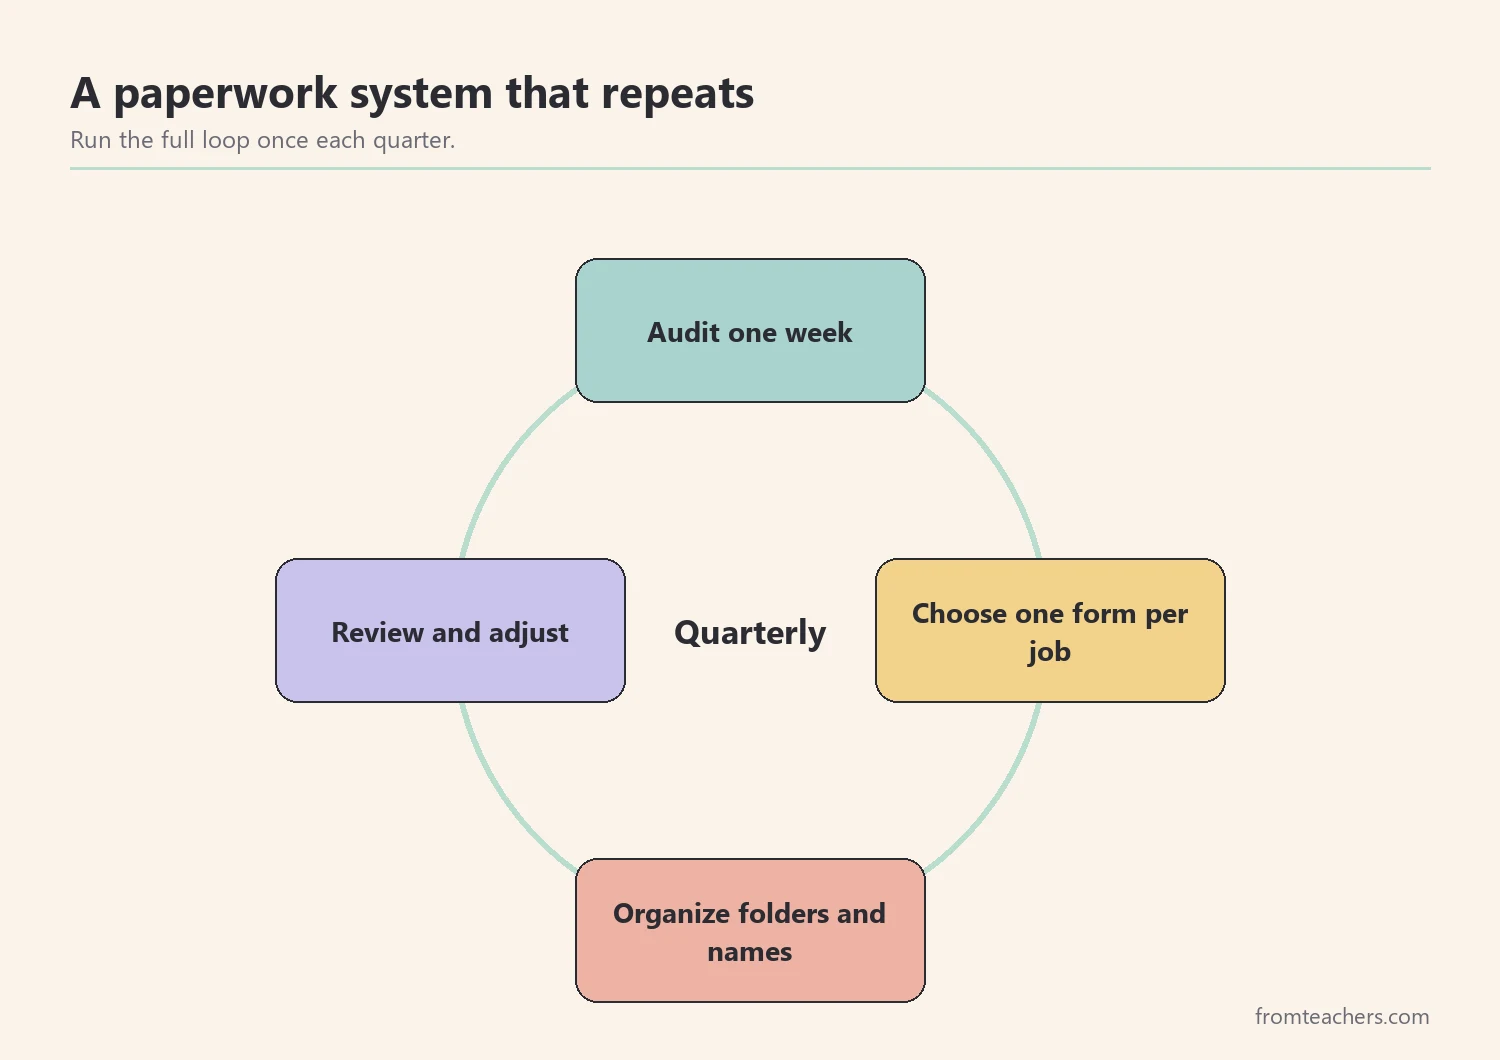
After the review, make one or two changes at most. For instance, add a missing field, remove an unused form, or rename a subfolder. Small changes keep the system familiar while it improves.
Worked example. At the end of the first quarter, Ms. Rivera notices that she never used her accommodations summary form. Instead, she kept those notes inside the meeting prep sheet. So she removes the separate form and adds an accommodations section to the prep sheet. Her set shrinks from five forms to four.
Common mistakes and how to avoid them
- Collecting too many forms. A huge library of fillable special education forms feels helpful but slows you down. Fix: keep one form per job and list them on an index page.
- Typing into the master template. One accidental save ruins the blank copy. Fix: always save a copy first, then fill it.
- Full names in file names. This exposes student information in previews and searches. Fix: use initials or student IDs.
- Only using check boxes. Records lose the detail a team needs later. Fix: keep one short free text field on every form.
- Skipping the review. Forms drift away from real practice. Fix: put a quarterly review on your calendar now.
Questions teachers and parents ask about fillable special education forms
Are fillable special education forms allowed for official IEP documents?
That depends on your district. Many districts require a specific IEP system for official documents. Use fillable special education forms for your own data, notes, and preparation, and follow district rules for the official IEP.
Do I need special software to use fillable forms?
Usually, no. Most fillable PDF forms open in a free PDF reader, and editable documents open in common word processors. Check which programs your school allows before you start.
How do I keep forms consistent across a team?
Share one set of blank templates in a common folder. Agree on the naming pattern and folder structure together. Then, review the set as a team once a quarter.
Can parents use these forms too?
Yes, some forms work well for families, such as a contact log or a meeting question sheet. Parents can keep their own copies to track conversations and prepare for meetings. Shared language between home and school also reduces confusion.
What is the first form I should switch to fillable?
Choose the form you complete most often, since that is where fillable special education forms save the most time. For many teachers, that is a daily or weekly data sheet. Your audit from step one will tell you for sure.
Related reading: The Power of Data Tracking in Special Education, Special Education Accommodation and Modification Tracker, and How Teachers Communicate With Parents in Special Education.
A companion resource for fillable special education forms:
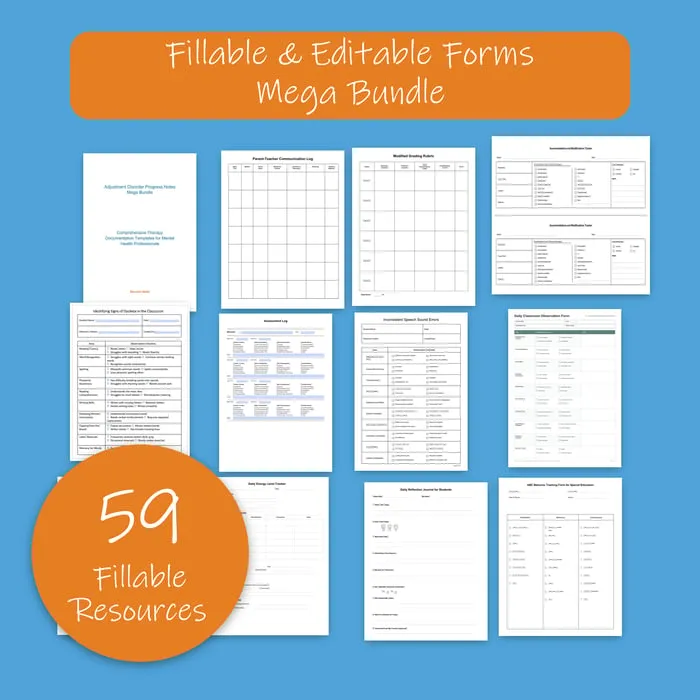
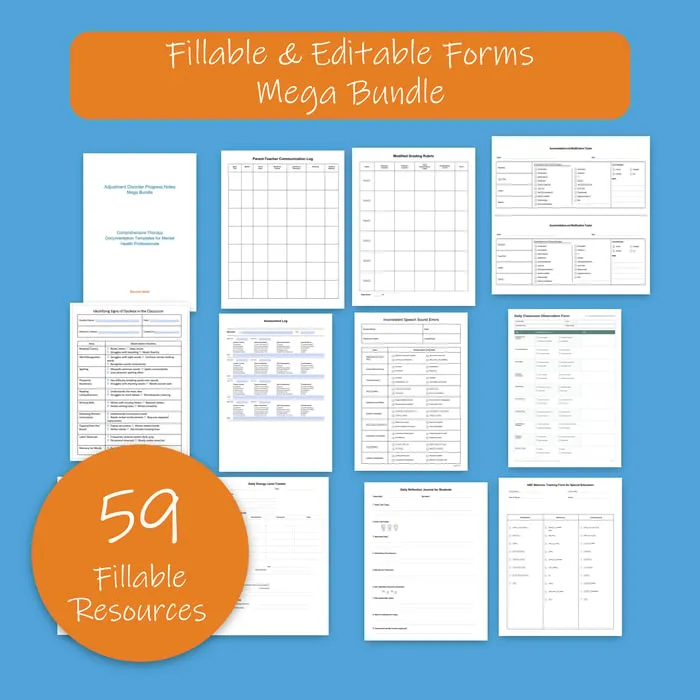
Fillable & Editable Forms Mega Bundle: a bundle of fillable, editable forms you can adapt to your own paperwork routine.
Sources and scope
- IDEA, U.S. Department of Education: the law behind special education services, IEPs, and parent participation.
- Student Privacy Policy Office, U.S. Department of Education: general guidance on student records and privacy.
- IRIS Center, Vanderbilt University: free modules on data collection, progress monitoring, and IEPs.
- Understood.org: practical articles for families and teachers on IEPs and school paperwork.
This guide covers practical ways to choose, organize, and maintain everyday paperwork forms. It does not replace your district’s official IEP system, legal advice, or local privacy policies.
Key takeaways
- Audit one week of paperwork before switching to fillable special education forms.
- Keep one form per job and list your set on an index page.
- Use one folder structure and a date-first naming pattern for every student.
- Prefill details that never change, and keep one free text field on each form.
- Protect privacy and review the system every quarter.








Leave a Comment