

Sensory supports for students can make the difference between a child who melts down by ten o’clock and one who gets through the morning with energy to spare. Imagine a third grader covering her ears during a noisy group activity, then hiding under her desk when the lights flicker. Meanwhile, twenty-four other students need your attention, too.
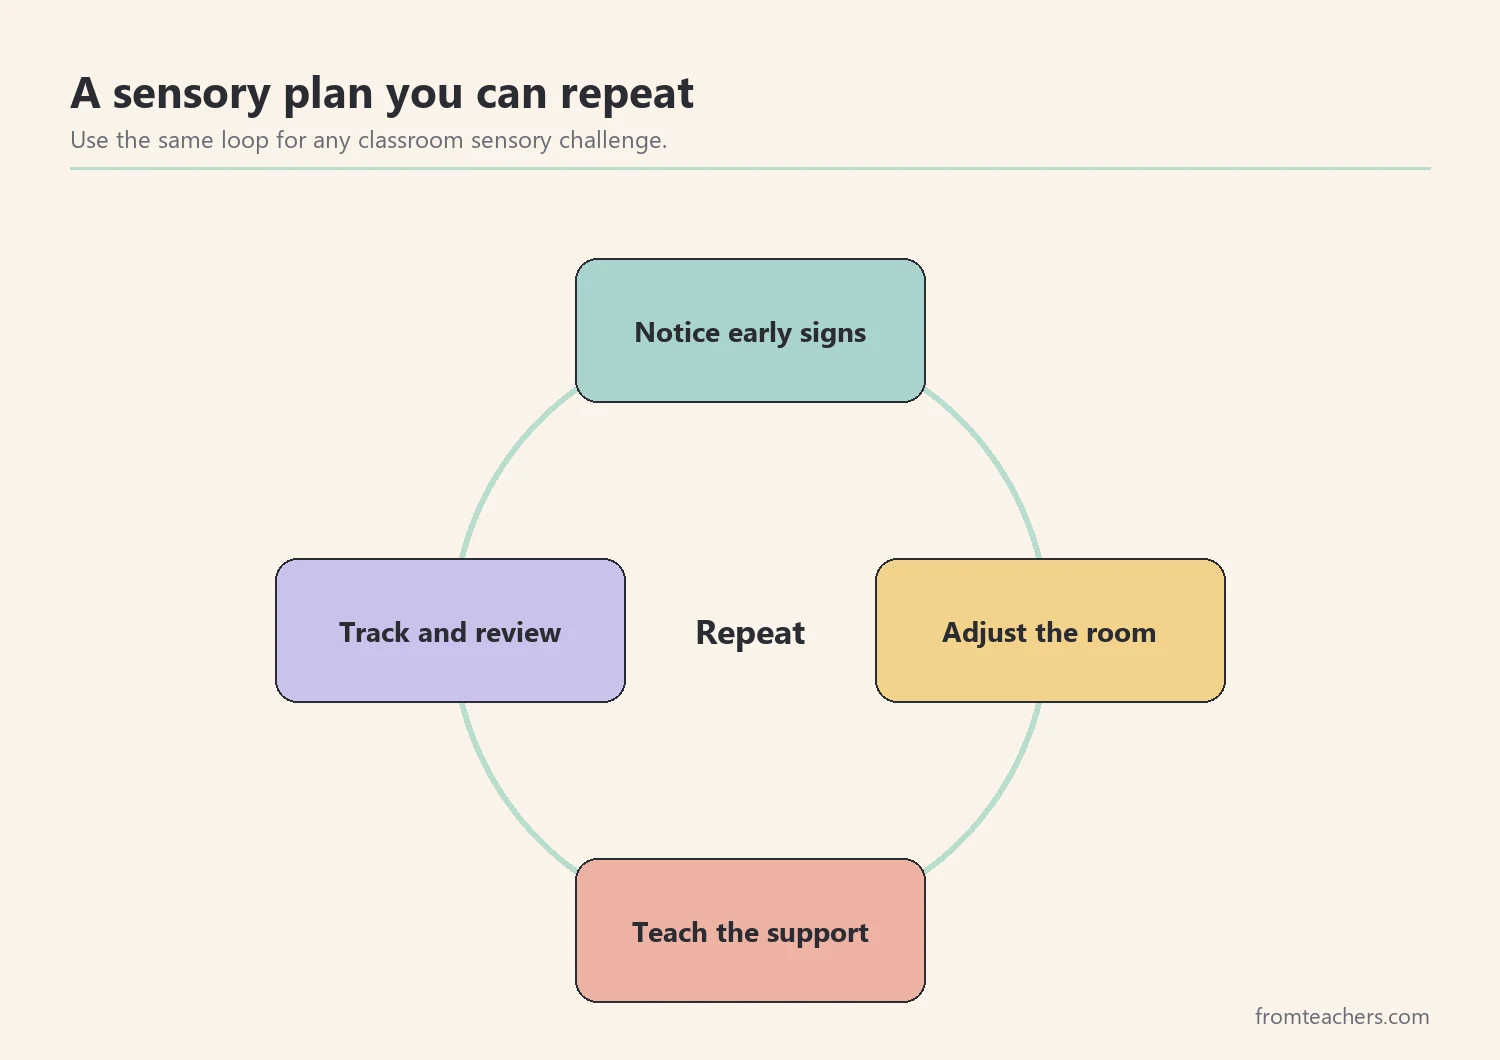
By the end of this guide, you will be able to spot sensory overload early, find the triggers in your room, set up sensory supports for students that fit your space, teach students to use them, and check whether they are working. As a result, the classroom becomes calmer for everyone, not only for one child.
Examples are fictional. Adapt to the student’s goals and agreed supports. This is guidance, not a diagnosis.
At a glance
- Learn the early signs of overload so you can act before a meltdown.
- Audit noise, light, clutter, and movement in your room once.
- Choose a few simple supports and give each one a clear home.
- Teach students when and how to use supports, then practice.
- Track one measure and adjust with the family and specialists.
1. Recognize the early signs of sensory overload
Overload rarely starts with a meltdown. Instead, it usually builds through small signals that are easy to miss in a busy room. Therefore, the first step is learning what those signals look like for each student.
Common early signs include:
- Covering ears or eyes, or pulling a hood over the head.
- Moving more: rocking, tapping, getting up often.
- Moving less: staring, going quiet, or not answering.
- Irritability with peers over small things.
- Asking to leave, go to the nurse, or use the restroom repeatedly.
For example, our fictional student, Maya, is in grade 3. Her teacher, Ms. Lopez, notices that before Maya’s hardest moments, she pulls her sleeves over her hands and starts humming. Those two signs usually come about five minutes before she shuts down.
Of course, signs differ from student to student. One child seeks more input when overloaded, while another tries to escape it. So watch each student over several days and write down the signals you see. In addition, ask the family what they notice at home, since parents often know the earliest cues.
Finally, remember that every learner has sensory preferences. Some students simply focus better with less noise, even without any diagnosis. Good sensory supports for students help those learners too.
2. Audit your classroom for sensory triggers
Once you know the signs, look at the room itself before choosing sensory supports for students. Many triggers are part of the environment, and they affect more students than you might expect. A quick audit takes about 20 minutes and gives you a clear starting list.
Stand in different spots in the room, including a student desk, and check four areas:
| Area | What to look for | Quick question |
|---|---|---|
| Sound | Humming lights, chair scraping, hallway noise | Where is it loudest? |
| Light | Flicker, glare on boards, direct sun | Where is it brightest? |
| Visual clutter | Crowded walls, busy displays near the board | Where do eyes rest? |
| Movement and space | Crowded paths, desks near doors | Where do people bump? |
In Ms. Lopez’s room, the audit showed three things. First, Maya’s desk sat next to the door to a noisy hallway. Second, a light panel above the reading area flickered. Third, the front wall was covered with posters right around the board.
Next, combine what you found with your notes on student signals. For instance, Maya’s humming often started during transitions, when the hallway was loudest. That connection points straight to a support: move her seat away from the door.
Similarly, keep your audit notes in one place, such as a single page in your planning binder. When you plan sensory supports for students later in the year, or when a new student joins, you can return to the same notes instead of starting over. Moreover, a dated audit makes it easy to see which changes you have already tried.
Also, involve students when you can. Older students can tell you which spots feel too loud or too bright. Even younger students can point to a picture of a happy or worried face for different areas of the room.
3. Set up sensory supports for students that fit your room
With your trigger list in hand, choose a small number of changes. Generally, it works best to start with whole-class supports, then add individual ones. Whole-class changes help many students at once and make individual supports feel normal rather than special.
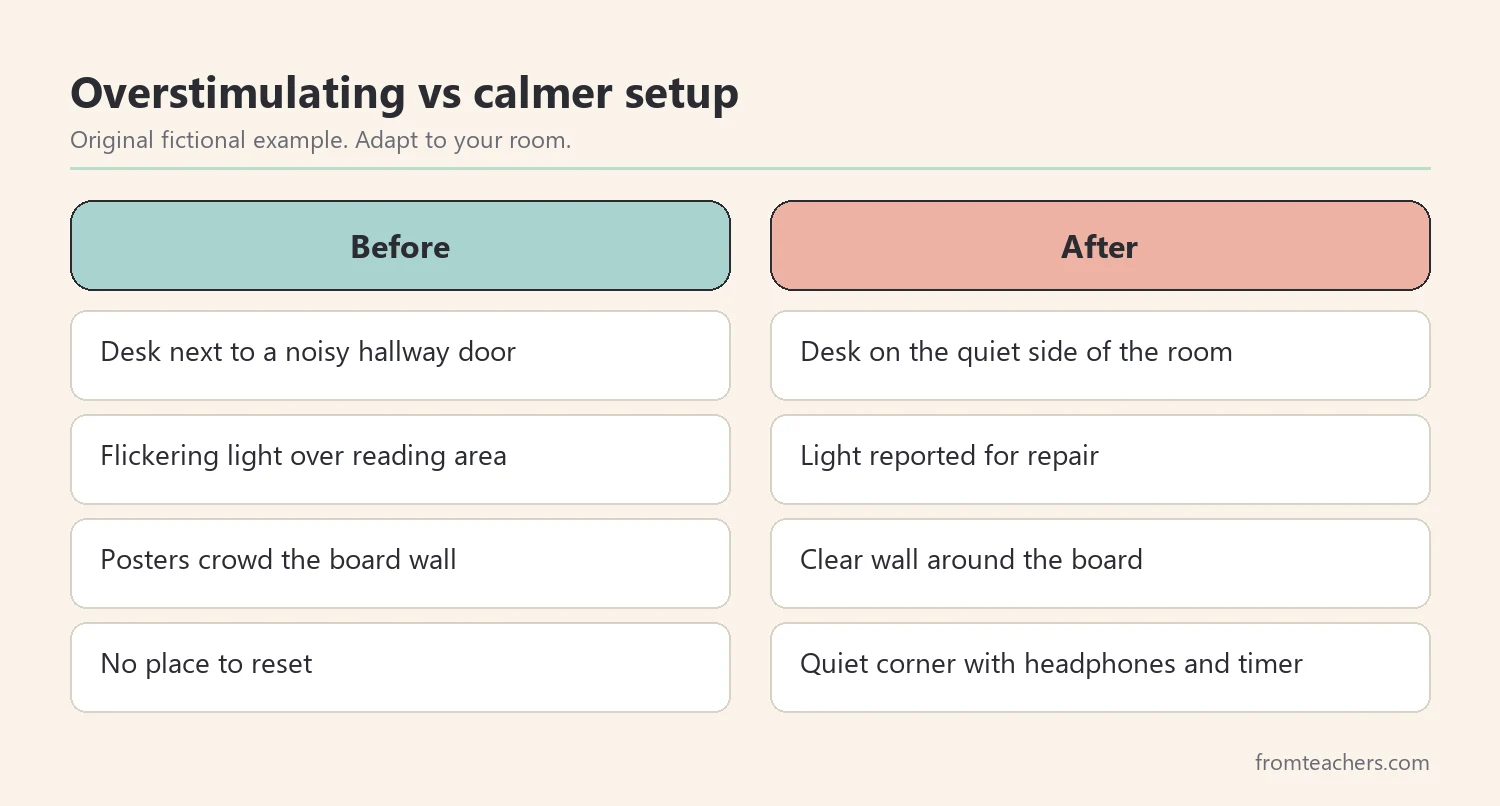
Useful whole-class sensory supports for students include:
- Felt pads or tennis balls on chair legs to reduce scraping.
- Reporting flickering lights and using natural light where possible.
- Clearing the wall around the board so eyes have a calm place to rest.
- A visual schedule so changes are predictable.
- A quiet corner with a soft seat and a timer.
Then, add individual supports based on each student’s needs. Examples include noise-reducing headphones, a seat away from doors, a fidget tool with a clear purpose, or a break card. It also helps to have ready-made responses for common situations. For that, a set of sensory support strategy tables for back to school gives practical steps for moments like reacting to classroom noise or correcting an overstimulating setup.
For Maya, Ms. Lopez moved her desk to the far side of the room, cleared the board wall, and placed headphones in a labeled basket by the quiet corner. Notably, she offered the headphones to the whole class during independent reading, so Maya did not stand out.
4. Teach students how to use each support
Sensory supports for students only help when students know how to use them. A support that is not taught is often ignored or misused. Therefore, teach each one like any other routine: model it, practice it, and give feedback. This step is where many good setups fall apart, so give it real time.
For each support, teach three things:
- When to use it (the signal: “When the room feels too loud…”).
- How to use it (the routine: “Take the headphones, sit in the corner, set the timer for five minutes”).
- How to return (the end: “When the timer rings, put the headphones back and return to your seat”).
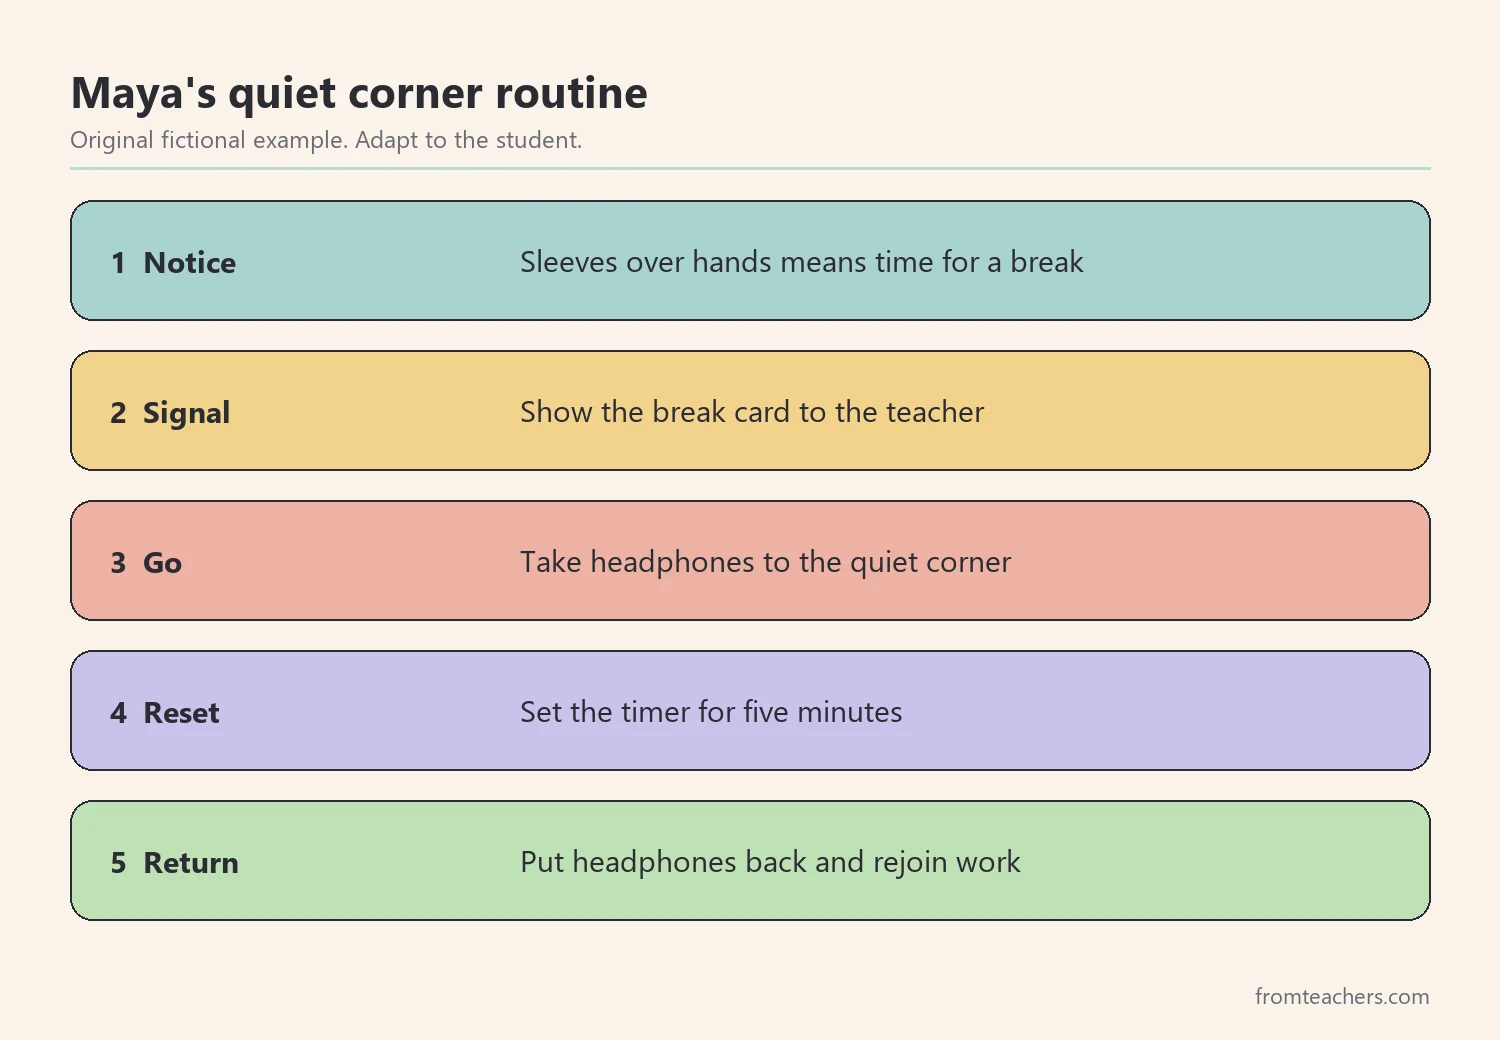
Practice at calm times first. For example, Ms. Lopez had the class rehearse the quiet corner routine during a morning meeting, with two students showing each step. Later, she practiced with Maya one on one, using her own early signs as the cue: “When your sleeves go over your hands, you can show me the break card.”
Additionally, keep language short and the same every time. A picture card for each support helps students who struggle with spoken directions in stressful moments. Over time, students begin to use supports on their own, which is the real goal.
For younger students, a short class book or poster that shows each tool and its routine can help. Older students, by contrast, may prefer a simple card on the desk listing their own sensory supports, written in their own words. In both cases, the aim is the same: the student knows what to do without waiting for an adult.
Finally, set clear expectations for the whole class. Sensory tools are for regulation, not for play. When everyone understands that, supports are used more calmly and fairly.
5. Help students regulate in the moment
Even with good sensory supports for students and careful teaching, hard moments will still happen. When they do, your response matters. In general, a calm adult, fewer words, and a clear option work better than questions or warnings.
Try this simple response sequence:
- Lower your voice and move closer, without crowding.
- Name what you see briefly: “It is loud right now.”
- Offer one or two choices: “Headphones or quiet corner?”
- Give time. Avoid asking why while the student is overloaded.
- Later, when calm, talk briefly about what helped.
For instance, during a fire drill practice day, Maya started humming and covering her ears in the hallway. Ms. Lopez knelt down, said “It’s loud. Headphones?” and handed them over. As a result, Maya joined the line instead of sitting on the floor.
Equally important, think about how other students see these moments. A short class talk about how “everyone’s brain needs different things” helps peers accept individual supports. Consequently, students who use supports feel less judged, which makes them more likely to use them early.
Afterward, celebrate calm moments, not only good work. A quiet “You used your card early today” tells the student that self-regulation is a skill worth practicing.
6. Track what works and review sensory supports for students
To know whether your sensory supports for students help, choose one simple measure and record it weekly. For sensory goals, good measures include the number of overload episodes, the number of times a student used a support on their own, or minutes spent out of the room.
Ms. Lopez tracked how many times each week Maya used the break card herself compared with how many times an adult had to prompt her. She added the two to get the total breaks.
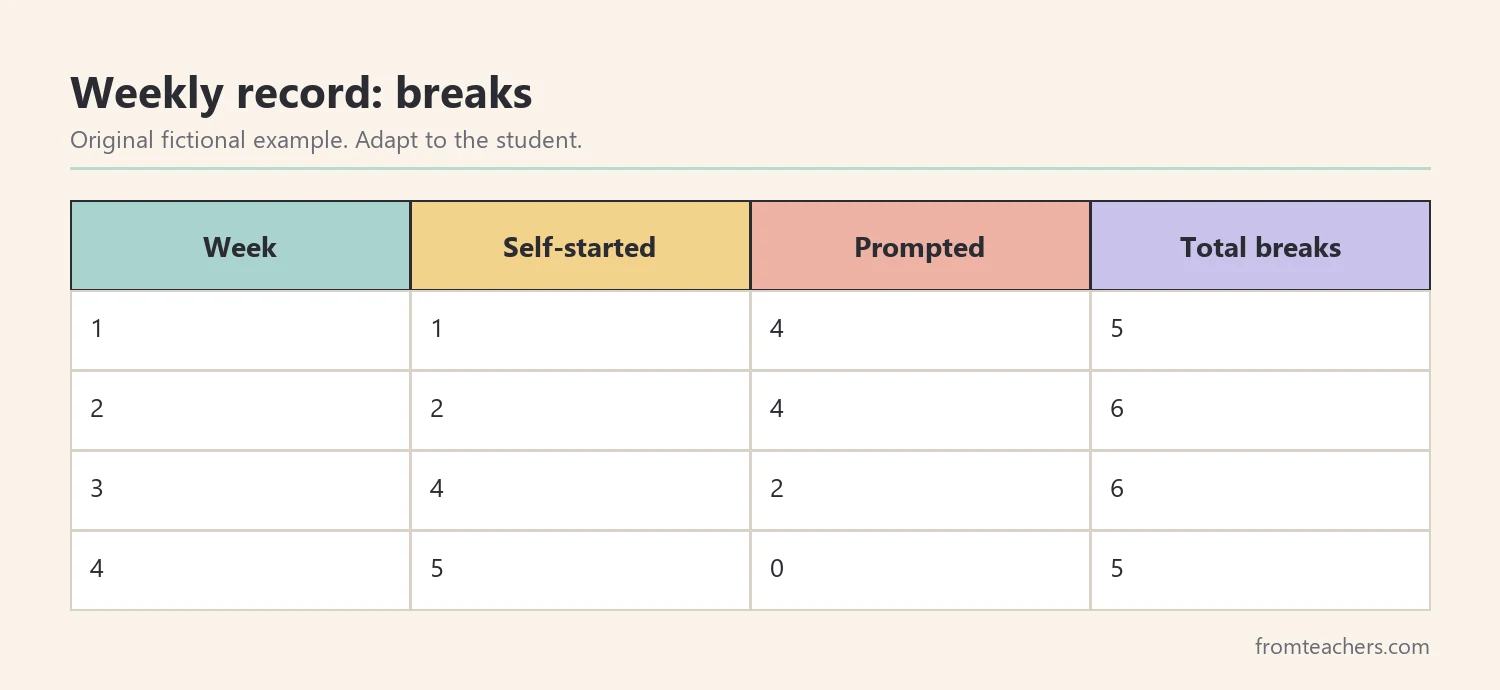
In this fictional record, Maya’s total breaks stayed between 5 and 6 each week, but the self-started ones grew from 1 to 5. In other words, she was not taking fewer breaks; she was taking them earlier and on her own. That is a meaningful change.
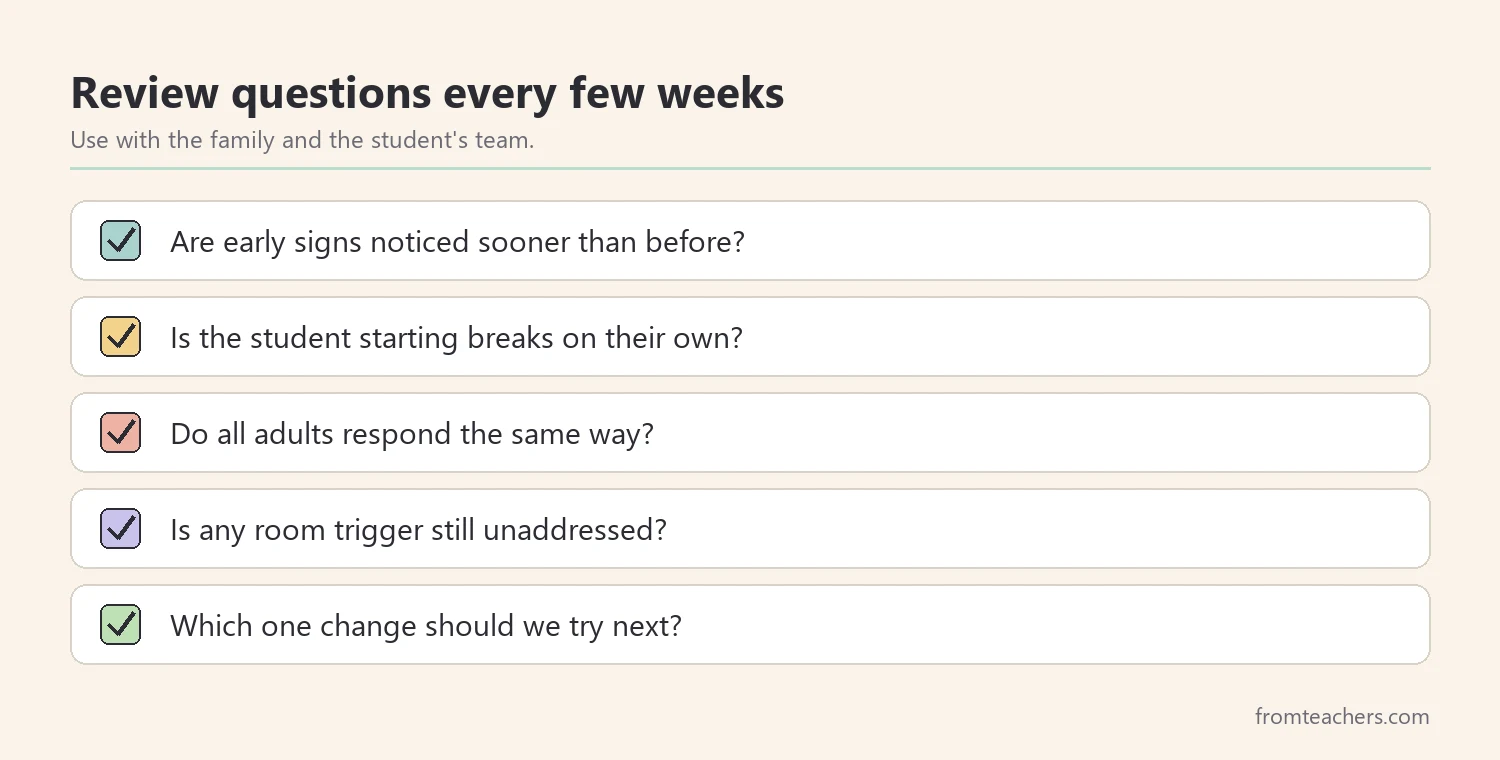
Then review the data every three to four weeks with the family and, where involved, the school occupational therapist. Ask what is working, what is not, and which one change to try next. Sometimes the review shows that sensory supports for students need a small change, such as a new seat or a shorter timer. If overload remains frequent or intense, a specialist can look more closely at the student’s needs.
Common mistakes and how to avoid them
- Waiting for a meltdown before acting. Fix: learn each student’s early signs and respond to those.
- Buying tools before checking the room. Fix: audit noise, light, clutter, and space first; many fixes are free.
- Handing out supports without teaching them. Fix: model, practice, and give feedback, just as with any routine.
- Making supports feel like punishment or a prize. Fix: present them as normal tools that anyone may need.
- Talking too much during overload. Fix: use few words and offer one or two clear choices.
- Repeating the same setup mistake. Fix: review notes regularly and change one thing at a time.
Questions teachers and parents ask about sensory supports for students
Do sensory supports for students need a formal plan?
Not always. Many whole-class sensory supports for students, like reducing noise or clearing walls, need no formal plan. However, if a student has an IEP or a 504 plan, agreed supports should be written there and used consistently.
Will other students want the same tools?
Often, yes, and that is fine. When supports are available to everyone with clear rules, interest usually settles. Meanwhile, the student who needs the tool most can use it without standing out.
Are fidget tools helpful or distracting?
It depends on the student and the tool. Quiet, simple tools with a clear purpose tend to work best. If a tool becomes a toy, teach the expectations again or try a different one.
How long before I see a change?
Some changes, like moving a seat, can help within days. Others, like using a break card independently, may take several weeks of practice. Weekly tracking helps you see small gains.
Who should I involve?
Start with the family, since they know the student well and can share which sensory supports for students have worked at home. In addition, the school occupational therapist, special education teacher, and counselor can all offer ideas, especially when needs are complex.
Related reading: Managing Sensory Overload: Practical Strategies for Autism and ADHD, Meltdowns vs Tantrums: A Guide to Understanding and Responding, and Understanding Autistic Burnout and School Exhaustion: Prevention and Support Strategies.
A companion resource for sensory supports for students:
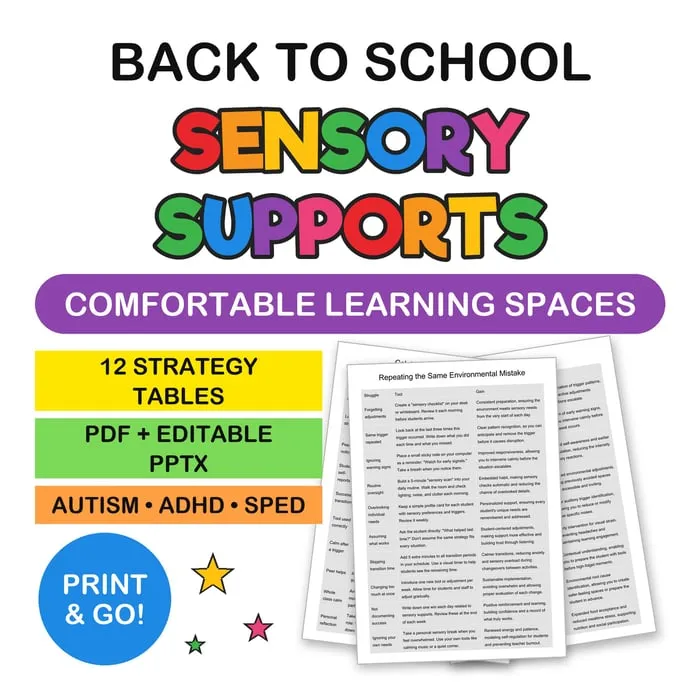
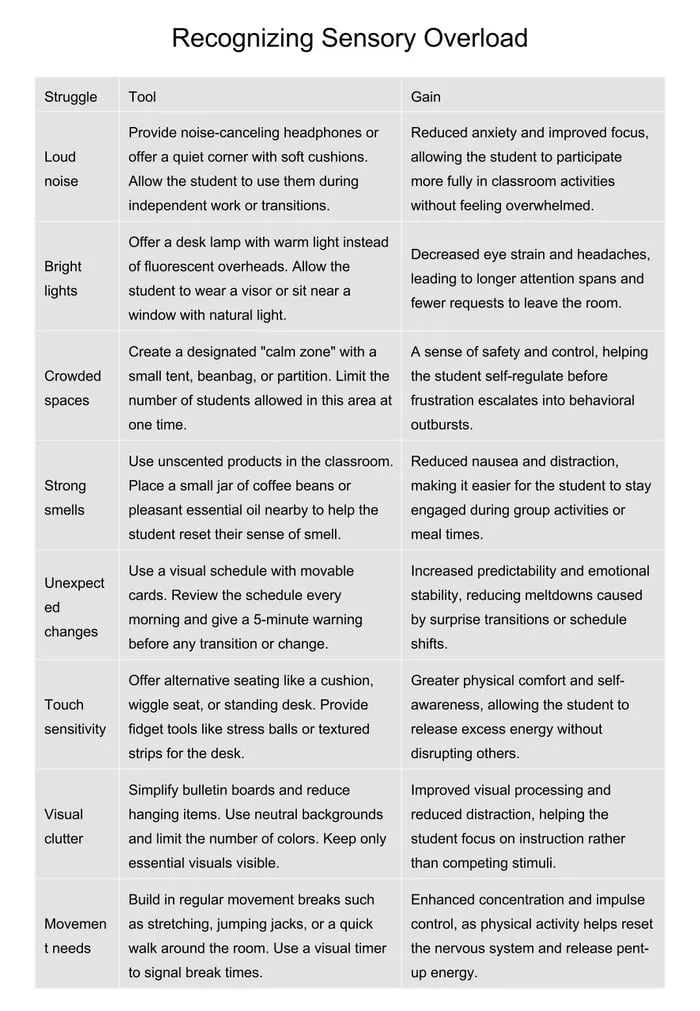
Back to School Sensory Supports: Comfortable Learning Environments Strategy Tables: a set of 12 strategy tables for special education teachers, OTs, and inclusion staff, each focused on one real situation, such as recognizing sensory overload, reacting to classroom noise, and helping a student regulate. Includes a PDF and an editable PowerPoint.
Sources and scope
- American Occupational Therapy Association (AOTA): information on how occupational therapists support sensory needs and participation at school.
- IRIS Center, Vanderbilt University: free modules on classroom environment, behavior, and evidence-based practices.
- CAST: the Universal Design for Learning framework for planning flexible learning environments.
- IDEA, U.S. Department of Education: the law behind special education services and IEPs.
This guide covers everyday classroom strategies for reducing sensory overload and teaching students to use supports. It does not cover diagnosis, sensory evaluations, or therapy plans, which belong to qualified professionals and the student’s team.
Key takeaways
- Sensory supports for students work best when you act on early signs, not meltdowns.
- A short room audit often reveals free, fast fixes.
- Start with whole-class supports, then add individual ones.
- Teach each support as a routine with a clear start and return.
- Track one measure and review sensory supports for students with the family every few weeks.


Leave a Comment